Check back often

Have you checked out all my blogs?


Dollhouse Minis: http://joannesminis.blogspot.com


18” Dolls: http://joannes18dolls.blogspot.com/


General Crafts: http://joannes-place.blogspot.com/


Cooking: http://joanne-kitchen.blogspot.com/


Also if for some reason I can't post I will try to give a head's up on the Facebook page so check there too.

Sunday, January 30, 2022

Dollhouse Miniature Cast Iron Skillet


Watch the video here.


This week I have a fun project that I came up with yesterday morning as I was putting my dishes away, I was putting my extremely heavy very old cast iron skillet back in the cabinet and I decided I needed to make a mini one for the dollhouse kitchen. I decided to make it right away since I am still trying to work out the final part of the other project I have been trying to figure out for you guys (I'll give you a small hint that that one is an appliance to go in the kitchen)


So I considered a couple of different approaches to this project and decided the most obvious choice (polymer clay) was the best choice. As a benefit it only takes one color of clay (black) and really any brand will work for this I do recommend using a firm brand over a soft one simply because although it will be harder to get started I think it in the long run it will work better.


Once I measured my own skillet I started looking for something to use as a form to build the skillet on. I decided to use one of the plastic disposable shot glasses that I picked up at Dollar Tree. I almost always have a bunch of these on hand because they are so useful on the craft table.


I rolled the clay out to a consistent thickness, I used a couple of craft sticks to help me. Then I placed a circle cut from parchment paper over the bottom of the glass to go between the plastic glass bottom and the clay. This step is essential, trust me. Then I smoothed the clay over the bottom and up the sides a ways. I used a strip of paper cut ¼” wide to guide me in cutting/leveling the top edge of the skillet. 


Once I was happy with how I had the top cut I moved the glass with the clay into the freezer for 15 minutes to firm the clay up. This way I could carefully work the skillet off the plastic form without messing up the shape too much.


Then it was time to bake the first stage of the skillet at the temperature your clay package directs for 10 minutes.


Once baked and cooled I used some sandpaper to even up the top edge of the skillet.


I then added a handle to the baked clay with some TLS (Translucent Liquid Sculpey) acting as the glue. Really smooth the edges of the handle into the baked skillet. Then bake again for another 10 minutes at the time directed on the clay package.


Once baked and cooled again I used an emery board to remove a few bumps and lumps and got the outside of the skillet looking the way I wanted it.


Now it was time to paint just the outside with some black craft paint. I like the slight sheen my clay baked to for the inside of the skillet, but I want the outside to be a completely mat black. 


Once dry it is ready for the doll family to use in their new kitchen.


As always I do want to sincerely thank all of you for watching my videos and reading my blog posts. It means so much to me that you are supporting me in this way. If I could ask you all to do just a bit more by subscribing to the channel and liking the videos and leaving comments. Those help more than you can imagine. Also if you could pass the links on to your friends I would appreciate it so much.


Saturday, January 29, 2022

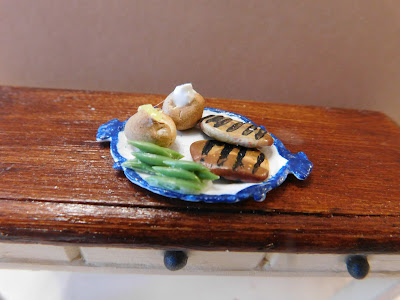
Dollhouse Miniature Steak


Watch the video here.


This week we are making the main dish for our Valentine's dinner, a steak. I am showing you kind of a generic boneless steak this time, later we might some steaks with bones in them. I wanted to keep this one a bit easier.


So for the steaks themselves we are using Caramel polymer clay from Fimo. I find it makes a really good cooked meat color in this type of project. The only other clay I am adding is just a tiny bit of a mixture of 2 parts Translucent with 1 part white clay. This is one of the clay mixes I try to always have on hand because I use it so much. This translucent mixture will form the areas of fat that run through out steak. You can use as much or as little as you wish, or just leave it out if you wish. I like a bit of the fat running though the steak I think it makes it look more realistic and adds some interest when you are looking at it.


To form our steaks I made a fat drum like shape from the caramel clay then I split it vertically a few times, trying to tear it more than cut it smoothly. On these newly exposed surfaces I smeared on some of the fat color then reassembled the clay shape. I also added a bit of the fat mixture to the outside of the drum on one side. When I was satisfied with the marbling of the fat in the meat I reduced the drum to a snake about ¼” in diameter. I then cut some small pieces and rolled them a little to start the process of getting the steaks to the correct thickness. Then I used my thumb and finger to finish flattening them. This way my finger prints are actually the texturing tool for the flat surfaces of the steak.


At this point I trimmed the steaks to size added some chalks to color them.


On the vertical edges of the steaks I added just a bit of a mix of red and a reddish brown chalk to replicate that blush that a steak cooked a bit rare will have. Do be careful to keep this color off the fat areas.


Then I added some yellow ocher chalk to all the surfaces paying particular attention to the fat areas.


A quick brush with some dark brown in just a few areas will give you steak a nice cooked look.


I then used a bent sewing pin dipped in just a thin layer of black paint to add the grill marks.


Once you are happy with how your steak looks cook it at the recommended time and temperature for your clay.


Once baked and cooled an very thin coat of satin Mod Podge will help give your steaks a delicious appearance.


As always I do want to sincerely thank all of you for watching my videos and reading my blog posts. It means so much to me that you are supporting me in this way. If I could ask you all to do just a bit more by subscribing to the channel and liking the videos and leaving comments. Those help more than you can imagine. Also if you could pass the links on to your friends I would appreciate it so much.


Tuesday, January 25, 2022

Miniature Toadstool House Makeover


Watch the video here.


I have been wanting to start on the makeovers of some of the items I got in the blind bags ever since I filmed those videos. I decided to start today with the cute little Toadstool house.


I love the shape of this piece but it had a few problems, at least I felt it did. First off, I was not crazy about the colors that had been used and the paint job was very messy. I also am not a fan of the shiny plastic look.


While I am not positive exactly how I am going to use this little house I know it will go somewhere around the dollhouse I am working on. It might end up on the porch permanently, it might end up in the landscaping as a fairly house or it might end up inside as a decoration. In any case I wanted to stay close to the color story I have been using so far in the house.


I have re-done similar plastic pieces in the past although I don't think I have done any on video. The steps I used are the ones I have found over time have worked for me. They are a combination of techniques I have seen other people use for similar projects.


My first step was to remove the shine to the piece. By removing the shine I know I will have a much better chance of my paint sticking and staying on long term. For this is carefully sand the piece to remove as much of the shine as I can. The finer the sandpaper (higher number on the back) the better it will work. The best I could do today was some 120 grit and it was fine although I usually try to use a 220 or higher. I also used an emery board where it would work.


Once the shine is gone I like to put small pieces like this onto a “handle” by using some poster tack to stick it temporally to a craft-stick. This will make all the steps to come so much easier.


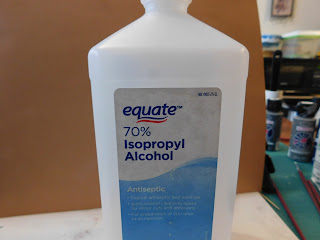
Next I used some isopropyl alcohol to remove both the dust from sanding as well as any oils that might be on the surface from handling the piece. Allow this dry completely.


Next I painted the entire visible surface with some white craft paint (I will list all the paints used later in this post) allow to dry.


Then give it a second coat of the same white paint, it is amazing how much better the second coat looks than the first.


Next I moved on to the roof color. I used a dark grey for this doing one coat on camera,


and a second off camera.


Once those colors were dry I moved on to the door


and the chimney.


And finally the spots on the roof, it is a toadstool after all.


You could definitely do more of the details but I wanted to keep with the feel of my dollhouse and I didn't feel that “cutesy” details would be the right style.


Once the paint was dry it was time for a coat of mat Mod Podge.


And then just small dots of some gloss Mod Podge into the window areas.


Now the toadstool house is ready to set up in the dollhouse. 


Here are the colors of paint I used today.


The products in this picture as well as the brushes used today were provided by Plaid for me to use in making videos for all of you.


The ones in this picture were purchased by me.


As always I do want to sincerely thank all of you for watching my videos and reading my blog posts. It means so much to me that you are supporting me in this way. If I could ask you all to do just a bit more by subscribing to the channel and liking the videos and leaving comments. Those help more than you can imagine. Also if you could pass the links on to your friends I would appreciate it so much.


Sunday, January 23, 2022

Dollhouse Miniature Bear Cookie Jar


Watch the video here.


The first thing I want to say is that this is not the project I had planned for today. I am working on something else but I still have a couple of details I need to work out so I decided to do yet another cookie jar. Someone in the comments last week was talking about making a bear cookie jar and I really wanted to make one too. I do apologize for this project not being as thought out as I try to be, I literally sat down yesterday to film this for today.


We are starting off just like with all the cookie jars I've been making with a paper base. This time it was cut ¾” by 4 “. wrap and glue this around a permanent marker to get the size and shape to build the cookie jar over.


Once the glue dries add a layer of plain white clay (I used Sculpey Original) using a layer of TLS (Translucent Liquid Sculpey) to adhere it. Also make a small plug of clay that will fit into the opening in the cookie jar to build our lid on later. Bake at 275° for 10 minutes and allow to cool to room temperature.


For this project I am using 4 colors of clay, you don't need to use the same exact colors just pick what you have that is close.


The colors I used are- black

translucent

beige (Premo)

Hazelnut (Sculpey III)

Mix equal amounts of the black and Translucent clays, I suggest mixing enough to make a 1” ball of the mixed clay.


Roll a snake of clay to use for the bear's legs mine was about 3/16” by 2 ½”

Roll a snake for the arms mine was 1/8” by 1 ½” cut this in half.


Now roll a thin sheet to cover the cookie jar body, using TLS to adhere.


Add the leg snake at the bottom folding up the ends to form feet.

Add small disks of the beige clay for paw pads.


Make a small cookie from the beige and brown clays and add to the front center of the cookie jar.


Add the two arms so the paws are holding the cookie.


Add some texture to the clay to make it resemble fur.


Bake the clay.


Now we work on the lid/head. I added a small ring of black clay to act as the beginning of the lid (and to keep the lid in place as I work on it). At this point I also used the brown clay to make two small balls that will be the bear''s eyes. Bake as before.


Now we need to build the basic head, I totally forgot to add the TLS in this step but it would be best to use it. Use the black clay to form a basic head shape. I find it much easier to do this with the lid in place on the cookie jar. Once happy with the shape add some texture just like with the body.


Using the beige clay make a small rounded cone shape for the bear's nose/snout. Smooth it in place on the face. Add a small disk of black clay for the nose. Add the eyes to the head just above the nose.


Make two ears, I just made two black disks of clay and added smaller beige disks to the center. Bake the ears only at this point for a short time, just enough to start to cure the clay.


Add the ears to the top of the bear's head.


Do any trimming of the clay and touch up the texture then bake for 15 minutes at 275°.


Once cooled to room temperature add a light coat of Satin Mod Podge, You could use gloss if you prefer, the cookie jar Loosely based mine on seemed to have a satin finish and I liked that with the texture of the fur.


Once the Mod Podge is dry your cookie jar is ready to display in your dollhouse.

Our miniature cookie jar collection is starting to grow nicely. 


As always I do want to sincerely thank all of you for watching my videos and reading my blog posts. It means so much to me that you are supporting me in this way. If I could ask you all to do just a bit more by subscribing to the channel and liking the videos and leaving comments. Those help more than you can imagine. Also if you could pass the links on to your friends I would appreciate it so much.

Saturday, January 22, 2022

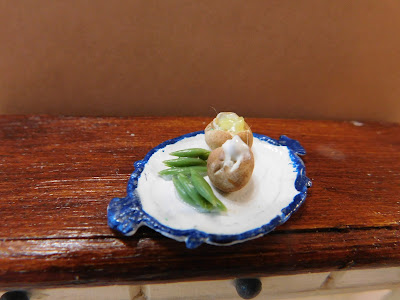
Dollhouse Miniature Green Beans


Watch the video here.


This week we are adding some green beans to our project. I love to make mini green beans because they are so easy and relaxing to make Really the most difficult part is getting the color of the clay correct.


In the past when I have made these I have used a clay color that was labeled as leaf green. I am out of that color so I just pulled out a bunch of the greens that I have on hand and started mixing. What I came up with was a mix of equal parts:

Fimo Green

Sculpey III Camouflage Green

Premo! Spanish Olive

Sculpey III Yellow

Sculpey III white


Combine these to make a nice green bean color or just sit down with the greens you have a play a bit to come up with a color that is similar to mine.


Once you have the green mixed it is time to add some Translucent Clay, for cooked green beans (what we are making today add twice as much Translucent as you have green. (if you want to make some raw green beans just add an equal amount of the Translucent to the green)


Once the color is well mixed it is time to make the green beans. I do suggest get yourself comfortable and maybe get a movie playing (or just binge watch some YouTube videos like I did)


Roll the clay into a thin snake


then cut very tiny pieces of clay from the snake.


Transfer the clay bits to the palm of your hand and first roll it into a tiny ball


then into a tiny green bean shape.


It is super easy to do and like I said earlier I find it very relaxing.


Once you have you a plate full of beans bake at the temperature directed on your clay for a6 or seven minutes and allow to cool to room temperature.


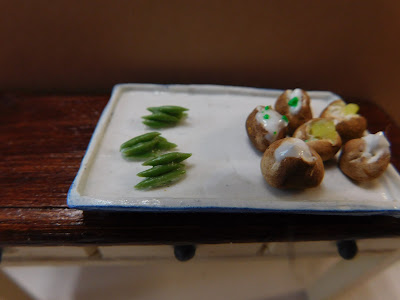
Now working on a piece of parchment paper form a small blob of TLS (Translucent Liquid Sculpey) and carefully add a few green beans. Try to imagine how they would look on a plate ready to eat them.


If you would like to put some of your beans into a serving dish you can do that the same way just add a bit of TLS and beans in layer, as long as your serving dish can go into the oven.


Bake ate the recommended temperature for 10 minutes and allow to cool to room temperature.


Now apply a very thin layer of Satin Mod Podge and allow to dry.


As always I do want to sincerely thank all of you for watching my videos and reading my blog posts. It means so much to me that you are supporting me in this way. If I could ask you all to do just a bit more by subscribing to the channel and liking the videos and leaving comments. Those help more than you can imagine. Also if you could pass the links on to your friends I would appreciate it so much.


Tuesday, January 18, 2022

Dollhouse Miniature Valentine Porch Sign


Watch the video here.


I am doing my best to give you all the holiday projects so you have time to get them done and enjoy them before the holiday arrives so this month we are going heavy into Valentine's Day projects.


This week for our Tuesday project I wanted to do another porch sign, I really enjoyed the ones I made earlier for the other holidays. This time I am going a bit rustic and sticking with the black background I used for the doormat last week. In fact all the paints I used this week were also in the doormat. I am tying to give you a set of projects that looks like a set of items you might find in a high-end store.


The sign I am making today is actually inspired by several signs I found in my search of the internet. I had found a really wonderful rustic sign for fall way back in November but it was too late to use it then and I didn't want to go that rustic for Christmas, so I just kept the idea in my brain till I could use it. Then when I started looking at Valentine's Day porch signs that were for sale for life size homes I found that the ones I was drawn to were on the rustic side. That for me meant it was time to use this wonderful idea.


The first step was to cut the boards for the base of the sign. For this I am again using some of the slim sticks from Hobby lobby. You can use skinny sticks if you have those or coffee stir sticks. I cut 4 of them to be around 5” long and used 3 short bits of craft-stick (a little less than ¾” long) to hold them together.


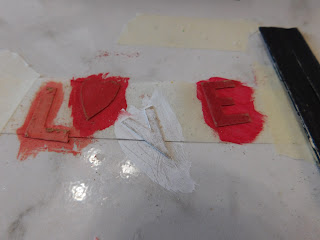
The sign I had seen back in November had wooden letters to spell fall. I decided to use the letters to spell love since we are doing Valentine's Day this time and the word fit so nicely. The only problem being I had no wooden letters that would work. Then I decided to try using some Kraft colored card-stock in place of the wood letters, paint them and distress them. To make the pattern for the letters I used some 8 square to the inch graph paper (you can find the one I used here) to make boxes that measured ½” wide by ¾” tall and drew very boxy letters for the L, V, and E. I used the 4th box to make a heart the same size.


 I then cut out the letters and glued them to the back of my scrap of Kraft color card-stock. Be sure the front of the letters is the side glued to the card-stock so that when you cut them out the side with no pattern glued to it is the front.


Once this is done it is time to paint everything. I painted the sign base in black and each letter in a different shade using reds, pink and white. I did need to give a couple of the letters a second coat to get the color the way I wanted it. 


I then took some sandpaper and distressed the edges of both the sign base and the letters. I carefully sanded the paint back to reveal the wood of the sign and the Kraft color of the card-stock which gives the card-stock the impression it is wood.


I then glued the letters onto the sigh trying to keep them spaced out evenly.


Once the glue dried I added a coat of mat Mod Podge to both seal the finish and help to make sure the paper layers will stay in place.


Once dry I wanted to add a “jute” bow. The problem being the only jute twine I have is way too big to use in this project. I did try separating the strands of my twine but the result was a messy kinked up strand of rope. So I dug through my embroidery floss and came up with the closest color I could find which was a kind of buff color. It works and just looks like a lighter colored jute.


I wrapped this floss around the top of the sign a few times and tied a bow. I them added a couple of dots of glue and clamped the bow in place until the glue dried to make sure it would stay where I put it.


 I then cut off the excess floss and adjusted the way the wrap was placed.


The sign is now ready to take its place next to the front door of the dollhouse or in the corner of a mini room.


As always I do want to sincerely thank all of you for watching my videos and reading my blog posts. It means so much to me that you are supporting me in this way. If I could ask you all to do just a bit more by subscribing to the channel and liking the videos and leaving comments. Those help more than you can imagine. Also if you could pass the links on to your friends I would appreciate it so much.