I have been wanting to start on the makeovers of some of the items I got in the blind bags ever since I filmed those videos. I decided to start today with the cute little Toadstool house.
I
love the shape of this piece but it had a few problems, at least I
felt it did. First off, I was not crazy about the colors that had been
used and the paint job was very messy. I also am not a fan of the
shiny plastic look.
While I am not positive exactly how I am going to use this little house I know it will go somewhere around the dollhouse I am working on. It might end up on the porch permanently, it might end up in the landscaping as a fairly house or it might end up inside as a decoration. In any case I wanted to stay close to the color story I have been using so far in the house.
I have re-done similar plastic pieces in the past although I don't think I have done any on video. The steps I used are the ones I have found over time have worked for me. They are a combination of techniques I have seen other people use for similar projects.
My first step was to remove the shine to the piece. By removing the shine I know I will have a much better chance of my paint sticking and staying on long term. For this is carefully sand the piece to remove as much of the shine as I can. The finer the sandpaper (higher number on the back) the better it will work. The best I could do today was some 120 grit and it was fine although I usually try to use a 220 or higher. I also used an emery board where it would work.
Once
the shine is gone I like to put small pieces like this onto a
“handle” by using some poster tack to stick it temporally to a
craft-stick. This will make all the steps to come so much easier.
Next
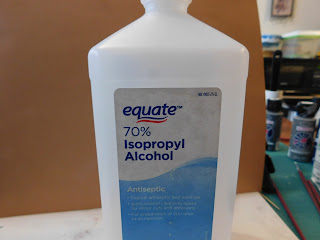
I used some isopropyl alcohol to remove both the dust from sanding
as well as any oils that might be on the surface from handling the
piece. Allow this dry completely.
Next I painted the entire visible surface with some white craft paint (I will list all the paints used later in this post) allow to dry.
Then give it a second coat of the same white paint, it is amazing how much better the second coat looks than the first.
Next
I moved on to the roof color. I used a dark grey for this doing one
coat on camera,
and a second off camera.
Once
those colors were dry I moved on to the door
and the chimney.
And
finally the spots on the roof, it is a toadstool after all.
You could definitely do more of the details but I wanted to keep with the feel of my dollhouse and I didn't feel that “cutesy” details would be the right style.
Once the paint was dry it was time for a coat of mat Mod Podge.
And then just small dots of some gloss Mod Podge into the window areas.
Now the toadstool house is ready to set up in the dollhouse.
Here are the colors of paint I used today.
The
products in this picture as well as the brushes used today were
provided by Plaid for me to use in making videos for all of you.
The
ones in this picture were purchased by me.
As always I do want to sincerely thank all of you for watching my videos and reading my blog posts. It means so much to me that you are supporting me in this way. If I could ask you all to do just a bit more by subscribing to the channel and liking the videos and leaving comments. Those help more than you can imagine. Also if you could pass the links on to your friends I would appreciate it so much.


No comments:
Post a Comment