Check back often

Have you checked out all my blogs?


Dollhouse Minis: http://joannesminis.blogspot.com


18” Dolls: http://joannes18dolls.blogspot.com/


General Crafts: http://joannes-place.blogspot.com/


Cooking: http://joanne-kitchen.blogspot.com/


Also if for some reason I can't post I will try to give a head's up on the Facebook page so check there too.

Saturday, April 30, 2022

Dollhouse Miniature Burritos and Quesadillas


Watch the video here.


First I want to apologize for being out of camera even more the last couple of videos. My tripod is giving me problems again and not staying where I tell it to. I am going to try to fix it (again) and hope it works for a while. I really need to get a new one soon.


As promised last week when we made the flour tortillas this week I am giving you a couple of ways to use some of them.


We start off with some really easy quesadillas. 


A little side note here, it looks like I owe you guys a Nacho tutorial I was certain I have filmed one a couple of years ago but I can't find it on the channel. So either it somehow got deleted, I did it as part of another video, or (more likely) I misremembered. So as soon as I can find the paint to use in them I will be making some nachos because we can't have the dolls living in a world without nachos.


 For the cheese I am using some polymer clay. I wanted a cheesy color so mix some Sweet Potato clay from Sculpey III with some yellow that was in my clay stash. I have no idea what the yellow was because that was the end of it and the packaging/label was long gone. Just mix the colors you have to get something that looks like cheese. Then roll the clay out and cut into a circle with a clay cutter (mine is ¾”) Cut this circle of clay into 8 wedges.


Then fold one of the tortillas in half and cut it into wedges. Keep the matching pairs of wedges together to make it easier on yourself. You will need to use 2 tortillas cut this way to use all 8 wedges of clay.


Apply a tiny bit of TLS (Translucent Liquid Sculpey) to the back side of one tortilla wedge and place it on a clay wedge. 


Turn this over and add the matching tortilla wedge to the other side using more TLS.


Use your finger to gently smoosh the quesadilla to give the cheese that melty look.. Repeat with as many as you need for your display.


Now onto the burritos. This time we are making whole burritos so the filling will be hidden. I tried a couple of ideas for making burritos that were sliced and I just wasn't happy with the result I was getting. We will re-visit burritos in the future so don't worry.


Since we won't see the filling I just used some clay out of my scrap clay bag. Remember how I tell you all the time to save those odds and ends of clay clay projects in a scrap clay bag. This is one of the reasons why. I didn't need to use “good” clay for this any old scrap of clay in any color will work just fine. Roll whatever clay you are using into a snake about the same diameter as a toothpick (about 1/16”) Cut this snake into pieces that will fit your tortillas. To determine that size fold the sides in on one of your tortillas just like you would if you were making a real burrito and use it as a guide. I cut mine around ½”.


Now fold the sides up on some tortillas and use some TLS to glue your little pieces of “filling” to them.

Now bake all both the quesadillas and the burritos for 10 minutes at the temperature your clay calls for and allow to cool.


Now the quesadillas are finished.


For the burritos we just need to roll them and use a bit of tacky glue to hold them closed. I found the small craft clamps from Dollar Tree to be perfect for holding these while the glue sets up.


And there you have some quesadillas and burritos to add to the doll family Mexican feast.


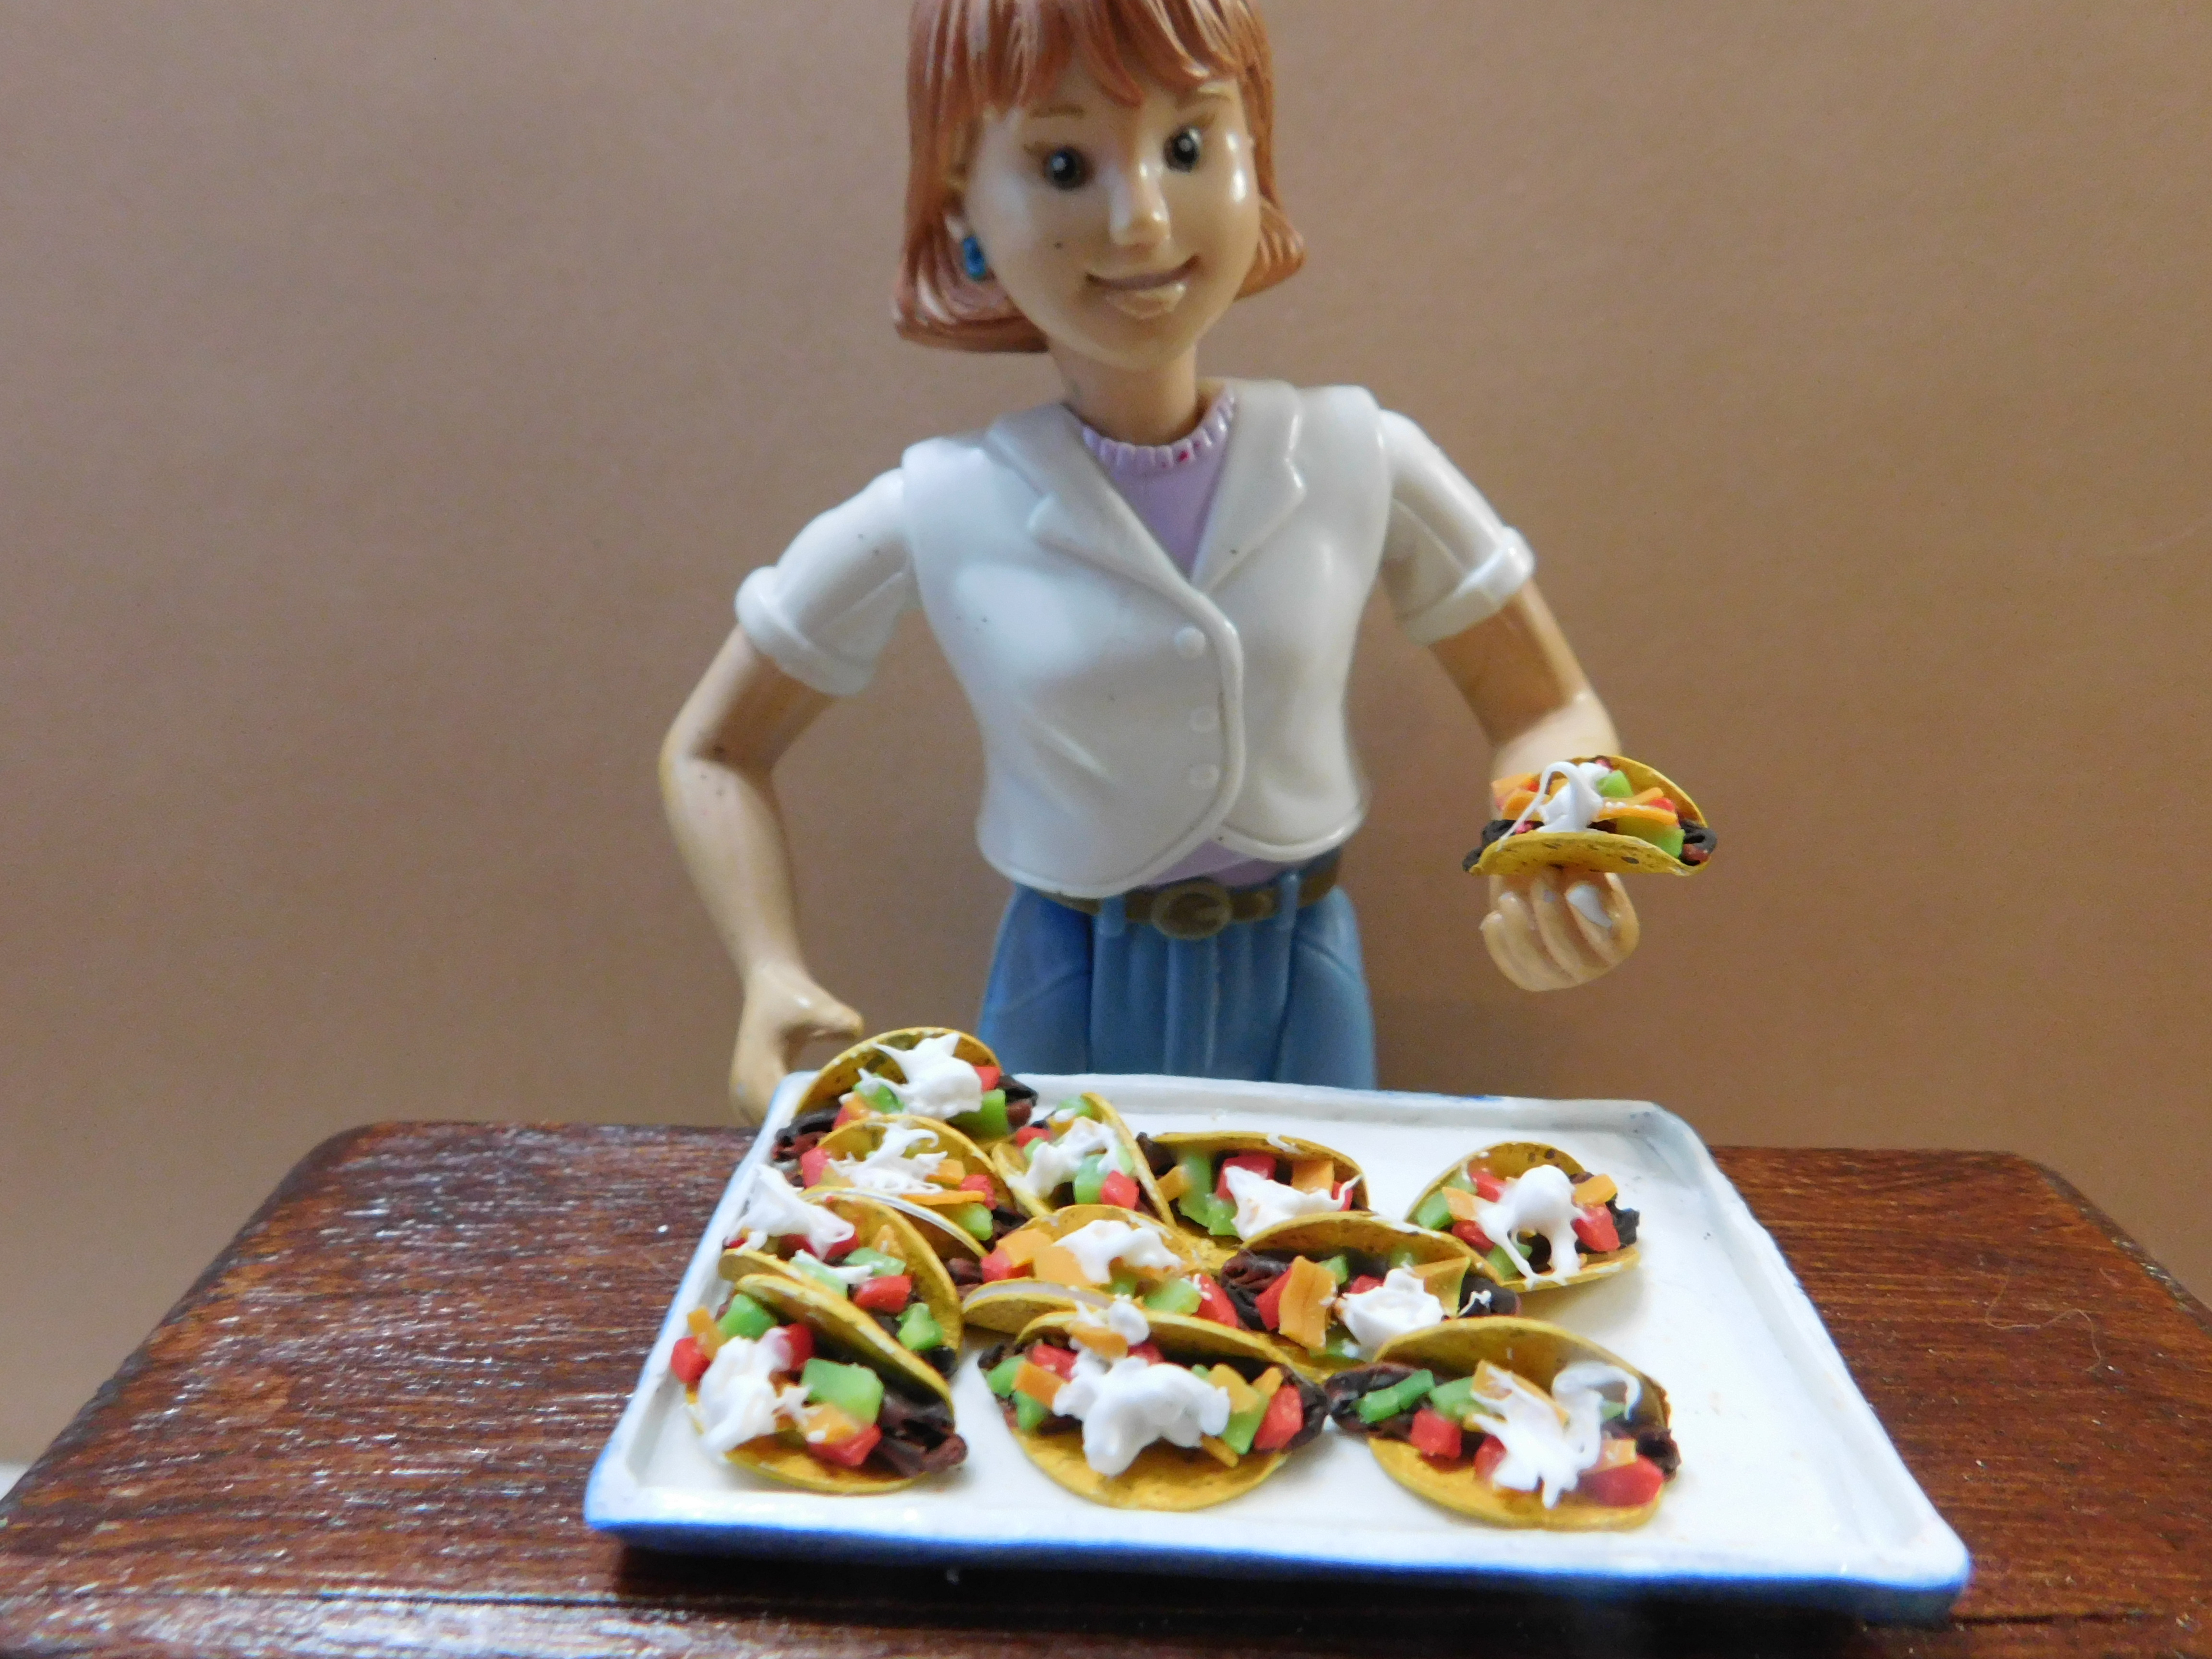
Here is a picture of all the items we made in the last month (or so) I think the dolls are going to enjoy a Fiesta for Cinco de Mayo!


Now as promised in the video a bit of a story about my filming time today. It had been pretty quiet around here all morning right up until I started filming. First right as I turned off the camera to mix that clay for the cheese I heard a garbage truck pull into the parking lot next door. Normally that just takes a few minutes and he is gone, not today. This time he was out there for 20 minutes banging around trying to get the dumpster dumped into his truck. Then when that finally got done one of my neighbors backed into someone's pickup truck right outside my window. (no one was hurt) Why as soon as I start filming does it get noisy??? Anyway I thought you all might enjoy hearing about what I had to work around today.


As always I do want to sincerely thank all of you for watching my videos and reading my blog posts. It means so much to me that you are supporting me in this way. If I could ask you all to do just a bit more by subscribing to the channel and liking the videos and leaving comments. Those help more than you can imagine. Also if you could pass the links on to your friends I would appreciate it so much.


Tuesday, April 26, 2022

Dollhouse Miniature Cactus Garden Flag


Watch the video here.


This week I wanted to add to our cactus themed set of front porch decor with a fun garden flag. As is my normal first step on these projects I did a Google search to see what is out there for real size homes. As I was looking through the cactus garden flags on in particular caught my eye. It had just a silhouette of a cactus set against a sky that was designed to look like a sunset, with beautiful yellow, orange and red tones. It was already a simple design but I did take the liberty of simplifying it a bit more for the sake of our smaller scale. I immediately knew how I wanted to do the wash of color on the background. I love using my alcohol markers for backgrounds like this and was so happy to be able to feature the technique here today.


But first things first, we need to start with the base for our garden flag, I like to use 100% cotton bleached muslin fabric. This is a rather inexpensive fabric that should be available at any stores that sell basic fabrics. It comes in many widths from 36” to 120” (or maybe wider at some stores) and is usually one of the cheaper fabrics. The fact that it is100% cotton means it is very versatile and will work with just about any technique I want to do.


I did start with my piece of fabric slightly over size today and then trimmed it to size before I finishing. You can start with yours the exact size or trim later. You will need to have a fabric piece that is 1” by 3” to make the flag at the end.


Start by laying your fabric on a piece of folded plain white paper (printer paper is perfect) this will absorb some of the mess we are going to be making. To color the background I am using my BIC brand alcohol markers but any brand will work so use whatever you have. Anything from Sharpies to Copics will be fine here. I found this package of BIC markers at Walmart a couple of years ago and even though I have a really nice set of markers I use for card making I pull these out for other crafting all the time.


Use your lightest color marker first, in today's flag that is my yellow. Color most of the flag blank with this color. Don't worry about getting a perfect coat of color but do try to make your marks horizontal since this is supposed to represent the sky at sunset.


Once the yellow is covering most of the fabric add some orange and then red lines to the fabric.


Now using some isopropyl alcohol (at least 70%, 90% is best for this) in a spray bottle get the fabric nice and wet. This will allow the ink to activate and blend. Allow to dry completely.


Once dry add any more color as desired. I added just a few red lines. Then re-spray with the alcohol and allow to dry again.


Once dry we are going to use a 1” square of Heat'n Bond ultra to glue our flag together. Be sure to leave the area nearest the fold free to slide onto the flag bracket. I have covered how to use this product in previous blog posts on the other garden flags so I won't cover it in detail here. If you need more complete directions look back at the bunny flag from last month.


Once the Heat 'n Bond has been applied we can add our cactus. I decided to add the cactus at this point because I wanted to have my cactus on each side to be back to back with each other this time. 


By painting a cactus on the first side with my paint pen I was able to use the bleed through as a guide to paint the cactus on the second side. I did go back to the first side and neatened it up off camera but it was super easy to find the placement and trace what I had done of the first side.


Now all we need to do is slip the flag onto to the flag bracket on the dollhouse front porch and the doll family can sit back and enjoy their cactus themed decorations.


A little side note as I said in the video this is the first video I have actually edited with my new editing software and I know I have a few bugs to work out yet. Please be patient as I learn this new very powerful piece of software.


As always I do want to sincerely thank all of you for watching my videos and reading my blog posts. It means so much to me that you are supporting me in this way. If I could ask you all to do just a bit more by subscribing to the channel and liking the videos and leaving comments. Those help more than you can imagine. Also if you could pass the links on to your friends I would appreciate it so much.


Sunday, April 24, 2022

Dollhouse Miniature Hairbrush and Mirror Set


Watch the video here.


Today's project started out because of a challenge I received from a very good friend. This friend although not a miniaturist watches all of my videos. They challenged me to create a hairbrush and hand mirror using polymer clay. I decided I couldn't leave this challenge unanswered so here we are today.


I did have to do several test bakes this morning to try out different ideas I had for what to use as the bristles of the hairbrush. For the purpose of today's video I decided it would be best to use the prickly part of some Velcro. It seemed to bake up just fine and gave a nice spread of 'bristles” to our hairbrush even though they are a bit on the short side.


For the body of both the brush and mirror I decided to go with a dark blue so I could use the set in the Beachside Bungalow. I did want to mix my colored clay with an equal amount of translucent clay so the finished pieces would have a more realistic look to them. I was afraid the colored clay on its own would look very dense and heavy, while this has more the look of a plastic brush set.


While I am happy with how these turned out, if I were to make them again I would change a few things. I am planning to do another set that is not made of clay in the future.


The first step was to make the two handles for our pieces. I find it is best to make these and at least partially bake them off before adding them to the main parts. That way the handles stay nice and straight and in whatever shape I decided to make them. These only baked for about 5 minutes, just enough to firm the clay up they didn't need to be completely cured at this point.


Once the handles are baked I made the hairbrush first. So I formed the body of the brush and attached the handle to it using some TLS (Translucent Liquid Scupley)


Now onto the mirror. For it I formed my basic shape (I went with an almost square shape) and added the handle the same way as for the brush and baked both pieces for 10 minutes.


Now it was time to add the Velcro “bristles” to the hairbrush with some TLS.


I then used the shiny side of some aluminum foil for the reflective mirror, also added with TLS. Bake for 10 minutes again.


Next I added a small snake of clay to the mirror to frame the mirror, using TLS again to glue it together and baked it once more.


Then all that was needed was a thin coat of Satin Mod Podge to give the pieces a nice finished look.


As always I do want to sincerely thank all of you for watching my videos and reading my blog posts. It means so much to me that you are supporting me in this way. If I could ask you all to do just a bit more by subscribing to the channel and liking the videos and leaving comments. Those help more than you can imagine. Also if you could pass the links on to your friends I would appreciate it so much.


Saturday, April 23, 2022

Dollhouse Miniature Flour Tortillas


Watch the video here.


First off, let me thank everyone for their patience this last week. If you didn't read my blog from last week I had a major issue with my video editing software and ended up not able to get this video finished for last weekend. I ended up getting a new editing program and I am still in the process of learning how to use it. Today's video is actually only the second video I have edited with it. I decided to work on the one that will go up next Tuesday first since it was shorter. I will get a handle on the program but it is going to take a while. So in the meantime videos might be a bit “glitchy” and I might make some editing errors along the way. Sorry for any of those problems, I am doing my best, learning new computer software is something I find very difficult.


So let's get on to talking about today's project, flour tortillas and and tortilla keeper/warmer/whatever the correct term is. If you do know what this container is properly called let me know.


Anyway, the tortillas again this week are made from card-stock with as painting technique to make them look realistic. This is another project that was in my notebook from years ago that I have always wanted to try. I love how they turned out. You do have to be careful not to make the brown spatters too large (something I seem to be struggling with) but overall these look very real. I love that they can be so thin and not be brittle like they would be id I had used polymer clay to make them.


When I first planned to make these I was going to make some kind of food to go with them in the same video. I didn't have time to do that so instead I decided to make the “terracotta” warmer/keeper instead. I do hope to make something else using some of the tortillas for next week's video though. Hopefully I will get them done in time.


We are starting out with a sheet of white card-stock and using a very thin wash of a cream color paint. You want lots of water and just a tiny bit of paint in this. It isn't about giving the paper an even wash of color you want the coat of color to be very light and splotchy. Then let this dry for a bit, not all the way just until the paper is more damp than wet. Now scrunch the damp paper into a tight ball, you might want to do this a couple of times. Then flatten it out, you want a very wrinkled surface. Now using the same cream color paint and a scrunched up paper towel wipe some cream color paint lightly onto the surface of the paper. You again don't want a full coat, you want to just hit the higher points and the idea is to have a wrinkled paper that has three colors- the white of the paper, the water down cream wash and just a bit of the full strength cream color.


Now while this last paint is sit fresh and the paper is still damp use any brown paint and a toothbrush to splatter on some brown specks.


Now the paper needs to dry completely before we punch out our circles from it. If it is at all damp it will not cut/punch out neatly. I ended up letting mine dry overnight to actually get it all the way dry.


I did use my Cricut to cut my circles since it was already out on my table and I have no idea where my circle punches are. You can make your flour tortillas in many sizes, I cut mine at 7/8” to replicate a tortilla that is around 10” in real life. I figure I can make a lot of different foods out of this size. If you want to make some soft tacos you might want to cut yours at ½” or if you want to make something that would take a larger tortilla you could cut them up to 1” and still have them look realistic. The sizes I would recommend would be- ½”, ¾”, 7/8”, or 1”.


The next thing to make was now the tortilla keeper/warmer/? whatever it should be called. I found a lot of variations online for these but I decided to go with a terracotta look one.


I used Kraft color card-stock as my base for this because I felt it would paint up to look the most realistic in the end.

For this you will need 7 circles that are 1”, 3 that are 7/8” (or ¾”) and a strip that is ¼” wide by about 8”.


Start by gluing the 3 of the 1” circles in a stack, 4 of the 1” circles in another stack, the smaller circles in a third stack. And allow the glue to dry. At this time you also need to glue the strip around something that is 1” in diameter. (I used my clay roller but anything the correct size will work) use a thick tacky glue for all the gluing.


Once dry it is time to glue the small stack onto the bottom of the stack of 4 circles. And glue the stack of 3 onto the strip that you glued into a ring shape so that the strip forms the sides of the keeper.


Allow this glue to dry. I like to add a bead of glue to the inside of the ring and spread it with a cotton swab so make a really good bond.


Now it is time to use a terracotta craft paint to paint our little keeper. If you want you could make yours any color you like. I do like to use 2 coats of paint.


Once the paint is dry add a couple of coats of Mat Mod Podge and your tortilla keeper is ready to use.


As always I do want to sincerely thank all of you for watching my videos and reading my blog posts. It means so much to me that you are supporting me in this way. If I could ask you all to do just a bit more by subscribing to the channel and liking the videos and leaving comments. Those help more than you can imagine. Also if you could pass the links on to your friends I would appreciate it so much.

Monday, April 18, 2022

Let's Catch Up


I wanted to let everyone know what is going on the video schedule lately.


First off I was ill for a portion of the month of March, I'm fairly certain it was a mild case of Covid. At its worst I was mostly just exhausted and was still able to keep up with what I wanted to do for my minis channel. My 18” doll channel has been suffering the effects since I just didn't have the energy to get anything up over there for the last several weeks.


As I was recovering from being ill I started getting more migraines than is normal for me. A quick Google search confirmed what I was suspecting, this seems to be something that migraine sufferers are getting hit with. For whatever reason after Covid migraines seem to be much more common and seem to last longer than normal. I am finding the after Covid to be much worse than the time while I was ill with it.


Then to top off things over this last weekend I ran into some issues with my video editing software. I won't go into the details except to say that after spending a lot of time getting my Sunday video ready to render (the last step in the process) my software wouldn't allow me to proceed. I tried contacting the company but being a holiday weekend they didn't respond until Monday.


This was far from the first problem I have had with this software, although it was the worst. I have been using this software suite since shortly after I started my YouTube channel, over a decade at this point. I had been contemplating a change but really didn't want to learn a new program. And since I was using several programs it would not be just one program to learn, I was also using their photo editing and music editing software as well as a few other programs. This latest problem however was the last straw. I was already feeling like crud from another migraine and I really had wanted to get the video finished but that was not going to happen.


I do want to say I had strongly considered changing programs for a while. I just hadn't, mostly out of laziness. Now however I decided I was done. So first thing Sunday morning I deleted all the programs from this software suite from my computer and looked at my options.


After a lot of looking online and a text conversation with my youngest son/IT guy I picked new programs to use for all the things I was doing with the now deleted software.


So what does that mean for the channel. Well, I am going to spend this week learning how to run these new programs. I am about 8 hours into watching tutorials and practicing with my new video editing software, more time will be spent on that today. Then I will need to work on learning the new photo editor. The music editor can wait for a while since I only need that when I change music cuts.


I am planning to be back on schedule starting on Saturday (April 23) so no video tomorrow even though I have it mostly filmed.


Wish me luck with learning to use the programs and please be patient with any glitches in the next few videos as I learn this new and much more powerful program.

Wednesday, April 13, 2022

Dollhouse Miniature Cactus Door Mat


Watch the video here.


This week we are adding a fun cactus-themed door mat to the porch on the dollhouse. Just like with all of our door mats lately I am using a 1 ½” by 2 ½” piece of felt as the base. This is the same stuff I have been using for all the door mats in this series and it is the type of felt that is sold by the yard in the fabric store as opposed to the squares from the craft store. This felt is a bit thicker so I feel it looks better but either will be fine, especially since we are giving it a good coat of paint later.


The first step though is a nice coat of Mat Mod Podge, this seals the felt so that that layer of paint will go one more evenly and we won't need as much paint. The Mod Podge will take a while to dry and you do want it to be dry before you add the paint.


For the background color this time I chose a cream color of craft paint, any light color would work though.


Once the paint dries it is time to add our design and this month I went pretty simple.


I decided to use an alcohol based marker for the lettering since I wanted to have thinner lines this time. I used one by Bic but a Sharpie or any alcohol based marker will work just fine. I started with the word HOWDY toward the top right. Then below it and slightly smaller y'all. I thought this phrase when well with the theme this month.


Then using a green paint I added a very simple cactus next to the words.


Allow the paint to dry and do any touch ups you feel you need. I did go over some of my letters to add ink where the pen had skipped.


And that is all there is to this month's door mat.


So I promised in the video to tell you what happened that this very short and simple project went up a day late. Well it all began on Sunday when I filmed the first part of my video. I got the door mat up the point where it was painted and I was ready to add the design. That would mean that on Monday I would have an easy time finishing it up and getting the video ready for you guys to watch on Tuesday. All went well until I started to film my into for the video, you see that very first part of every video you see is usually the very last part I film. I turned the camera on and started to tell you about the project and suddenly realized I had misspelled HOWDY! How you might be asking, well I managed to leave out the D! I couldn't believe I had done that and the idea of fixing it at that point was just not in the cards. I decided to toss the mistake and start over. I also knew that I could rush and get the project redone but I decided to not do a rush job and just have this video go up a day late and take my time and not make any mistakes.


As always I do want to sincerely thank all of you for watching my videos and reading my blog posts. It means so much to me that you are supporting me in this way. If I could ask you all to do just a bit more by subscribing to the channel and liking the videos and leaving comments. Those help more than you can imagine. Also if you could pass the links on to your friends I would appreciate it so much.


Sunday, April 10, 2022

Dollhouse Miniature Humming Bird Feeder


Watch the video here.


This is a really easy project and I think it turned out really well. I used to make humming bird feeders way back when I sold minis and they were pretty popular. Those were made entirely from beads and I sadly don't have any of the kinds of beads I used back then. So I sat down this morning and thought up another way to make these and I really like how they turned out.


For the bottom of the feeder I decided to start with a ball of red polymer clay about ¼” in diameter. This is then flattened out and a head pin poked through. I did dip the head of the head pin into TLS to make sure it would stay in place on the finished feeder. 


I also took just a moment and slid a cocktail straw down over the head pin to make an indentation in the top of the clay. This will make gluing the feed tube on easier later. Remove the straw and back at the recommended temperature for your clay for 10 minutes and allow to cool.


Using a red alcohol marker color about ¾” of the end of a white cocktail straw. If you have a clear straw that would probably be even better than white and you could possibly skip coloring it. Allow the ink to dry.


Once the ink dries and the clay cools cut about ½” length of the colored straw , dip just a bit of one end into some super glue and slide it onto the feeder with the glue toward the top of the red clay base. Allow the glue some time to set up/dry,


now slide on a tiny silver (or any color you wish to use) bead onto the wire and form a loop with the head pin that is snug against the small bead at the tip of the feeder.


Using a blunted toothpick paint some dots for the openings the humming birds will get the food from around the base with some yellow paint. Allow to dry.


Touch up any spots on the tube portion with your marker and give your humming bird feeder a coat of Satin Mod Podge. Allow to dry.


Use a piece of wire of some fine jewelry chain to create a hanger for your feeder and display it hanging from the front porch of your dollhouse.


As always I do want to sincerely thank all of you for watching my videos and reading my blog posts. It means so much to me that you are supporting me in this way. If I could ask you all to do just a bit more by subscribing to the channel and liking the videos and leaving comments. Those help more than you can imagine. Also if you could pass the links on to your friends I would appreciate it so much.


Saturday, April 9, 2022

Dollhouse Miniature Tacos


Watch the video here.


A while one of you requested that I make some tacos and I think the ones I make in today's tutorial turned out pretty cool.


This is actually a project that has been on my list for a long (very long) time. Back when I first got into miniatures, long before I had even touched my first block of polymer clay I was checking out every book and magazine on dollhouse miniatures that was available through the county library system. I had purchased a notebook and would copy down directions for projects I wanted to try to make.


These taco shells are based on one of the projects from that old notebook. I have no idea where I had seen the project since it never occurred to me to note that in my notebook.


Anyway, I did have to make few changes to them based on what materials I could get my hands on now. But the main idea is still intact.


I know we could make the tortillas/taco shells from polymer clay and if you decide you want to do that rather than the card-stock like I did today look on my channel for my tortilla chip video, you can use the same clay mixture I used for that to make your tortillas. In addition to really wanted to finally make this I love that I can make the taco shells so thin and they aren't fragile like they would be if they were made from polymer clay. The card-stock is a perfect thickness to look in scale and yet it won't crumble on you while you work.


So for the tortillas you will need a piece of sturdy card-stock in a cream or very light beige color. This needs to be really pastel in color to work correctly here. Then we will build up the color in layers. It is important that you work with all 3 layers of color one right after the other. Don't allow this to set up and dry between layers. This will help with getting the colors to just slightly blend and meld into each other.


For the first layer use a rather dark yellow color of craft paint and just rub it onto the card-stock with a paper towel. Don't try for a really nice even coat of paint you want it to be slightly blotchy with some of the paper color showing through.


Next we need a darker golden yellow color, a yellow ocher type color. This one we will just be using a paper towel to dab it on like if you were sponge painting.


Next use any brown and with an old toothbrush and a toothpick splatter the brown onto the surface.


Once the paint dries completely on this side do the same steps on the other side of the card-stock.


Once both sides are painted and completely dry punch out a bunch of ½” circles, you can use a hole punch if you have one, I decided to use my Cricut machine since I already had it out on the table and this was so much quicker than finding my hole punch.


Once you have your tortillas cut out use a small amount of the two yellow paint colors to touch up any edges or spots as needed.


Now onto the fillings.


For our diced tomatoes mix a red polymer clay with an equal amount of translucent clay, roll it out and cut tiny pieces. Transfer to a paper plate for baking.


For the lettuce mix a green clay with an equal amount of translucent and roll as thin as possible, you are aiming to go paper thin if you can. Use your clay knife to score tiny pieces and transfer it to the paper plate. Try to kind of roll it a bit as you lift it so it isn't laying completely flat.


For the cheese mix a yellow and a golden yellow/ocher color clay and roll as thin as possible and score it just like for the lettuce. Move it to the plate in same way so it isn't flat.


Bake these pieces at recommended temperature for you clay for 5 minutes. They don't need to cure completely just firm up so they will be easier to work with.


The meat filling is made the same way as we did fro the enchiladas last week. Using a reddish brown and a dark brown chop the clays up finely and form a mottled snake.


Now use a toothpick to form the tortillas into taco shells.


Add some TLS (Translucent Liquid Sculpey) to the inside bottom of your taco shells and lay the snake of meat filling inside. Cut the ends even with the shell and texture the meat with a pointed tool.


Layer on some more TLS and add the chopped tomatoes,


 lettuce


 and cheese adding more TLS as needed. 


Bake for 10 minutes to cure then add some some white TLS “frosting” (white clay mixed with TLS to make a spreadable frosting) you just want a cute little dollop on the top of the other fillings. Bake again for 10 minutes and your tacos are ready to display in your next miniature scene.


As always I do want to sincerely thank all of you for watching my videos and reading my blog posts. It means so much to me that you are supporting me in this way. If I could ask you all to do just a bit more by subscribing to the channel and liking the videos and leaving comments. Those help more than you can imagine. Also if you could pass the links on to your friends I would appreciate it so much.