Check back often

Have you checked out all my blogs?


Dollhouse Minis: http://joannesminis.blogspot.com


18” Dolls: http://joannes18dolls.blogspot.com/


General Crafts: http://joannes-place.blogspot.com/


Cooking: http://joanne-kitchen.blogspot.com/


Also if for some reason I can't post I will try to give a head's up on the Facebook page so check there too.

Wednesday, September 27, 2023

Dollhouse Miniature Plastic Pumpkin Makeover


Watch the video here.


A while back I got some little plastic pumpkins in a couple of the sets of blind bags and I said when I opened them that I would try to remember to do a tutorial on how I decided to re-do them. So today that is what we are doing. As I say in the video though this is actually tied to what I have planned for the Sunday tutorial too because I want to make some decorative pumpkins for the dollhouse to create a fall tabletop display. You see in real life I accidentally started collecting ceramic pumpkins a few years ago. I wasn’t planning to collect them I didn’t even realize I had an actual collection until I took a look at them last fall. I was just buying them in the fall because I love how they look. As I was putting out a few of them a few weeks ago in my living room I decided it would be fun to make some for the dollhouse also. So we are staring today with the repaint of these two cute little pumpkins. This same method could be used on any plastic items you want to re-do so even if you can’t find similar pumpkins I think this will be useful.


The first thing I like to do is add a handle to any small objects that I am trying to paint. That way I can move the object around and not have to touch it and interfere with my painting. My favorite way to do this is to use some of that poster tack stuff and attach the object to a regular craft-stick. This works really well for me and is is easy to remove when I am done with the project. Do try to make sure that the poster tack doesn’t block the areas you want to paint though.

Once the pumpkins were on their individual handles I cleaned them with just a bit of Isopropyl alcohol. This will not only remove any dust/dirt on the surface but also any oils from either handling them or from the manufacturing process allowing the paint to adhere much better. I do this will all plastic items I am going to paint and I use either the alcohol or distilled vinegar depending what is handy at the time. I find both work pretty much the same although the alcohol does dry faster so I can get on to the painting (fun) part quicker. Allow to dry.


Now we can give the pumpkins a base coat of a black craft-paint. This will allow the finish coat of color to really pop. Do a thin coat so as not to hide the details on the pumpkins and allow it to dry completely.


Now for the fun part of the project we are going to add the color to our pumpkins, this time I am using gold and copper. I chose those colors for a couple of reasons. One being that I have both of those colors in my ceramic pumpkins and they are among y favorites. Also since I don’t have any copper paint so I am using the nail polish for that color this was a good place to use that since on Sunday we are probably only going to be making our additional pumpkins from polymer clay.


You will want to use 2 thin coats of whatever color you choose that way the details will not get filled in and will still show. Allow to dry.


Now we have the first 2 of hopefully a nice collection of pumpkins for the dollhouse family to display for fall.


As always I do want to sincerely thank all of you for watching my videos and reading my blog posts. It means so much to me that you are supporting me in this way. If I could ask you all to do just a bit more by subscribing to the channel and liking the videos and leaving comments. Those help more than you can imagine. Also if you could pass the links on to your friends I would appreciate it so much.


Sunday, September 24, 2023

Dollhouse Miniature Pumpkin Sign


Watch the video here.


I have another free pattern for you to download so you make the project. You can find the file here. In the download there are 3 files: a PDF for hand-cutting of the pieces, a PNG to use with your electronic cutting machine and a text file with handy hints and tips (and the sizing information) to use the PNG.


As with most of these projects I cut all the pieces from medium weight white card-stock, the kind used to make cards and such. This is way more economical than having to purchase a bunch of colors and in my experience the paint colors are a lot more stable than the paper colors. I rarely get noticeable fading with the painted projects.


You are free to use the pattern as many times as you wish and even to sell the finished project. But, please don’t give away or sell my patterns. I spend a lot of time creating them and the only compensation I get is from people watching the videos and checking out the blog post. I really want to keep offering these for free so please if someone else wants to make one send them to the video and blog so they can get their own copy of the pattern.


This time there are only 2 shapes to the pattern with a total of 6 pieces to cut. I wanted to have a super simple project this time because I wanted to spend more time on the painting of the sign than the assembly.


Like always I am using a fairly thick tacky glue in a very thin layer to put mine together. After the pieces are glued I did put a weight on them until they were partly dry to help them stay flat. You do want to make sure these pieces are dry before moving on to the next step.


Once the glue is dry we can do just the first coat of paint. I wanted a good base layer of paint but I also wanted to do a fun paint technique on the finished pumpkin and this was the easiest way I could think of to do what I wanted.


For the stem I wanted a lightish brown but I don’t have the color I wanted so I mixed together some of the dark brown I have with some white to get the color I was after. I used this just on the stem of the back piece of the sign. I then used a pumpkin color paint to paint just the edges/sides of the back piece and entire front and sides of the other piece. Allow this paint to dry all the way.


Now we get to assemble the pumpkin, this is a really easy project since there are only the 2 pieces. If you missed any spots with the orange paint on the edge of the front piece be sure to position those spots so they will be easy to cover with the second coat of paint. Use the same glue as you did earlier and allow the sign to dry.


I wanted to add some detail to the stem so I added some thin lines with the dark brown paint using a round toothpick. This allowed me to get really thin lines. I wasn’t after perfection here, I just wanted to add a few lines so the stem got a bit of character and no longer looked so flat. Allow this paint to dry long enough that it won’t smear when you are handling the pumpkin.


Now for the fun part of this project. Start by painting the edge of the pumpkin part of the sign with the same color you used before. Make sure the edges are coated then place the sign back on the tape on your work surface so it stays in place. Add a slightly thicker second coat of the same color of orange the front of the pumpkin. And immediately add some thin lines of a slightly darker orange to look like the curves of a real pumpkin. Blend these lines a little or a lot (or not at all it’s up to you). Now again immediately add some yellow highlights between the dark orange lines. And blend these really well. Because we are working on the layer of orange paint everything should blend nicely and give the impression of highlights and shadows making the pumpkin look like it has a bit of shape.


Once the paint dries give your sign a coat of Satin Mod Podge on both the front and back sides (make sure to get those edges also) and allow to dry completely.


If you want to add more to your sign this would be the time. You could add a phrase like Happy Halloween, or a Jack-o-lantern face to the sign. If you do be sure to seal it with another coat of Satin Mod Podge.


Once completely dry you sign is ready to display in you mini scene.


As always I do want to sincerely thank all of you for watching my videos and reading my blog posts. It means so much to me that you are supporting me in this way. If I could ask you all to do just a bit more by subscribing to the channel and liking the videos and leaving comments. Those help more than you can imagine. Also if you could pass the links on to your friends I would appreciate it so much.

Wednesday, September 20, 2023

Dollhouse Miniature Another Ghost


Watch the video here.


I saw some similar ghosts in an ad for real size Halloween decorations and immediately thought they would be both adorable and super easy to make for the dollhouse.


I start by cutting a strip of white medium weight card-stock ¾” wide by 3” long. This is pre-rolled about a Sharpie type pen to give it a little bit of curve since we will also be using the pen as our form to build the ghost on. I then marked where the strip overlapped so I could glue the “streamers” from just the inside area of the ghost.


For the streamers I used some white embroidery floss, I like to have lots of colors on hand of the floss since is is very useful in mini-crafting. I cut about 10 to 12 pieces of floss that were 3” long. I had an empty small tablet for writing notes to myself and the back of it was 3” wide so I used that as a measure for the streamers.


Lay a bead of glue on the area before the mark on the card-stock strip (the part that was touching the marker) and add the floss pieces to make a fringe along the bottom edge.


I do like to add an additional bead of glue on top of the floss pieces just to make sure they are going to stay in place. I normally use my finger to pat this layer into the floss to really get it all stuck down. Now this will need to dry completely so that your ghost doesn’t stick to the pen in the next step. I let mine dry overnight so I was sure it was all the way dry.


Now we can add glue to the card-stock strip and roll it around the barrel of the marker. Try to get it rolled nice and tight and evenly. Then allow the glue to dry long enough to set up.


Once the glue has dried add the face to your ghost, I do try to make sure the seam in the card-stock is in the back and I almost always sketch out the face with a pencil first. That way I can decide on size and placement before it becomes permanent. Once I have a face sketched on I use the black permanent marker to add the face.


Next we need a way to hang the ghost up. For this I cut a piece of the same floss that was 4 ½” long. I glued both ends into the top of the ghost to form a hanger. Allow the glue on this to dry at least most of the way so that it doesn't shift in the process of hanging the ghost up.


On my dollhouse I added some eye-pins to the beam above the porch railing so it would be easy to hang things. So that is where these ghosts are going to be located.


I did try to film the process but there was no way to angle camera where I needed to and hang the ghost by myself. It was simple though I just put the end of the hanger through the eye-pin then the ghost through the hanger loop. This way the ghosts will stay in place until I am ready to take them down to store for next year.


And here we have the porch with at least some of the Halloween decorations in place. Be sure to check out the Halloween playlist on the channel for even more Halloween projects.


As always I do want to sincerely thank all of you for watching my videos and reading my blog posts. It means so much to me that you are supporting me in this way. If I could ask you all to do just a bit more by subscribing to the channel and liking the videos and leaving comments. Those help more than you can imagine. Also if you could pass the links on to your friends I would appreciate it so much.

Sunday, September 17, 2023

Dollhouse Miniature Metal Pumpkin


Watch the video here.


This week I decided to make another item I keep seeing in real size Halloween/fall decoration photo, this metal pumpkin. It is a bit of a fiddly project but still really easy. It requires very few materials and they are all things that are easy/cheap to find.


We will need a wooden skewer from the kitchen, I get most of mine from the dollar store. Mark 1/8” from the end of the skewer all the way around, this will act as a gluing guide.

Next we need 6 strips f heavyweight card-stock cut 2 ½” long by 1/8” wide. Mark both ends of the strips ½” from both ends again to act as a gluing guide. Now pre-curl the strips by gently wrapping them around a fat paint brush handle or something similar. 


Glue 2 of the strips onto the skewer lining up the lines you drew and making sure the paper strips are across from each other. When you are done it should look like this. Allow the glue to dry.


Repeat the gluing process with 2 more strips adding them on one side of the skewer to fill in the area between the first 2. allow to dry.


Finish up by adding the last 2 strips to the other side of the skewer and again allow the glue to dry.


Now to make our lives easier later in the project I suggest painting what will become the inside of the pumpkin with some black craft paint. You can wait if you wish but it is so much easier to paint this side of the strips now while they are basally the outside of the project. Try to not get too much paint on the reverse side of the strips we will need to be able to see the gluing guidelines in the next step.


Once the paint dries it is time to start making the pumpkin shape. Again start with 2 strips across from each other. Add a bit of glue to the area at the end of the strips starting at the guideline we made earlier. Carefully flip the end to meet the skewer, lining the guideline with the spot where the other end of the strips is and hold it in place until the glue grabs. Once both are in place I did suggest using a small clamp to hold them in place until the glue sets up nicely. It should look like this.


At this point I decided it would be best to just glue one strip at a time since the area was pretty small and I wanted to make sure it looked really nice. If your fingers are more nibble than mine you might be able to do both on one side at a time. Just glue these the same way as in the last step being sure to leave space for the one to line up next to the one you are gluing.


Repeat this same step with the rest of the strips, I did mine one at a time waiting about 20 or 30 minutes at least between to give the glue plenty of time to get a good hold. Since each one took just a few seconds it was a good project to have on my table and glue a strip between other tasks I had that day. Once all 6 steps are glued you will want the glue to dry completely before going to the next step.


Once the glue is dry and you are happy with how the strips are placed it is time to finish the coat of black paint on the outside of the pumpkin. Be sure to up the skewer a little bit also since that will be the stem of the pumpkin when we are done. Allow the black to dry completely before moving to the next step.


Once the base of black is dry it is time to make this paper strip pumpkin look a metal one. I really wanted mine to be copper but I don’t have any copper paint. I was just about to settle for silver when I remembered I have some copper nail polish in my polish collection. I decided to use that and I am so glad I did. I think it looks way better than any copper paint I’ve used in the past and it has the bonus of not needing to have a finish coat of any kind over it.


Once the copper is dry go ahead and trim the stem to the length you want it to be. Touch up the cut edge with a dot of the black and once that dries add a dot of the copper. Allow to dry and your pumpkin is ready for display in your mini scene.


As always I do want to sincerely thank all of you for watching my videos and reading my blog posts. It means so much to me that you are supporting me in this way. If I could ask you all to do just a bit more by subscribing to the channel and liking the videos and leaving comments. Those help more than you can imagine. Also if you could pass the links on to your friends I would appreciate it so much.

Wednesday, September 13, 2023

Dollhouse Miniature Paint Test- Texture


Watch the video here.


I got so much positive feedback on the last paint test where we looked at metallic paints and how an under-layer of paint can affect the final look of the metallic paint I decided to delve into another paint test. Today we are looking at just a few ways to add some texture to paint. Since in our mini world we sometimes want to replicate various materials with simple/lightweight materials we many times want or need to add the needed texture via our paint. So lets look at a few that I thought of. If you have other things you would like to see paint tests done on let me know.


So let’s talk about the set up for this week’s test. I wanted to have each test be done with the same paints and on the same surface. I chose to use some black craft paint and white craft paint. I did this for a couple of reasons, mainly that is the type of paint many of use because it is inexpensive and pretty easy to get. I went with black and white because they are on the extremes for color and I felt they would best show any color change the texture materials caused. As for a surface I wanted something that would be similar to what we may be working with in a dollhouse but would also be easy to store with my paints for reference later. I decided on using the jumbo craft sticks that I got at Walmart. I have a lot of them, they are again inexpensive, they are made of a decent quality wood, and they will slip into my tub with my paints and take up very little extra room.


So onto the paint test. 


Baking Soda- we’ve used baking soda on the channel on numerous occasions to give a cement like texture. I have been using it both in my mini work and in full size decor items for years. The only times I have run into problems was when the finished object got wet. It then had a funky haze to toe finish. Since we don’t normally have moisture around our minis I have no issues using baking soda on them I would however not use it on anything that will be in a totally sealed environment like a frame with a glass and little air circulation.


After drying I was not surprised at all since we have used this in the past and I got the result I was expecting. You can use more or less baking soda to make a smoother or rougher texture and it is a very reliable finish. One thing I do love is the baking soda does not alter the color of the paint. This can be really important in some cases with some projects.


Sand- I think we’ve used sand on the channel before also. It gives a nice texture and there are n worries about it attracting either bugs or moisture. It is used in full size construction sometimes to give some texture and it tends to be very durable once dried.


Once dry this does have a nice texture with no color shift in the paint. It has the advantage of not being a “food” item so there is pretty much zero chance of it drawing any bugs to the project and it won’t draw any moister from the surrounding air. The texture is a bit more coarse than that of the baking soda example, more “grainy” but again I see a lot of uses for this in future projects.


Coffee Grounds- these are the same coffee grounds that I keep on hand for use as miniature soil. To prepare the coffee grounds you will need plain (not flavored) coffee grounds that have been used to make coffee. This removes the oils and allows the grounds to work better in our projects. Then dry them thoroughly, I usually put mine into a pan and bake them all day in a low oven, normally this is done while I am baking polymer clay since I already have the oven on for hours at a low temperature on clay day.


The coffee grounds definitely soaked up more of the moisture in the paint making for a really dry mix. So less is better with these.


Once dried we can really see the color shift in the white example. It turned a grayish brown color, which is not surprising. I do love the texture and it can see this used for a path in a mini landscape. It has the look of small rocks like would be found in a path.


Cornmeal- I don’t remember ever using cornmeal as a texture in paint and I am really impressed with the result. It didn’t soak up so much moisture from the paint so you can add more to give more texture than with the coffee.


Once dried I was very happy with this sample it had a nice texture kind of in between the coffee and the sand. I think this is going to be used in future projects for sure.


Glitter- I wish I could have found a white glitter that had more texture than the ultra-fine I used. This one actually reminds me of tile grout and I think it could be an interesting thing to play around with in miniatures.


I was a bit disappointed that there was no sparkle at all on the finished sample. Maybe if I had used a coarser glitter that would have happened. I do like the texture and I think I might play around with glitter in paint more in a future test to see what we can do with it.


As always I do want to sincerely thank all of you for watching my videos and reading my blog posts. It means so much to me that you are supporting me in this way. If I could ask you all to do just a bit more by subscribing to the channel and liking the videos and leaving comments. Those help more than you can imagine. Also if you could pass the links on to your friends I would appreciate it so much.

Sunday, September 10, 2023

Dollhouse Miniature Halloween Gnome


Watch the video here.


I have another free pattern for you to download so you make the project. You can find the file here. In the download there are 3 files: a PDF for hand-cutting of the pieces, a PNG to use with your electronic cutting machine and a text file with handy hints and tips (and the sizing information) to use the PNG.


As with most of these projects I cut all the pieces from medium weight white card-stock, the kind used to make cards and such. This is way more economical than having to purchase a bunch of colors and in my experience the paint colors are a lot more stable than the paper colors. I rarely get noticeable fading with the painted projects.


You are free to use the pattern as many times as you wish and even to sell the finished project. But, please don’t give away or sell my patterns. I spend a lot of time creating them and the only compensation I get is from people watching the videos and checking out the blog post. I really want to keep offering these for free so please if someone else wants to make one send them to the video and blog so they can get their own copy of the pattern.


One thing about these projects that I have bee meaning to mention but kept forgetting is that with my Cricut I sometimes find that some of the pieces with detailed edges get cut with a flat edge. I simply glue the units with those pieces towards the back and make sure one the correctly cut pieces is in front.
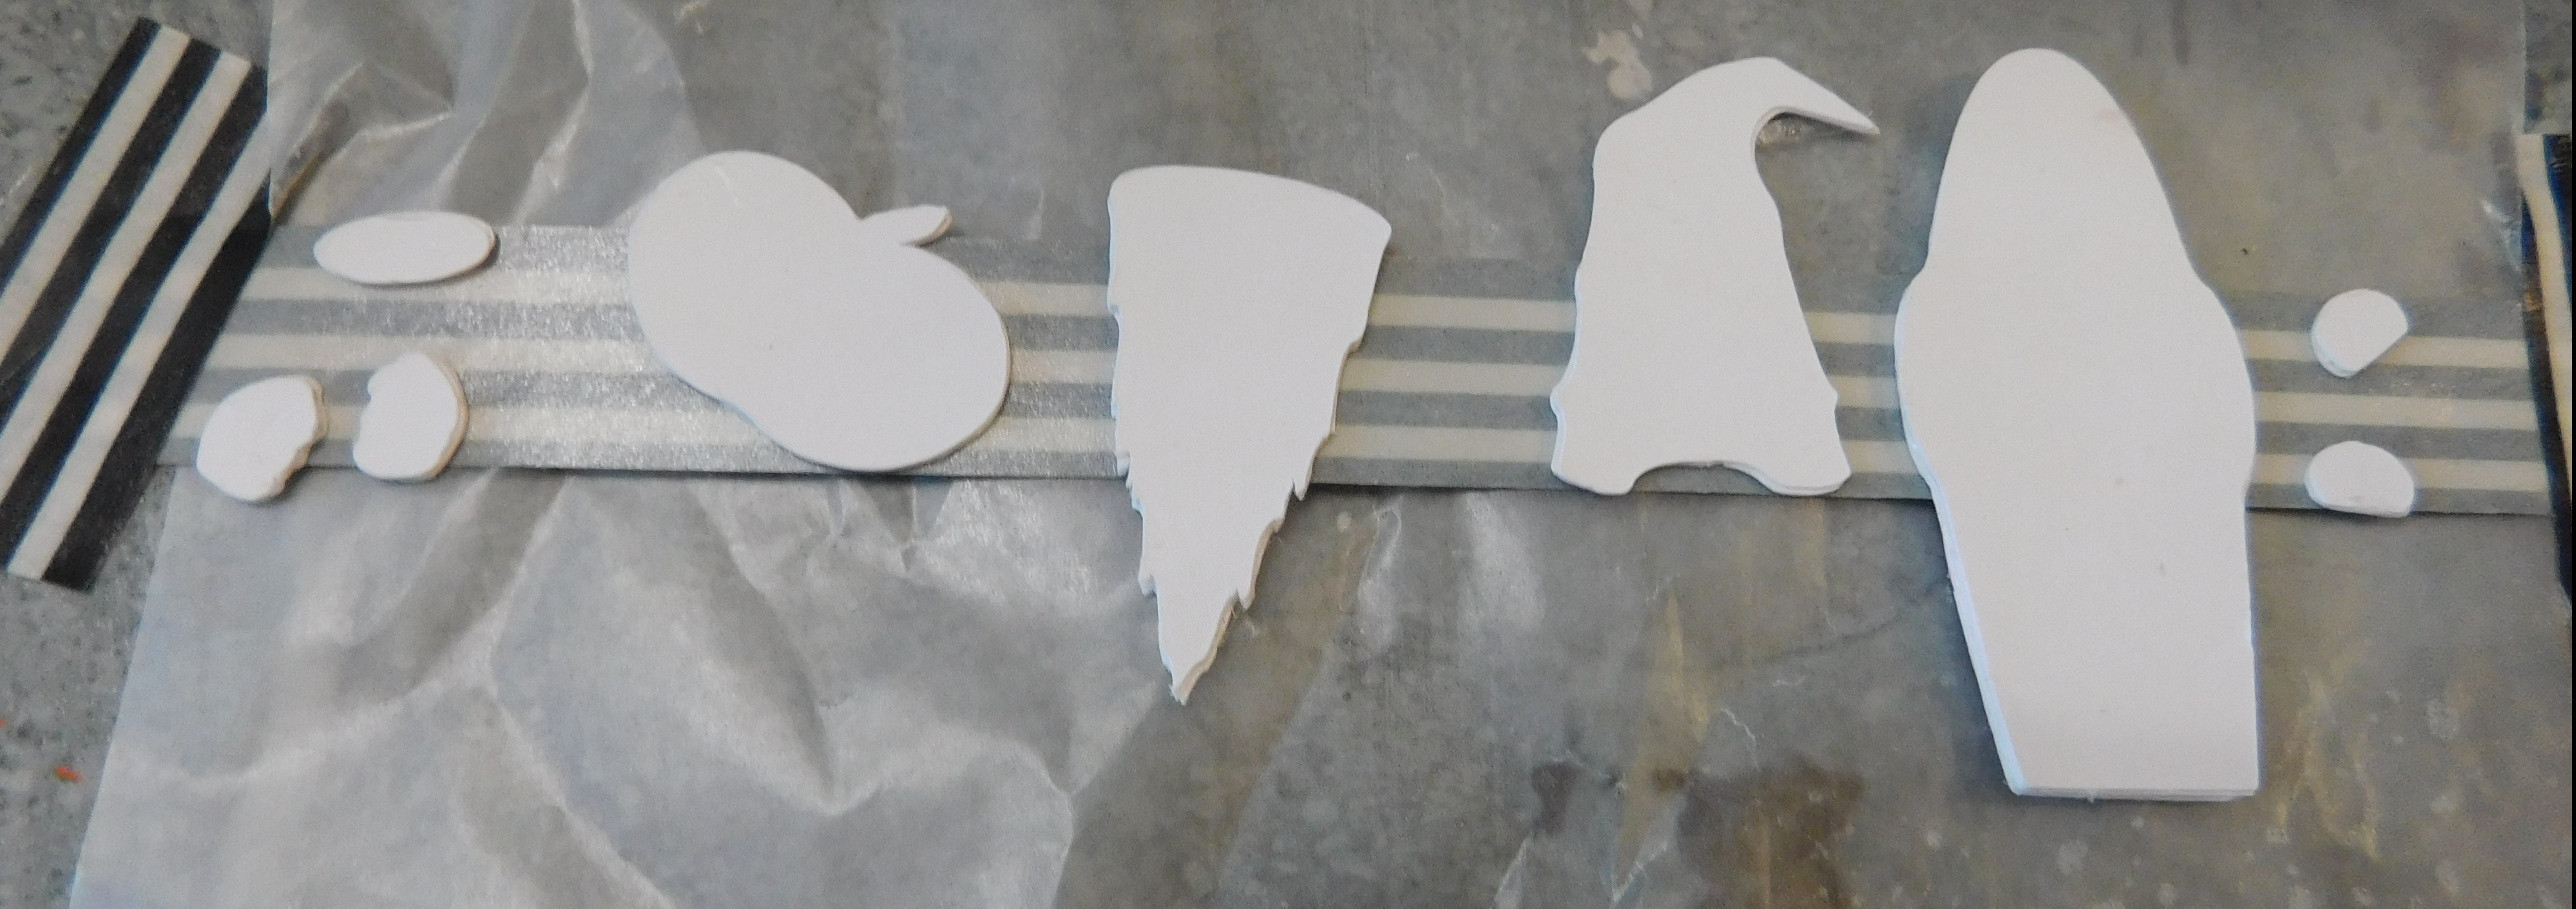


So here is a picture of all the pieces to the project, there are 3 pieces per unit to be glued with the exception of the backing piece. I like to make that 4 layers most times lately because it has to support all the rest of the project.


I like to use a thick tacky type glue to glue everything together for these projects. I have the best luck with that. Be sure to use a thin coat of glue no matter what kind you use. And be sure the glue has dried completely before moving to the next step.


To prepare to paint I like to attach my pieces to a strip of tape. This holds them still so I can do a better job of painting. I am currently using some Washi tape but any tape that is not too sticky will work. Simply lay out a strip of tape sticky side up and tape it down on the ends. I do try to group my pieces according to the color that they will be painted to make the process much easier.


The shoes were painted brown this time.
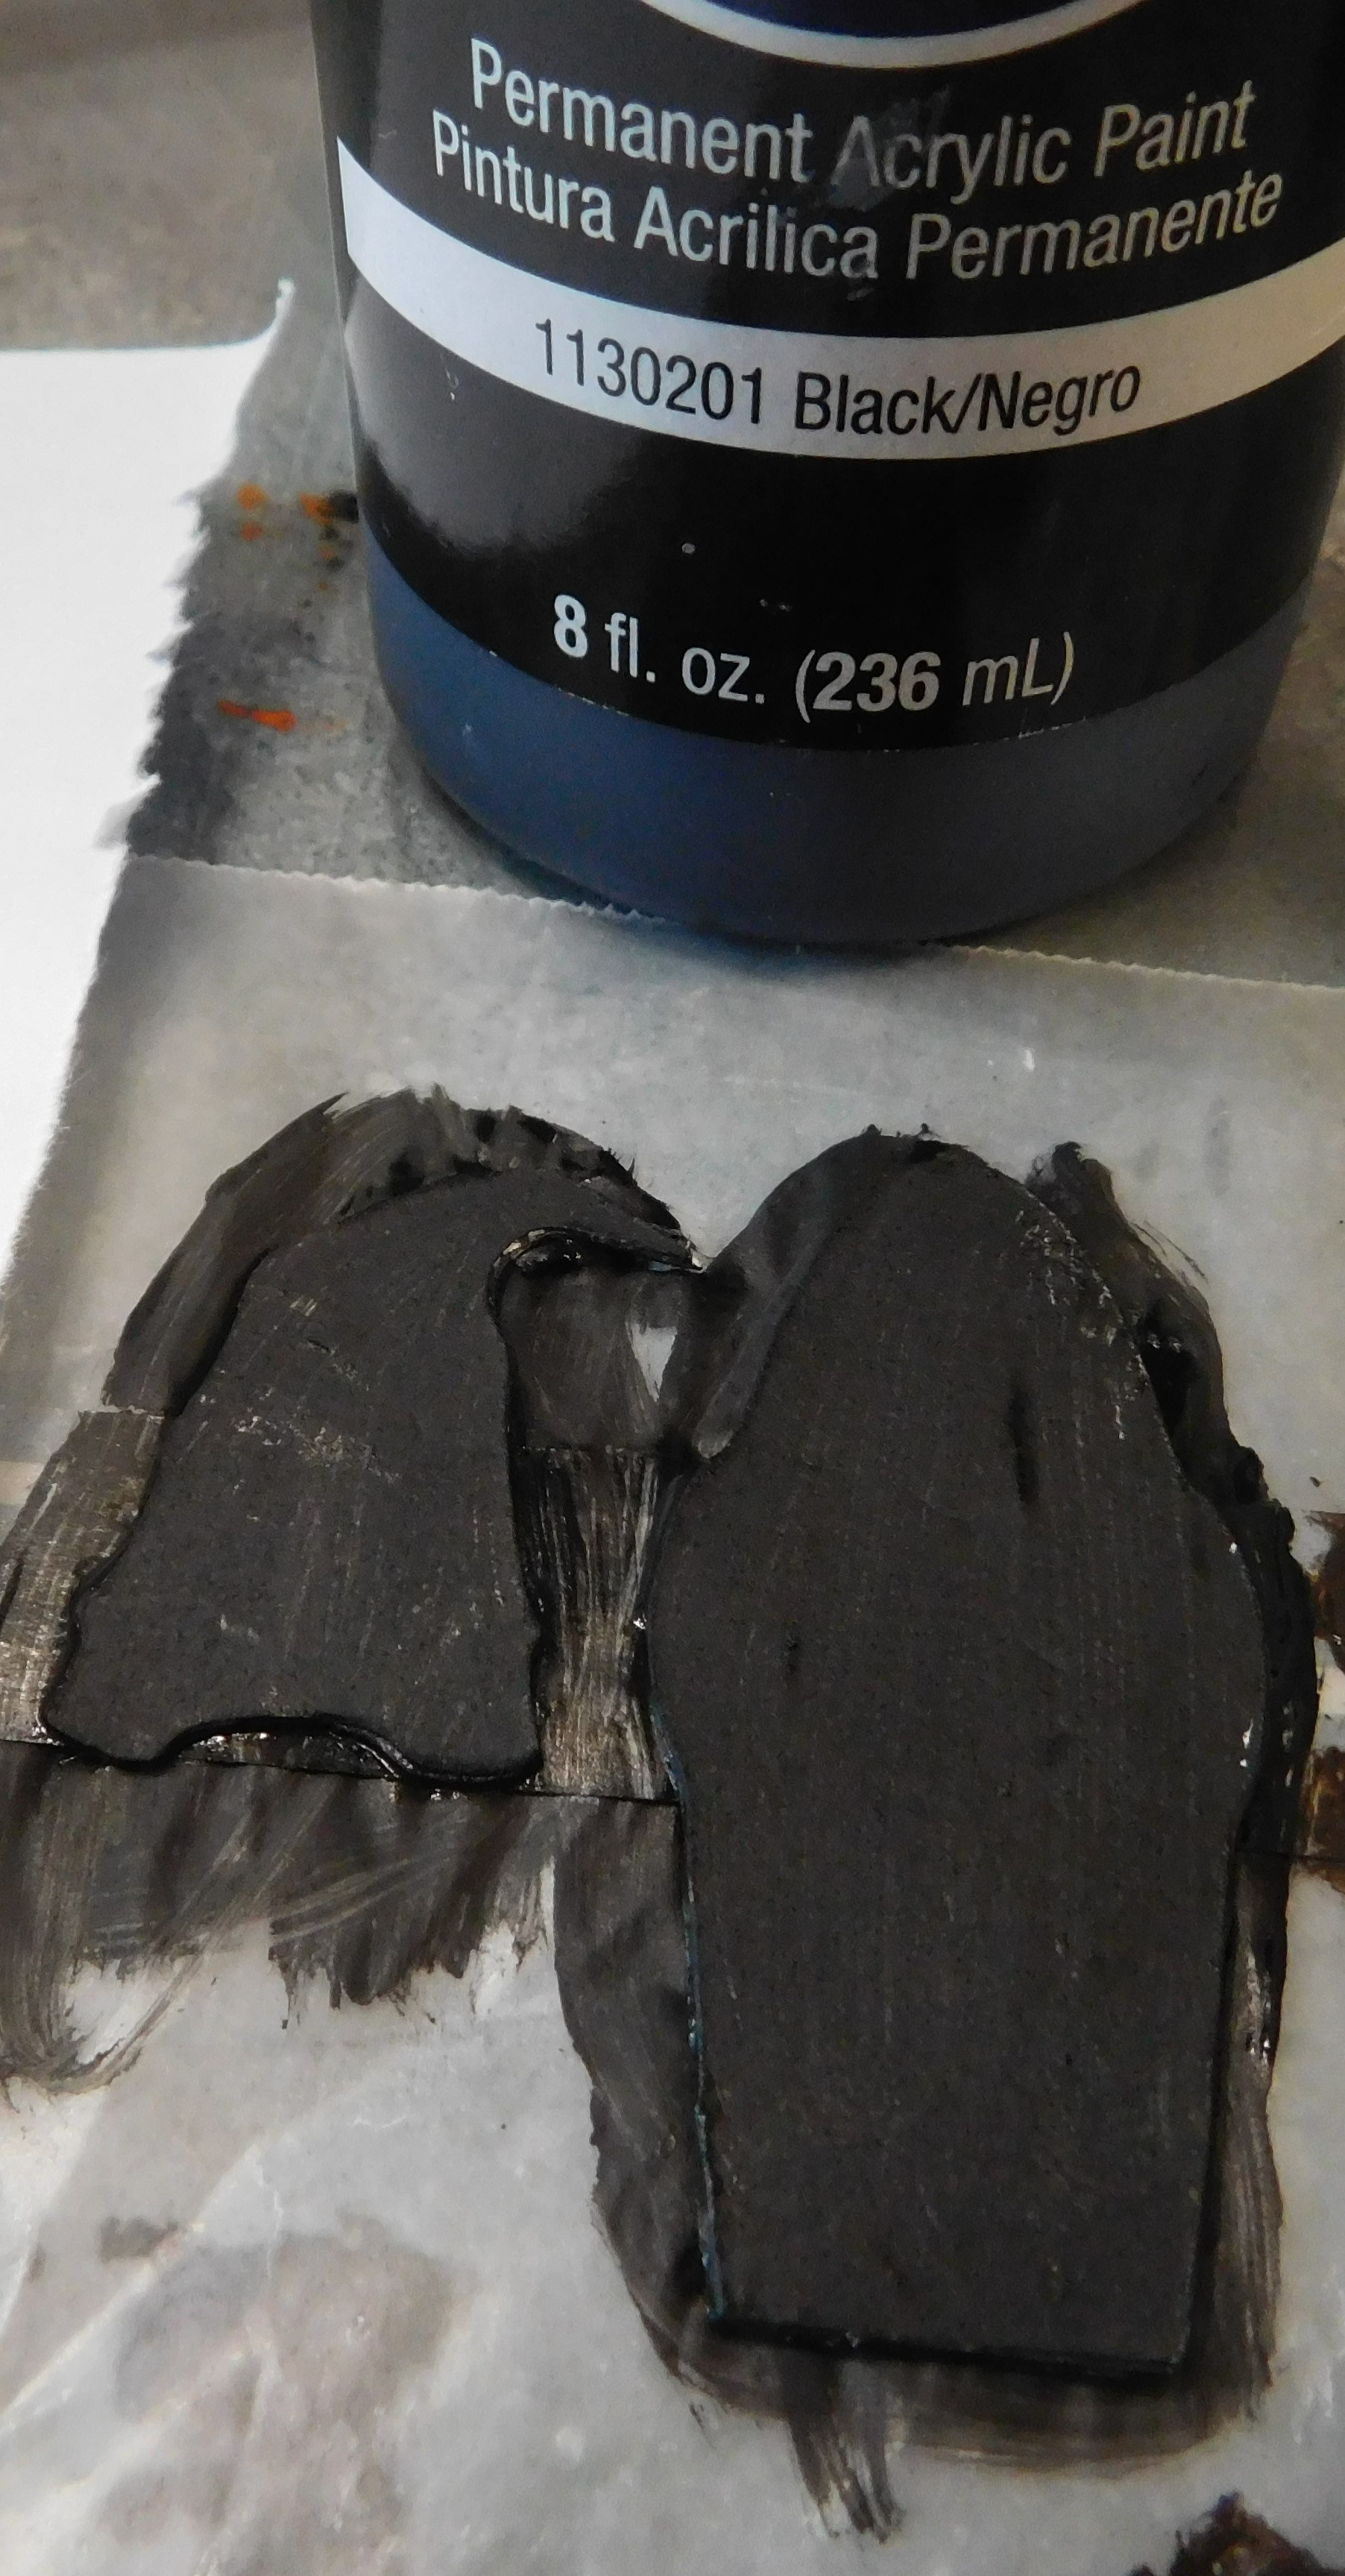


The hat and body black.


The beard white with just a small amount of brown streaked through.


The pumpkin in an orange color.


And finally the hands and nose in green.


Allow to dry and give any pieces second coat if needed. Also make sure that the edges are coated in paint.


Since I am going to be adding a face to the pumpkin I decided to give just the pumpkin piece a coat of Mat Mod Podge. This seals the paint and makes it much easier to fix any mistakes I might make when I go to paint the face. If the paint is not sealed and you make any errors in the painting of the face it is much harder to “erase” those mistakes. I look at it as a bit of insurance. Allow to dry completely.


Once the Mod Podge is dry it is time to add the details to the pumpkin. I used the same brown paint with a very tiny brush to color the stem of the pumpkin. Then for the face I like to use a pencil to lightly sketch on where I want the features first. It is easier to erase the pencil than to get rid of paint. Once I have the face in the spot I want it I use a tiny dotting tool and some black craft paint to draw on the mouth and eyes. If you do make a mistake at this point carefully wipe the paint off with a damp cotton swab and try again. That is the beauty of sealing the paint before his step.


While the pumpkin dries we can begin assembly of the gnome. I like to start putting these little gnomes together by placing the beard first. It really does determine where all the other parts are going to go. The only rules here is to center the beard side to side as best as you can and make sure the tip of the beard is no lower than the bottom edge of the body piece. Use the same glue that we used to put the all the layers together., I like to add the shoes/feet at the same time just in case I need to make any adjustments to where I placed the beard. Allow the glue to set up enough that the beard and shoes won’t get moved around when you are adding the next pieces.


Now we can glue on the hat and nose to the gnome. And since I was a bit short on time I went ahead and added the pumpkin as well as the hands at the same time. This glue will need to dry at least enough that any glue that is showing has turned clear. If we add a sealer coat over the glue and it is still cloudy at all there is a risk that the cloudy area will stay cloudy.


Now it is time for a thin even coat of Satin Mod Podge on the gnome to finish him off. This not only makes him look more finished it makes the project a bit more durable. I also like to give a coat of the same Mod Podge on the back of the project to protect it even more.


And here here have today’s gnome on the front porch of the dollhouse with some of the other Halloween items we have made in the past. I have a lot of Halloween projects over on the channel so be sure to check the playlist in case you’ve missed some of them.


As always I do want to sincerely thank all of you for watching my videos and reading my blog posts. It means so much to me that you are supporting me in this way. If I could ask you all to do just a bit more by subscribing to the channel and liking the videos and leaving comments. Those help more than you can imagine. Also if you could pass the links on to your friends I would appreciate it so much.