Check back often

Have you checked out all my blogs?


Dollhouse Minis: http://joannesminis.blogspot.com


18” Dolls: http://joannes18dolls.blogspot.com/


General Crafts: http://joannes-place.blogspot.com/


Cooking: http://joanne-kitchen.blogspot.com/


Also if for some reason I can't post I will try to give a head's up on the Facebook page so check there too.

Wednesday, April 26, 2023

Dollhouse Miniature Cactus Yard Sculpture


Watch the video here.


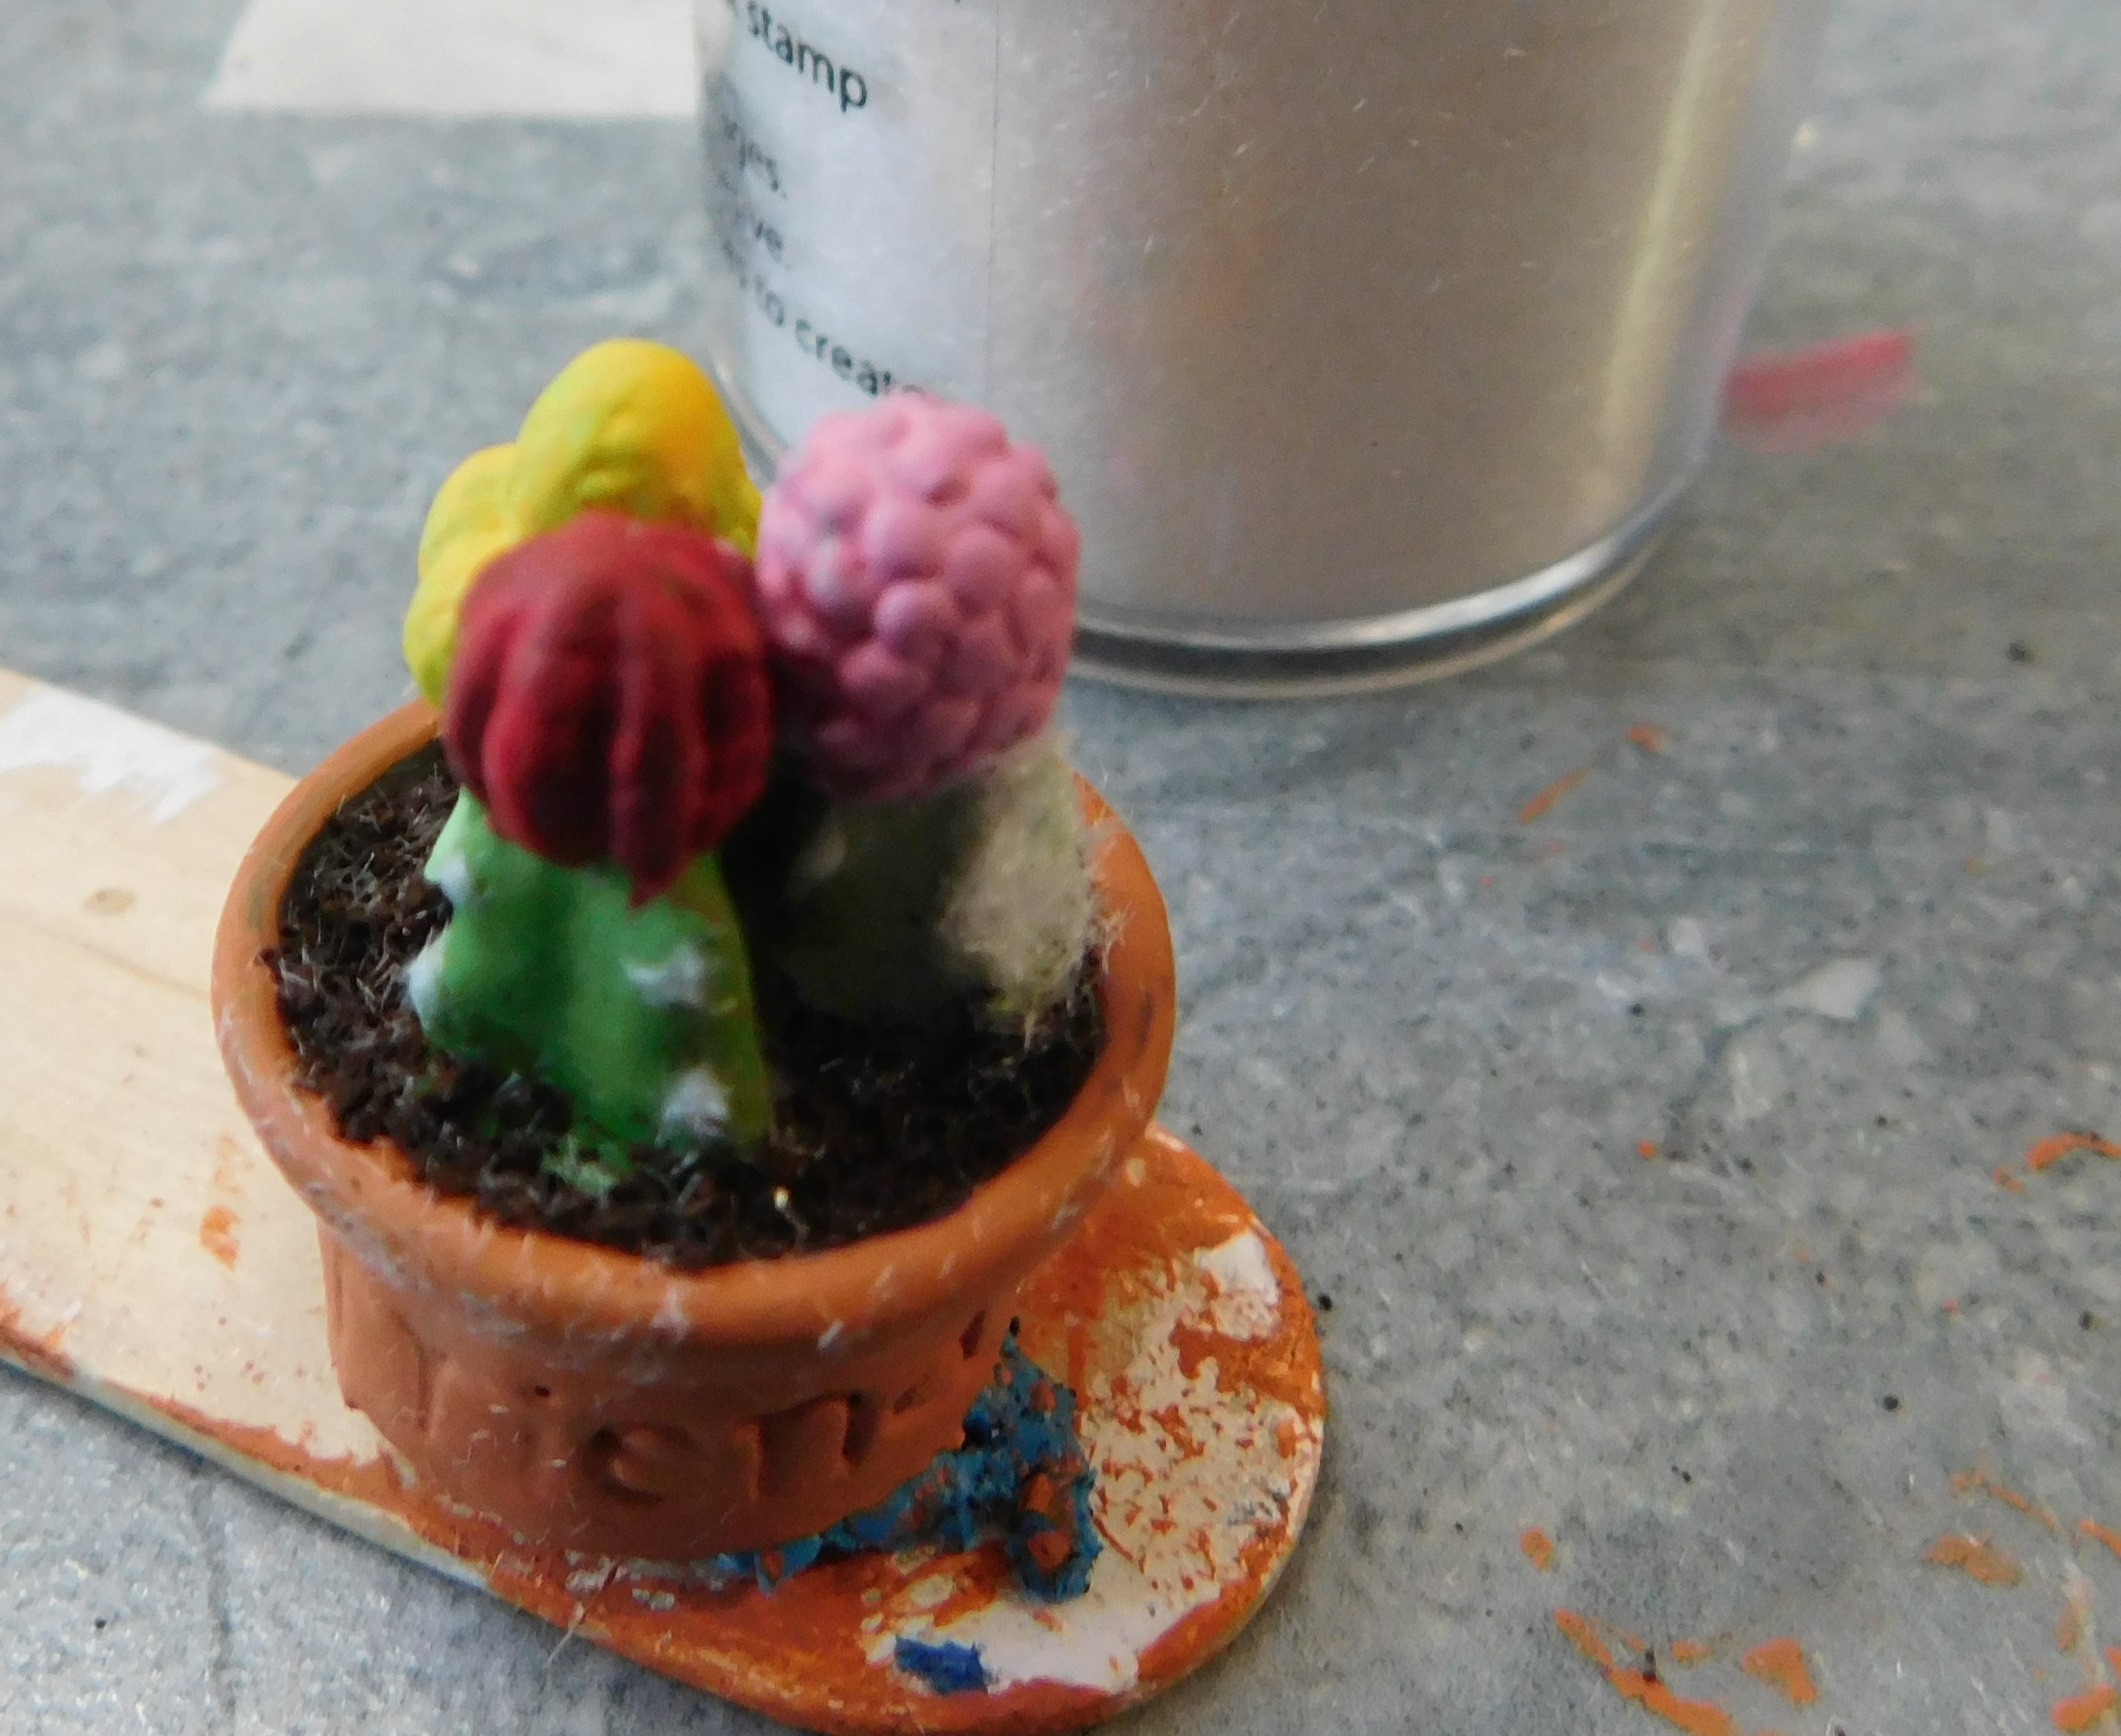
I had decided that I wanted to do some kind of cactus themed art for the dollhouse for today’s tutorial so as I normally do I did a Google image search of what is out available for real size homes. I ran across a lot of really cool pieces that would have been a lot of fun to make (I might just have to make some more of them at a later time) I fell in love with this little piece and found several variations from different places. I especially like the version I made today with the light green paint with some blue on the edges. It just made me so happy to look at it I just knew the dolls in the dollhouse would have to have at least one to place somewhere around the house.


This is another project I have created a pattern for you to use so you can one easily. You can get the free pattern by following this link. You will find both a PDF version to hand cut and a PNG version that can be used with your electronic cutting machine. Be sure to check the text file for sizing information and other helpful hints.


I designed this project to me cut from medium weight white card-stock then painted to the colors you wish. I prefer to use white card=stock and paint the projects since I have had better luck with the painted surfaces not fading as much as the colored card-stock tends to. Also the paint helps to hide the layers of card-stock making it look more like the real thing.


This pattern is really simple there are only 4 pieces and only two of each of those pieces. I played around with different numbers of layers and this is what I found looked the best for this project.


Once you have the pieces cut out it is really simple to glue the pieces together with their matching pieces. For the flowers be sure to offset the petals. You should have 4 sets of glued pieces that look like this. Allow the glue to dry until it is set up.


Now we just need to put the 3 parts of the cactus together and make sure the pieces are sitting evenly spaced. Add some glue to hold them in place.


Use a tool like a dotting tool or a paint brush handle to cup the flower. I like to lay the flower piece on a soft surface and use the ball tool to press it until it cups up.


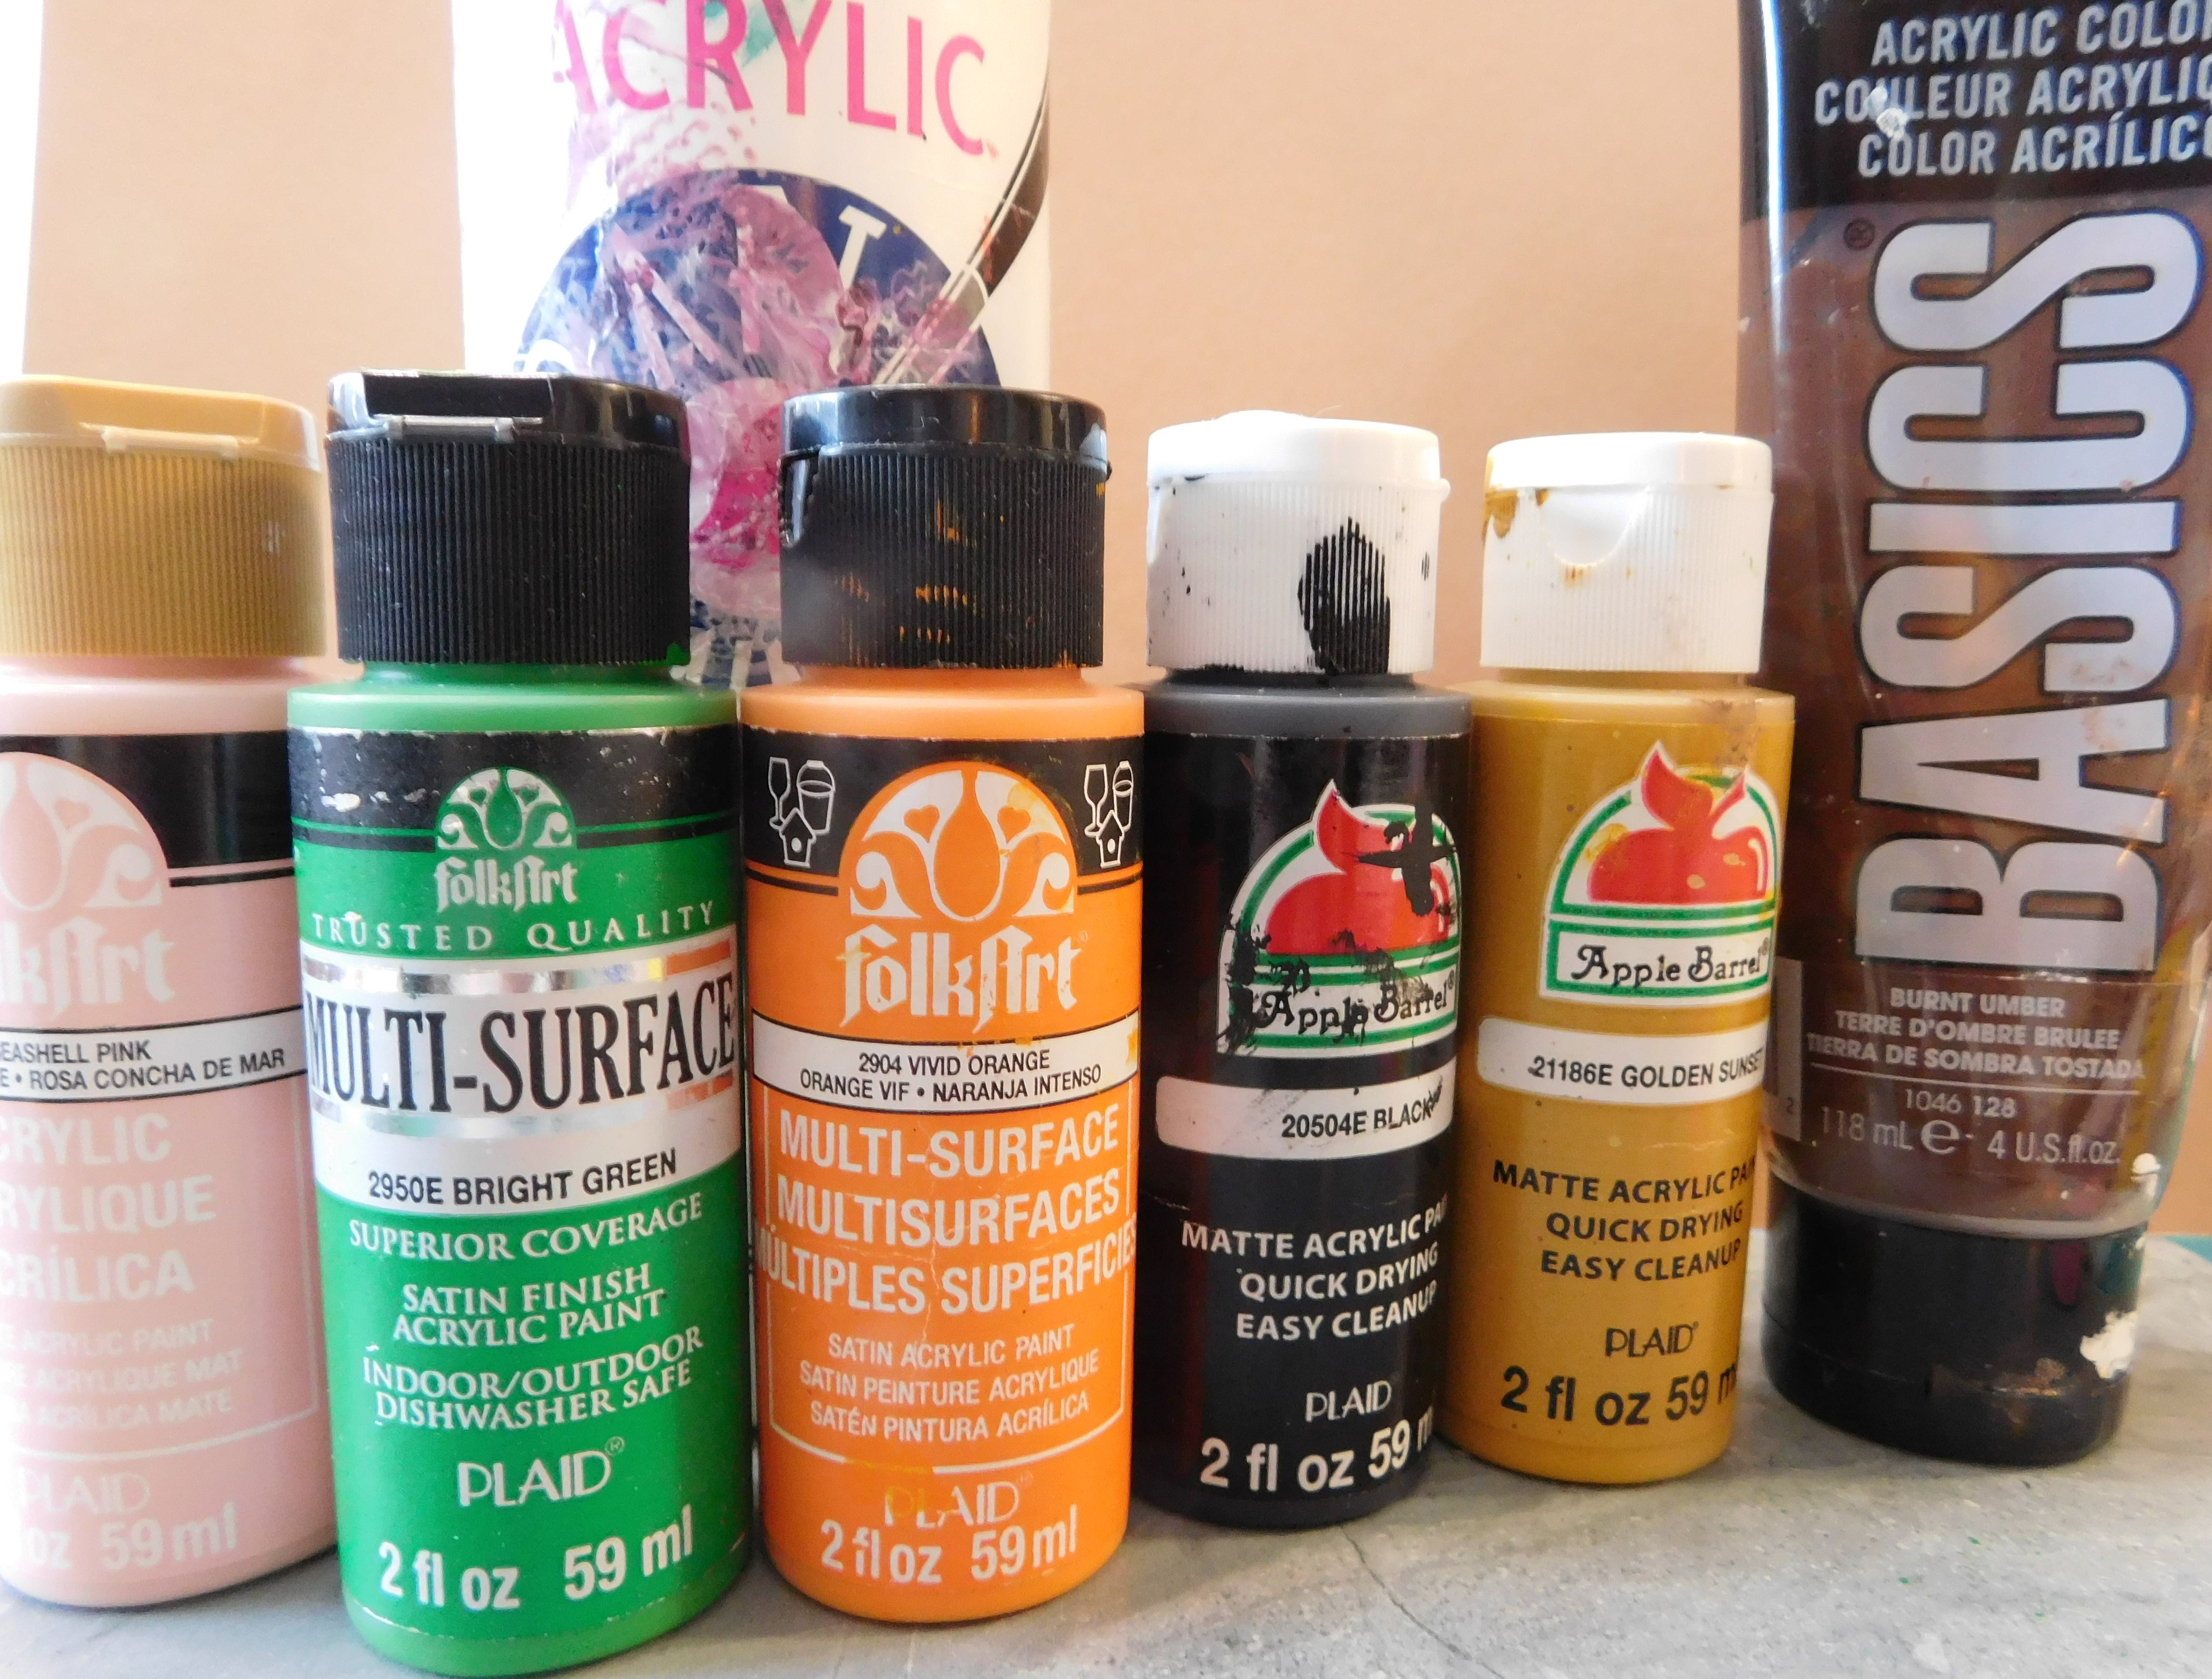
When you are ready to paint I find it easiest to use some tape to attach the pieces to a craft-stick so they are easier to hold. I wanted my cactus to be a light green but I didn’t have any paint the color I wanted so I mixed some bright green with white. For the flower I used my favorite fuchsia color. Allow the paint to dry.


The real life sculpture I was inspired by had a blue edge on the cactus so I added that to my mini one also.


Remember you can paint your sculpture any colors you wish.


Allow the paint to dry. Then use some glue to attach the flower to the top of the cactus. Allow the glue to dry.


All that is needed now is to finish yup with a coat of Satin Mod Podge.


I love how cute this sculpture looks on the porch.


As always I do want to sincerely thank all of you for watching my videos and reading my blog posts. It means so much to me that you are supporting me in this way. If I could ask you all to do just a bit more by subscribing to the channel and liking the videos and leaving comments. Those help more than you can imagine. Also if you could pass the links on to your friends I would appreciate it so much.

Sunday, April 23, 2023

Dollhouse Miniature Cactus Pot Makeover


Watch the video here.


A few months ago I got this cute potted cactus plant as part of a blind bag. I told you all then that I would repaint it as a tutorial when we got to the month when I am doing some of the cactus themed items.


I know you probably won’t have the same little item but the techniques I am showing you can be used on any similar item. I admit I do this slightly differently each time I repaint one of these plastic items. Partly because I have done this many times and I have an idea what will work in each and partly because different supplies are within reach when I sit down to do the project.


When re-painting one of these little plastic pieces the first step is always to clean it. Off camera I did do a quick wash with soap and water and let it dry completely.


Next I almost always wipe the item down with either rubbing alcohol of with white distilled vinegar. Since I had the vinegar out to use for some real size cleaning the day I filmed this I used that.


Since this little pot is fairly small and I didn’t want to get any oils from my skin on it after I spent time cleaning it I used some poster tack to attach it to a craft-stick to make it easier to work with.


Allow what ever you use to clean the item dry completely before moving on to the next step.


Once dry I gave the entire piece a coat of mat Mod Podge to act as a primer for my paint. I am not completely sure this works but I almost always do this step and so far I have had good results when I do.


Next I worked from the bottom up with my painting. I figured the pot was the biggest part of the piece so that seemed like a good place to start. I used a terracotta color craft-paint and gave the pot 2 coats to cover the bright blue completely. Allow to dry.


Next I gave the cactus plants each a coat of green paint. I decided to use three colors of green since there were three individual plants in the pot. You could use all one color or use more like I did. I painted the entire plants including the flowers on the tops. This way if I miss a bit with the flower color later it won’t matter as much. Allow the green to dry.


Now it was time to paint the flowers on the tops of the plants. Again I decided to paint each one a different color. That way you know at a glance this is a pot with 3 plants in it. Since the flowers are pretty small and close together use the smallest brushes you have for this step and allow to dry.


Now I added some dried coffee grounds to the top of the soil area in the pot. This gives a nice texture and looks nicer than just the flat paint the pot had before. Just paint on a bit of tacky glue and add the coffee grounds. Allow the glue to dry and brush off any loose coffee grounds.


Just for fun I pulled out my jar of white flocking and used it on the cactus plants where the stickery parts would be in real life. I know it doesn’t show a lot (you can see it better in person than in the pictures or video) so it is optional but I like the look of it.


Once your glue has dried you are ready to display the piece in your mini scene.


As always I do want to sincerely thank all of you for watching my videos and reading my blog posts. It means so much to me that you are supporting me in this way. If I could ask you all to do just a bit more by subscribing to the channel and liking the videos and leaving comments. Those help more than you can imagine. Also if you could pass the links on to your friends I would appreciate it so much.


Sunday, April 16, 2023

Dollhouse Miniature Cinco de Mayo Gnome


Watch the video here.


For today’s tutorial I have another project that I have designed a pattern for yo to use. You can find the pattern by following this link. You will find both PDF version if you want to hand cut the project and a PNG that can be used with an electronic cutting machine. (like the Cricut) Be sure to check the text file for sizing directions and a few hints to make cutting the file on your machine easier. You will find the download here.


The pattern like most of the ones I have made for you is designed to be cut from a medium weight white card-stock and then the layers glued together and painted to the colors you choose for you display.


Here’s what the pieces look like still on the cutting mat, hopefully you can see that I do group the pieces together that need to be glued together. In the video I went over what each piece was. You will find 3 pieces for each set that needs to be glued together except the back/body of the gnome and the optional stand- those two shapes have 4 each to make them stronger. As for the stand I chose not use it with my gnome this month but left it on the file so you can decide if you want to add it or not. It does make the gnome stand nicely without having to lean him against a wall.


So the first step after cutting the pieces is to glue the sets together. Here is a photo of the sets glued. I do recommend putting at least the larger pieces under a weight while they dry to help keep them flat. Allow to dry completely.


Now onto painting. You can use any colors you wish for your gnome. Here are the ones I used. Picking the colors for these little guys is so much fun and you can make them go into any scene by changing the colors. Be sure the paint is totally dry before you move onto the gluing step.


Now we can start gluing, I like to start by placing the beard onto the gnome. It is designed to be centered side to side and the tip lined up just a tiny bit above the bottom of the body. Today I also added the shoes/feet to each side of the beard and glued the center of the guitar in place. Allow this glue to set up enough that the pieces will stay in place.


The second round of gluing is to add the main part of the hat and the nose.


And finally we can add all the rest of the parts to our gnome. Now he needs to dry before we move on to the next step.


If you are adding the optional stand go ahead and add it now. And allow to dry.


And finally we can give the gnome a light even coat of Satin Mod Podge and allow to dry.


Now he is ready to display in your dollhouse.


As always I do want to sincerely thank all of you for watching my videos and reading my blog posts. It means so much to me that you are supporting me in this way. If I could ask you all to do just a bit more by subscribing to the channel and liking the videos and leaving comments. Those help more than you can imagine. Also if you could pass the links on to your friends I would appreciate it so much.

Wednesday, April 12, 2023

Dollhouse Miniature Round Cactus Sign


Watch the video here.


This week I have decorative round sign for your dollhouse. This one adds to our set of cactus themed items we made last year. To make the sign you will need to download the free pattern I created for you to use. You can find the download here. This one is really simple, just two shapes and a total of 6 pieces to cut out. In the download you will find both a PDF to use if you are hand cutting the pattern and a PNG if you want to use your electronic cutting machine. You will also find a text file that gives you the size you need to set the PNG in your machine and a few hints I have figured out over the months I have been making these patterns. As always you are welcome to sell items made from the pattern just please don’t share the pattern itself. If someone else wants the pattern send them over to this blog post so they can download it themselves.


Like always I am cutting mine from some medium weight white card-stock that I will paint rather than using a colored card-stock. I do this for several reasons, fist the color of the paint tends to normally be more stable than that of the colored paper and doesn’t fade as quickly. Secondly I only have to have one color of paper on hand to make the project instead of having a rainbow of paper which gets very expensive and takes up a lot of room.


Like always we start by gluing the groups of pieces together and like I said this is a really simple one. Only 2 sets the background and the landscape. Here is what you should have once the sets are glued.


I find it is best to place the pieces under something flat and a little heavy while the glue dries, this helps to cut down on the warping.


Once dry we can paint the pieces. For the background piece I am using 4 colors- a yellow, orange, magenta, and a blue. I painted about the bottom half of the round piece with the yellow then added bands of the other 3 colors slightly blending them where they meet. This makes for a nice sunrise/sunset look to the background. Don’t worry about the edges of the background piece we will be painting that black once the sign is glued together


Now we just need to paint the landscape part with some black paint. Be sure to paint the edges of the shaped top part (the land and the cactus shapes) and the front area but don’t worry about the round edge. We will be painting the outside edge later. Allow the paint to dry.


Once the paints are dry glue the pieces together doing your best to have the bands of color running horizontally in the background and the cactus standing up straight. Allow to dry.


Now for a bit of insurance since I am a messy painter I added a coat of Mat Mod Podge to the front of the sign around the edge. This way when I get black paint where I don’t want it in the next step it will be easier to clean off. Allow to dry completely.


Once completely dry use a brush to paint just the edge of your sign with some of the black paint. Clean up any mistakes as soon as possible. Since we sealed the surface it will be a little bit easier to clean up.


Allow the paint to dry completely.


Now all we need to do is add a coat of Satin Mod Podge to out sign and once dry it will be ready to hang in the dollhouse.


Now I promised to talk a bit about the inspiration for this sign. I knew wanted to make a round sign for our cactus grouping. I loved the cactus silhouette that I used on the garden flag last year so I knew I wanted to do something similar. It just happened that a friend sent me a picture of a large real life painting he had just finished for his living room that had a large cactus and other desert items silhouetted on beautiful sunset/sunrise background. This sign is a very simplified piece inspired by his painting. He painted his large canvas because he and his partner have set a goal of being able to move the desert in the future and his painting is a way to keep that dream/goal in front of them all the time. My round sign is my way of giving them a bit more support to fulfill their dream.


As always I do want to sincerely thank all of you for watching my videos and reading my blog posts. It means so much to me that you are supporting me in this way. If I could ask you all to do just a bit more by subscribing to the channel and liking the videos and leaving comments. Those help more than you can imagine. Also if you could pass the links on to your friends I would appreciate it so much.


Sunday, April 2, 2023

Dollhouse Miniature Bunny Easter Sign


Watch the video here.


This week I have a last minute Easter project for you to make to decorate the dollhouse. I know we are only a week away from Easter but I really wanted to get this one done for this year. I am feeling a lot better and hope to be back at full video schedule in the near future.


This project uses another of the patterns I have created for you to use either by hand cutting (a PDF) or with an electronic cutting machine (PNG with a text file that gives details/hints for sizing etc). You can download all the files here.


Here are what all the pieces look like when they are cut out. The pieces are grouped together on both files and I do recommend keeping them together to make gluing easier. There are two pieces that are meant to be left in a single layer and they are the lining pieces for the bunny ears. The rest are glued together in either sets of 3 or 4 and I talked about that in the video.


Here are the sets all glued together. I do find it works best to put something flat on top of the glued sets and add a weight to hold them flat until dry. It does take a bit longer for the pieces to dry this way but they remain much flatter and easier to work with.


Since I decided to make one of the ears flap over we now need to glue that little flap layer onto the ear. They piece should fit perfectly since it was sliced from the ear. I just found it looked a lot nicer when I added this little piece. Allow this glue to dry before moving on to the next step.


Now we can paint all the pieces in the colors of your choice. Here are the paints I used but you can make you bunny sign truly yours by picking different colors.


I like to set up a strip of sticky tape to hold the pieces in place for painting. Just be sure that the glue you used in assembly is totally dry. I also try to have most pieces partly off the tape to make removal easier. I also make sure to press the tape against something like my jeans to take some of the sticky away to help me in getting the pieces off the tape intact. I recommend grouping the pieces together by the color of paint you are going to use also.

Depending on the final look you are after and the paints you use you might need to use 2 or more coats of paint. Allow to dry completely.


Now we can add the lining pieces tot he ears and put the carrots together. This is a simple job of lining up the pieces and gluing them, allow the glue to dry.


Now we are going to prep to add the details. I like to add a thin coat of mat Mod Podge to the pieces I am going add details to. On this project that would be the bunny face and the carrots. This acts as a bit of insurance in case I mess up in the painting of the details. It is much easier to remove the paint from a sealed surface as opposed to a not sealed surface.


One the Mod Podge was dry I used a pencil to figure out placement for the facial features and the lettering I was going to paint on. Once I had everything placed in about the spots I wanted I used a very fine tipped dotting tool and some black paint to add the details. This also might need 2 or more coats to look the way you want. Allow this paint to dry completely before going the next step. (you don’t want to smear the details)


Once the paint dries completely we can glue most of the sign together. I found it was much easier to lay the backing “sticks” on some tape to line them up and have them stay in place while I added the face and the carrots to them. You can also add the tiny nose to the face now. Allow to dry until set.


Now add the ears to the back of the head piece in whatever angle you want. You can really give your bunny some personality by changing the way his ears are set.


Once the glue dries add a finish coat of Satin Mod Podge and allow to dry.


And here is the front porch of the Beachside Bungalow with the Easter items from this year along with the ones from last year.


As always I do want to sincerely thank all of you for watching my videos and reading my blog posts. It means so much to me that you are supporting me in this way. If I could ask you all to do just a bit more by subscribing to the channel and liking the videos and leaving comments. Those help more than you can imagine. Also if you could pass the links on to your friends I would appreciate it so much.