Check back often

Have you checked out all my blogs?


Dollhouse Minis: http://joannesminis.blogspot.com


18” Dolls: http://joannes18dolls.blogspot.com/


General Crafts: http://joannes-place.blogspot.com/


Cooking: http://joanne-kitchen.blogspot.com/


Also if for some reason I can't post I will try to give a head's up on the Facebook page so check there too.

Tuesday, December 28, 2021

Dollhouse Miniature Snowman Porch Sign


Watch the video here.


I was looking at various home decor sites the other day and saw a couple of adorable snowmen signs to put on the front porch of a real house. They were so cute I just had to make a mini version for today's tutorial.


This is a really easy and quick project and I tried to do my best to design it in such a way that you can use what you have on hand. The items I used were all in my stash of wood shapes, if you don't have the exact ones use something close in size. My circles are made of wood only because I have some of different sizes rattling around in my bin of stuff I want to get used up. If you don't have these you could use anything of about the same size, even cut some from some heavy card-stock should work just fine.


I started with 3 circles (½”, ¾” and ⅞” ) I glued these to a craft-stick. I left a bit of the craft-stick showing at the top and a lot at the bottom. At this point I hadn't figured out exactly how this was going together but I lucked out and had the right amount at the top for my hat later on.


After the glue dried I painted this part all white and allowed to dry.


Next I cut and painted some wood pieces for the hat (½” of craft-stick and about ¾” of slim stick) these I painted black and allowed to dry.


Next step was to glue the hat in place. And allow to dry.


Next up was to paint the features, for this I just used a toothpick since all the details are really small. I used some black paint for the charcoal pieces that form the eyes, mouth and buttons. And just a touch of orange to represent the carrot nose. (a tiny orange bead would be cute for the nose too)


After this was dry I created a stand for the snowman. I used a small bit of craft-stick (¾”ish) and a bit about ¼” of a piece of ⅛” by ⅛” strip-wood. (use whatever you have on hand)


 I did try to glue the stand on with the small piece behind the snowman but found he was a bit too tippy that way so I ended up gluing it in the front. Once painted it doesn't show too badly.


Speaking of painting it was now time to paint the stand/base with the same white paint we used earlier. If you want you could sprinkle some white glitter over the wet paint to add some sparkle.


Once the paint dries give your snowman a coat of mat Mod Podge and once dry he can stand either on the front porch of you dollhouse or in the corner of any mini room.


As always I do want to sincerely thank all of you for watching my videos and reading my blog posts. It means so much to me that you are supporting me in this way. If I could ask you all to do just a bit more by subscribing to the channel and liking the videos and leaving comments. Those help more than you can imagine. Also if you could pass the links on to your friends I would appreciate it so much.


Sunday, December 26, 2021

Dollhouse Miniature Thermos


Watch the video here.


This week for the Sunday tutorial I thought it would be fun to make a thermos for the dollhouse family. I actually got the idea while I was looking out my window at the snow in the parking lot. There was a guy on a tractor out there that had just gotten done clearing the snow and he was taking a break. As I looked out he reached under the seat of his tractor and got out his thermos of coffee (at least I assume that is what it was) to take a short break before he moved on to the next parking lot on the street.


I started thinking about ways to make this but didn't come up with a really good idea until the middle of the night when I woke up with the idea we have here. So that is why we are making this today. I hope you enjoy the project.


This is really a simple project and is made entirely out of paper. I did size the paper strips for the particular pencil and wooden skewer I had on hand. (both are from Dollar Tree I think) Use what you have on hand, there is a possibility you might need to make small adjustments in the paper sizes but it should be close.


The paper strips are cut as follows:


from solid color paper cut- 1 @ 2” by ⅞ “

1 @ 2” by ¾”

1 @ 4” by ¼”

1@ 2” by > ⅛” (the narrower the better)

a couple of small scraps of the same paper


From a paper with a small design cut-   1 @ 2” by ¾”


Pre-roll the paper pieces.


Then coat the back of the 2” by ⅞ “ piece with glue and tightly wrap around the skewer. Add the solid color 2” by ¾” piece gluing it tightly around and lining up one edge. This is the base of the body of the thermos. Let it set while we work on the cup. You might need to wrap this tightly with a rubber band for a few minutes until it stays in place.


Glue and wrap the 4” by ¼” piece around the pencil being careful to keep the edges straight and the wrap tight. Slip this off the pencil and allow to dry.


Now add the patterned paper strip to the main body piece. Again gluing and wrapping tightly and keeping the edge straight. Slip this off the skewer and allow to dry.


Now add some glue to the bottom of the main body piece and place it on one of the scraps of the paper. Add some glue to the other scrap and place the cup piece on it. The cup needs a good pool of glue inside the bottom of the cup to keep it held long term. Allow to dry.


Carefully using a pair of small, sharp scissors cut away the extra scrap paper from around the pieces.


Add the really narrow piece of solid color paper as a trim strip at the very bottom of the thermos body. This will cover up the seam where the bottom is attached and hide any crooked edge at the bottom. Cut this piece just to size with no overlap.


Once all the glue is dry give both pieces a good coat of Satin Mod Podge and allow to dry at least overnight.


Now you have a thermos with a lid that can be put in place or removed depending on how you want to display it. I would suggest leaving the lid off if you are going to store this for any amount of time so it doesn't stick.


As always I do want to sincerely thank all of you for watching my videos and reading my blog posts. It means so much to me that you are supporting me in this way. If I could ask you all to do just a bit more by subscribing to the channel and liking the videos and leaving comments. Those help more than you can imagine. Also if you could pass the links on to your friends I would appreciate it so much.


Saturday, December 25, 2021

Dollhouse Miniature Crackers


Watch the video here.


This week for the Saturday video we are adding some crackers to our cheese and meat tray.


I do have an older cracker video on the channel which you can find here if you want to do some other crackers,


I am starting with the same base color of clay for my first set of crackers this time that I used in that video. But I am using other colors for the 2nd and 3rd crackers this time than I use in that video. Ia am also making all three of these differently than I did in that video.


For the base color of clay I am mixing equal parts white and beige polymer clay. Any brand will work.


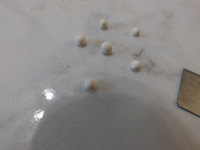
For the first set of crackers I rolled that clay out into a snake ⅛” in diameter. 


Then cut this into approximately ⅛” pieces.


 Roll each of these pieces into a small ball. 


Flatten each ball with your fingertip.


Then add some holes using either the tool I showed you how to use in Tuesday's tutorial or anther pointed tool.


Dust the tops with chalk and bake according to the directions on your clay. I baked mine at 275°F for 7 to 8 minutes.


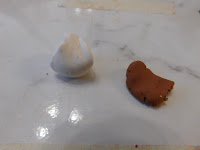
For cracker number 2 I added a bit of Fimo Yellow Ocher to give the clay just a bit of a warm beige color. 


For these I printed off a sheet of ¼” graph paper to use as a guide for cutting. I got my paper here as a PDF, this is a site I visit often and have gotten many different items from with no issues. I then out a piece of parchment paper over the graph paper to work on top of. I used two of the slim sticks from Hobby Lobby to guide me in getting a nice evenly rolled surface. I then used the lines on the graph paper to score the crackers then to cut them to size. 


The crackers were then textured with the same tool as I use with the first batch. Then chalk was applied and they were baked.


For the third variety of crackers I added some Fimo Caramel to my base clay for a nice light brown color. Maybe a light rye or whole wheat cracker. 


These were rolled the same way as the last batch but I cut them into diamonds just bloodlessly using the lines to guide. For these I used the texture tool with 3 pins.

Then again chalk was added and they were baked.


Our meat and cheese board is really starting to come together. I hope you are enjoying the process as much as I am. If there any items you would like to see me make to add to the board? Be sure to let me know if you have any requests.


As always I do want to sincerely thank all of you for watching my videos and reading my blog posts. It means so much to me that you are supporting me in this way. If I could ask you all to do just a bit more by subscribing to the channel and liking the videos and leaving comments. Those help more than you can imagine. Also if you could pass the links on to your friends I would appreciate it so much.


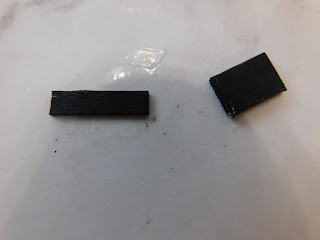
Tuesday, December 21, 2021

Clay Texturing Tool


Watch the video here.


This week I have something a bit different for the Tuesday video. I needed a specific clay texturing tool in for the video I have planned for next Saturday. I used to have one of these that I had made many years ago. Unfortunately I have no idea what happened to that tool. I decided I might as well make a new one. And since I am going to be using it a video I figured I should probably do a tutorial on how I made it.


This is a super easy tool to make and the items to make it are very few.


You will need some sewing pins, TLS (Translucent Liquid Sculpey, and some polymer clay (I am digging into my scrap clay bag)


The first step is to safely cut the pins to about 1” in length. Use a good sturdy pair of wire cutters and use eye protection. Also make sure the little bits you are cutting off are contained. It is super important that the pins are as close to the same length as possible.


Now take a pair of needle nose pliers and bend the cut end like this. This gives the clay more to hold onto and will keep your texturing tool intact for a lot longer.


Now roll a small ball of clay and insert the pins into it spaced as you wish for the projects you plan to use it for.


Use some TLS to really attach the bent ends of the pins to the top side of the ball.


Roll a thin layer to act as a cap over the bent ends of the pins.


Now turn the tool over and make sure the pins are right where you want them as far as spacing. Also make sure the points are all at the same level. Add a generous amount of TLS to the area where the pins exit the ball of clay.


Bake the tool at 275°F for 2 minutes and allow to cool.


You new clay texturing tool is now ready to use. I made a total of 4 of these while I was at it. One each with 1 pin, 2 pins, 3 pins and 4 pins.


Be sure to store these in a safe place. I am going to keep mine in this little clear box with a lid that I picked up at the dollar store. Otherwise I know I will be sticking my finger every time I reach into my tool drawer.


As for trouble shooting this one, the only real way to make it incorrectly is to not have all the points at the same level. If this happens carefully trim the lung one(s) so they are all the same length with wire cutters.


As always I do want to sincerely thank all of you for watching my videos and reading my blog posts. It means so much to me that you are supporting me in this way. If I could ask you all to do just a bit more by subscribing to the channel and liking the videos and leaving comments. Those help more than you can imagine. Also if you could pass the links on to your friends I would appreciate it so much.


Sunday, December 19, 2021

Dollhouse Miniature Outdoor Fireplace


Watch the video here.


10 ounce size orange juice bottle
Right up until the moment I was throwing away the bottle that my orange juice came in I had no idea I was going to be making an outdoor fireplace. There was just something about the way it looked in that split second before I tossed it when I just knew this had to happen. So that is why we are making an outdoor fireplace for the dollhouse in the middle of winter. Does this happen to anyone else? Please tell me it happens to you and I am not the only crazy one out there.


I do want to add a nice fire to the interior of this project in the future so I am planning to leave the bottom area at the back unfinished. Since this idea is fairly new I haven't thought through exactly how that will happen yet.


So I felt this particular bottle would work very nicely as kind of a cement/stucco/whatever material you would call it. I started cutting out an opening on the front of the bottle to allow access to the “fire” area. I just followed the design of my bottle for this. Do be careful this can be dangerous if you are not careful.


Next up was to make a base for our fireplace to live. I did this with 4 pieces of foam-core board cut 4 ½” by 3”. One of these was left intact. One I traced the base of the bottle on and cut out a round opening right at the back edge and centered on the board. And two were cut with an opening that would give room for the bottle base.


 I glued these pieces together and to the bottle. 


Make sure to center the opening along the solid long edge. (I almost messed this step up and only caught it when I got ready to take the pictures)


Now it was time to give the inside of the bottle a nice thick coat of black paint mixed with baking soda. This will do a couple of things. First off it looks like the soot stained interior of a well used fireplace. It looks like the material that would be made of also. And just as importantly since I am planing to add a light/fire to this later it will block any light from going either in or out where we don't want it.


Once this was dry I added a layer of white paint mixed with baking soda to the outside of the bottle. I debated what color to make this layer. I had thought about tinting it a tan/cream color but was concerned I would run out part way through the layer and have to mix more. I know how hard it is to mix a custom color for something like this. So I used white for this layer and added the color later via layers of washes. I like the effect of the washes better anyway because they do give a depth of color that can't be copied with a layer of color.


The layers of wash coats started light and went darker as I went. This gives the best result in my opinion. You could do the same with other color choices and have a very different looking finished fireplace.


I ended the layers of washes with some diluted black paint on the areas I felt would be smoke/soot stained on a well used fireplace.


This was all then sealed with a coat of mat Mod Podge.


Now it was time to work on the base/hearth. You can cover this in so many ways. I opted to use stones made from paper egg carton. I painted flat areas of my egg carton with various grey and brown craft paints and allowed them to dry.


Then I cut them to size (for this project I cut them all about 1” by ¾”) then glued them in place. Work in areas so that the glue doesn't set up on you or make too much of a mess.


Once you are happy with the placement of your stones, give them a coat of mat Mod Podge and allow to dry thoroughly.


Now it is time to grout. You have many options for this. I have used various things over the years. Real tile grout works well, as does paint-able caulk mixed with paint. This time I used a paint/baking soda mixture (it was the batch leftover from the foundation of the Beachside Bungalow) and it worked very nicely.


Now your fireplace just needs to dry and it is ready to display. 


As always I do want to sincerely thank all of you for watching my videos and reading my blog posts. It means so much to me that you are supporting me in this way. If I could ask you all to do just a bit more by subscribing to the channel and liking the videos and leaving comments. Those help more than you can imagine. Also if you could pass the links on to your friends I would appreciate it so much.