Check back often

Have you checked out all my blogs?


Dollhouse Minis: http://joannesminis.blogspot.com


18” Dolls: http://joannes18dolls.blogspot.com/


General Crafts: http://joannes-place.blogspot.com/


Cooking: http://joanne-kitchen.blogspot.com/


Also if for some reason I can't post I will try to give a head's up on the Facebook page so check there too.

Showing posts with label polymer clay tools. Show all posts

Sunday, August 21, 2022

Polymer Clay 101 pt 5 Chalks & Such


Watch the video here.


This week for the clay 101 post we are going to talk about chalks and similar products that you can use to color the outside of you clay projects. If you have watched my clay videos you have most likely seen me use my set of artist chalks. I use them every time I make a baked item and for a lot of other items as well.


All of the products we are talking about today are applied to raw clay and become permanent one the clay is baked. 


So let’s talk about those chalks, the ones I use are all very inexpensive artist chalks in stick form. They are the kind that people that know to do it make beautiful art work on paper. For what we are doing you only need the cheap ones. I have several sets that I have picked up over the years. Sometimes I buy a new set because I am almost out of a color that I use all the time and sometimes I just buy them because they are so pretty sitting on the shelf at the craft-store.


The first thing we will need to do is get the chalk off the stick so we can use it on our clay. There are a couple of ways to do this. I usually just scrap some dust off with a craft-knife (not m clay knife) to use. I also know some artists that scribble the chalk on a piece of paper and use it from there. Try a few different ways and see what works best for you.


Once you have the chalk in a usable form use a brush to apply it to the raw clay. I prefer a cheap eye-shadow brush. I know most people I have seen use a paint brush but in my experience since an eye-shadow brush is designed to be used with a powder it picks up and applies a lot better. Try both and see what works best for you. All of my brushes are very cheap from either the make-up department at Walmart or from the dollar store. Just be sure to take care of and clean any brush you use no matter where you got it.


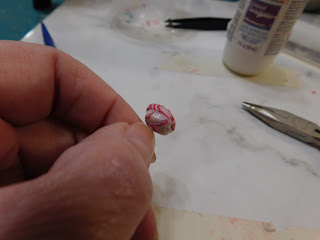
Once the chalk is on the brush use the brush to really burnish the color onto the clay. This will help it to bake on permanently. If you just dust it on it will rub off even after baking.


You can also use the chalk wet. For this I use a cheap paint brush and just a tiny bit of water. For this I do use a paint brush since I am working with a wet medium. You can get different effects this way so play around with both ways of applying the chalk and see what works for your project.


Next we are looking at chalk in a pan format. Sometimes I see these called Pan Pastels. The ones I have I got on a clearance sale several years ago and because of the brand I know they are not high quality. I picked them up only because I wanted to play with them. I find the ones I have give a really subtle color, that could be the quality or it could be the format. If you have these go ahead and use them just like the chalk sticks and see what effects you can get on your projects.


The last product type we are talking about today is eye-shadow. Any powder eye shadow will work on your clay either the loose kind like I showed in the video or the kind that is pressed into pans. If you are going to use it on normal foods be sure to get matte eye-shadow since most of it seems to have at least a bit of a shine.


That being said the pearl ones can be used for special effects really nicely. I once had a special order of food for a fairy house. The lady that ordered it described her house as a combination of fairy and mermaid and it was spectacular. She wanted all the foods to have a pearlescent shimmer. So for example the apples I made were chalked with a red pearl eye-shadow with a touch of a green pearl. It was so much fun to do.


As always I do want to sincerely thank all of you for watching my videos and reading my blog posts. It means so much to me that you are supporting me in this way. If I could ask you all to do just a bit more by subscribing to the channel and liking the videos and leaving comments. Those help more than you can imagine. Also if you could pass the links on to your friends I would appreciate it so much.


Sunday, July 3, 2022

Polymer Clay 101 pt 4 Texturing Tools


Watch the video here.


This week we are going to talk about texturing our clay projects. This is one of my favorite parts of working with clay. It is just so much fun to take a piece of clay and use some simple tools to give it the texture to make it look like something else.


These are my favorite tools for this process and none of them are expensive. Most in fact are free or almost free. None will cost you more than a few dollars. In a future Clay 101 we will cover things we add to clay to give it texture today I am limiting the items to tools that we use on the surface of the clay.


First up is the peppercorn. Yes, you read that correctly a peppercorn from the kitchen. These little things are really just little balls of texture. Each one is just a bit different and they are small and easy to use. Look for one that has lots of texture, some are much smoother than others.


Next is really a category and I will just call them “pointy tools” these can be anything that comes to a sharp point. The three here are my favorites but look in your stash and see what you can come up with. My all time favorite is the dental pick,
I use it all the time for so many things. In working with minis it is really just an extension of my hand. I like it the best of these pointy tools because of the long handle so I can get the point to just the angle I want it. Do note that dental tools come with different styles on the pointy part, for me the style I show in the video is the most useful and easiest to use. The pin is my next favorite, try to find one with the bead type head, they are much easier to hold onto (and they don't get lost as easy on the work table) Pins are really good when you need to texture really small areas since the point is so much smaller than the one on the dental pick. Toothpicks on the other hand have a much larger point and are a good addition to your texturing tool collection as well as being so useful for other areas of crafting.


A ball of aluminum foil is the next tool we are working with. Either a large ball or a small one, or have a few on hand of different sizes. Just crumple the foil up a few times then mash it into a ball that is comfortable to hold. I love that from one piece of foil I can have so much variety in texture depending on how I crumple it. It is also great for texturing a large area quickly so I can lay down a base layer of texture then use the other tools to refine the texture.


Our fourth “tool” is some sandpaper and/or an emery board. They are really used for the same texture just different scales of the texture. I also occasionally bake items on top of a piece of sandpaper, that way the texture just happens automatically. I also use the emery board to help me hold/support items when I am using some of the other tools. To really work well for texturing you need a coarse grit and I am completely out of that kind. At least I couldn’t find it in time to do today’s video.So you really can't see the texture in the photo. 


The pot scrubber, you can get these near the dish washing items in the grocery store or the dollar store.
Different brands seem to have different textures and you can usually see what they look like in the package. Check both the regular stores and the dollar stores, the ones I normally find in the dollar stores tend to be softer so the effect is very different from the firmer texture of the grocery store brands.


Our last tools are the brushes. I use both some wire cleaning brushes that I purchased at Harbor Freight and a dollar store toothbrush. I am sure you can get the wire brushes just about anywhere that sells tools. These both are so handy and I use them a lot.


So those are my favorite tools to texture clay with. I hope you are finding this series helpful. If you have specific areas of working with clay you would like me cover be sure to let me know. 


As always I do want to sincerely thank all of you for watching my videos and reading my blog posts. It means so much to me that you are supporting me in this way. If I could ask you all to do just a bit more by subscribing to the channel and liking the videos and leaving comments. Those help more than you can imagine. Also if you could pass the links on to your friends I would appreciate it so much.


Sunday, June 19, 2022

Polymer Clay 101 pt 3 Conditioning & Beyond


Watch the video here.


Since everyone seems to be enjoying the clay 101 series so far I decided to give you the next one today. So today we are talking about the consistency of the clay you are working with. From conditioning the clay to prepare it to work with to how to fix too soft or too hard clay. Along with some of a little about why you might want clay that is softer or firmer. And then finally I talk a bit about reviving old crumbly clay.


So what is conditioning and why do we need to do this? Just like an athlete our clay needs to stretch and warm up a bit before we put it to work. There are several reasons for this. One being that while the clay is not being worked with it can stiffen up and become more firm than it normally is. You won’t know how soft/firm your clay is until you condition/warm it up. Also clay can have air pockets hidden in it and these need to be worked out before you go to the work of creating your masterpiece. Clay that has sat for a while can also develop an inconsistent texture. It might be softer in one area but firmer in another. To condition just work with the clay in your hands, knead it, roll it into a snake and fold it and repeat that. Just work with it until it becomes flexible. The goal is to be able to make a snake, fold that snake and see no cracks or tears. Some clays will condition much quicker than others for many reasons.


Too soft clay. While a really soft clay is much easier on the hands it is very difficult to get fine details with really soft clay. It just can’t hold the finer details we many times need working in smaller scales.


To remedy this there are several simple things you can do. First off try cooling your hands and work surface. Sometimes giving your hands a quick wash with cold water is all that 9is needed. You can also chill your work surface (if possible) and this can go a long way with just slightly soft clay.


If you are going to be mixing your clay with another clay to achieve a different color picking a firmer clay to mix with will go a long way.


Another of my favorite tricks is to flatten out the clay and place it on a clan sheet of white paper overnight. This will draw out some of the oils in the clay and really makes a big difference.


If your clay gets too soft while working with it stick it in the freezer for 15 or 290 minutes and you will see an improvement also.


What if your clay is really firm? I do prefer to work with a firmer clay because I can get much better details in what I make. That being said a clay that is too firm is painful to work with and even I get discouraged. Another to thing I want to say is that I found in my experience that clays that are firmer seem to be more durable after baking, the finished items seem to not be quite as fragile so something to keep in mind.


If a clay is really firm the first thing I usually do is stick the bag containing the clay into my pocket or into my clothing against my body. The body heat will help to make it a bit more pliable. Also try washing your hands with hot water exotically if the room you are working in is cold.


Depending on what you are making adding some translucent clay will soften firmer clays because the translucent clays are by their very nature very soft. If you are going to be mixing the clay with another clay to adjust the color try to pick a softer clay to mix in.


What if you have old crumbly clay that you want to revive? As clay sits it can get very dried out and crumbly like the one I used to demonstrate this portion of the video. That particular clay was a very firm clay to begin with and it has been in my stash for many years. If I had to guess I would say probably at least 10 years.


The first steps would be to try the suggestions in the working with too firm clay section. I have tried all of those things many times on this particular clay and know it is beyond those working.


So when I want to use this clay I start by chopping it very fine and using my clay roller to roll it. You need to use a lot of pressure on the roller especially at first. Just keep chopping and rolling until it starts to come together.


As a final step you can add something like TLS (Translucent Liquid Sculpey) or one of the clay softeners that some of the clay manufactures market.


As yo saw I was able to pretty quickly make that crumbly mess into a very workable clay.


You can almost always rescue old clay if you know how. As long as it has not been stored at too hot of a temperature that is of course.


As always I do want to sincerely thank all of you for watching my videos and reading my blog posts. It means so much to me that you are supporting me in this way. If I could ask you all to do just a bit more by subscribing to the channel and liking the videos and leaving comments. Those help more than you can imagine. Also if you could pass the links on to your friends I would appreciate it so much.


Sunday, June 5, 2022


Watch the video here.


I got so much positive feedback part 1 of this series I decided to put up part 2 this week.


So this week we are talking about the 5 basic tools that I feel you need to have on hand to start working with polymer clay.


So let’s start at the bottom and talk about a clay friendly work surface. I personally use a ceramic floor tile that is 12” by 12”. I really think it is the best work surface for the clay and I actually do most of my crafting on my tile. I love that it is durable and easy to clean. It protects whatever surface it sits on and it is portable if I need to move a project in progress out of the way for whatever reason. The one I use cost less than $1 at the local Lowes. I recommend getting one in a neutral color (gray or beige) and a smooth surface. Remember what ever texture you work surface has will be imprinted on the bottom side of your clay.


Another option would be a sheet parchment paper or maybe a silicon mat.


Don’t work directly on a wood table because the clay can mar the surface. And plastic should be avoided since the raw clay can dissolve some plastics. Also, the dark colors of clay have a nasty habit of staining light color surfaces.


Next we need something to roll out our clay with. I use an acrylic roller that is made for use with polymer clay. You can see one like it here.


When I first started with polymer clay I used a well cleaned caper jar. It was perfect until I could get a real roller.


I would not recommend using a wood roller since they can leave a texture on the surface of your clay.


Okay now that we have our clay rolled out we might need to cut it. For this I use a clay blade like the one here.


These are the real clay tool I recommend you purchase first.


Some people like to use a razor blade but I find them limited in use because it is hard to cur thick pieces of clay or anything very wide.


The next piece of equipment we need to talk about is a baking surface. For the majority of my clay project I use a plain paper plate. These are great. Leave a mice mat finish on the bottom of the clay and can be thrown away when they get dirty.


And lastly I recommend you keep a package of wet wipes handy to clean up all your equipment and your hands while and after working with your clay.


These are just the basic tools, we will be talking about other tools in later videos in this series. There will also be dedicated posts to some of the types of tools where we talk about using tools to get effects on our clay.


As always I do want to sincerely thank all of you for watching my videos and reading my blog posts. It means so much to me that you are supporting me in this way. If I could ask you all to do just a bit more by subscribing to the channel and liking the videos and leaving comments. Those help more than you can imagine. Also if you could pass the links on to your friends I would appreciate it so much.


Sunday, May 29, 2022

Polymer Clay 101 pt 1 The Basics

 Watch the video here.


Today we are starting a new series on the channel covering polymer clay. To tell you the truth I thought I had already done this on this channel but when I went looking on my channel list of videos I discovered I had not. I do have a similar series over on my 18” doll channel but no one here. So we are going to fix that situation.


I wanted to start with a video that was very basic and explained first what polymer clay is. I get so many questions from people that are not familiar with this wonderful clay so I hope my explanation helps.


I did use this video in particular as an excuse to treat myself to some new blocks of clay. I wanted to able to show you all the new packaging and also share a couple of things I always try to do when opening a new block of clay. Also I didn’t feel it would be fair to compare the brands using clay that was old since it does get a little bit harder to work with as it ages for long periods of time.


I also want to be clear these are not the only brands of polymer clay on the market. These are just the ones that my local Michael's had in stock there are a couple of new to me brands that I really want to get my hands on and if I do I will share them on the channel.


The brands I do show in this video are all wonderful ones to start out with if you have not worked with the clay before and they are also the backbone of my polymer clay collection.


Once clay I did not cover and I believe is available at at least some Hobby Lobby locations is Kato Clay. That is one brand that you should stay away from if you are just beginning. It is beautiful but it is very hard so it is more difficult to work with. It is designed for jewelry makers and with experience you can get fantastic details using it. It also bakes at a much higher temperature so I personally would not mix it with other brands.


Polymer clay comes is a huge number of colors and you can mix them to create even more colors so you can work with any color you can imagine.


The brands I show in the video and other brands that bake at similar temperatures can be mixed with no issues.


By mixing clays you can get not only additional colors but you can create special effects. I will try to put a video covering that in this series later on.


Let’s talk about the clays I show in the video just a bit.


Original Sculpey-
this is a very soft, white clay. It is usually cheaper by the ounce than other clays but only comes in larger packages. Fro my work on this channel I normally use it mostly in parts of my project that don’t show a lot. I do use it more in my larger scale items. It is easy to work with as far as hand strength since it i8s soft. But at the same time because it is soft it is very difficult to get good details in your project.


At the time I am writing this blog post prices range from $13.99 (US) for a 1 pound package to $32.99 (US) for a 3.75 pound package.


Craftsmart Clay
- I believe is a Michael’s store brand but I am not positive, it is much softer than most of the clay I work with. Very similar to the Original
Sculpey if not maybe even a bit softer than that. It does come in many colors and seems to be a bit cheaper than the big name clays.


At the time I am writing this blog post the price is $1.99 for the standard 2 ounce block.


Sculpey III
- probably the clay most of us started with when we first started working with polymer clay, this is soft clay that works up nicely for most projects. Since it is soft you won’t get the really fine details we try for in some of our mini projects but definitely a good clay to work with.


At the time I am writing this blog post the price is $2.59 for the standard 2 ounce block.


Sculpey Premo
- this is the more high end offering from the people at Sculpey, so it is a bit firmer. You can get wonderful details with this clay and the colors that it come in are wonderful.


At the time I am writing this blog post the price is $2.89 for the standard 2 ounce block.


Fimo Soft
-Traditionally all of us clay snobs swore by the Fimo line. Even the soft is capable of fine details and it is a fantastic clay. The people that make Fimo have several lines of clay, I just got the one block of soft for this video. When we talk about special effects that you can achieve with clay I might need to treat myself to some of their more specialized blocks.


At the time I am writing this blog post the price is $2.89 for the standard 2 ounce block.


For most colors of clay I purchase the standard 2 ounce blocks. The exception being white and translucent. Those I prefer to get in the larger 8 ounce blocks so I use so much more of them than other colors.


When you open a new package of clay I suggest you find the information on the label that needs to stay readable and cut in such a way as to preserve those areas. I showed my favorite places to cut the packages of clay open. You will want to be able to still read the color name, the brand, and the baking temperature in the future. For years I just cut the packaging open wherever and didn’t think about it. It wasn’t until I watched a tutorial by someone doing some jewelry and saw her purposely open the package to retain those pieces of information that I even thought abut it. It was truly an “oh duh” moment.


Once you clay package is cut open you will need to have a way to safely store it. I put each color into a zippered sandwich bag. I have used these since I started working with the clay over 30 years ago and I find it is the best way for me anyway. The bags can be reused when you use up the clay in them.


Those bags I store in the plastic shoe boxes you can buy almost anywhere. In the 30 + years I have been working with this clay I have never had the plastic in these boxes react with the clay.


Speaking of which you do need to be careful because polymer clay will eat right through some types of plastic. It is always a good idea to clean all the tools you use with your clay with a wet wipe after each use.


To bake the clay you can use the oven in your kitchen or a dedicated toaster oven. I really prefer to use my regular oven because I feel the temperature stays more consistent in that over a toaster oven. If you are worried about the fumes it is perfectly safe to bake you clay in a baking bag like these from Reynolds.


So let’s talk about safety as it pertains to polymer clay. The clay is nontoxic but you still do need to be careful. You don’t want to ingest it.


Anything you use that comes into contact with the raw clay can not be used for food again. So plan carefully.


Also do not leave your raw clay in your car or sitting in the hot sun as it can bake/cure in those conditions.


The last thing I want to touch on in this post is a short comparison of polymer clay to air dry clay. I know a lot of people are more familiar with air dry clay.


Polymer clay comes in many more colors than air dry clay,

Polymer clay is much more durable than air dry clay once cured.

Polymer clay remains workable until you bake it in the oven unlike air dry clay.

Polymer clay holds its shape better while you are working with it.

You can get much finer detail with polymer clay.

Polymer clay is waterproof.


As always I do want to sincerely thank all of you for watching my videos and reading my blog posts. It means so much to me that you are supporting me in this way. If I could ask you all to do just a bit more by subscribing to the channel and liking the videos and leaving comments. Those help more than you can imagine. Also if you could pass the links on to your friends I would appreciate it so much.

Tuesday, December 21, 2021

Clay Texturing Tool


Watch the video here.


This week I have something a bit different for the Tuesday video. I needed a specific clay texturing tool in for the video I have planned for next Saturday. I used to have one of these that I had made many years ago. Unfortunately I have no idea what happened to that tool. I decided I might as well make a new one. And since I am going to be using it a video I figured I should probably do a tutorial on how I made it.


This is a super easy tool to make and the items to make it are very few.


You will need some sewing pins, TLS (Translucent Liquid Sculpey, and some polymer clay (I am digging into my scrap clay bag)


The first step is to safely cut the pins to about 1” in length. Use a good sturdy pair of wire cutters and use eye protection. Also make sure the little bits you are cutting off are contained. It is super important that the pins are as close to the same length as possible.


Now take a pair of needle nose pliers and bend the cut end like this. This gives the clay more to hold onto and will keep your texturing tool intact for a lot longer.


Now roll a small ball of clay and insert the pins into it spaced as you wish for the projects you plan to use it for.


Use some TLS to really attach the bent ends of the pins to the top side of the ball.


Roll a thin layer to act as a cap over the bent ends of the pins.


Now turn the tool over and make sure the pins are right where you want them as far as spacing. Also make sure the points are all at the same level. Add a generous amount of TLS to the area where the pins exit the ball of clay.


Bake the tool at 275°F for 2 minutes and allow to cool.


You new clay texturing tool is now ready to use. I made a total of 4 of these while I was at it. One each with 1 pin, 2 pins, 3 pins and 4 pins.


Be sure to store these in a safe place. I am going to keep mine in this little clear box with a lid that I picked up at the dollar store. Otherwise I know I will be sticking my finger every time I reach into my tool drawer.


As for trouble shooting this one, the only real way to make it incorrectly is to not have all the points at the same level. If this happens carefully trim the lung one(s) so they are all the same length with wire cutters.


As always I do want to sincerely thank all of you for watching my videos and reading my blog posts. It means so much to me that you are supporting me in this way. If I could ask you all to do just a bit more by subscribing to the channel and liking the videos and leaving comments. Those help more than you can imagine. Also if you could pass the links on to your friends I would appreciate it so much.


Tuesday, July 20, 2021

Tools to Roll Your Clay With


Watch the video here.


This week for the Tuesday video I thought I would talk a little bit about tools you can use to roll out your polymer clay with. Over the years I have posted a lot of polymer clay videos on this channel and I am thinking it is about time I start thinking about doing some more.


I haven't touched my clay in a very long time but the last couple of weeks I have been thinking it is time to dig it out and take stock of what clay I still have and what I need to stock up on. Then I can play with my clay again.


One of the most frequent questions I get on my clay videos relates to how to roll the clay out if you don't have a pasta machine. So this week I thought it was high time I addressed that topic.


Of course my first choice, especially if you are planning to do a lot of work with clay is a pasta machine. A real pasta machine not one of those contraptions they sell in the craft store that looks like a pasta machine and is sold for use with clay. Unless they have changed a lot in the last few years they really aren't worth it. Just shop garage sales and thrift stores, maybe check Facebook marketplace and look for a used pasta machine. They are so much sturdier and will last you a very long time.


Now if you are just starting out and want to purchase a less expensive option I would recommend one of the acrylic rollers that are sold right with the calys in the craft-store. You can find one here also. You will still need a small roller of some kind even with a pasta machine. These are well made and will last a long time and you will definitely get use it a lot.


Now for the free option, just check the recycling bin and find a straight sided glass bottle of some kind. I think the best ones either come filled with green olives or capers. This is how I started out and an added benefit is you also can use the bottle to store some of your tools for clay work also. The other bottle I show in the video held Kombucha and would also work very nicely. Just look for a bottle that is relatively straight (not curved) and fairly narrow. Be sure to remove all traces of the label and the glue that held the label and wash the bottle very well before using.


Now lets take a moment to mention a couple of things I don't recommend. First anything made of plastic. This is because raw polymer clay has a really bad habit of eating holes in plastic. Also I don't recommend using either a wooden rolling pin or a wood dowel, since both will leave marks in the clay from the wood grain.


As always I do want to sincerely thank all of you for watching my videos and reading my blog posts. It means so much to me that you are supporting me in this way. If I could ask you all to do just a bit more by subscribing to the channel and liking the videos and leaving comments. Those help more than you can imagine. Also if you could pass the links on to your friends I would appreciate it so much.