Check back often

Have you checked out all my blogs?


Dollhouse Minis: http://joannesminis.blogspot.com


18” Dolls: http://joannes18dolls.blogspot.com/


General Crafts: http://joannes-place.blogspot.com/


Cooking: http://joanne-kitchen.blogspot.com/


Also if for some reason I can't post I will try to give a head's up on the Facebook page so check there too.

Sunday, July 31, 2022

Dollhouse Miniature Simple Bench


Watch the video here.


This week I have a really fun and simple project. I decided the front porch of the dollhouse needed a small bench and I came up with this the one I am showing you today. I had taken a walk to the local dollar store and picked up a new package of craft-sticks so I had plenty of them to play with. (you get 100 of them for just over a dollar at Family Dollar) The bench we are making is very loosely based on one I saw on a front porch in the neighborhood a while back.


To make the process easier I am building the bench in “units” that way we don’t have to do near as much measuring and the pieces fit together to create the bench.


Let’s start by making the seat and back units. For these two pieces we will need 5 whole craft-sticks and 4 small pieces. For the seat lay 3 of the craft-sticks side by side and cut 2 brace pieces that are just shorter than the width of the seat. Mine were about ¾” use some glue to attach the braces to the back side being sure that both of the brace pieces are glued to part of all three seat pieces. For the back repeat the same steps using just 2 craft-sticks and my brace pieces were around ½” for this part. Be very careful to make sure all the craft-sticks are lined up evenly. Allow the glue to dry.


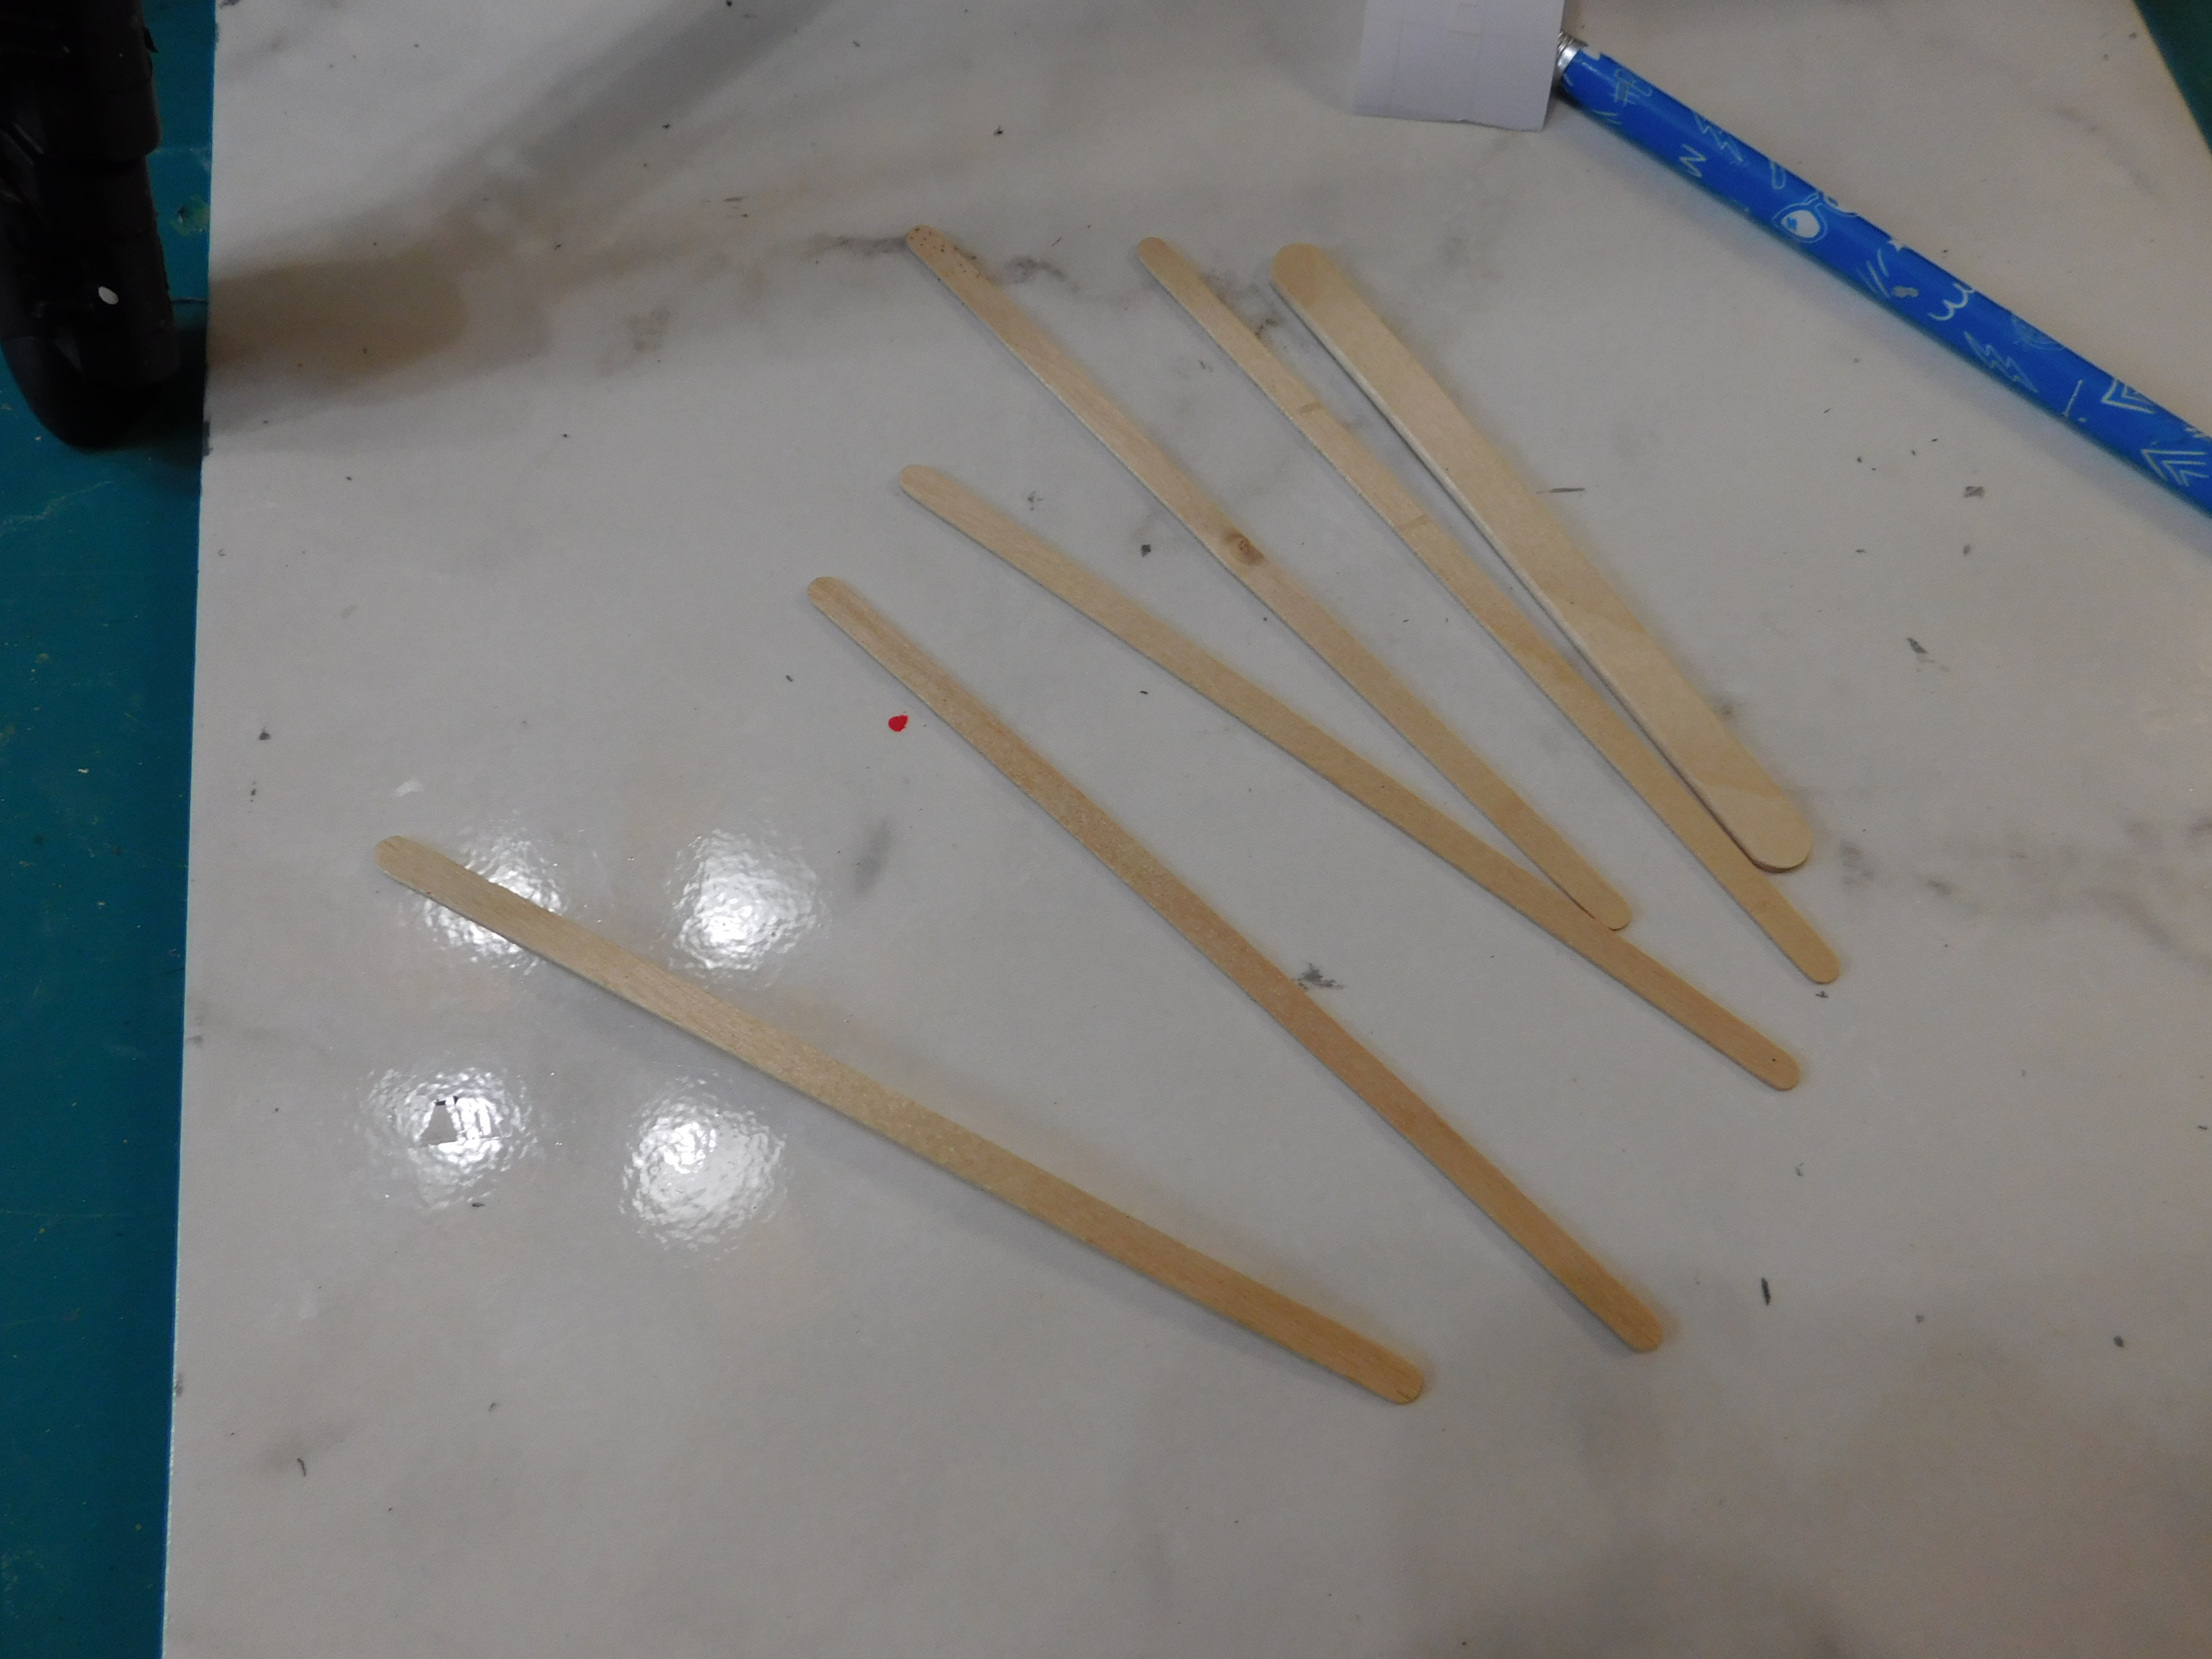
Next we move on to the leg units. We will need to use 4 craft-sticks all together. Cut two in half, mine were 2 ¼” each, these will be the actual legs. Make a mark on each one that is 1 ½” from the cut edge, this will be the placement line to for the front/back pieces.


Now glue the pieces together so they look like the ones in this photo. Be very sure to line up the top edge of the complete craft-sticks with the lines you drew on the legs. Make sure everything is nice and straight and squared. Allow to dry and double check that the 2 leg units are exact matches.


Now glue the seat to first one of the leg units and allow to dry. You just want to use a bead of glue along the top of the craft-stick between the legs. Use something to hold this in place and make sure it is correctly placed so that you will have a level seat. Once dry I like to add a bit more glue on the under side of the joint just to be sure it will hold. Allow to dry completely.


Now repeat with the second leg unit, be extra careful to keep all the angles correct so that the seat remains level when finished. Add the additional bead of glue to the under side once dry and allow to dry again.


Now we are adding the back unit. I lined up the top (rounded part) of the legs with the curve on the bottom board of the back unit. Make sure to again line everything up correctly, glue and clamp. Allow to dry.


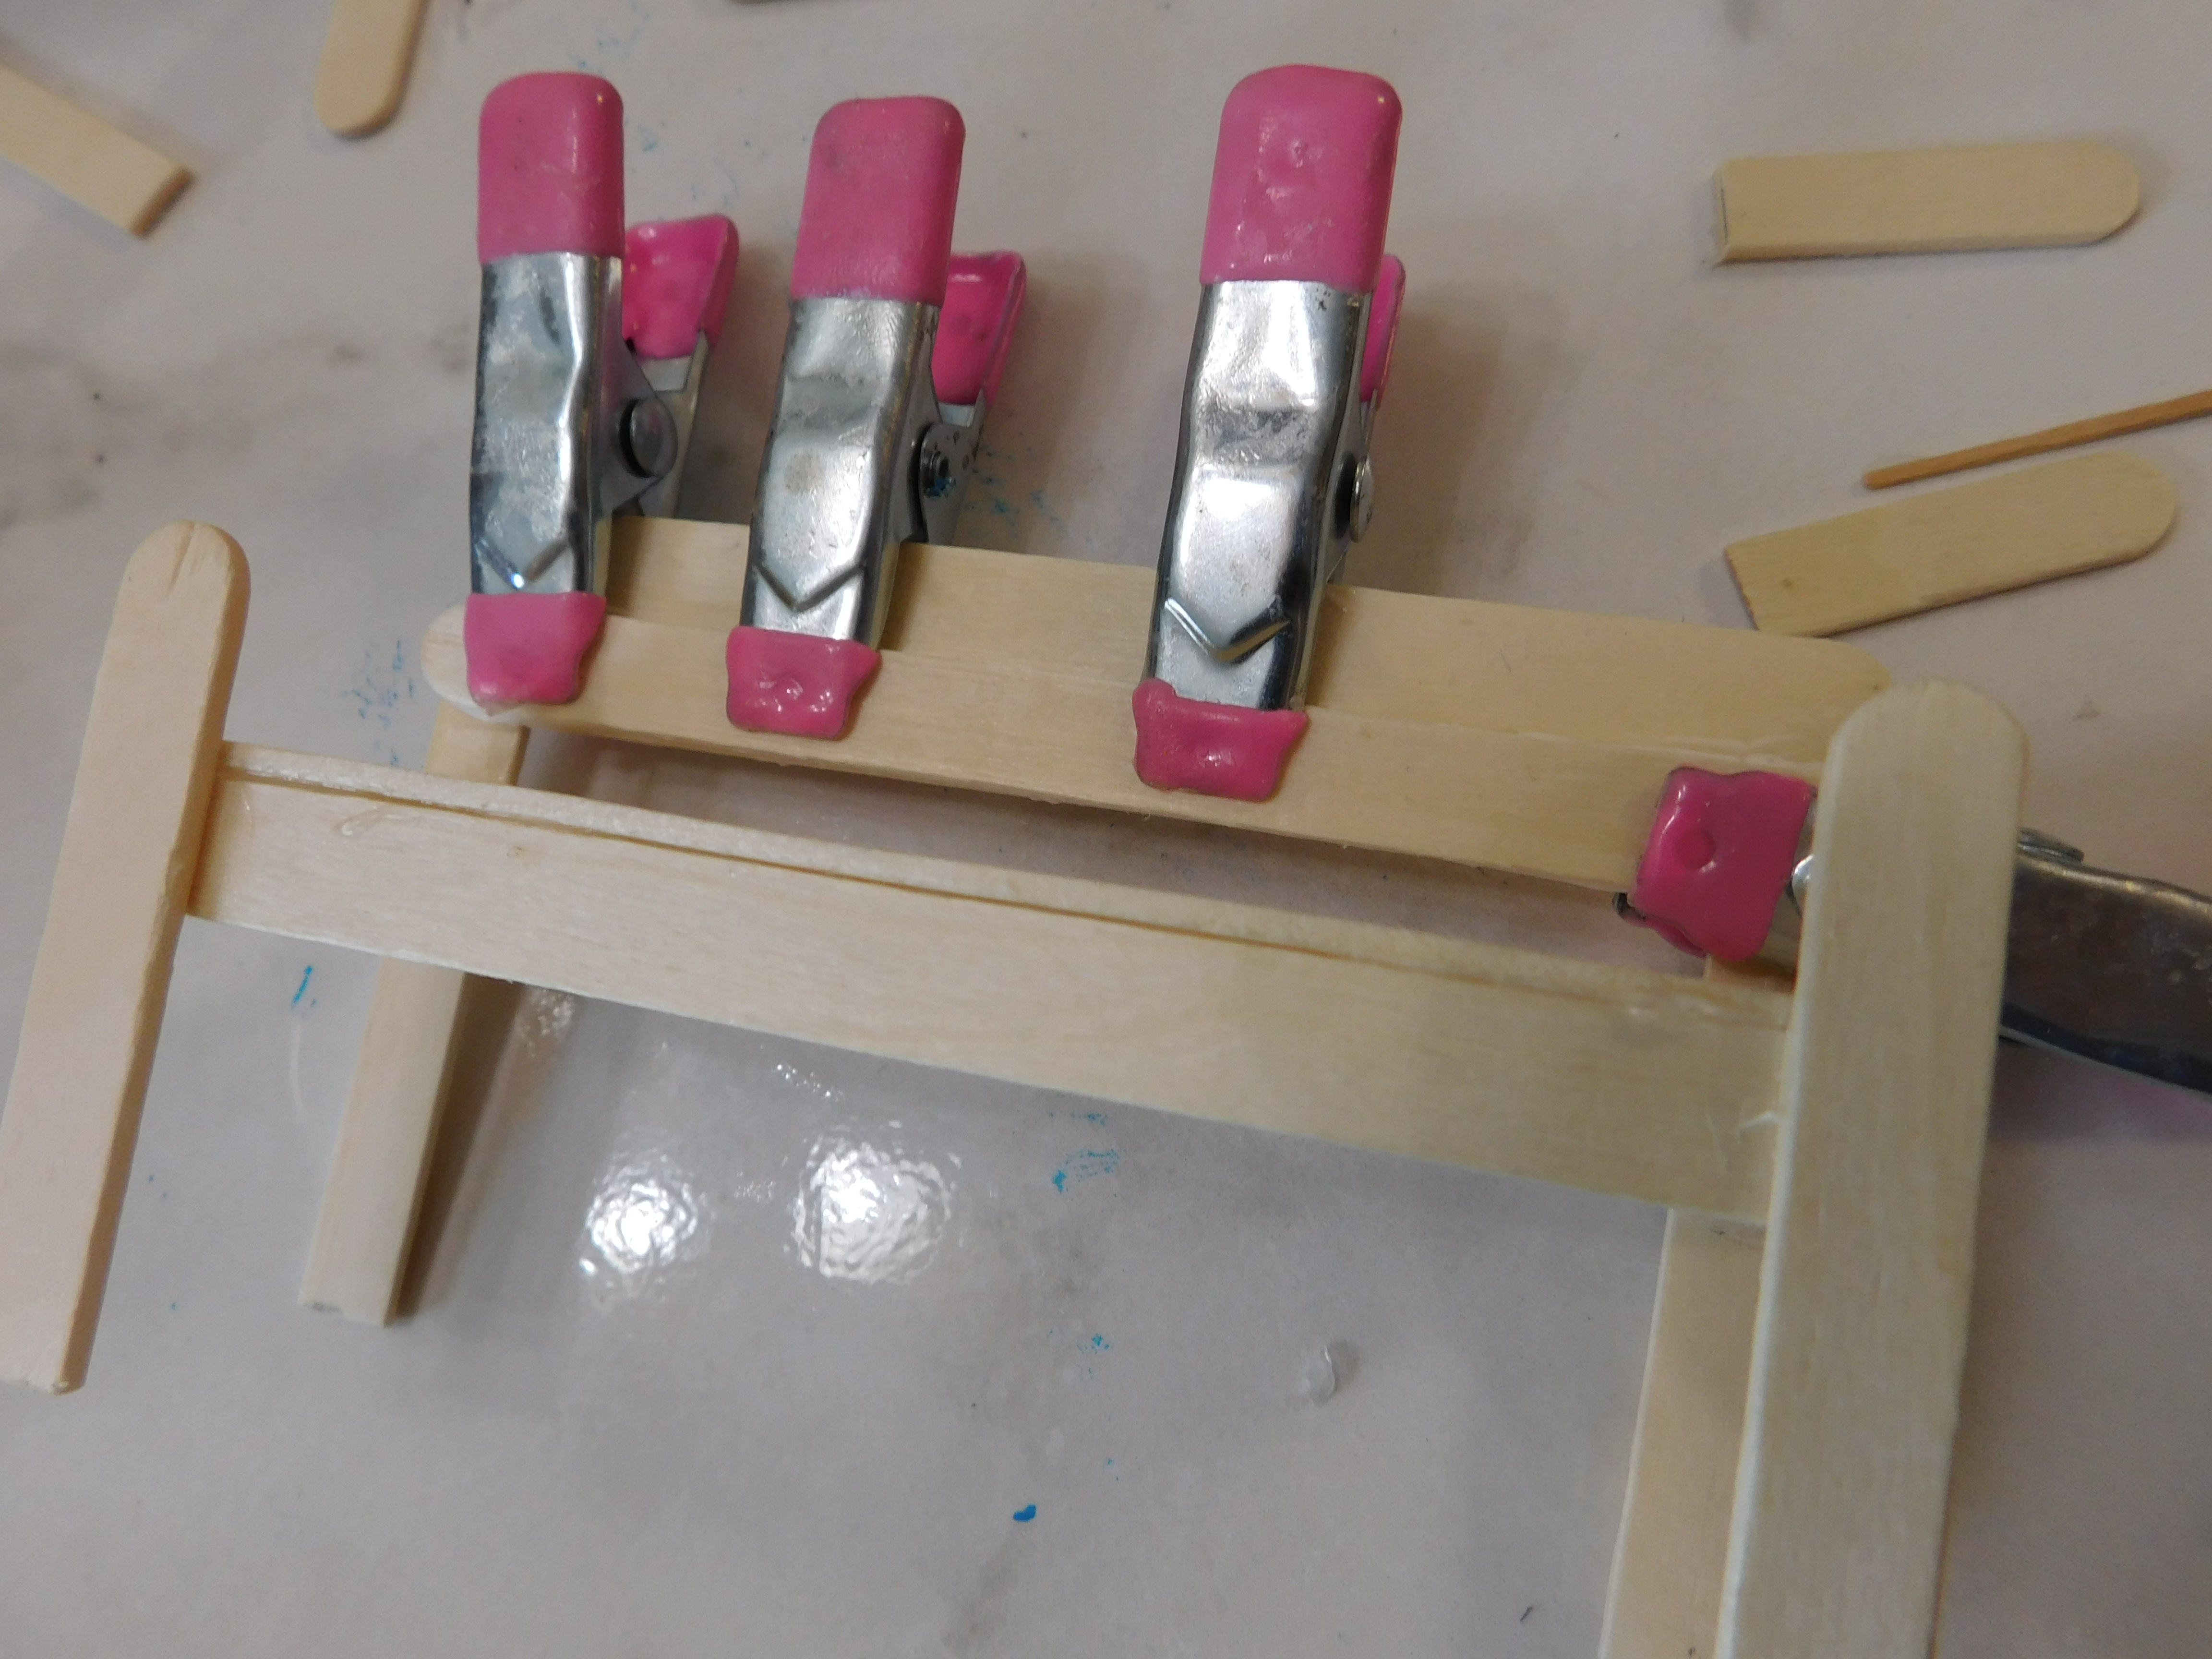
I decided to make adding the arm rests easier by adding an additional craft-stick to the back lined up with the bottom board on the front. This doesn’t show much but gives a ledge to glue the arm rest to in the next step. The secret to making it blend in as much as possible is to clamp it line it up really well and then clamp it well so it remains flat against the board that is already there. Allow to dry.


Now we are adding some arm rests, these are the rounded ends of another craft-stick cut to 1 ¼” long. Carefully glue them to the top of the front leg and to the top edge of our extra back piece.


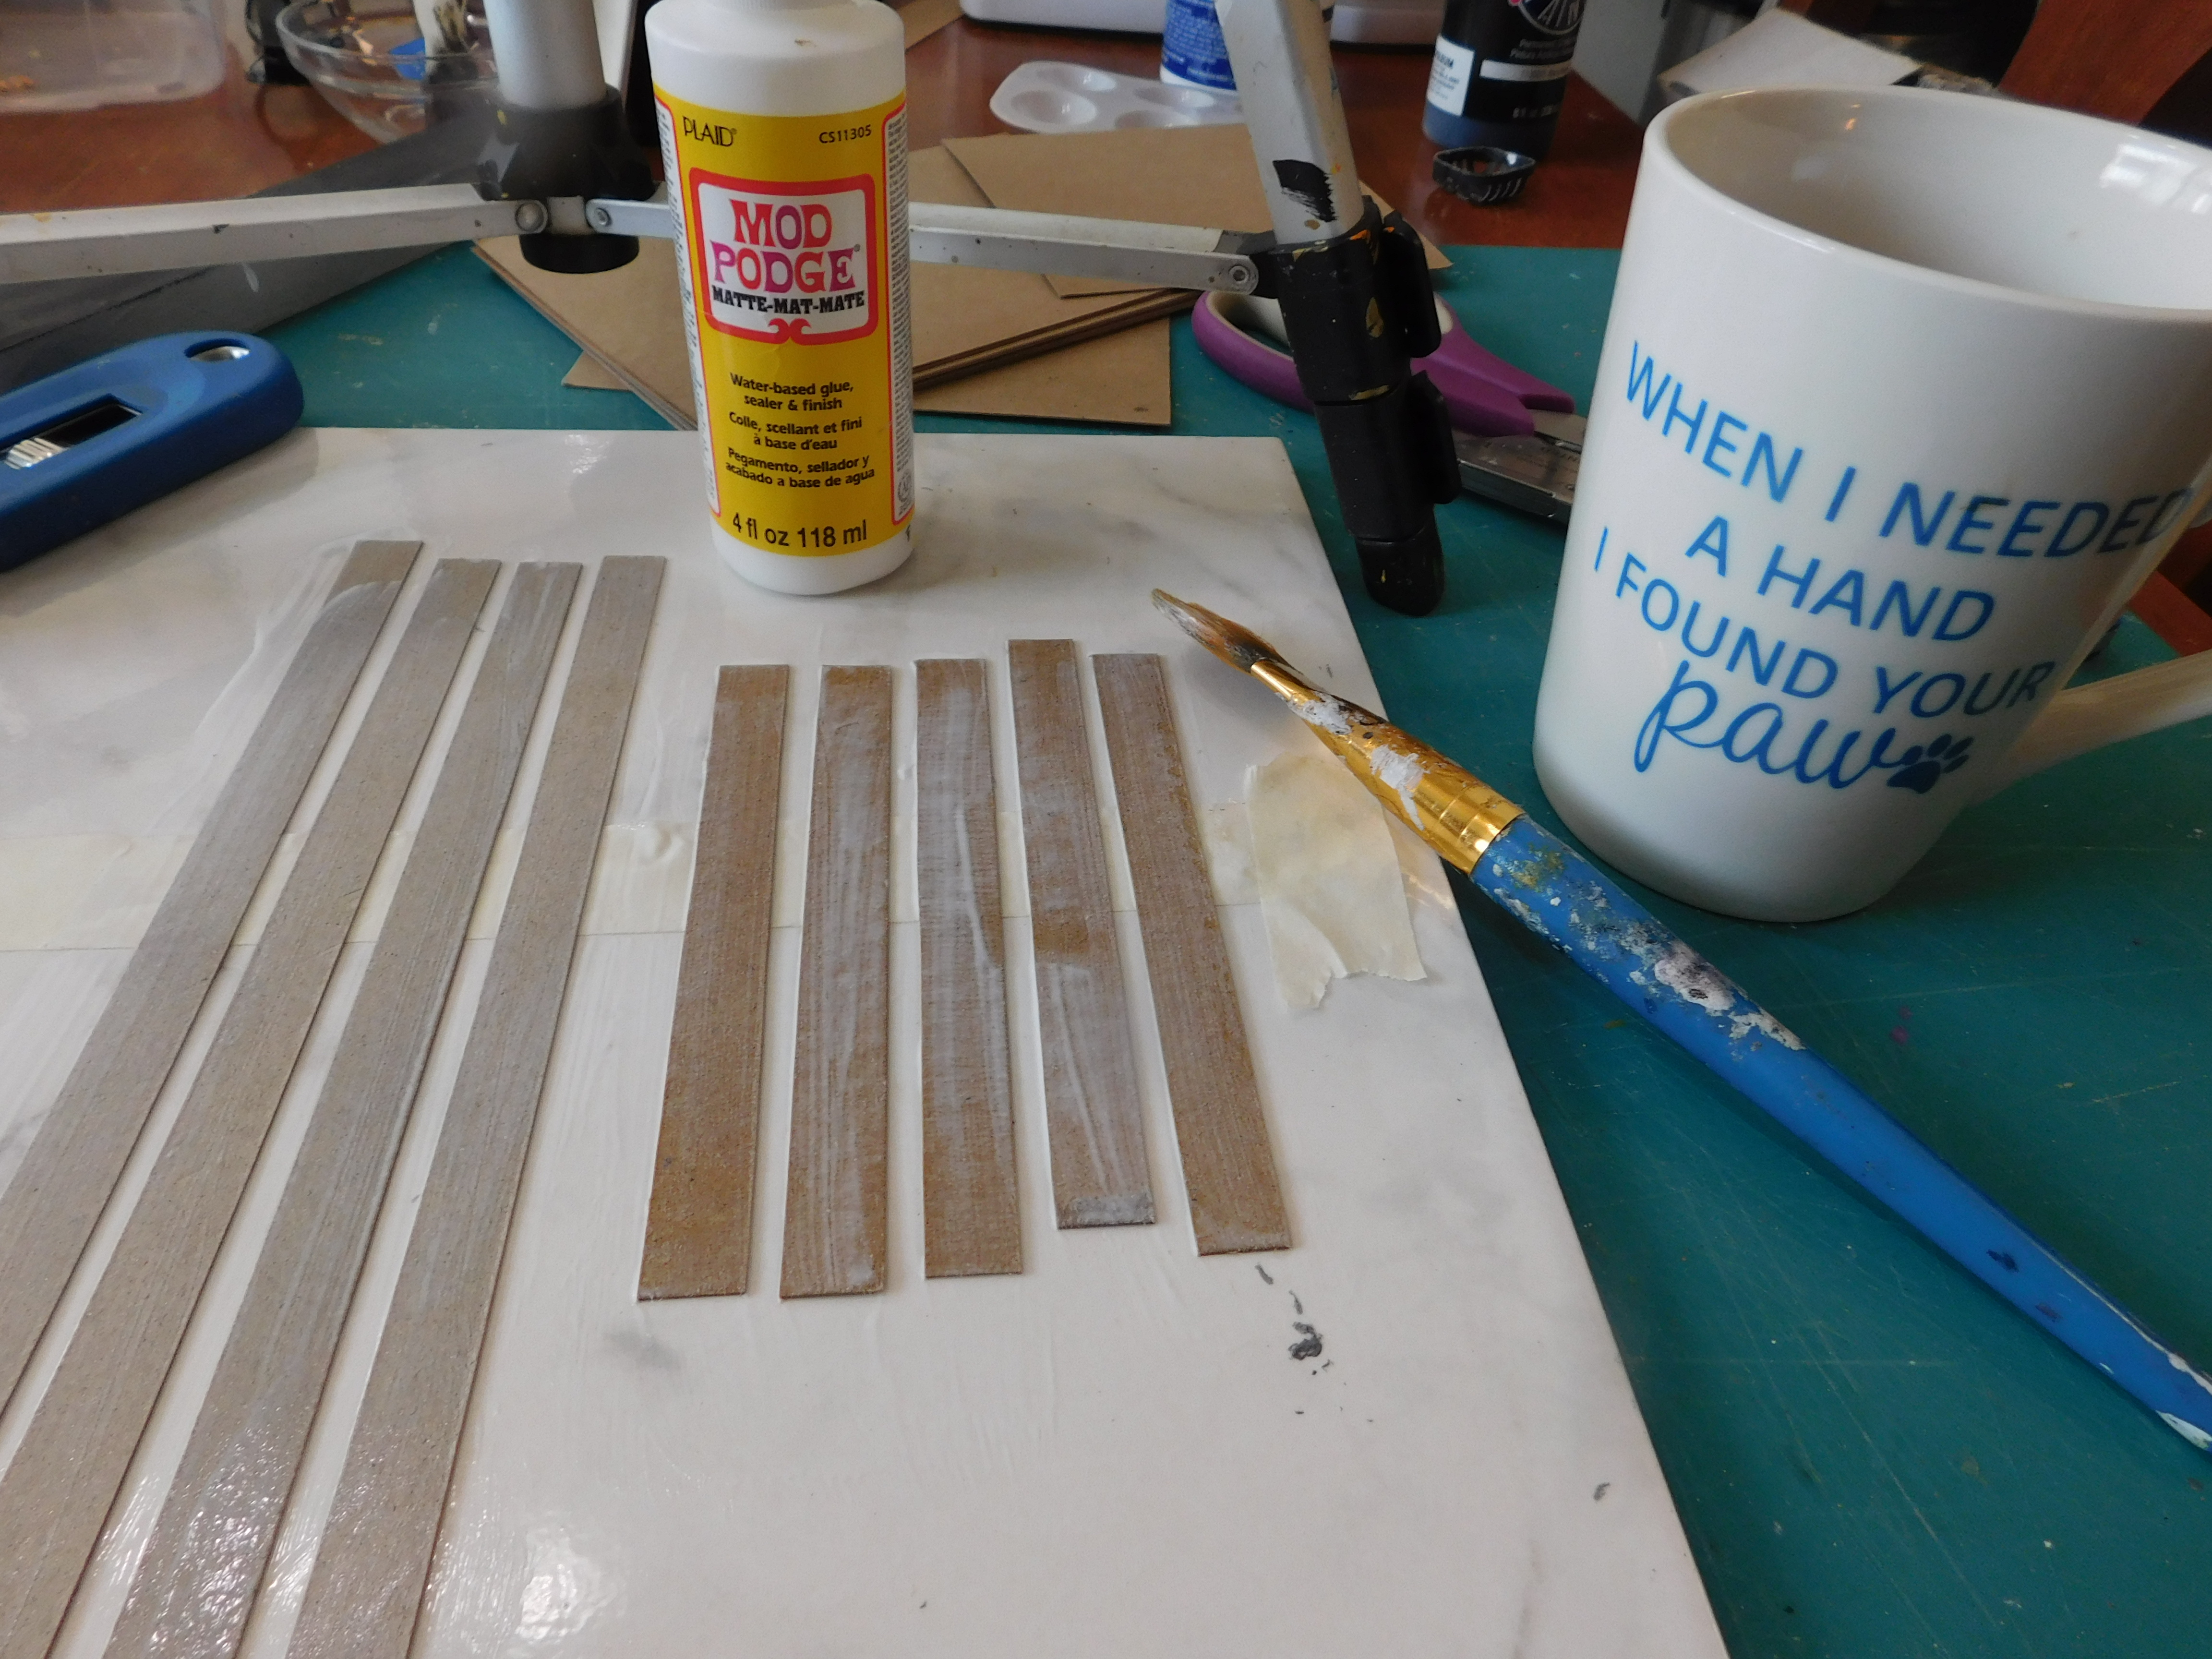
Once dry you can paint your bench any way you desire. I went with white (from Apple Barrel) but I was also very tempted by a dark blue. Show me picture of how you do your bench. I did use two coats to give it a nice finish.


Once the paint dries add a coat of Satin Mod Podge or any sealer you choose.


A huge thank you to Plaid for providing the paint, Mod Podge, and brushes used in today’s tutorial.


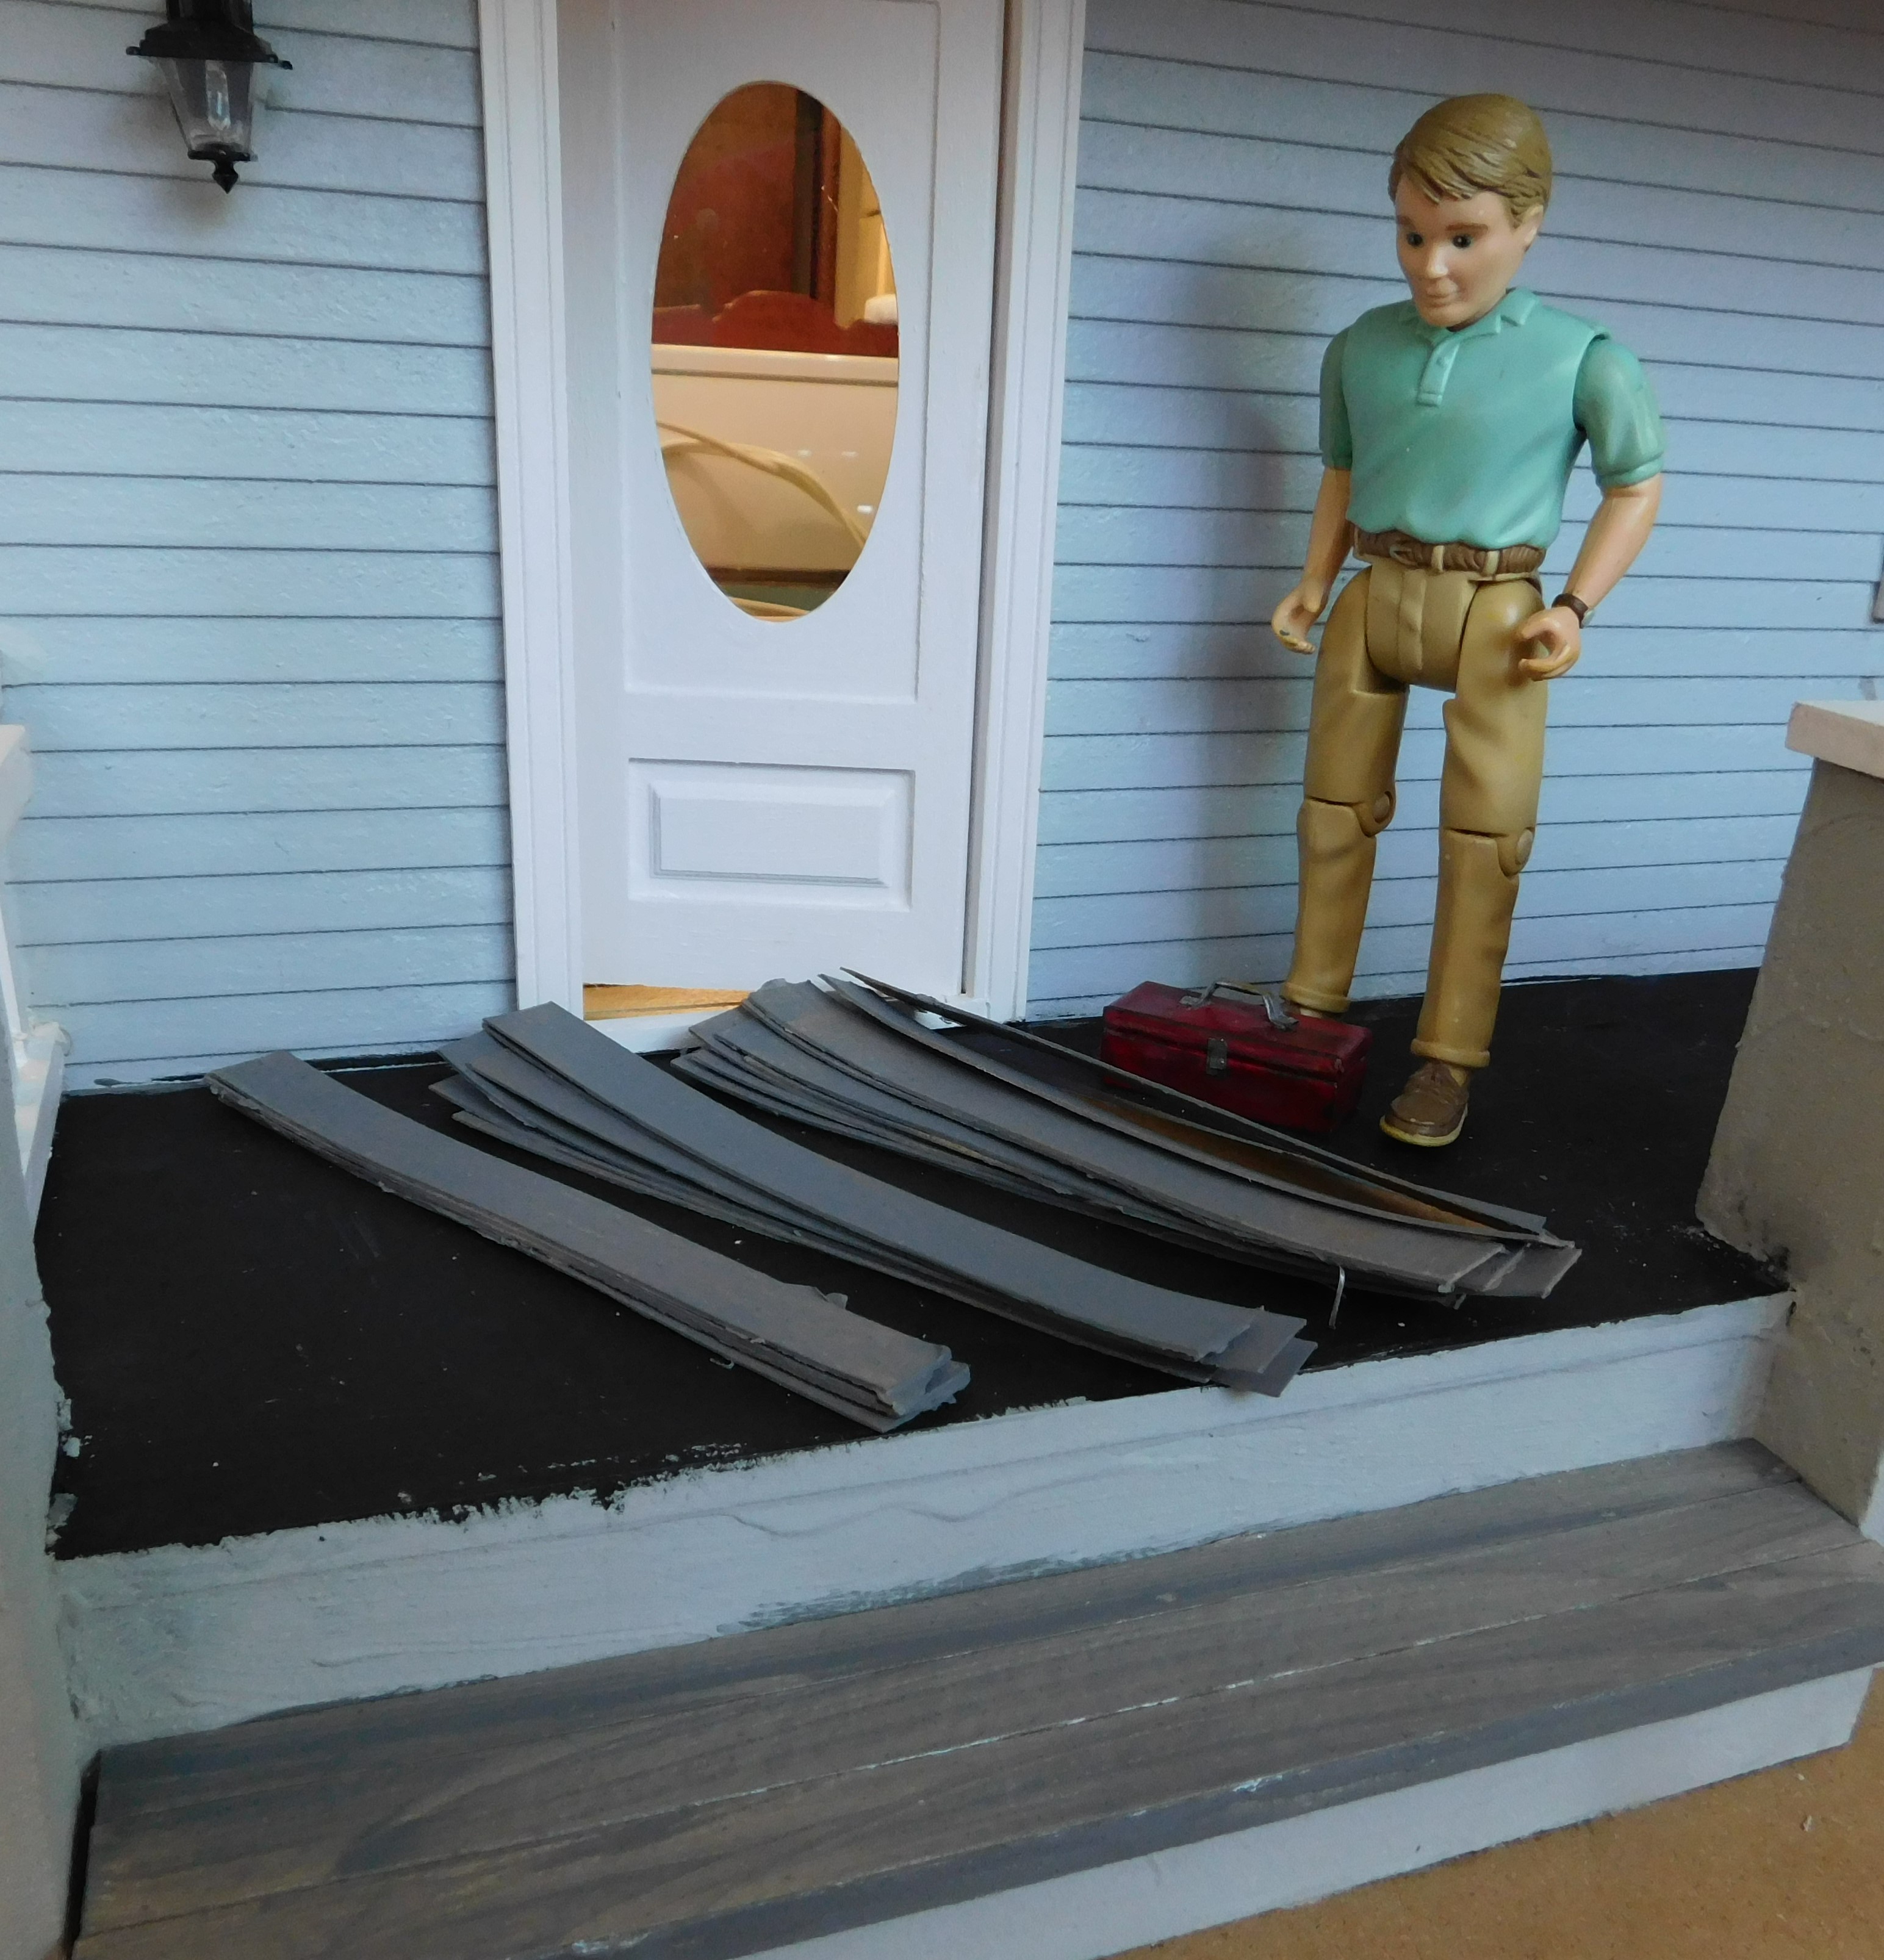
Once dry your bench is ready to set on the porch, in the landscaping, in the entry way or any number of other locations around the dollhouse.


As always I do want to sincerely thank all of you for watching my videos and reading my blog posts. It means so much to me that you are supporting me in this way. If I could ask you all to do just a bit more by subscribing to the channel and liking the videos and leaving comments. Those help more than you can imagine. Also if you could pass the links on to your friends I would appreciate it so much.


Sunday, July 24, 2022

Building the Beachside Bungalow part 24 Porch Floor pt 2


Watch the video here.


This week we are finishing the front porch floor. And even though I am writing this part of the blog before the work is done I already know I love how this looks. I got the slightly aged wood look I was after without going too far. I think I achieved the mix of old with new and I used just stuff I had on hand. Actually the “stuff” I used a lot of people would consider to be trash. I love it when I can tie a Trash to Treasure project into a major component of a project. I have a lot of the cardboard still on hand (and I get more every month) so don’t be surprised to see more of it in future projects on the channel.


Of the 60 some strips I cut last week I have around 15 or 20 left over. I was hoping to have extra since I would rather have more than I need than have to stop in the middle of a project to make more. I am sure I will figure out a use for the leftovers. Maybe the dollhouse needs a matching doghouse……..


I used the same wallpaper gel glue that I used on the step and on the inside wallpaper in the house. If you don’t have any of this look for the thickest glue you can find. The thicker the glue, the lower the moisture of the glue and the less problems you will have with the project.


I did use a brick to weigh down the strips as I went. I placed a piece of parchment paper in between the brick and the floor to protect it. I did manage to cause some minor damage to the front wall of the dollhouse but it was easy to fix with a bit of sandpaper and some touch up paint. There was already a drip in the paint below the window that I have been meaning to fix for like forever so I did that at the same time.


This project would have been much easier to do before the porch railing went on for sure. But I know I would not have thought of this method back then so I am glad I waited.


I cut the strips to fit in batches so that I would only cut the amount I needed so the ones that are leftover are full length.


Be sure to make sure every strip you lay down is straight that is the key to this project. Take your time and be careful.


To fit around the places like the posts and the door I used the method my dad taught me many years ago when we were replacing flooring in the house we lived it. Here are some photos showing the process I used, if you do the same you send up a thank you to my dad for me.


When working on projects like this I like to lay just a few strips and let the glue/paste do its job before I add more. That way I find I have a better chance of my finished floorboards being straight the entire length of the porch. If I try to lay too many at a time I find by the time I get to the far end of the porch my boards will have a definite slant which will really show up at the end by the rail.


After laying all the flooring I gave it a coat of Satin Mod Podge. This will seal the floor and make it much more durable. I would have used Mat Mod Podge but I am almost out of that and I wanted to get this finished this week. I do have to say while if you use wood you might be able to skip the clear finish with the paperboard I feel it is necessary.


As always I do want to sincerely thank all of you for watching my videos and reading my blog posts. It means so much to me that you are supporting me in this way. If I could ask you all to do just a bit more by subscribing to the channel and liking the videos and leaving comments. Those help more than you can imagine. Also if you could pass the links on to your friends I would appreciate it so much.


Tuesday, July 19, 2022

Dollhouse Miniature Beach Porch Sign


Watch the video here.


For the porch sign to go with our beach theme this month I decided to go a bit rustic. I do love rustic signs both in mini and in real life, especially when paired with the beachy blue colors and the beach theme.


I also decided to make the sign a bit wider this time using 5 of the slim sticks instead of the normal 4. I just felt like giving it a slight change. The finished sign is around 1” wide instead of just over ¾” this time. I purposely picked a couple of the less straight boards this time also, which added to the extra width. I do love how it turned out.


So to begin I cut the sticks to 5” long and then cut 3 pieces of a regular size craft-stick to just under 1” to use as brace pieces to hold the sign together.


I just used some nice thick tacky glue to glue everything together. After I held the boards in place for a few minutes (until they started to hold on their own) I used a brick to hold everything together until the glue dried.


Now it was time for a coat of paint. I choose this lovely beachy blue from Folk Art and gave a fairly even coat. Don’t stress too much about the paint being perfect since in the next step we are going to be sanding the paint back to reveal the wood. Allow the paint to dry completely before the next step.


After my glue dried I decided I wasn’t completely happy with the how stable the sign felt so I added a bit more glue to the backside to help firm up those connections.


Now the fun part. Use a piece of sandpaper and sand off some of the paint, concentrating on the edges of the boards and the ends. Do this as much or as little as you like.


Now it is time to add the lettering. I used my Cricut again this time to cut the letters. I have been doing a couple of non-mini projects with it so it was on the table. Let me know if you would like me to figure out how to share the cut file for this sign. You of course don’t need a fancy cutting machine to make your sign. You could paint your letters like we have done on several of the signs in previous months or you could use stickers. The letters I cut were just a bit less than ½” tall so you have an idea of what size to make yours. I did use a cut out of a shell for the “o” one the sign. You could use a sticker for yours or you could use a tiny real shell if you have one. I was thinking about doing just that but didn’t have time to get to the craft store to buy shells before doing this.


Once the lettering was in place it was simply a matter of a thin coat of Mat Mod Podge and the sign was ready to place on the front porch of the dollhouse.


I want to thank Plaid once again for the paint, brushes and Mod Podge they provided to me to use in these videos.


As always I do want to sincerely thank all of you for watching my videos and reading my blog posts. It means so much to me that you are supporting me in this way. If I could ask you all to do just a bit more by subscribing to the channel and liking the videos and leaving comments. Those help more than you can imagine. Also if you could pass the links on to your friends I would appreciate it so much.


Sunday, July 17, 2022

Building the Beachside Bungalow part 23 The Front Porch pt 1


Watch the video here.


I decided I wanted to finally do something with the floor of the front porch of the dollhouse. I have been staring at it for several months and I am frankly tir4ed of it being unfinished. I mean we keep making fun decorations for the front porch so it needs to look its best.


So one of the things that had been holding me back on finishing this was indecision on what to use for the floor boards. I looked at wood but it was hard to find what I wanted and wood prices (even in mini) are getting anything but mini lately. The few times I found something I felt was thin enough to work either the store didn’t have enough or the price was really high. So I have been thinking about this for a long time.


Then as I was putting away some cans of cat food the other day it struck me that the pieces of cardboard that separate the layers of canned cat food in the cases would be perfect for the dollhouse porch floor. I know not everyone is going to have exactly this same cardboard and I gave some alternatives in the video but for me this is the perfect medium, I knew I had been saving all of those pieces for a reason. LOL


To prepare the house for the addition of the boards I decided to paint just the top surface of the porch floor with some flat black paint. That way if we do see between any of the boards in spots it will just look like a shadowed area.


Next I had to decide which direction I wanted my boards to run. I looked online at pictures and found that depending on how the joists for the porch run the boards can run either front to back or sideways. I like the look of them them running front to back best so that was the way I decided to go with this project.


Now the task of cutting the boards, and this was a big project. I measured the porch and did some math. Based on my boards being cut ½” wide to represent 6” boards I was going to need over 50 of them I had been considering cutting my boards a bit narrower than ½ until I realized how many boards I would be cutting. I decided that the ½” was narrow enough. Since I know that I might make mistakes I wanted to have some extra. In total I cut around 60 off camera as well as the 5 on camera. So while the video might not be as long as some I put up I did a lot off camera this week in order to get the video ready for you.


I also wanted to cover the top of the front step with boards. The problem being the step is wider than my pieces of cardboard. If I had had a cereal box on hand I could have used that but I don’t have any in my stash. Instead I pulled out a piece of the chipboard I have in my stash and used it. I think it will work just fine.


Once cut I laid my boards out on my ceramic tile held down with some tape like I do when I paint small things. Then I gave them a coat of mat Mod Podge. This will help to seal the surface and add a bit of strength to the boards.


While this was drying I made my final decision on what color paint I wanted to use. I looked at a bunch of pictures online of porch floors and decided I wanted a darkish gray. I was also very tempted but a dark navy blue but decided to stick with the neutral gray.


I found the darkest gray. I had in my stash a Charcoal gray. from Anita’s. I brushed this onto the boards lightly making sure to stay going the direction the wood grain would run. I didn’t want to have a solid “just painted” look. By being a bit streaky I think it really gives the feeling of wood grain.


Once the boards were dry I carefully removed them from the tape and used a piece of sandpaper to remove the excess paint from the edges.


I decided to start with the step since I can work on it on my work tile and it will be easier. I use the same wallpaper paste we used on the walls of the dollhouse and glued down the first strip lining it up with the front edge. I then turned this upside down and used a brick to weight it down until it started to dry. I am treating the step a bit differently than I will be the porch floor we’ll talk about that more next week.


Once the first board was set in place I could add the rest that were needed to cover the top.


Once dry I cut the back board to be even with the step top and gave the piece a coat of Satin Mod Podge.


Next week we will start placing the boards on the front porch.


As always I do want to sincerely thank all of you for watching my videos and reading my blog posts. It means so much to me that you are supporting me in this way. If I could ask you all to do just a bit more by subscribing to the channel and liking the videos and leaving comments. Those help more than you can imagine. Also if you could pass the links on to your friends I would appreciate it so much.

Saturday, July 16, 2022

Dollhouse Miniature Potato Salad & Macaroni Salad


Watch the video here.


This week for the Saturday tutorial I decided to make on of my favorite summer side dishes, potato salad. And I figured since Macaroni Salad is basically the same with just an adjustment of the shape of the clay for the main component I might as well do both in the same tutorial.


I made the salads to reflect how I make mine in real life, if you have other favorite components in your real version I am sure you can add them into your mini version.


So to begin we need to create some “warm” white clay. To do this I simply added a touch of yellow ocher clay to the white. The difference in color is very subtle but makes a big difference in the finished dish.


Now for the potatoes just roll out the clay to a thin slab and cut tiny bits for the diced potatoes.


For the macaroni roll a thin snake and cut tiny pieces. 


Then use either a toothpick or another “pointy” tool to add the curve to each piece. 


I did find this was easiest to do in the palm of my hand.


Now pick some other colors to represent the other stuff you add to your salad. I used some green (green pepper?). Red (tomato or red pepper) a bit of yellow and some black(olives) and just dice these colors up really finely. This would be a great time to raid your scrap clay bag for little bits of clay that is leftover from other projects.


At this time I also added a bit of the main color clay to the bottom of my serving dishes. This will act as a filler so we don’t need to make so much of the little tiny bits to fill the bowls. I like to add texture to the top of this so it will blend in with our salad in the finished salads. Be sure to use some TLS (Translucent Liquid Sculpey) to act as a glue for this bit.


Now bake for a full 10 minutes at the temperature recommended on your clay package. And allow to cool to room temperature.


Now to bind our salad together I am using a mixture of craft paint (white with just a bit of yellow) mixed with some Mat Mod Podge. I find this works much better than just paint that I have seen in some directions for mini potato salad.


Mix the paint to the desired color then add the Mod Podge.


Then just stir in the ingredients for your salad and transfer to the prepped bowl spread it around to cover the top as well as you can. I like to add a few bits of the ingredients to the top and nestle them down into the sauce in a few places. Allow to dry.


Now I added a very thin coat of Gloss Mod Podge to just the bowls and allowed to dry.


To finish I dabbed on a bit of the Mat Mod Podge to the top of the salads and sprinkled on some red artist chalk to represent the paprika that a lot of us sprinkle over our salads in real life.


As always I do want to sincerely thank all of you for watching my videos and reading my blog posts. It means so much to me that you are supporting me in this way. If I could ask you all to do just a bit more by subscribing to the channel and liking the videos and leaving comments. Those help more than you can imagine. Also if you could pass the links on to your friends I would appreciate it so much.


Tuesday, July 12, 2022

Dollhouse Miniature Beach Themed Flag


Watch the video here.


For the garden flag to go with our beach theme this month I decided to go with one with a flip flop design. I mean can you really get anything that symbolizes summer and the beach more than a pair of flip flops? And they come in so many fun colors and designs that you can customize your flag to go with any color scheme you want.


Like always we are starting with a strip of plain white, 100% cotton fabric. I use bleached muslin for my flags, you should be able to find this fabric in any fabric store/department especially if they carry any fabrics geared to quilters. For our flag we need a strip that measures 1” by 3”.


The other item we will need to begin is some paper backed fusible web. This is basically a fabric glue that is heat activated and comes on a sheet of paper making it very easy to use. I prefer the Heat 'N Bond brand. There are other brands in stores and you can use whatever brand you can find. I do recommend you pick one that is designed to hold without sewing. Mine is labeled “Ultra-Hold” this way you won't need to worry about your flag coming apart later. You will need a 1” square of the paper-backed fusible web.


Follow the directions on your fusible web product to form your flag.


Now we can add the background color to our flag. Since I wanted the background to represent the sand of the beach I mixed up some tan paint similar to the color we used on our doormat last week.


While this was drying I made a very simple flip flop shape to use as a pattern for my flag. To do this I started with a 1” strip of card-stock. I drew a line so that I could keep my design fairly straight.


Then I lined up my drill gauge with the top edge and the line I had drawn and traced a ½” circle.


Then I moved down a lined up the 3/8” hole in my gauge with the line and the boom edge. And traced another circle.


I then connected the two circles with a slightly curved line along the line on my strip of card-stock and a curved line on the other side.


Then just cut out the resulting pattern and you have both a right and a left flip flop by just flipping it over.


Once the tan paint is dry use a pencil to trace around the flip flop pattern being sure to flip it over to make both a right and left sandal.


Then paint your flip flops with whatever color you desire. I used this pretty blue color. I did need 2 coats of paint to give a nice even color.


Once dry use cut around the bottom edge of the traced shape and then line the pattern up on the reverse side and trace and paint the flip flops on that side also.


Use a contrasting paint color to add the straps to the flip flops and allow to dry again. At this point you could decorate your flag in way you wish. You could add a design to the flip flops or add some word to the flag. I thin fun in the sun would look lovely on this one.


When all the paint is dry it is time to display your flag on your dollhouse or in the dollhouse garden.


As always a huge thank you to Plaid for the paints and brushes used in today’s video.


As always I do want to sincerely thank all of you for watching my videos and reading my blog posts. It means so much to me that you are supporting me in this way. If I could ask you all to do just a bit more by subscribing to the channel and liking the videos and leaving comments. Those help more than you can imagine. Also if you could pass the links on to your friends I would appreciate it so much.