Check back often

Have you checked out all my blogs?


Dollhouse Minis: http://joannesminis.blogspot.com


18” Dolls: http://joannes18dolls.blogspot.com/


General Crafts: http://joannes-place.blogspot.com/


Cooking: http://joanne-kitchen.blogspot.com/


Also if for some reason I can't post I will try to give a head's up on the Facebook page so check there too.

Saturday, February 26, 2022

Dollhouse Miniature Chocolate Bundt Cake


Watch the video here.


This week for the Saturday tutorial I decided to make a chocolate bundt cake. I was looking online at Google images for ideas of what to make. I was in the mood to make some kind of dessert this week and I figured it would be fun to do something that could be served either for Saint Patrick's Day or just for spring. When I checked out cake images I ran across a dark chocolate bundt cake with some beautiful green and white drizzle running down it's sides. It was crowned with some green sprinkles, I knew I had found the project for today.


I know I am probably overusing the TLS oil paint icing the last few weeks but I love making it so much and I love how it looks on the clay baked goods. I was so happy when I found my box of oil paints a few weeks ago (I had put them in a “safe place” when I moved) that I just want to use them now.


So for the cake, there are several ways to approach the creation of a bundt cake in miniature. This is just one, I think it is probably the easiest one that doesn't require a special mold.


We only need one color of clay for this, a dark brown, I am using Sculpey III in Suede Brown but use whatever dark brown clay you have on hand.


Make a ½” ball with the dark brown clay.


Use your finger to flatten it a bit to make disk about 5/8” in diameter.


Now use a tool to make a hole in the center of your cake.


Next using some more of the same color clay and roll out a sheet of clay on a piece of 1/8” graph paper (here is a link to the free one I use). Use a pair of craft-sticks to make sure you have a consistent thickness to your sheet of clay.


Square off one long edge of the sheet of clay by cutting in line with one of the printed lines on the paper. Then using your clay knife at an angle cut a bevel on the cut edge. This will make it much easier to blend the strip of clay at the top of the cake.


Now cut 8 strips that are 1/8" wide from the clay.


Add the strips evenly around the cake with the beveled end at the top of the cake.


Texture the cake lightly with a toothbrush.


Now roll some more clay into a snake about the same diameter as a toothpick (about 1/16”) 


and use this snake to fill the small spaces between the strips.


Now use the toothpick to emphasize the seams between all the pieces you have added.


Lightly texture the cake again.


Bake at the recommended temperature for your clay for 20 minutes and allow to cool to room temperature.


Now we are going to make the drizzle icing for our cake.


I like to do this on a small piece of aluminum foil so I can wrap it up and throw it away when I am done, this stuff can get messy if you aren't careful.


For each color of icing you want to make form small pool of TLS (Translucent Liquid Scupley) on your foil. Also put out a tiny bit of oil paint on the foil.


Using a toothpick mix a very tiny bit of the oil paint into the TLS to make your icing colors. I used Titanium White for the white, Emerald Green for the lighter green, and a mix of Viridian green with a tinier bit of Lemon Yellow.


Use toothpicks to apply the icing drizzle to your cake. Sprinkle on some glass mico-bead “sprinkles” if desired and bake for the recommended temperature for 10 minutes.


Once cooled completely your cake is ready to place in your mini scene.


As always I do want to sincerely thank all of you for watching my videos and reading my blog posts. It means so much to me that you are supporting me in this way. If I could ask you all to do just a bit more by subscribing to the channel and liking the videos and leaving comments. Those help more than you can imagine. Also if you could pass the links on to your friends I would appreciate it so much.


Tuesday, February 22, 2022

Dollhouse Miniature Saint Patrick's Day Garden Flag


Watch the video here.


This week I wanted to make a garden flag to go on the holder we made a few weeks ago, (video here) Since we have been working on getting the dollhouse porch ready for Saint Patrick's Day that was the theme I decided to go with.


I looked online and found a lot of inspiration in flags that are for sale for our real homes. In the end I decided to combine ideas from a couple that I really liked and I do love how it turned out.


One of the things I love about making the garden flags is that I get to play with fabric. You see sewing and fabric have been a part of my life and crafting for my entire life and I am always excited when I can merge any kind of fabric craft into the dollhouse.


For the flag itself I am using some bleached muslin fabric. This is a less expensive 100% cotton fabric that is pretty easy to find anywhere that sells fabric. It comes in a lot of different widths and prices many times start at just a few dollars per yard. I use it for so many things around the house that when I find a sale I purchase several yards at a time so I always have some on hand.


For our flag we need a piece that is 1” by 3”.


To begin our flag we are going to paint a background.


I decided to use fabric paints although if you don't have any plain craft paint could be used. I just prefer to use fabric paint on fabric since it is formulated to work better. In this case it is totally optional though.


I wanted my pot of gold to be set against a blue sky so I wanted a light blue color that was slightly mottled with white. To achieve this since I have a limited range of colors in my fabric paint collection I mixed some white (about 2 drops) with the blue I have (about 1 drop) I used a toothpick to mix these but left some color streaking. I then used a plain cotton ball to apply the paint. Don't go too heavy you want a sky with some clouds look.


This then needs to dry completely before we can move onto the next step.


Once the paint was completely dry I added my rainbow. I wanted to have the colors of rainbow be really vibrant against the sky and I wanted to have the control to place the colors exactly where I wanted them. To do this I chose to use alcohol markers, mine are made by Bic but any brand will work, you could use anything from Sharpies to Copic markers or a mix of different brands. I recommend working on a piece of plain white paper (I use a folded piece of printer paper) this will help to soak up some of the excess ink and keep bleeding to a minimum. I did finger press the crease at the top of flag to aid in placement of my rainbow and don't forget you need to do one on each end so that your flag will be two sided.


Now the ink needs a couple of hours to dry and cure, I found in playing around with this project that if I tried to move to the next step too quickly it just didn't work, the glue on the paper backed fusible wouldn't stick. After a few hours however it worked just fine.


So now we are going to make a flag out of our strip of fabric. To do this we need to adhere the loose ends of the strip to form a flag. I am using a paper backed fusible web for this. I feel it is far superior to glue for this project and is very easy to use.


If you are not familiar with this product let me do a short explanation here for you.


Basically what this is is a piece of paper with a heat activated glue on it. You use the heat of an iron to apply it to the back of the first piece of fabric, remove the paper backing and then use the iron to add the second fabric.


The brand of the product I am using is Heat 'n Bond, and I am using the ultra hold variety. I do recommend this for this project. It is easy to find prepackaged in pretty much any store that sells fabric.


The iron I am using is from the Tulip company (same as the fabric paint) and is sold in craft stores near the other fabric embellishment stuff. It is fairly inexpensive (around $15) and great to have on hand for craft project where you don't want to haul out the big iron and ironing board. I used a wooden cutting board covered with a piece of printer paper as my ironing surface.


Once you have your flag fused together we can paint on the pot of gold. This is going to be done in a couple of easy steps.


First the pot of gold is a simple shape at the bottom of the flag. Once again I used some of my fabric paint for this. I do recommend a small stiff, flat brush like I used in the video. For the second side I grabbed a different shape brush and it was a bit harder to get the right shape. 


Once the black paint is dry you can add the gold coins to the pot. Since I don't have any gold paint in my collection of fabric paint I used my gold Brushed Metal paint that Plaid sent to me. It is fine for this since the flag is for decoration only. To apply the paint I used the flat end of a wooden skewer from the kitchen, it worked great to make coin shapes.


Once the gold was dry I did the extra step of adding some gold glitter 3-D paint using the same skewer.


Once the gold glitter was dry I trimmed any loose threads and the flag was ready to hang on the dollhouse. I love this flag and can't wait to come up with more seasonal designs in the coming months.


As always I do want to sincerely thank all of you for watching my videos and reading my blog posts. It means so much to me that you are supporting me in this way. If I could ask you all to do just a bit more by subscribing to the channel and liking the videos and leaving comments. Those help more than you can imagine. Also if you could pass the links on to your friends I would appreciate it so much.


Sunday, February 20, 2022

Dollhouse Miniature Coffee Maker


Watch the video here.


So I have been working off and on on this video since the end of December. I knew I wanted to make a coffee maker for the dollhouse kitchen and I had a couple of ideas for what I wanted to do. In fact the basic coffee maker is one I have been making for many years. I used to sell one with the same base part a different coffee pot part. I also did a tutorial for my Patreon page back when I had that up and running. The old version had the pot made out of a large clear bead (I think it was about ½” in diameter) but for this version I wanted to “modernize” it a bit and make a coffee pot that had a more cylinder shape. I have lost track of how many different ideas I tried over the last almost 2 months but it was a lot. Some were total failures, some worked out okay but when I tried to replicate them I couldn't get them to work out again. This one while I feel there is room for improvement is the closest to what I wanted to make at least so far. I felt happy enough to take the time and energy to make a tutorial on it. I may do another version in the future, who knows.


So for the coffee maker part we need the following items.


From heavy white paper (I used some 140lb watercolor paper) we need 2 circles that are ½” in diameter.


From either a really thick paper or a piece of double layer card-stock a strip that is 1/8” wide by 3” or 4”.


From card-stock that is painted silver (I painted mine with one coat of grey craft paint then one coat of silver) 2 strips that are 1/8” by about 4”


From white card-stock a 1” wide piece that is a few inches long (depending on your dowel you might not need this piece, I'll discuss this later)


From a 5/8” wide craft-stick cut two pieces (1 from each end) that are 1 ¼” long, you will need the round ends of the craft-stick on both pieces.


A small wooden spool that has been cut shorter to look like the filter holder.


And finally a piece of 5/8” dowel cut 1” long.

A thin round wooden shape ½” in diameter (you could use a round of black card-stock for this if you don't have the wood piece)


Once all the pieces needed are cut and gathered we can start building.


First step is to glue the two heavy paper disks together with the double layer strip extending from them. This will become the lid/handle unit.


Glue the cut spool to the round end of one of the craft-stick pieces.


Once this is set up add the dowel and the other craft-stick piece and allow to dry.


Since the dowels I have in this size are made of a really coarse wood I decided to wrap that part of my coffee maker in the strip of card-stock to make a nicer finish. If your dowels are nice and smooth you won't need to do this step.


Once all the glue is dry paint the body of the coffee maker with white craft paint. It will most likely take 2 coats at least.


Paint the small wooden circle with some black craft paint.


Now onto creating the coffee pot portion of our project.


I am using a sheet of acetate, I purchased this tablet of acetate sheets probably 20 or more years ago. And I although I have used them in many projects I still have a lot left. Here is a link to a similar product.


One of the problems I ran into in coming up with a way to make the coffee pot was a good way of cutting something that is so hard to see. I couldn't mark the acetate sheet with cutting lines and without cutting lines it was very difficult to get straight cuts.


Then I came up with the idea of making the lines on a piece of paper then taping the acetate to that paper and cutting both.


Since my acetate sheets are 9” wide I decided to make my life easier and use a piece of printer paper turned on it's side. That way I could line the acetate up and have room on both sides to tape it securely.


I don't remember what order I drew the lines in the video, as long as you put them in the same places the order, for the most part doesn't matter.


I drew a line ½” from the left side of my pattern paper, this is the line the that the left edge of my acetate sheet will line up with.


Next I drew a line 3 ½” from the left edge of the pattern paper. This is where I will transition the cut size of the pattern.


Now I drew a line ½” down from the top (long) edge of my pattern paper. This is the cut line that will determine the height of the coffee pot.


Now from the 3 ½” line draw a line 1/8” up from the ½” long line. And then draw another line 1/8” from the top of the page starting at the same point.


Hopefully that description along with what I did in the video will help you to get all the lines in the right places.


Now using a couple of pieces of masking tape adhere the acetate sheet to the pattern page lining the left side of the sheet to the line ½” from the left edge of the page and the top edge of the acetate with the top edge of page.


Make sure you tape your acetate really well in the area you are going to cut off. You want the pattern page piece to be taped still when it is cut away from the rest of the piece of paper.


Carefully cut as shown in the video to give you the piece needed to make the coffee pot.


Now for those that have been with me for a while you know that I am not a fan of the hot glue gun. I tried every glue I had on hand and nothing else worked as well. That being said I did have to try all 4 of my glue guns to find the right combo of glue gun and glue. Some melted a hole in the plastic, this one did too if I put the glue on directly, but with a toothpick it was fine.


Some of them left a cloudy haze when the glue cured. The big glue gun I used in the video with it's glue sticks worked well and dried clear. Before you ask I have not idea what brand glue sticks I have since they are just dumped into the drawer where my glue gun lives.


Heat the glue gun on low heat.
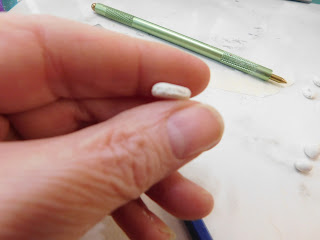
I did use a bit of transparent tape to hold the beginning of the roll together. I used a permanent marker pen as my base to roll the pot around.


Be really careful to keep everything rolled tight and straight. Add a few dots of glue as needed to hold this together, just remember every drop of glue has the potential of showing so just do them where needed.


Once you have the coffee pot rolled use some glue to hold the end of the strip to the rolled shape and carefully slide it off the pen.


Now use a pool of glue to glue the coffee pot to a scrap of acetate and allow this to harden.


Once hardened trim the excess acetate and glue away from your coffee pot body.


Glue the lid/handle unit to the top of the coffee pot.


Add the silver strips as shown in the video.


Once all the hot glue is dry coat the coffee pot with some clear nail polish. I found this to be the perfect finish for the acetate and it had the bonus of helping to hold everything together.


Give the part of the coffee maker that you painted white a coat of satin Mod Podge and allow to dry.


Glue the black disk onto the correct area of the coffee maker and allow the glue to dry.


Once everything is dry try to place the coffee pot into the coffee maker. If it is too tight to slide in sand away at the filter holder area until it fits. I did have to sand mine a bit to get it to fit in. You want this to bit hard to get in place so it doesn't come out every time the dollhouse is bumped.


There you have it, a coffee maker to put in the dollhouse kitchen. Pair it with the mug tree (video can be found here) and the mugs (video here) that we made a few years ago and I think the dolls will be very happy.


As always I do want to sincerely thank all of you for watching my videos and reading my blog posts. It means so much to me that you are supporting me in this way. If I could ask you all to do just a bit more by subscribing to the channel and liking the videos and leaving comments. Those help more than you can imagine. Also if you could pass the links on to your friends I would appreciate it so much.


Saturday, February 19, 2022

Dollhouse Miniature Doughnuts


Watch the video here.


For our Saturday tutorial this week I decided that the dolls in the dollhosue needed to have some doughnuts. Well, I really wanted doughnuts but the weather wasn't something I wanted to deal with to go the store for real doughnuts so I decided to make some mini ones.


We only need one color of clay for this project, a soft white one. I am using Original Sculpey but use what you have.


Start by making some ¼” balls of clay, one for each doughnut. If you want to make some Maple Bars (or whatever they call them where you live) make some balls of clay that are slightly larger.


Let's make the doughnuts first- start with that ball of clay and flatten it into a thick disk shape.


Now using a pointed tool make the hole in the center. I have regular clay tool for this but a sharpened piece of dowel or a thin paint brush handle would work also.


After you have your doughnuts formed use a pointy tool to make a textured band around the outside of the doughnut shape.


For the maple bars roll the balls into fat short logs then flattened the log into a bar shape.


Do the same texturing around the outside edge of each bar.


Use some yellow ocher chalk to color the shapes.


Then using a reddish brown chalk color the top and bottom (avoiding the textured area)


Now bake your doughnuts for 10 minutes at the temperature recommended for your clay.


Time to mix the icing we are using the same TLS (Translucent Liquid Sculpey) and oil paint mixture we used last week. This time we are making 4 colors of icing using 4 colors of paint- Titanium White, Burnt Umber, Yellow Ocher, and Rose Madder.


For our chocolate icing just use a tiny bit of the burnt umber in the TLS and mix to combine.


For white, the white paint.


For the Maple icing the yellow ocher with a tiny touch of the burnt umber.


And finally for the pink some white with the tiniest touch of the red.


A note about red oil paint in TLS. I have found that most reds that I have tried tend to drift to an orange color when baked in TLS, the Rose Madder is the exception to this.


Now add the icing to your doughnuts in whatever combinations you desire. There are thousands of pictures online to inspire you.


I also used some of my stash of no-hole micro beads for sprinkles on some of my doughnuts.


Bake the iced doughnuts at recommended temperature for 10 minutes to cure the TLS.


And your mini doughnuts are ready for the dolls to enjoy.


As always I do want to sincerely thank all of you for watching my videos and reading my blog posts. It means so much to me that you are supporting me in this way. If I could ask you all to do just a bit more by subscribing to the channel and liking the videos and leaving comments. Those help more than you can imagine. Also if you could pass the links on to your friends I would appreciate it so much.