
This week for the Tuesday tutorial I have really quick little project, another doormat, this time one for Saint Patrick's Day. Now I will be the first one to admit I don't generally do a lot of decorating on my real home for this holiday I do love to decorate the dollhouse for it. The decorations are so cute and so much easier to store for next year than the same items would be in real size. So let's go all out for all the holidays for the dollhouse.
Just like all of the doormats I have made lately I am starting with a piece of felt that measures 1 ½” by 2 ½” in size. The felt I am using is some I bought several years ago by the yard in a fabric store so it is slightly heavier in weight than the felt you will find in the squares at most craft-stores. Either would work just fine so if you don't want to invest in a big chunk of the felt by the yard pick up some of the squares next time you visit the craft-store. I do love that this piece is this rusty brown color since that is kind of close the color of the real doormats I am being inspired by here.
I want to let you know that the Mod Podge, the green paint and the paint brushes used were provided to me by Plaid to use in videos for you.
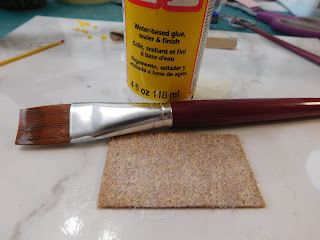
Just like the last several of these mats I started by giving the felt a good coat of Mat Mod Podge. This does two things, It stiffens up the felt a bit so it lays better on the dollhouse porch and it seals the surface to the felt doesn't soak up so much of any paint we put on the surface.
This time I decided to skip the layer of paint for a background color and go with the more “natural” color for this mat.
Most of the time when I am laying out my letters on projects like this I sketch in my letters with a pencil. This wouldn't work on the mat this time so I came up with another way to line my letters up. First I laid down some masking tape on my work surface and marked the size of my mat (2 ½”) with pencil marks. Then I marked the center point. I then taped my doormat on the work surface just under this tape. That way I had a reference point for spacing my letters.
I wrote out the word “home” leaving out the “o” but leaving a space for it.

When the black painted letters were dry I then used some bright green paint (Folkart Multi-Surface in Bright Green) to make a shamrock in the place of the “o” in the word home. I used a fat paint brush handle to place 2 dots for each lobe of the shamrock leaf then a small paint brush to connect those shapes and to add a stem. I think it turned out really cute.
And that is all there is to making this doormat. So easy but so darn cute and a great welcome for all the friends the doll family might have visiting this next month or so.
As always I do want to sincerely thank all of you for watching my videos and reading my blog posts. It means so much to me that you are supporting me in this way. If I could ask you all to do just a bit more by subscribing to the channel and liking the videos and leaving comments. Those help more than you can imagine. Also if you could pass the links on to your friends I would appreciate it so much.
No comments:
Post a Comment