
I was looking around online for ideas for today's video and kept seeing all the cute flags people were hanging on their front porches for the seasons. Since I didn't have a way to hang a flag I decided that would be the first step to adding a flag to our dollhouse front porches. So today's video is here to fill that need.
I looked at several styles of flag brackets that are made for both real houses and those available in miniature. I took ideas from several and after a bit of looking through my stash of bits and pieces today's project is what I came up with.

The
parts I used were: a small wooden spool, a regular size craft-stick,
a toothpick and a very small wooden bead
For the bracket itself I decided to use a wooden spool mounted on a piece of craft-stick. Since I wanted my flag to hang at an angle I cut the spool with my Easy Cutter (see my review of this tool here) at a 45° angle. The spool did split a tiny bit and the small piece I cut off did fall apart but the result was just what I needed to give my bracket the angle I wanted. I am sure you could use one of the small miter boxes also if you don't have an Easy Cutter. I also cut a piece of the craft-stick to 1” long to use as the back plate of my bracket.

Once the pieces were cut and sanded I glued the spool to the piece of craft-stick slightly up from the cut edge and centered side to side.
I also glued the bead to the end of the toothpick.
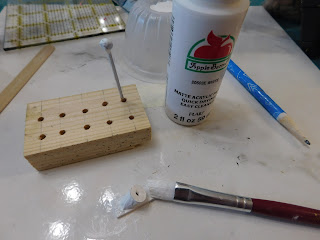
Once the glue dried I cut the extra end off the toothpick and then painted both pieces with 2 coats of white paint.

Once the paint dried I gave both a coat of Satin Mod Podge.
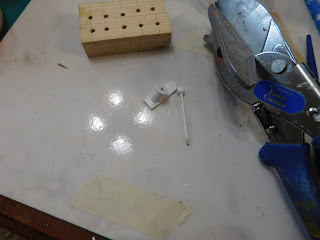
To attach the flag bracket to your dollhouse I recommend using some tacky glue which is what I will do once I am certain where I want to place it. In the meantime I used some poster tack to temporarily hold it in place on one of the porch posts. I also want to see what I looks like on the other post and the front wall of the dollhouse.
In future videos we will make some cute flags to go on the flag bracket so stay tuned for that. The one I used today I just threw together to get an idea of what size everything was going to be and to help me figure out how to make the bracket.

As always I do want to sincerely thank all of you for watching my videos and reading my blog posts. It means so much to me that you are supporting me in this way. If I could ask you all to do just a bit more by subscribing to the channel and liking the videos and leaving comments. Those help more than you can imagine. Also if you could pass the links on to your friends I would appreciate it so much.
No comments:
Post a Comment