
Today for the Saturday tutorial we plating the steak dinner and dessert we have been making for the last few weeks. I am using some plates I had on hand from some experiments I have been doing for a future tutorial. Use whatever miniature plates you have on hand.
For the dinner we need a plate that is about ⅞” in diameter to make a good in scale plate for 1/12th

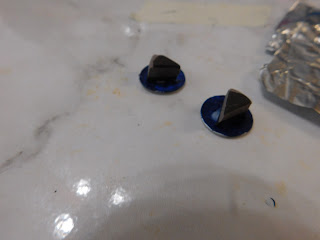
You just need a tiny bit on the bottoms of your food items to make this work. If you use too much you run the risk of it leaking past the edges of the food and that would no be as attractive.
Once you are happy with the placement of your food items on your plate bake at the temperature recommended on the bottle of TLS for 10 minutes. Allow to cool and your plates are ready to place in a scene in your dollhouse or a mini restaurant.

For the dessert we are going to be doing a 2 step process today. For this portion of the project I am using some smaller “dessert” size plates that measure ⅝” in diameter.

First just like the with the dinner pieces we are using a tiny bit of TLS on the bottoms of our cheesecake wedges to stick them to the plates and bake for 10 minutes. This will assure we don't knock our dessert off the plates while we put on the glaze.

For the glaze step I am mixing some white oil paint into my TLS and using that for a glaze. This mixture is much thinner than we get when we mix TLS with polymer clay. The oil paints I use are mostly from a really cheap set I purchased several years ago at a craft store. You don't need high end paints for this.

Make sure the oil paint and TLS are mixed completely then use a toothpick or other pointy type tool to put the glaze exactly where you want it. When you are happy bake for another 10 minutes.
Since this oil paint/TLS bakes up with a slightly shiny surface it doesn't need any finishing once bake.
So there you have our special steak dinner for the dollhouse dolls to celebrate a special occasion or just a good dinner to place on the table to help tell the story of you what is happening in the dollhouse.
Now let's talk about adding the paint to the TLS, I have used this technique in the past and I love the look it gives. This week for the topping on the cheesecake it is the perfect glaze/icing to give the dessert the look I am looking for.
I know there are some tutorials out there that tell you can use acrylic paints in TLS, they are wrong. I did a lot of research on this before I ever used it in a tutorial since I wanted to make sure I was giving the best advice. The problem with acrylic paints is the water content. The water that is a normal part of the acrylic paint can actually boil and explode when heated in the oven. The oil paint does not run this risk. So be safe and use the oil paints, like I said you don't need expensive paints to do this.
As always I do want to sincerely thank all of you for watching my videos and reading my blog posts. It means so much to me that you are supporting me in this way. If I could ask you all to do just a bit more by subscribing to the channel and liking the videos and leaving comments. Those help more than you can imagine. Also if you could pass the links on to your friends I would appreciate it so much.
No comments:
Post a Comment