
For our Saturday tutorial this week I decided that the dolls in the dollhosue needed to have some doughnuts. Well, I really wanted doughnuts but the weather wasn't something I wanted to deal with to go the store for real doughnuts so I decided to make some mini ones.
We only need one color of clay for this project, a soft white one. I am using Original Sculpey but use what you have.

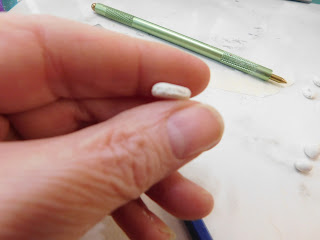
Start by making some ¼” balls of clay, one for each doughnut. If you want to make some Maple Bars (or whatever they call them where you live) make some balls of clay that are slightly larger.

Let's make the doughnuts first- start with that ball of clay and flatten it into a thick disk shape.

Now using a pointed tool make the hole in the center. I have regular clay tool for this but a sharpened piece of dowel or a thin paint brush handle would work also.


After you have your doughnuts formed use a pointy tool to make a textured band around the outside of the doughnut shape.

For
the maple bars roll the balls into fat short logs then flattened the
log into a bar shape.
Do the same texturing around the outside edge of each bar.

Use some yellow ocher chalk to color the shapes.

Then using a reddish brown chalk color the top and bottom (avoiding the textured area)
Now bake your doughnuts for 10 minutes at the temperature recommended for your clay.

Time to mix the icing we are using the same TLS (Translucent Liquid Sculpey) and oil paint mixture we used last week. This time we are making 4 colors of icing using 4 colors of paint- Titanium White, Burnt Umber, Yellow Ocher, and Rose Madder.
For our chocolate icing just use a tiny bit of the burnt umber in the TLS and mix to combine.
For white, the white paint.
For the Maple icing the yellow ocher with a tiny touch of the burnt umber.
And finally for the pink some white with the tiniest touch of the red.
A note about red oil paint in TLS. I have found that most reds that I have tried tend to drift to an orange color when baked in TLS, the Rose Madder is the exception to this.
Now add the icing to your doughnuts in whatever combinations you desire. There are thousands of pictures online to inspire you.
I also used some of my stash of no-hole micro beads for sprinkles on some of my doughnuts.
Bake the iced doughnuts at recommended temperature for 10 minutes to cure the TLS.

And your mini doughnuts are ready for the dolls to enjoy.

As always I do want to sincerely thank all of you for watching my videos and reading my blog posts. It means so much to me that you are supporting me in this way. If I could ask you all to do just a bit more by subscribing to the channel and liking the videos and leaving comments. Those help more than you can imagine. Also if you could pass the links on to your friends I would appreciate it so much.
No comments:
Post a Comment