This week I wanted to add to our cactus themed set of front porch decor with a fun garden flag. As is my normal first step on these projects I did a Google search to see what is out there for real size homes. As I was looking through the cactus garden flags on in particular caught my eye. It had just a silhouette of a cactus set against a sky that was designed to look like a sunset, with beautiful yellow, orange and red tones. It was already a simple design but I did take the liberty of simplifying it a bit more for the sake of our smaller scale. I immediately knew how I wanted to do the wash of color on the background. I love using my alcohol markers for backgrounds like this and was so happy to be able to feature the technique here today.
But first things first, we need to start with the base for our garden flag, I like to use 100% cotton bleached muslin fabric. This is a rather inexpensive fabric that should be available at any stores that sell basic fabrics. It comes in many widths from 36” to 120” (or maybe wider at some stores) and is usually one of the cheaper fabrics. The fact that it is100% cotton means it is very versatile and will work with just about any technique I want to do.
I did start with my piece of fabric slightly over size today and then trimmed it to size before I finishing. You can start with yours the exact size or trim later. You will need to have a fabric piece that is 1” by 3” to make the flag at the end.
Start by laying your fabric on a piece of folded plain white paper (printer paper is perfect) this will absorb some of the mess we are going to be making. To color the background I am using my BIC brand alcohol markers but any brand will work so use whatever you have. Anything from Sharpies to Copics will be fine here. I found this package of BIC markers at Walmart a couple of years ago and even though I have a really nice set of markers I use for card making I pull these out for other crafting all the time.
Use your lightest color marker first, in today's flag that is my yellow. Color most of the flag blank with this color. Don't worry about getting a perfect coat of color but do try to make your marks horizontal since this is supposed to represent the sky at sunset.
Once the yellow is covering most of the fabric add some orange and then red lines to the fabric.
Now using some isopropyl alcohol (at least 70%, 90% is best for this) in a spray bottle get the fabric nice and wet. This will allow the ink to activate and blend. Allow to dry completely.
Once dry add any more color as desired. I added just a few red lines. Then re-spray with the alcohol and allow to dry again.
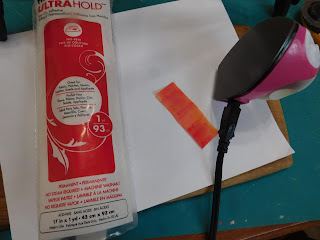
Once dry we are going to use a 1” square of Heat'n Bond ultra to glue our flag together. Be sure to leave the area nearest the fold free to slide onto the flag bracket. I have covered how to use this product in previous blog posts on the other garden flags so I won't cover it in detail here. If you need more complete directions look back at the bunny flag from last month.
Once the Heat 'n Bond has been applied we can add our cactus. I decided to add the cactus at this point because I wanted to have my cactus on each side to be back to back with each other this time.
By painting a cactus on the first side with my paint pen I was able to use the bleed through as a guide to paint the cactus on the second side. I did go back to the first side and neatened it up off camera but it was super easy to find the placement and trace what I had done of the first side.
Now all we need to do is slip the flag onto to the flag bracket on the dollhouse front porch and the doll family can sit back and enjoy their cactus themed decorations.
A little side note as I said in the video this is the first video I have actually edited with my new editing software and I know I have a few bugs to work out yet. Please be patient as I learn this new very powerful piece of software.
As always I do want to sincerely thank all of you for watching my videos and reading my blog posts. It means so much to me that you are supporting me in this way. If I could ask you all to do just a bit more by subscribing to the channel and liking the videos and leaving comments. Those help more than you can imagine. Also if you could pass the links on to your friends I would appreciate it so much.


No comments:
Post a Comment