
I am doing my best to give you all the holiday projects so you have time to get them done and enjoy them before the holiday arrives so this month we are going heavy into Valentine's Day projects.
This week for our Tuesday project I wanted to do another porch sign, I really enjoyed the ones I made earlier for the other holidays. This time I am going a bit rustic and sticking with the black background I used for the doormat last week. In fact all the paints I used this week were also in the doormat. I am tying to give you a set of projects that looks like a set of items you might find in a high-end store.
The sign I am making today is actually inspired by several signs I found in my search of the internet. I had found a really wonderful rustic sign for fall way back in November but it was too late to use it then and I didn't want to go that rustic for Christmas, so I just kept the idea in my brain till I could use it. Then when I started looking at Valentine's Day porch signs that were for sale for life size homes I found that the ones I was drawn to were on the rustic side. That for me meant it was time to use this wonderful idea.

The
first step was to cut the boards for the base of the sign. For this I
am again using some of the slim sticks from Hobby lobby. You can use
skinny sticks if you have those or coffee stir sticks. I cut 4 of
them to be around 5” long and used 3 short bits of craft-stick (a
little less than ¾” long) to hold them together.


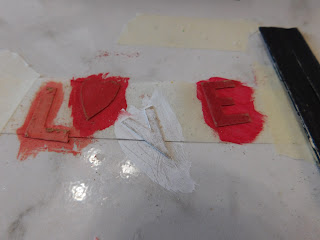
Once this is done it is time to paint everything. I painted the sign base in black and each letter in a different shade using reds, pink and white. I did need to give a couple of the letters a second coat to get the color the way I wanted it.

I
then took some sandpaper and distressed the edges of both the sign
base and the letters. I carefully sanded the paint back to reveal the
wood of the sign and the Kraft color of the card-stock which gives
the card-stock the impression it is wood.

I
then glued the letters onto the sigh trying to keep them spaced out
evenly.

Once
the glue dried I added a coat of mat Mod Podge to both seal the
finish and help to make sure the paper layers will stay in place.
Once dry I wanted to add a “jute” bow. The problem being the only jute twine I have is way too big to use in this project. I did try separating the strands of my twine but the result was a messy kinked up strand of rope. So I dug through my embroidery floss and came up with the closest color I could find which was a kind of buff color. It works and just looks like a lighter colored jute.

I
wrapped this floss around the top of the sign a few times and tied a
bow. I them added a couple of dots of glue and clamped the bow in
place until the glue dried to make sure it would stay where I put it.

I then cut off the excess floss and adjusted the way the wrap was placed.
The sign is now ready to take its place next to the front door of the dollhouse or in the corner of a mini room.

As always I do want to sincerely thank all of you for watching my videos and reading my blog posts. It means so much to me that you are supporting me in this way. If I could ask you all to do just a bit more by subscribing to the channel and liking the videos and leaving comments. Those help more than you can imagine. Also if you could pass the links on to your friends I would appreciate it so much.
No comments:
Post a Comment