
We start the cookie jar like pretty much all the others we have made, with a card-stock core or base. This is made from a strip of white card-stock that is ¾” by 4” and is rolled around a Sharpie type marker and glued to form a tube. This allows us to have a sturdy base to build our cookie jar on and it also gives the inside of the cookie jar a nice finished appearance.

I do highly recommend using a thick tacky glue for this step and then allowing the glue to dry really well (overnight is probably best) This way the glue will not let go in the oven. At least that is what has worked best for me on these. The only time this method didn’t work for me was when I tried to rush and didn’t give the glue enough time to dry completely.

Once the glue on the card-stock base has dried we need to add a very thin layer of white polymer clay. This will give us a nice base to build our cookie jar on. For this I used Liquid Sculpey in White. I would much rather of used TLS (Translucent Liquid Sculpey) but I am almost out and couldn’t get any the last time I shopped.
Once you have the outside of the base covered including a bottom added bake for 10 minutes at the temperature recommended on your clay. We also need to make a small disk of clay that will fit inside the top of the cookie jar to form the lid on. Bake your pieces for 10 minutes and allow to cool to room temperature before moving to the next step.

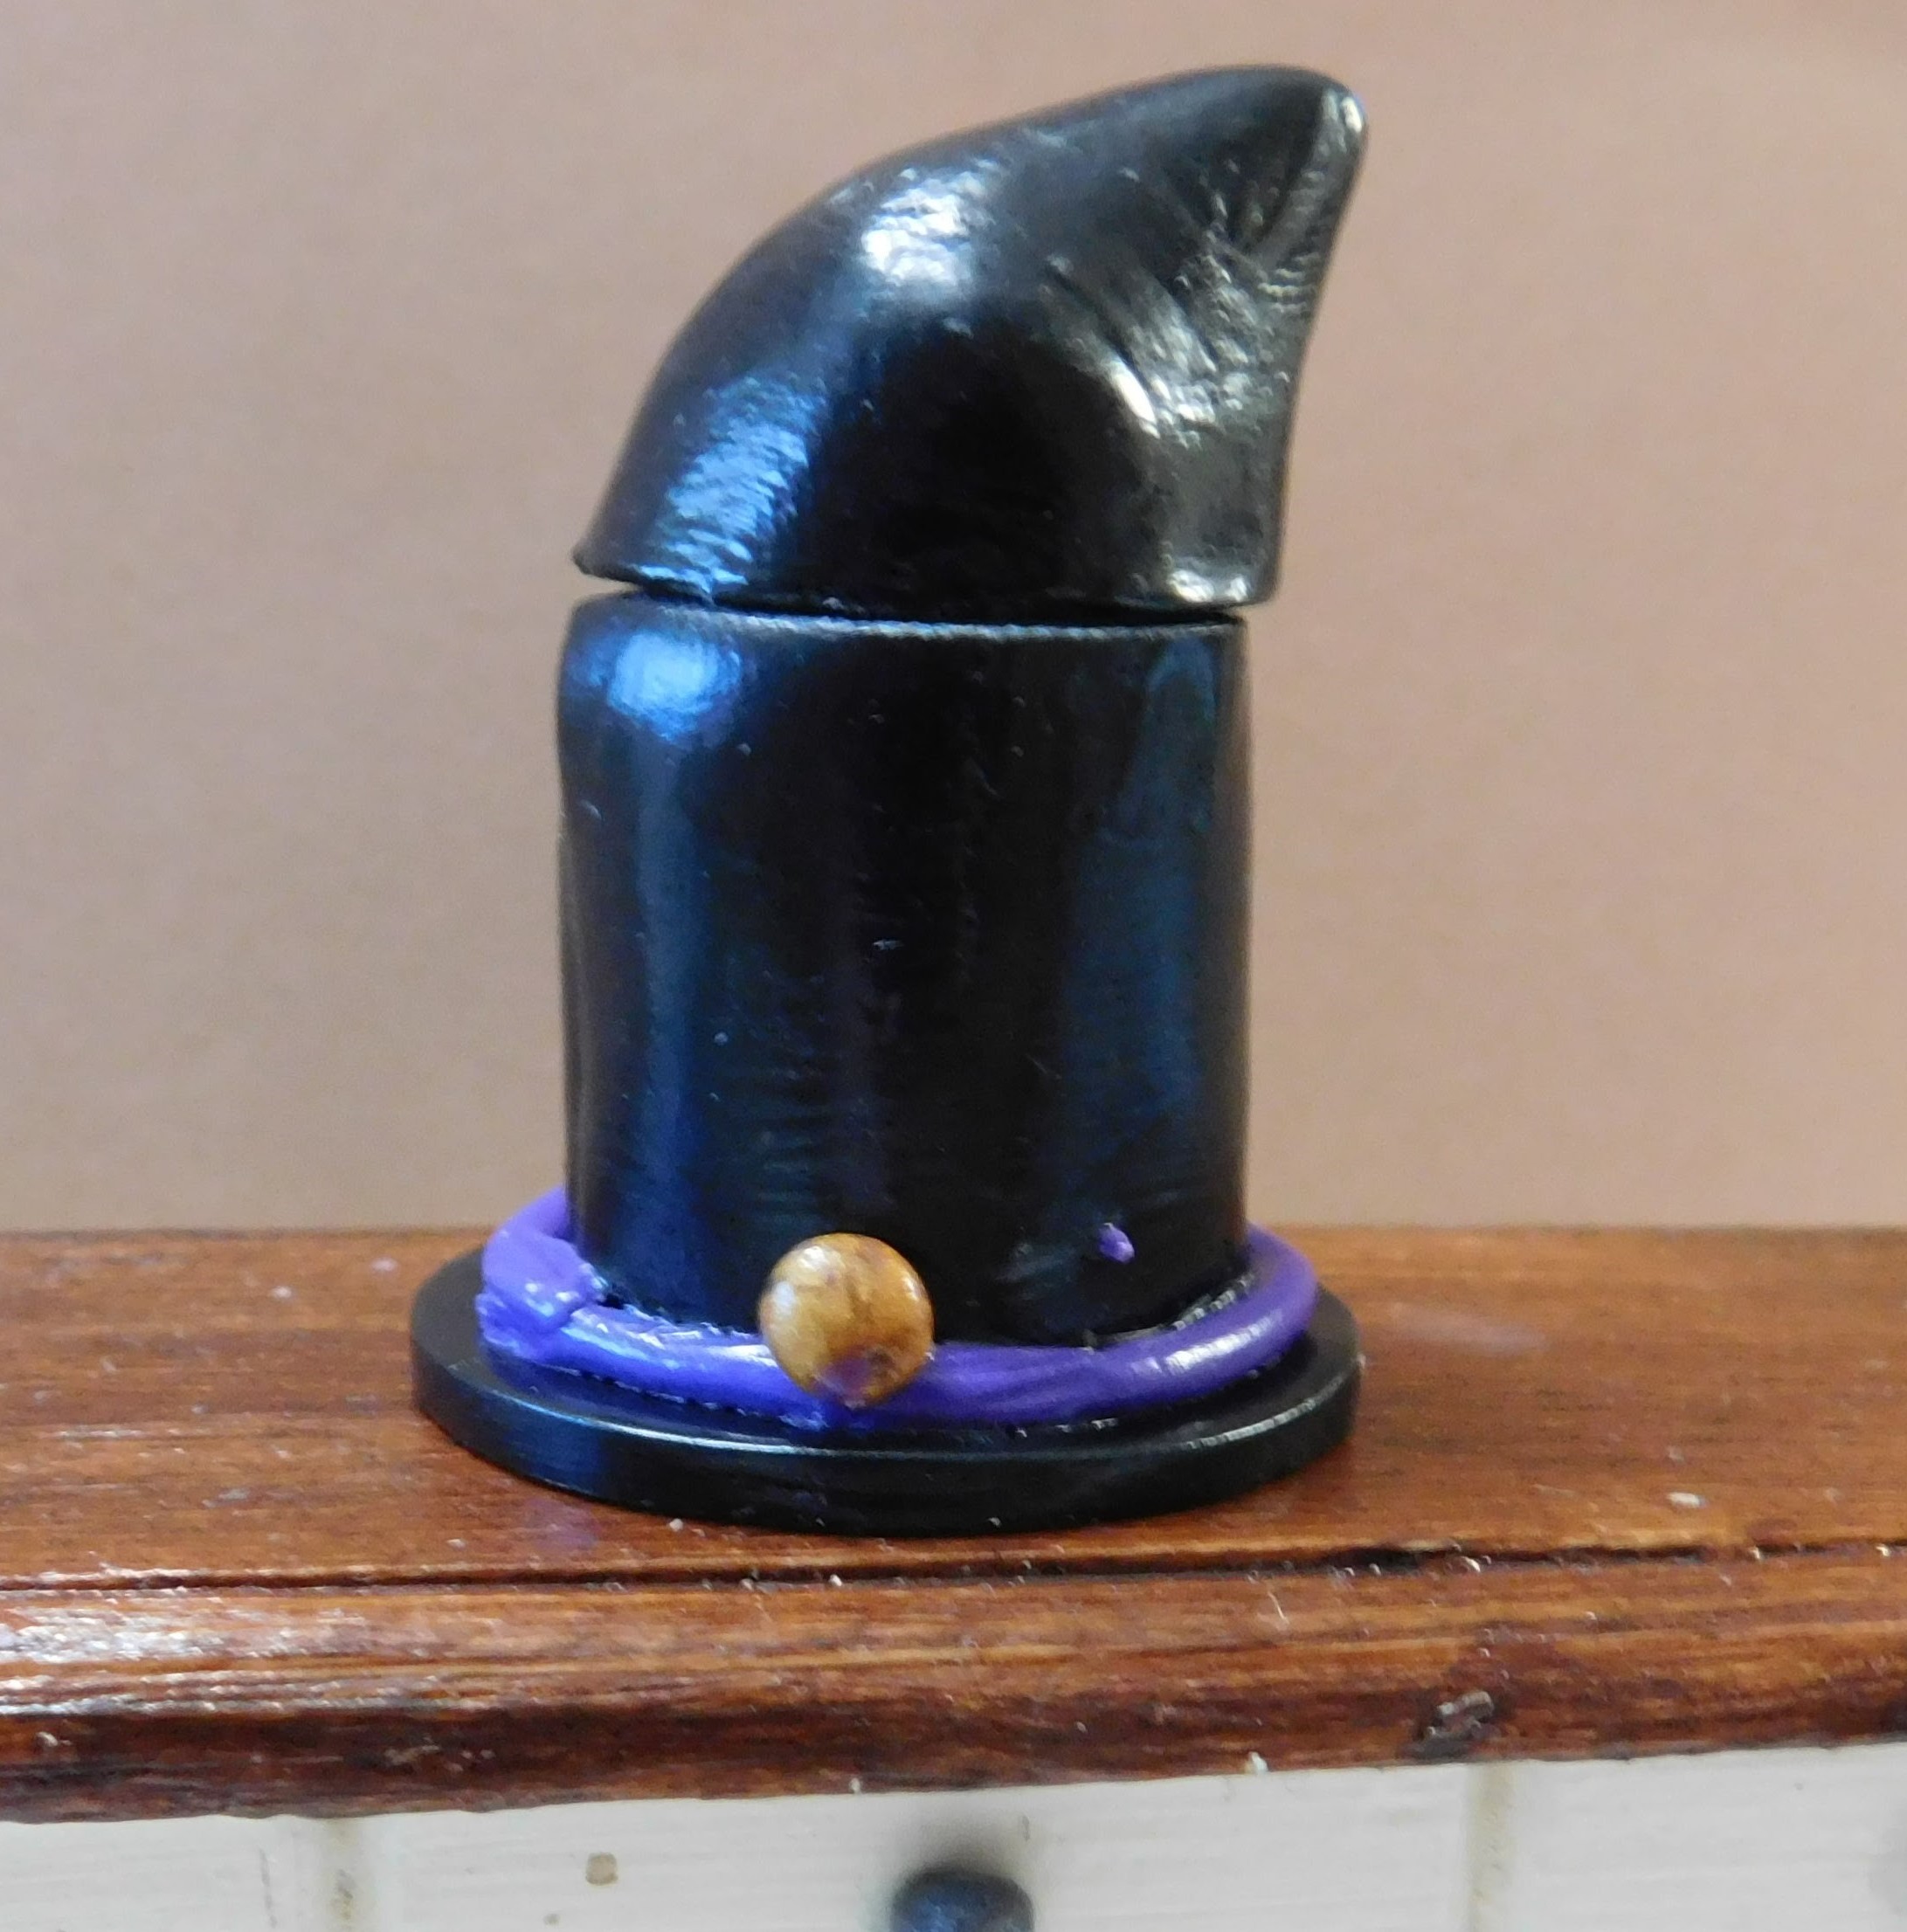
Now we can make this cookie jar look like a witch’s hat. We start by adding a thin layer of black clay. I used some Premo in Black this time. I rolled it out very thin and used some TLS (Translucent Liquid Sculpey) to attach it. I am almost out of the TLS and any only using it where I really feel I need to until I can get more clear/translucent liquid clay. Trim this black clay as best you can on both the top edge and the bottom. Also work on the seam with your fingers to smooth and minimize it. Now roll out some more of the black clay using a couple of craft-sticks to get a nice even thickness for the brim. I used my round clay cutter that is about 1” in diameter. Use a bit more TLS to attach this part and make sure your cookie jar is centered on the brim.
Back for 10 minutes at the temperature recommended for you clay and allow to cool.
Now that the main part of the cookie jar is baked we might need to even up the top edge. To do this tun it upside down on a piece of coarse sandpaper and carefully remove any un-eveness from the top edge. Be very careful to hold your cookie straight up and down while doing this.

Now use some more black clay to make the pointed part of the hat that will serve as the lid to our cookie jar. To do this start with a ball of clay and work with it until you like the shape. I like to place a small piece of parchment paper over the top of the cookie jar and really make sure the lid is the correct size and shape. Once you are happy with the lid bake at the recommended temperature for your clay for 20 minutes. We want to be very certain we get the clay all the way in the middle of the piece baked. Allow to cool to room temperature.

If needed even up the bottom of the lid with your sandpaper just like for the cookie jar. Now cradle the lid upside down in some foil to keep it level and use some TLS to attach the little piece we formed from the white clay.

At this point we can add trim to the cookie jar also. I used some purple Fimo to form a thin snake that would go all the way around the hat where it meets the brim to form a hat band. I also made a tiny ball of gold metallic Premo as a bit of a decoration.
I decided to forgo the liquid clay on this step because I didn’t think I could apply it so that it would not show on the finished cookie jar. Even the TLS will show up against the black. Since this piece is in a rather protected area and the purple clay goes all the way around and meets itself I am fairly sure it will be fine.
Bake both pieces for another 10 minutes at the recommended temperature and allow to cool to room temperature.

The last step is to apply a thin even coat of Satin Mod Podge to the outside of the cookie jar. This will not only add a nice finish but also give me a tiny bit more insurance that the purple band won’t come off later. Allow to dry.
And there have the newest addition the cookie jar collection.

As always I do want to sincerely thank all of you for watching my videos and reading my blog posts. It means so much to me that you are supporting me in this way. If I could ask you all to do just a bit more by subscribing to the channel and liking the videos and leaving comments. Those help more than you can imagine. Also if you could pass the links on to your friends I would appreciate it so much.
No comments:
Post a Comment