I just had to create a pair of these witch’s legs for the dollhouse this year. Every time I see them in real life I chuckle so I decided the doll family has to get in on the fun.
If you have the area around your dollhouse landscaped you could skip the pot of beads and just poke the legs into the lawn or a flower bed but since I haven’t even thought about doing the landscaping yet I put mine into a big pot.
So to start we first need to create the witch's shoes and legs. I did these very much like the crashed witch project from last year. I used some black polymer clay which I rolled into a rather fat snake. (about ¼” in diameter, maybe a bit bigger) then I cut 4 slices that were about ¼” long and two snakes that were somewhere in the neighborhood of 1 ¼” to 1 ½” long. I didn’t measure I rolled and cut pieces that looked right. Make the snake of clay to come a point on one end.
Then I cut some wire to be about 3” long. The wire I used is kind of heavy but very bendable, I think I got it at Dollar Tree in the floral area.
I dipped the end of the wire into some TLS (Translucent Liquid Sculpey then put it through one of the slices.
Then I dipped it again and put the snake of clay on the wire.
Then dip one more time and add the second slice.
Now position the clay pieces at the very end of the wire and shape the snake so it looks like a shoe with the bottom slice acting as the heel of the shoe. Form the snake to an arch so it touches the surface in front of the heel.
Now cure the pointed end to look like the curled tip of a witch's shoe.
Bake the legs at the temperature recommended for the brand clay you are using for 15 minutes. Allow to cool.
While the clay was baking I painted my container black. I used one of the wooden candle cups you can usually get at the craft-store with the wooden shapes. I used black for mine. You can use pretty much any container for your witch.
Once this paint dries add a chunk of some kind of foam to your container. I used some floral foam since that was handy. Use some flue to make sure it stays in place.
Now we are going to cover the leg wires and give our witch legs. To do this I cut 2 strips of white card-stock 1 ½” by 5 ½”. I used my scissors to start the curl then wrapped it around a skewer. Now I coated the back of the strip with thick tacky glue and rolled it up over the skewer. Take it off to dry.
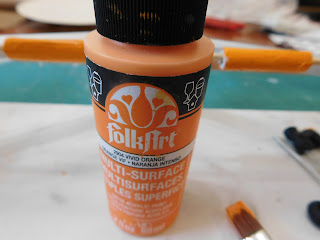
Now paint the legs as desired. I started by painting mine solid orange.
Then added some black stripes.
Allow to dry.
By now hopefully the glue from adding your foam to the pot is dry so you can trim the foam a bit below the top of the container and paint the top with the same black paint. And allow to dry.
Once the paint dries add a generous amount of tacky glue to the top of the foam. Slip the wires attached to the shoes into the card-stock legs and then slip them into position in your pot. Make sure the card-stock comes in contact with the glue.
Now add whatever filler you want. Since one of the ones I saw online was filled with sliced up pool noodles I decided to use pony beads to fill the top of mine. I felt they gave the same look and feel in mini form and I have a bunch of them leftover from making masks a few years ago. I picked out just some of the green, yellow and white ones. Add a layer of the beads over the tacky glue. Now be aware the tacky glue won’t do a great job of holding the plastic beads that is why we have a couple more steps coming.
Once the tacky glue dries completely, this took forever on mine. Add another layer of beads using some e6000 or a similar glue that will hold the beads better. Be sure to get some of the glue holding beads to the legs too. Allow to dry, making sure you give the glue ample time to cure.
Now coat everything in a coat of Satin Mod Podge. This will not only give it a finished look it will also aid a bit in holding everything together.
As always I do want to sincerely thank all of you for watching my videos and reading my blog posts. It means so much to me that you are supporting me in this way. If I could ask you all to do just a bit more by subscribing to the channel and liking the videos and leaving comments. Those help more than you can imagine. Also if you could pass the links on to your friends I would appreciate it so much.


No comments:
Post a Comment