Check back often

Have you checked out all my blogs?


Dollhouse Minis: http://joannesminis.blogspot.com


18” Dolls: http://joannes18dolls.blogspot.com/


General Crafts: http://joannes-place.blogspot.com/


Cooking: http://joanne-kitchen.blogspot.com/


Also if for some reason I can't post I will try to give a head's up on the Facebook page so check there too.

Sunday, January 29, 2023

Dollhouse Miniature Valentine Candy Box


Watch the video here.


In yesterday’s tutorial we made the chocolate candy so today we are making the box for the candy. We do want the dolls to be ready for Valentine’s Day.


This tutorial was actually a very last minute addition to the filming schedule so I didn’t have time to create a pattern for the box. You will have to just draw the lines from the measurements I gave in the video (and am repeating here of course)


Start on the edge of a sheet of medium weight card-stock and draw a line ¼” from the edge. Then another ½” from it and a third ¼“away. Now turn the paper 90° and draw a line ¼” from the edge, one ¾” from that line. And finally another ¼” away that one. Repeat the lines in this direction so you have both the box top and bottom.


I like to stop at this point and score the lines that need to be scored. I have much better luck with this at this point than after I cut the shape out. Once scored cut out along the outer lines and fold on all score lines.


Once you have pre-folded on the lines go ahead and release the tabs at the end of each long side and cut away the excess. Your shape should look like this now.


Fold the long sides in half and glue down.


Now fold up the ends gluing the tabs inside the end flaps.


Allow to dry.


If you want to make your box so the lid can fit on the box you will need to add just a bit of extra on box in place of the ½” and ¾” I didn’t have time to do the math on it this time.


Once the glue dries paint the top of the box with a red paint and allow to dry. I also painted the bottom piece with white to cover up the pencil lines.


Now you can decorate the top of the box as desire. I added a strip of washi tape but you could draw a heart or a bow or a flower. You could add a sticker, use your imagination. I do recommend whatever you do use actual glue to attach the decoration and don’t rely of the sticky on the back of things like stickers and wash tape.


Once decorated give the box a coat of Satin Mod Podge and allow to dry.


Use a clay friendly glue to attach your candies in the box. I designed the box to hold 12 of the chocolates we made in yesterday’s tutorial.


As always I do want to sincerely thank all of you for watching my videos and reading my blog posts. It means so much to me that you are supporting me in this way. If I could ask you all to do just a bit more by subscribing to the channel and liking the videos and leaving comments. Those help more than you can imagine. Also if you could pass the links on to your friends I would appreciate it so much.


Saturday, January 28, 2023

Dollhouse Miniature Chocolate Candy


Watch the video here.


I was pondering what to do for today’s tutorial and decided that since I had made chocolates over on my 18” doll channel I didn’t want the dolls in the dollhouse to feel left out. So today we are making some chocolates for them to exchange on Valentine’s day. And since I had to give you somewhere to put the chocolates I have a candy box for tomorrow’s tutorial so be sure to come back for that one.


You can use any dark brown polymer clay for this project, I am using Premo in Burnt Umber but all the major brands have wonderful dark brown colors. I mixed in some Translucent clay with my dark brown. First because my clay was very crumbly and I just didn’t have the patience for that this week. But even more importantly I wanted to make sue the finished candy didn’t have that heavy chalky appearance that dark colors can sometimes have. I mixed in a little bit less than an equal amount of the translucent clay.


Since I also wanted to make sure the dolls that preferred a milk chocolate had some choices I took some of that chocolate clay and added some white to it. For this one it is up to you how much, how light in color do you want the milk chocolate to be?


Making these candies is super simple. For the square ones I used my single layer craft sticks and rolled out my clay on a piece of 8 squares to the inch graph paper. This makes cutting your candy shapes so much easier. Just line you clay blade up on the lines and cut. 


For the squares I like them to be 1/8” by 1/8” this makes a nice size candy in this scale.


For the round candies roll the clay out the same way then place a piece of plastic wrap (the stuff from the kitchen) over the clay and use a cocktail straw to cut the clay. Be sure to twist the straw when you cut and the pieces should work out beautifully. 


The sheet of plastic wrap does two things. It allows the candy piece to be easily removed from the straw without distorting the shape. And it gives the candy a wonderful domed top just like the real candy pieces have.


Make as many candy pieces as you want then bake for 10 minutes at the temperature directed on your brand of clay. Allow to cool completely.


Now we just need to add a very thin coat of Satin Mod Podge to give the candy the sheen that real chocolate has. I did place mine on a piece of masking tape to corral them until I was ready to place them


As always I do want to sincerely thank all of you for watching my videos and reading my blog posts. It means so much to me that you are supporting me in this way. If I could ask you all to do just a bit more by subscribing to the channel and liking the videos and leaving comments. Those help more than you can imagine. Also if you could pass the links on to your friends I would appreciate it so much.

Wednesday, January 25, 2023

Dollhouse Miniature Valentine Gnome


Watch the video here.


I have to admit I love seeing the gnomes in all kinds of decor and I have been wanting to do some in mini for a while. I was having a challenging week last week and needed an escape so I sat down with my graphics program and put one together. You can expect to see several seasonal variations of this little guy over the next year of so.


Like all my projects that I have designed a pattern for I have both a PNG for use with electronic cutting machines and a PDF for hand cutting. You can find the file for this gnome here.


I designed the pattern to be cut from a medium weight card stock. I use white for most of my projects since paint is less likely to fade over time and the also the paint helps to bind all the layers together and hide the fact that there are in fact all those layers.


Here is a picture of the pieces still on the cutting mat after being cut by my Cricut. All I did was remove the excess paper from the mat so you could see the pieces. I do recommend leaving the pieces on the mat and removing them as you glue the stacks. That makes it much easier to keep everything organized. Do be careful because there are some pieces that are not symmetrical this time. The hat is obvious but the beard you might not notice. I wanted to make it more interesting that to have it completely symmetrical this time. Also there are meant to be two stacks of both the shoes/feet and the hands (be careful there is a right hand stack and a left hand stack 3 pieces each) so there are 6 of each of those pieces.


Here is a closer pic of the pieces laid out on my work tile.


Glue the sets of pieces together into stacks like this. All the stacks have 3 pieces except the back which has 4 to make it a bit more stable. I like to use a thick tacky glue for this step, spread pretty thinly. For me this works the best for this kind of project and it seems to hold up the best over time for me also. I do recommend putting something like a paint bottle of similar on top of the larger stacks while they dry to help prevent warping.


Once the glue dries it is time to paint the pieces. I like to put the really small pieces (nose, hands and feet) onto a piece of masking tape that I have run against my jeans to make it a bit less sticky. This keeps them where I can find them when I need them.


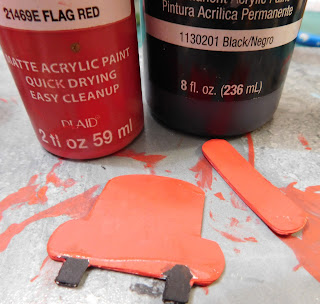
Paint colors are up to you I kept my gnome in a pink red color scheme. Since I don’t have any flesh color paint right now I did mix that color. Here are the colors I used in the video.


Once the paint dries it is time to assemble the gnome.


I like to start with the placement of the beard since it is central to all the other pieces. It is meant to line up in the middle side to side and just a hair above the flat bottom of the back piece. Let the glue on this piece set up so you don’t move the beard around placing the other pieces around it.


Now we can add the hat to our gnome. I designed the hat to fit against the bump on the top of the gnome and to lean against the very top of that same bump. Here are a couple of views of the hat so you can hopefully understand what I mean.


Next the nose fits into the curve at the bottom of the hat right on top of the beard. Since I used the same shape to cut the curve at the bottom of the hat it should be a really nice fit.


The shoes/feet go on either side of the beard at the very bottom. Be sure to like the flat side up with the straight edge at the bottom of the back piece. Allow this glue to set up before going on.


Now we can add the heart to the front of the gnome. You can place yours where ever you wish, although there are arm bumps on the sides of the back piece to guild you. Allow this glue to set up.


Now we can add the hands to each side of the heart. There is a left and a right hand so be careful when placing them. Allow the glue to dry completely.


Now we can add a thin even coat of Satin Mod Podge (or the sealer of your choice_ and allow to dry.


Here is the gnome along with some of the other Valentine items we have made in past tutorials. I love the way everything comes together on the porch.


As always I do want to sincerely thank all of you for watching my videos and reading my blog posts. It means so much to me that you are supporting me in this way. If I could ask you all to do just a bit more by subscribing to the channel and liking the videos and leaving comments. Those help more than you can imagine. Also if you could pass the links on to your friends I would appreciate it so much.


Wednesday, January 18, 2023

Dollhouse Miniature Round Hello Sign


Watch the video here.


This week I have another project with a free downloadable pattern for you. You can find the pattern here. You will get both a PDF version of the pattern that can be hand cut and a PNG for use with an electronic cutting machine like a Cricut. There is also a note page that will give sizing information for using the PNG.


All pieces are cut from a medium weight white card stock then painted to the desired colors. This is both more economical since one pack of paper will make a lot of projects and the color when painted seems to be less likely to fade over time from exposure to light than colored paper.


I know the letters are going to be hard to cut by hand so I would recommend just painting the word Hello on the sign during assembly. It’s a short simple word and I know it won’t look the same as having the letters added will be much easier.


I was actually looking for inspiration for a more Valentine’s Day themed sign when I came across a couple of simple hello signs and decided I just had to make this one this week. It is kind of Valentine themed because of the colors but can easily hang all spring if not all year in the dollhouse. You could easily change the paint colors to make it fit any color scheme and any time of year too.


So lets start with the parts of the pattern. This one is pretty simple, just 5 sets of pieces. 


I like to make the backs of these signs with 4 layers so that they are more apt to stay flat. Also when you glue the back circles together I do highly recommend putting something on top of it to weight it down until he glue dries. This will help this piece to stay flat.


I like to use a thick tacky glue to glue my pieces together since I find the items I do that way stand up much better. I have discovered way too many projects that have come apart in storage from year to year when glued with a glue stick.


Line the pieces up carefully and let the glue dry completely before moving on to the next step, painting.


For painting use a good brush and double check that you have covered the edges of each piece with paint. This will not only make them look better it will add a bit more insurance that they stay together long term.


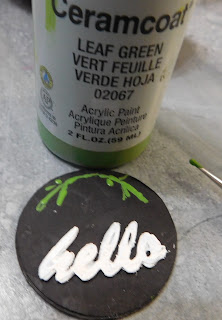
The word hello is painted with white paint, this allows it to look like it belongs with the rest of the pieces and also disguises the fact it is made of three layers of paper.


I painted the back round in black and be sure to paint both sides of it at the same time. This will be the added insurance that it stays flat.


The pieces of the bow are painted pink but could be any color really. Also a


Allow the paint to dry and check again that every thing is completely covered, it is much easier to touch up the paint now than after you glue the pieces together.


We are going to start by gluing the pieces of the bow together. They stack as shown in the video, tails, loops, and the knot on top. Just line up the oval part of each layer and they should stack nicely.


For the back glue on the word hello at the bottom center of the sign.


This is also a good time to paint on some green stems at the top of the sign. I like to put these on before the bow so they come out from under the bow.


Once the pieces we glued and painted are dry glue the bow to the top of the sign and allow to dry again.


Now using some dotting tools or the ends of paintbrush handles paint small dot flowers in the colors you want to use on and around the stems we painted on earlier.


Allow to dry again and add a coat of clear sealer, I used Satin Mod Podge. I have found it is a good idea to seal the back of the signs also because I use poster tack to put mine up and sometimes it pulls the back layer of the sign off when I remove it.


So here we have our dollhouse front porch decorated for Valentine's Day.


As always I do want to sincerely thank all of you for watching my videos and reading my blog posts. It means so much to me that you are supporting me in this way. If I could ask you all to do just a bit more by subscribing to the channel and liking the videos and leaving comments. Those help more than you can imagine. Also if you could pass the links on to your friends I would appreciate it so much.


Sunday, January 15, 2023

Dollhouse Miniature Valentine Truck Sign


Watch the video here.


I absolutely love the holiday truck decorations that are so popular in the real size world so I decides that the dolls needed to join in the fun too.


This is another project that I have created a free pattern you can download here to use to make yours. There is a PDF for hand cutting as well as a PNG for use with electronic cutting machines. You can get the pattern here. There is also a notes page with important information on sizing the PNG in your cutting machine also.


I would like to say I doubt you will be able to cut out the letters in the piece that goes on the tailgate so I recommend you just paint/write the letters on there after painting.


Like most of the patterns I provide here I recommend cutting the pieces all from white medium weight card stock. I find this to the be most versatile since I can paint it any color I need so I only need to have one package of paper. Also the colors when painted tend to be more stable than the colors on pre-colored papers that tend to fade over time. Also the paint hides the layers of the paper so that the pieces look like they were cut from a heavier material.


Here are all the pieces cut out and ready to put together. At this point you can set the little tiny hearts off to the side until we are ready to paint them.


Now we can glue the sets of like pieces together. Most of the sets have 3 layers except the back set which has 4 layers to make it more stable.


I like to use a nice thick tacky glue applied with a toothpick to glue my layers together. I have the best long term results that way. Since the back piece is a bit larger I did set a paint bottle on top of it until the glue dried to help it stay flat.


Now the fun part we get to paint all the pieces.


To corral the little tiny hearts I took a piece of masking tape that de-sticked” by putting the tape against my jeans a few times. Then I anchored it down on my work tile sticky side up and put the hearts on it lightly.


I painted the hears with various colors of pink and white.


The sign for the tailgate with the letters cut out is designed to look like wood. I had to mix a couple of colors together to make a wood color.


The window piece was painted a light blue.


The tires on the back piece were painted black.


Then the rest of the truck back piece and the tailgate piece were painted with a red.


Be sure to paint the edges of the pieces so that there is no white showing.


Once the paint dries we can start gluing the pieces together. I like to place the


window first so that there is a small rim around it that is fairly even.


Use the tailgate piece to draw a placement line for the hearts. And glue on some of them on and around the line then add the tailgate and add as many of the hearts as you would like.


Once dry add a thin even layer of Satin Mod Podge or other clear finish.


And now the truck is ready to hang in your dollhouse.


As always I do want to sincerely thank all of you for watching my videos and reading my blog posts. It means so much to me that you are supporting me in this way. If I could ask you all to do just a bit more by subscribing to the channel and liking the videos and leaving comments. Those help more than you can imagine. Also if you could pass the links on to your friends I would appreciate it so much.