I absolutely love the holiday truck decorations that are so popular in the real size world so I decides that the dolls needed to join in the fun too.
This is another project that I have created a free pattern you can download here to use to make yours. There is a PDF for hand cutting as well as a PNG for use with electronic cutting machines. You can get the pattern here. There is also a notes page with important information on sizing the PNG in your cutting machine also.
I would like to say I doubt you will be able to cut out the letters in the piece that goes on the tailgate so I recommend you just paint/write the letters on there after painting.
Like most of the patterns I provide here I recommend cutting the pieces all from white medium weight card stock. I find this to the be most versatile since I can paint it any color I need so I only need to have one package of paper. Also the colors when painted tend to be more stable than the colors on pre-colored papers that tend to fade over time. Also the paint hides the layers of the paper so that the pieces look like they were cut from a heavier material.
Here are all the pieces cut out and ready to put together. At this point you can set the little tiny hearts off to the side until we are ready to paint them.
Now we can glue the sets of like pieces together. Most of the sets have 3 layers except the back set which has 4 layers to make it more stable.
I like to use a nice thick tacky glue applied with a toothpick to glue my layers together. I have the best long term results that way. Since the back piece is a bit larger I did set a paint bottle on top of it until the glue dried to help it stay flat.
Now the fun part we get to paint all the pieces.
To corral the little tiny hearts I took a piece of masking tape that de-sticked” by putting the tape against my jeans a few times. Then I anchored it down on my work tile sticky side up and put the hearts on it lightly.
I painted the hears with various colors of pink and white.
The sign for the tailgate with the letters cut out is designed to look like wood. I had to mix a couple of colors together to make a wood color.
The window piece was painted a light blue.
The tires on the back piece were painted black.
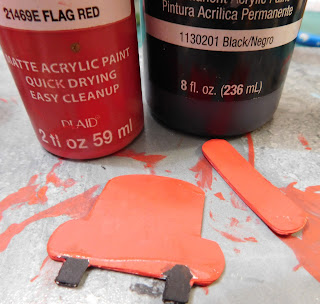
Then the rest of the truck back piece and the tailgate piece were painted with a red.
Be sure to paint the edges of the pieces so that there is no white showing.
Once the paint dries we can start gluing the pieces together. I like to place the
window first so that there is a small rim around it that is fairly even.
Use the tailgate piece to draw a placement line for the hearts. And glue on some of them on and around the line then add the tailgate and add as many of the hearts as you would like.
Once dry add a thin even layer of Satin Mod Podge or other clear finish.
And now the truck is ready to hang in your dollhouse.
As always I do want to sincerely thank all of you for watching my videos and reading my blog posts. It means so much to me that you are supporting me in this way. If I could ask you all to do just a bit more by subscribing to the channel and liking the videos and leaving comments. Those help more than you can imagine. Also if you could pass the links on to your friends I would appreciate it so much.


No comments:
Post a Comment