Check back often

Have you checked out all my blogs?


Dollhouse Minis: http://joannesminis.blogspot.com


18” Dolls: http://joannes18dolls.blogspot.com/


General Crafts: http://joannes-place.blogspot.com/


Cooking: http://joanne-kitchen.blogspot.com/


Also if for some reason I can't post I will try to give a head's up on the Facebook page so check there too.

Tuesday, February 15, 2022

Dollhouse Miniature Saint Patrick's Day Porch Sign


Watch the video here.


Today we are adding to our front porch decor for Saint Patrick's Day with a really fun porch sign. I love how this one turned out and I hope you also enjoy the project.


The paints, and brushes were provided to me by Plaid so that I can create better videos for all of you.


We start out with 4 of the slim sticks that I picked up at Hobby Lobby, you could also use either slim sticks or coffee stir sticks for the sign. I cut each of these sticks at 5”.


I also cut 3 pieces of regular craft-stick at ¾” long.


I lined up my sticks making sure the ends were as even as possible. Since one of the sticks I am using this time is pretty crooked I used some masking tape to hold all the sticks right where I wanted them. I then glued the craft-stick pieces to the back side to hold all 4 of the slim sticks together. I don't worry too much about how far apart I space these since they won't really show once the sign is in place. 


Once the glue dried I used some white craft paint and gave the front of my sign a really good smooth coat. I also got the edges of the sign but skipped the back.


Once dry I found the center of my sign and marked it with a pencil. I then penciled on the letters to the word “welcome” skipping the letter “o”


After making sure I was happy with the placement and size of my letters I used a black fine tip paint pen to write the letters to word. Any pencil lines that still show can be erased once all the paint is dry.


Once my letters were dry I used some green craft paint (Folkart Multi-Surface in Bright Green) to paint a shamrock in the place of the letter “o” that we skipped earlier.


Allow this to dry completely.


I decided to skip the Mod Podge this time for the sign since I really liked how it looked without the finish on it.


As always I do want to sincerely thank all of you for watching my videos and reading my blog posts. It means so much to me that you are supporting me in this way. If I could ask you all to do just a bit more by subscribing to the channel and liking the videos and leaving comments. Those help more than you can imagine. Also if you could pass the links on to your friends I would appreciate it so much.

Saturday, February 12, 2022

Dollhouse Miniature Plating the Steak Dinner


Watch the video here.


Today for the Saturday tutorial we plating the steak dinner and dessert we have been making for the last few weeks. I am using some plates I had on hand from some experiments I have been doing for a future tutorial. Use whatever miniature plates you have on hand.


For the dinner we need a plate that is about ⅞” in diameter to make a good in scale plate for 1/12th

scale. Make sure that your plates are safe to bake in the oven so for this project plastic won't work. If you are using plastic ones use a polymer clay safe glue to adhere your project to your plate. Since my plate is safe to bake I am using TLS (Translucent Liquid Sculpey) as my “glue” today.


You just need a tiny bit on the bottoms of your food items to make this work. If you use too much you run the risk of it leaking past the edges of the food and that would no be as attractive.


Once you are happy with the placement of your food items on your plate bake at the temperature recommended on the bottle of TLS for 10 minutes. Allow to cool and your plates are ready to place in a scene in your dollhouse or a mini restaurant.


For the dessert we are going to be doing a 2 step process today. For this portion of the project I am using some smaller “dessert” size plates that measure ⅝” in diameter. 


 First just like the with the dinner pieces we are using a tiny bit of TLS on the bottoms of our cheesecake wedges to stick them to the plates and bake for 10 minutes. This will assure we don't knock our dessert off the plates while we put on the glaze.


For the glaze step I am mixing some white oil paint into my TLS and using that for a glaze. This mixture is much thinner than we get when we mix TLS with polymer clay. The oil paints I use are mostly from a really cheap set I purchased several years ago at a craft store. You don't need high end paints for this.


Make sure the oil paint and TLS are mixed completely then use a toothpick or other pointy type tool to put the glaze exactly where you want it. When you are happy bake for another 10 minutes.


Since this oil paint/TLS bakes up with a slightly shiny surface it doesn't need any finishing once bake.


So there you have our special steak dinner for the dollhouse dolls to celebrate a special occasion or just a good dinner to place on the table to help tell the story of you what is happening in the dollhouse.


Now let's talk about adding the paint to the TLS, I have used this technique in the past and I love the look it gives. This week for the topping on the cheesecake it is the perfect glaze/icing to give the dessert the look I am looking for.


I know there are some tutorials out there that tell you can use acrylic paints in TLS, they are wrong. I did a lot of research on this before I ever used it in a tutorial since I wanted to make sure I was giving the best advice. The problem with acrylic paints is the water content. The water that is a normal part of the acrylic paint can actually boil and explode when heated in the oven. The oil paint does not run this risk. So be safe and use the oil paints, like I said you don't need expensive paints to do this.


As always I do want to sincerely thank all of you for watching my videos and reading my blog posts. It means so much to me that you are supporting me in this way. If I could ask you all to do just a bit more by subscribing to the channel and liking the videos and leaving comments. Those help more than you can imagine. Also if you could pass the links on to your friends I would appreciate it so much.


Tuesday, February 8, 2022

Dollhouse Miniature Saint Patrick's Day Door Mat


Watch the video here.


This week for the Tuesday tutorial I have really quick little project, another doormat, this time one for Saint Patrick's Day. Now I will be the first one to admit I don't generally do a lot of decorating on my real home for this holiday I do love to decorate the dollhouse for it. The decorations are so cute and so much easier to store for next year than the same items would be in real size. So let's go all out for all the holidays for the dollhouse.


Just like all of the doormats I have made lately I am starting with a piece of felt that measures 1 ½” by 2 ½” in size. The felt I am using is some I bought several years ago by the yard in a fabric store so it is slightly heavier in weight than the felt you will find in the squares at most craft-stores. Either would work just fine so if you don't want to invest in a big chunk of the felt by the yard pick up some of the squares next time you visit the craft-store. I do love that this piece is this rusty brown color since that is kind of close the color of the real doormats I am being inspired by here. 


I want to let you know that the Mod Podge, the green paint and the paint brushes used were provided to me by Plaid to use in videos for you.


Just like the last several of these mats I started by giving the felt a good coat of Mat Mod Podge. This does two things, It stiffens up the felt a bit so it lays better on the dollhouse porch and it seals the surface to the felt doesn't soak up so much of any paint we put on the surface.


This time I decided to skip the layer of paint for a background color and go with the more “natural” color for this mat.


For the letters I used a black fine tip paint pen that I think I got at Walmart, you can get these pretty much anywhere that craft paints are sold.


Most of the time when I am laying out my letters on projects like this I sketch in my letters with a pencil. This wouldn't work on the mat this time so I came up with another way to line my letters up. First I laid down some masking tape on my work surface and marked the size of my mat (2 ½”) with pencil marks. Then I marked the center point. I then taped my doormat on the work surface just under this tape. That way I had a reference point for spacing my letters.


I wrote out the word “home” leaving out the “o” but leaving a space for it.


When the black painted letters were dry I then used some bright green paint (Folkart Multi-Surface in Bright Green) to make a shamrock in the place of the “o” in the word home. I used a fat paint brush handle to place 2 dots for each lobe of the shamrock leaf then a small paint brush to connect those shapes and to add a stem. I think it turned out really cute.


And that is all there is to making this doormat. So easy but so darn cute and a great welcome for all the friends the doll family might have visiting this next month or so.


As always I do want to sincerely thank all of you for watching my videos and reading my blog posts. It means so much to me that you are supporting me in this way. If I could ask you all to do just a bit more by subscribing to the channel and liking the videos and leaving comments. Those help more than you can imagine. Also if you could pass the links on to your friends I would appreciate it so much.


Sunday, February 6, 2022

Dollhouse Miniature Pot of Gold Cookie Jar


Watch the video here.


This week I have yet another cookie jar tutorial for you. I promise I will get more variety going soon. And we will get back to the kitchen series, I just still need to be able to get the materials that I need to move on with the project.


So this week while I was looking at Google images for ideas I ran across some adorable pot of gold cookie jars and with St Patrick's Day not that far away I thought I would tackle one of them this week.


We are starting out like we most often do with a 4” strip of card-stock glued into our base cylinder, this time I used a ½” wide strip because most of the cookie jars in this shape were a little shorter and fatter than some of the others we have made.


After the glue dried this base was wrapped with some white clay, I used Original Sculpey, using TLS (Translucent Liquid Sculpey) as a glue. I also added a rather fat snake to the middle to make an almost ball shape. I also made the flat disc we will be building our lid on at the same time. Bake these pieces at the recommended temperature for 10 to 15 minutes, allow to cool to room temperature before going to the next step.


Once your cookie jar is cooled roll out some black clay into a sheet big enough to cover your cookie jar. Coat the baked cookie jar with TLS and wrap and smooth the black clay onto it to cover. Cutting excess clay smoothing until you are happy with the coverage and the cookie jar is as smooth as possible. Next I added 4 tiny balls to the bottom of the jar to act as feet. I also cut a disc of the black clay and using TLS adhered it to the lid base we made to start forming the lid. Bake again and cool to room temperature.


This is the perfect time to make sure your lid is still going to fit on your cookie jar. Trim as needed.


Now using some yellow clay, I have no idea what color this clay is. It is the end of a package that the labeling has been lost. I can tell it is Sculpey III by the feel of the clay but that is about all know about it. Use any kind of bright yellow clay for this step. Since I am almost out of this color I did take a bit and using some TLS I put some on top of my lid. I wanted to make sure I had enough clay to do this before I started making coins. Set this piece off to the side and roll your yellow clay into a skinny snake and cut off little pieces. Roll these into tiny balls and using your finger tip flatten them to make your “coins” for the top of the cookie jar lid. Bake just the coins for about 5 minutes at the temperature recommended on your clay. And (I bet you know what I'm going to say) cool to room temperature.


Now I did add a bit more clay to the top of the lid to give it a better shape since I still had some left. I then coated the lid (a little bit at a time) and added coins to the top. Try to keep the coins looking like they are laying on top of each other not standing on their edges. If you need to bake your lid part way through this process do it. 


I was able to get mine all on in one run, bake for at least 10 minutes at the recommended temperature and cool.


Check that you are happy with the amount of coins on your lid. If you feel you need more add them. If not go with that you have.


Once you are happy with the way the lid looks give just the yellow clay a thin coat of gold paint. I am using Brushed Gold by Folkart. Use multiple thin coats of this paint, don't try to get a really good coat in the first coat.


If you want you could add some lettering to the front of your cookie jar. Some of the ones I saw online said things like “ Pot 'O Gold” or something like that. I decided not to tackle that today but feel free to go for it if you wish.


Once you are done with all the painting of details and they have dried completely give your cookie jar and it's lid a very light coat of Gloss Mod Podge and allow to dry naturally.


As always I do want to sincerely thank all of you for watching my videos and reading my blog posts. It means so much to me that you are supporting me in this way. If I could ask you all to do just a bit more by subscribing to the channel and liking the videos and leaving comments. Those help more than you can imagine. Also if you could pass the links on to your friends I would appreciate it so much.


Saturday, February 5, 2022

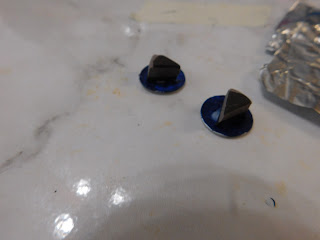
Dollhouse Miniature Chocolate Cheesecake


Watch the video here.


This week we are adding the last piece to our romantic dinner for two, the dessert. I have to admit I had a bit of trouble picking what dessert to make for this project. So many ideas came to mind. The choice to do chocolate was fairly easy, since that is what I would want to eat. But what? There are so many chocolate desserts to choose from. I did some scrolling through Google images and found myself drawn mostly to the chocolate cheesecakes. So that is what is on the menu today.


This one is pretty easy as polymer clay foods go, only three colors of clay and minimal tools required.


The clay colors are- a dark brown (I used Scupley III in Suede) any brand of black clay and any brand of white. I do suggest going with an actual white clay and not the white Original Sculpey for this though.


We start by mixing equal parts dark brown and black to make a nice dark chocolate crust color.


Then equal parts dark brown and white to make the cheesecake filling.


We will also need a small amount of the dark brown by itself to put on the top.


Using a pair of craft-sticks as guides I rolled out a nice thin sheet of our darkest color and set it to the side.


Then using thicker guides, I used sets of 2 craft-sticks that I have glued together, I rolled out the lightest color clay for the filling layer.


These were then stacked and cut with a 1” round clay cutter.


Then I took a small bit of the dark brown clay (not mixed with any other colors) and pinched it out to make the topping for our cheesecake.


This was then put into my freezer for 10 minutes to firm up. Please don't skip this step because it does make a big difference in how well your clay cuts.


Once cut, I make cut my cheesecake into 8 slices, I used a tightly crumpled piece of foil to texture the cheesecake filling.


Then with my pointy tool I teased the surface of the crust to give a crust texture.


Once all the wedges were textured the pieces were baked at the recommended temperature for 15 minutes,


I allowed them to cool and they are now ready to place in a scene.


We will be glazing the topping a tiny bit when we plate them next week. 


As always I do want to sincerely thank all of you for watching my videos and reading my blog posts. It means so much to me that you are supporting me in this way. If I could ask you all to do just a bit more by subscribing to the channel and liking the videos and leaving comments. Those help more than you can imagine. Also if you could pass the links on to your friends I would appreciate it so much.


Tuesday, February 1, 2022

Dollhouse Miniature Flag Bracket


Watch the video here.


I was looking around online for ideas for today's video and kept seeing all the cute flags people were hanging on their front porches for the seasons. Since I didn't have a way to hang a flag I decided that would be the first step to adding a flag to our dollhouse front porches. So today's video is here to fill that need.


I looked at several styles of flag brackets that are made for both real houses and those available in miniature. I took ideas from several and after a bit of looking through my stash of bits and pieces today's project is what I came up with.


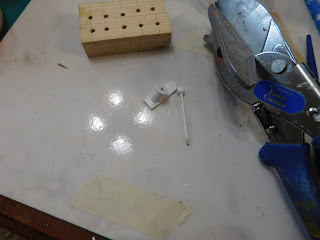
The parts I used were: a small wooden spool, a regular size craft-stick, a toothpick and a very small wooden bead


For the bracket itself I decided to use a wooden spool mounted on a piece of craft-stick. Since I wanted my flag to hang at an angle I cut the spool with my Easy Cutter (see my review of this tool here) at a 45° angle. The spool did split a tiny bit and the small piece I cut off did fall apart but the result was just what I needed to give my bracket the angle I wanted. I am sure you could use one of the small miter boxes also if you don't have an Easy Cutter. I also cut a piece of the craft-stick to 1” long to use as the back plate of my bracket.


Once the pieces were cut and sanded I glued the spool to the piece of craft-stick slightly up from the cut edge and centered side to side.


I also glued the bead to the end of the toothpick.


Once the glue dried I cut the extra end off the toothpick and then painted both pieces with 2 coats of white paint.


Once the paint dried I gave both a coat of Satin Mod Podge.


After drying I cut the flag pole to 1 ¾” long. I did have to do a bit of sanding at the cut end to get the flag pole to go into the hole in the bracket since I had a lump of paint right at that spot.


To attach the flag bracket to your dollhouse I recommend using some tacky glue which is what I will do once I am certain where I want to place it. In the meantime I used some poster tack to temporarily hold it in place on one of the porch posts. I also want to see what I looks like on the other post and the front wall of the dollhouse.


In future videos we will make some cute flags to go on the flag bracket so stay tuned for that. The one I used today I just threw together to get an idea of what size everything was going to be and to help me figure out how to make the bracket.


As always I do want to sincerely thank all of you for watching my videos and reading my blog posts. It means so much to me that you are supporting me in this way. If I could ask you all to do just a bit more by subscribing to the channel and liking the videos and leaving comments. Those help more than you can imagine. Also if you could pass the links on to your friends I would appreciate it so much.


Sunday, January 30, 2022

Dollhouse Miniature Cast Iron Skillet


Watch the video here.


This week I have a fun project that I came up with yesterday morning as I was putting my dishes away, I was putting my extremely heavy very old cast iron skillet back in the cabinet and I decided I needed to make a mini one for the dollhouse kitchen. I decided to make it right away since I am still trying to work out the final part of the other project I have been trying to figure out for you guys (I'll give you a small hint that that one is an appliance to go in the kitchen)


So I considered a couple of different approaches to this project and decided the most obvious choice (polymer clay) was the best choice. As a benefit it only takes one color of clay (black) and really any brand will work for this I do recommend using a firm brand over a soft one simply because although it will be harder to get started I think it in the long run it will work better.


Once I measured my own skillet I started looking for something to use as a form to build the skillet on. I decided to use one of the plastic disposable shot glasses that I picked up at Dollar Tree. I almost always have a bunch of these on hand because they are so useful on the craft table.


I rolled the clay out to a consistent thickness, I used a couple of craft sticks to help me. Then I placed a circle cut from parchment paper over the bottom of the glass to go between the plastic glass bottom and the clay. This step is essential, trust me. Then I smoothed the clay over the bottom and up the sides a ways. I used a strip of paper cut ¼” wide to guide me in cutting/leveling the top edge of the skillet. 


Once I was happy with how I had the top cut I moved the glass with the clay into the freezer for 15 minutes to firm the clay up. This way I could carefully work the skillet off the plastic form without messing up the shape too much.


Then it was time to bake the first stage of the skillet at the temperature your clay package directs for 10 minutes.


Once baked and cooled I used some sandpaper to even up the top edge of the skillet.


I then added a handle to the baked clay with some TLS (Translucent Liquid Sculpey) acting as the glue. Really smooth the edges of the handle into the baked skillet. Then bake again for another 10 minutes at the time directed on the clay package.


Once baked and cooled again I used an emery board to remove a few bumps and lumps and got the outside of the skillet looking the way I wanted it.


Now it was time to paint just the outside with some black craft paint. I like the slight sheen my clay baked to for the inside of the skillet, but I want the outside to be a completely mat black. 


Once dry it is ready for the doll family to use in their new kitchen.


As always I do want to sincerely thank all of you for watching my videos and reading my blog posts. It means so much to me that you are supporting me in this way. If I could ask you all to do just a bit more by subscribing to the channel and liking the videos and leaving comments. Those help more than you can imagine. Also if you could pass the links on to your friends I would appreciate it so much.