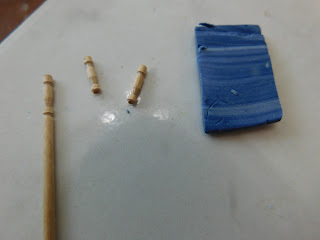
Today we are using some of the polymer clay marble we made in yesterday’s video to make a rolling pin for the dollhouse. If you missed that video you can find it here.
In addition to the marble clay we also need some of those fancy toothpicks. I got my last batch a few years back at a large Asian grocery store. They are fairly cheap and you get a lot of them in the package and they are so useful for so many projects.
Cut two of the toothpicks so you have just the decorative top ends.
Now use a small piece of the marble clay to make a snake about ¼” in diameter, it doesn’t need to be exact because these rolling pins come in different sizes. Cut it to be 1” long.
Now dip the end of each of you pieces of the toothpick into some TLS (Translucent Liquid Scupley) and carefully insert one into each end of the clay snake. If your clay is really soft and hard to work with put it into the freezer for 15 to 20 minutes to firm it up a bit.
Use you clay knife to neaten up the ends of the rolling pin and make sure everything is straight and just the way you want it.
Now bake at recommended temperature for 10 minutes and allow to cool.
I wanted to make a little stand for my rolling pin so help keep it in place in the dollhouse kitchen. For this I used a 1” length of craft-stick and 2 `” lengths of Slim Sticks. Just glue them together to form a little stand. And allow to dry.
To finish the rolling pin add a light coat of Satin Mod Podge to just the clay part and allow to dry.
Now you have a rolling pin for the dollhouse kitchen and doesn’t look really cute next to the mortar and pestle from yesterday’s tutorial.
As always I do want to sincerely thank all of you for watching my videos and reading my blog posts. It means so much to me that you are supporting me in this way. If I could ask you all to do just a bit more by subscribing to the channel and liking the videos and leaving comments. Those help more than you can imagine. Also if you could pass the links on to your friends I would appreciate it so much.
Mod Podge, and brush provided to me by Plaid to use in videos.


No comments:
Post a Comment