
I was putting my real toaster away the other day when I realized we don't have a toaster for the dollhouse. I knew I needed to change that so here we are.
I had been going through some boxes a while back (oh the joys of moving, will I ever have all the boxes emptied) and found a package of Chipboard I had purchased for a project before I moved. I had put it aside to use on a project soon and this seemed like a good one to try it out on. I was going to post a photo of the label but I can't find the label but this link will take you to a similar product.

I cut 6 pieces of chipboard at ½” by 5/8”

and glued them together in pairs making 3 double thick pieces. These will form the walls of our toaster.

I then cut 4 pieces of 1/8” strip-wood to a bit over 1” in length. The length on these doesn't matter because we will cut them to size in the next step. I tried to make them the needed size and found it way too difficult to get them glued in place. The extra bit to hold onto makes a huge difference here. Glue these pieces of wood like this to 2 of the double thick chipboard pieces. Making sure to line up the edge and tops. The ½” dimension is the height and the 5/8” is the width on the toaster. Once the glue dries cut the excess wood strips off at the bottom.

Then glue all the pieces of chipboard like this to make a sandwich forming the basic shape of the toaster.

Using some lightweight paper cover the ends of the toaster, since my toaster will be black with chrome I used black paper.
Next cut a strip of paper and cover up the one side over the top and down the other side of the toaster with the same black paper.
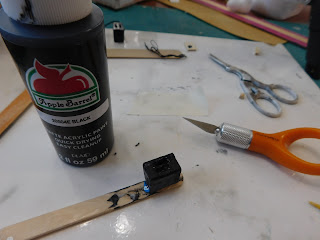
Use a knife with a small tip to cut the slots in the top once the glue dries. And then paint the entire toaster with a coat of craft paint the color of your finished toaster.

Since I wanted my toaster to have chrome on the body just like my real one I used a piece of stainless steel Contact paper (you can find it here) just cut a strip and add it to the toaster. I did use some glue under mine just to make sure the bond will be permanent.
Now we can add some of the extra bits.

I started on one end and cut a small bit of toothpick and a ¼” circle of chipboard. These were glued to one end to form the thing the electric cord wraps around for storage on my real toaster.

For the other end I cut another small bit of toothpick for the handle to raise and lower the toast and a very small bit of the point of a toothpick to represent the dial that determines how dark you want your toast. Glue these to the opposite end of the toaster.
Once the glue dries give another coat of paint over the ends of the toaster to paint the new bits.

Use the same knife to cut the slits in the top of the toaster through the contact paper.

Make a cord from embroidery floss (2 strands) and a tiny bead if desired. Then cut a base for the toaster from chipboard and glue the cord and base to the bottom of the toaster.
Once the glue is dry give any areas another coat of paint and at the same time paint the base.

Give all the painted areas a coat of Satin finish Mod Podge.
And you are done and the dolls in the dollhouse can make some toast to go with their coffee.
Paint, brushes and Mod Podge used in this video were provided by Plaid for use in videos.
As always I do want to sincerely thank all of you for watching my videos and reading my blog posts. It means so much to me that you are supporting me in this way. If I could ask you all to do just a bit more by subscribing to the channel and liking the videos and leaving comments. Those help more than you can imagine. Also if you could pass the links on to your friends I would appreciate it so much.
No comments:
Post a Comment