
This week I was in the mood to make some radishes so that is today's project. I had picked a bunch of them up at the store and while I was cleaning them to put them away I decided that they would be the perfect project for today.
They are really simple and use just a few colors of clay and a couple of colors of chalk.
To start we need to create the roots and stems so they will be ready to use when we create our radishes.

For the roots, I decided that I would use some white embroidery floss and coat the individual strands with some TLS (Translucent Liquid Sculpey). I cut a piece of the floss to around 2” then separated it into the 6 individual strands. Give each strand a good coat of TLS and move to a nonstick baking surface.

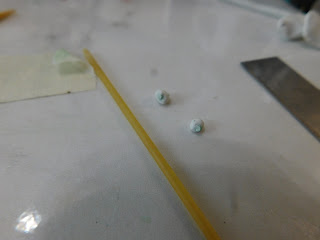
Next we need to make the stems. For this I used a small amount of my 50/50 blend of white/translucent clay that is always in my stash with a very tiny bit of green clay. You just want to tint the clay a very pale green. Then roll out into as skinny of a snake as you can. Break the snake into 3 pieces. Coat the tip of your finger with some green chalk and roll the clay some more, coating the snakes with the darker green color. Now gently press the 3 snakes together, keeping their round shapes as much as possible.

Now bake both the roots and stems at the recommended temperature for 10 minutes and allow to cool completely.
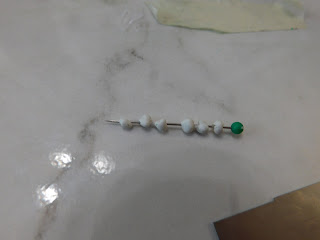
Meanwhile take some more of the white/translucent blend clay and make a snake about 1/8”. cut this snake into pieces about 1/8” long. Some can be a bit smaller some a big bigger. Roll the pieces into balls and slide them onto a sewing pin. This serves 2 purposes it creates the hole in the middle we will need to add the stems and roots and it also keeps the balls in one place to they are easy to keep track or. Allow the balls of clay on the pin to set and rest for at least 15 or 20 minutes longer if possible. This will allow the clay to firm up again since it gets very soft when you work with it.
Once
the clay has rested and the stems and roots have cooled cut the stems
into tiny bits. Try to have some variety of stems with 1, 2, and 3
snakes in them.
Then dot some TLS into the hole at one end of one of the radish balls and insert a stem piece. Try to keep it going vertically so you see the cut edge when you are done. Do this to all the radishes.
Now dot some more TLS into the opposite hole in the radish balls and insert a root into each one. Use your finger tips to carefully ease the clay around the root to form the shape of the radish.
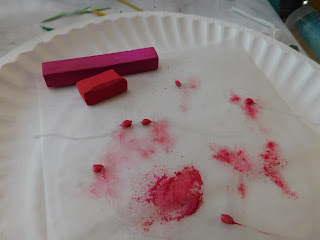
Once all the radishes have both roots and stems grate some red and hot pink chalk onto your baking surface and carefully using a brush coat each radish with the combined chalk color. Go just a bit down the root also.
Now bake for 10 minutes at the temperature recommended for your clay and allow to cool.
Once cooled trim the roots to a realistic length and you are finished. You even have more roots to use to make more radishes.
As always I do want to sincerely thank all of you for watching my videos and reading my blog posts. It means so much to me that you are supporting me in this way. If I could ask you all to do just a bit more by subscribing to the channel and liking the videos and leaving comments. Those help more than you can imagine. Also if you could pass the links on to your friends I would appreciate it so much.
No comments:
Post a Comment