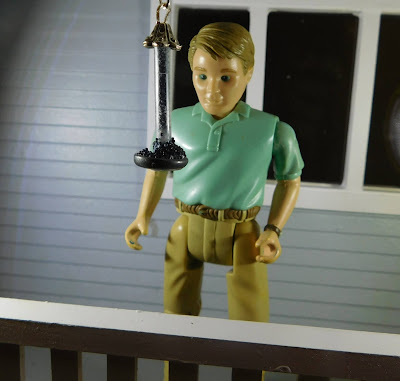
I was sitting here thinking about what I wanted to do for today's tutorial the other day while I was looking at the front porch on the Beachside Bungalow. I was toying with a couple of different ideas when I started thinking back to when my kids were little. This is the time of year we always got all our bird feeders in order for the winter. We would make sure they were all clean and do any repairs that needed to be done. This was also when we usually replaced any that were starting to not look very good. We would be talking about all the birds we would be enjoying over the winter months as they got food from those feeders. And making sure our books on identifying the different birds were close by the window. So I decided that the doll family should probably hang at least one bird feeder on that front porch.
This is actually one of the items I used to make for sale years ago when I sold minis. I made a lot of them and they were always popular, I think I sold out every time I listed them. The feeder we are making today is pretty close to the same on I used to sell. I did simplify a couple of steps for you guys so the video would go together a bit faster. And also came up with a couple of improvements too.
This bird feeder is made of some really simple parts that most of us probably have on hand.
The
first step is to prep the feeder base and the wire that will become
the hanging loop. For the base I used a ½” button, these can be
found in fabric stores and also in a lot of craft stores. The one I
used to day had four holes while I usually try to use one with only 2
holes, this is what I had on hand. Also I loved how it went with the
bead cap I used for the top of the feeder. I am not sure what gauge
wire I used since the packaging is totally missing.
Slide the wire down through one hole in the button and then back up through the other hole. Use some pliers to twist the wire around itself as close to the button as possible.
Now it is time to cut your tube portion of the bird feeder to size. Today I used one of the protective covers that was on my new paint brushes. It was the perfect size. When I used to make these to sell I used the flexible plastic tubing from the aquarium section of the pet store. Whatever you use cut it to be 1” long.
I
added just a small drop of super glue to the top of the beads and
slid the plastic tube in place. Allow the super glue to dry before
you go on to the next step.
Next we need to add some more bird seed and make sure it is going to stay in place. For this I used a bit of gloss Mod Podge and a small old brush. I do try to use an old brush for this step because I really want to cram that Mod Podge down into the beads that are already in place. Both the action of the really pushing the brush into those beads and the fact there could still be a bit of super glue that has not dried all the way I don't want to risk my good paint brushes for this step.
For the hanger you can do a couple of different things. For this video I took the easiest route and simply cut a piece of wire to length and bent each end to form a hook. You could also use some jewelry chain to make a nicer hanger which I might do in a future video if I decide to make more bird feeder options.
As always I do want to sincerely thank all of you for watching my videos and reading my blog posts. It means so much to me that you are supporting me in this way. If I could ask you all to do just a bit more by subscribing to the channel and liking the videos and leaving comments. Those help more than you can imagine. Also if you could pass the links on to your friends I would appreciate it so much.


Thank you. The bird feeder is so cute.
ReplyDelete