Check back often

Have you checked out all my blogs?


Dollhouse Minis: http://joannesminis.blogspot.com


18” Dolls: http://joannes18dolls.blogspot.com/


General Crafts: http://joannes-place.blogspot.com/


Cooking: http://joanne-kitchen.blogspot.com/


Also if for some reason I can't post I will try to give a head's up on the Facebook page so check there too.

Saturday, September 10, 2022

Dollhouse Miniature Spider Bread


Watch the video here.


This week for the Saturday Tutorial we are making a loaf of bread shaped like a spider for Halloween in the dollhouse. I wish I would have thought of making one of these in real life when my kids were little because I am sure they would have loved it.


We are using the same bread clay mixture that we have been using for the last few weeks- 4 parts white polymer clay with 1 part Fimo Sahara. You could also use the pumpernickel mixture from last week’s Tricolor Bread tutorial, I saw these loaves of bread in both varieties online.


After conditioning your clay make the following shapes to begin:

½” ball

¼” ball

snake of clay that is about the diameter of a toothpick that is cut into 8 pieces just a bit longer than ¼”.


Shape the ½” ball into the body of the spider, either round or oval. Once you are happy with the body shape add the smaller ball as a head.


Now use a tool like a small ball tool (dotting tool) to make 4 small holes along each side of the body piece. These will set up the placement of the legs making it both easier to get them lined up properly and to stay attached to the body a bit better. You can bend the legs in any direction you wish, kind of play around with them and find a design you like.


Once you are happy with you spider loaf it is time to chalk the clay to make it look baked. For this I am using the same three colors of artist chalk I normally use for this- a yellow ocher, a reddish brown, and a dark brown.


First coat most of the surface of the bread with the yellow ocher color. This is the lightest color and the one you will use the most of. Be sure to burnish in each color of chalk to make it adhere to the clay.


Now use a bit less of the reddish brown and burnish it mostly at the top of the bread. This goes where the majority of the browning of the bread happens. There are a lot of really good pictures of these breads online that show the browning really well so it will be easy to know the placement of the colors of chalk.


Lastly add just a tiny touch of the brown chalk. This will tone down that red tint in the last color but too much and it looks like the bread was burnt in the oven.


Next I used the same ball tool as before to add some eyes to the head of my spider. You could add small black balls of clay or beads to these areas if you wish.


At this point you could decide to cut a bowl area out of the bread body area for the dolls to serve some “dip” in. To do this place it in the freezer for about 15 minutes to firm the clay up then use a knife to form the opening. You use some clay mixed with liquid clay for the dip. Then bake as directed.


Now bake the loaf of bread at the temperature recommended for your clay brand for 15 minutes and allow to cool.


Now you have a wonderful centerpiece for the doll’s Halloween table.


As always I do want to sincerely thank all of you for watching my videos and reading my blog posts. It means so much to me that you are supporting me in this way. If I could ask you all to do just a bit more by subscribing to the channel and liking the videos and leaving comments. Those help more than you can imagine. Also if you could pass the links on to your friends I would appreciate it so much.


Wednesday, September 7, 2022

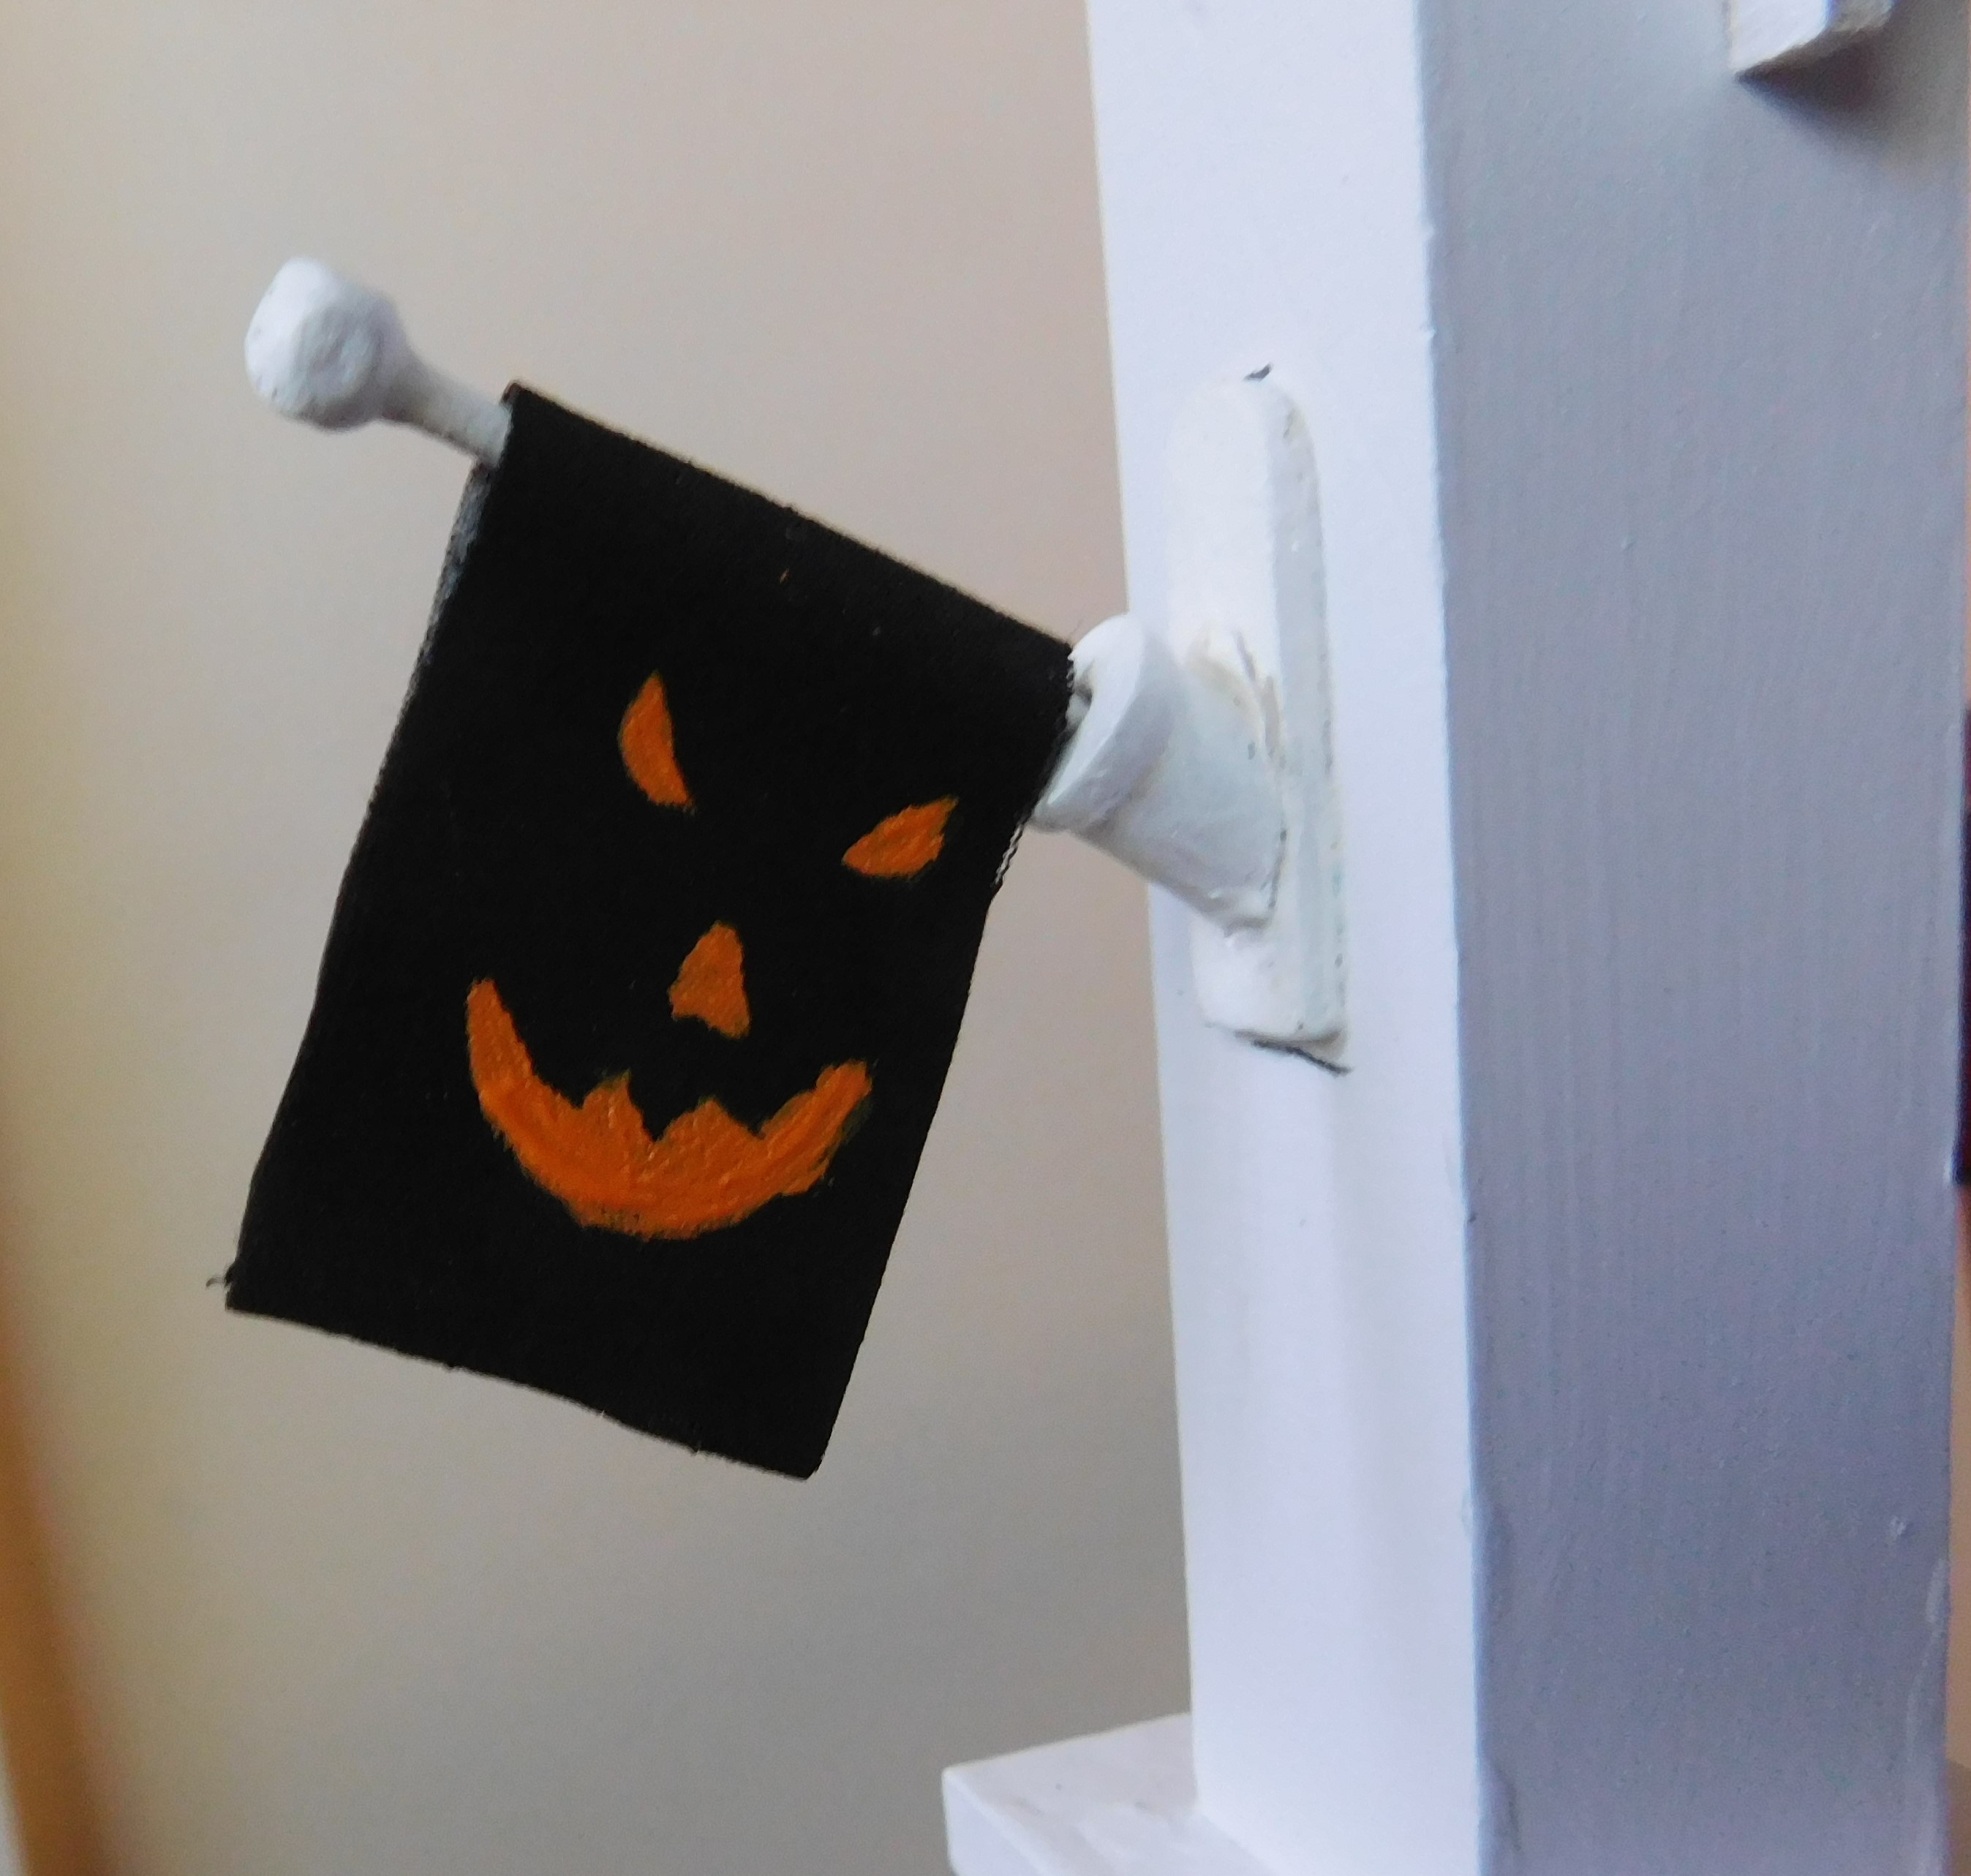
Dollhouse Miniature Halloween Garden Flag


Watch the video here.


Like always we are starting with a strip of plain white, 100% cotton fabric. I use bleached muslin for my flags, you should be able to find this fabric in any fabric store/department especially if they carry any fabrics geared to quilters. For our flag we need a strip that measures 1” by 3”.


The other item we will need to begin is some paper backed fusible web. This is basically a fabric glue that is heat activated and comes on a sheet of paper making it very easy to use. I prefer the Heat 'N Bond brand. There are other brands in stores and you can use whatever brand you can find. I do recommend you pick one that is designed to hold without sewing. Mine is labeled “Ultra-Hold” this way you won't need to worry about your flag coming apart later. You will need a 1” square of the paper-backed fusible web.


Follow the directions on your fusible web product to form your flag.


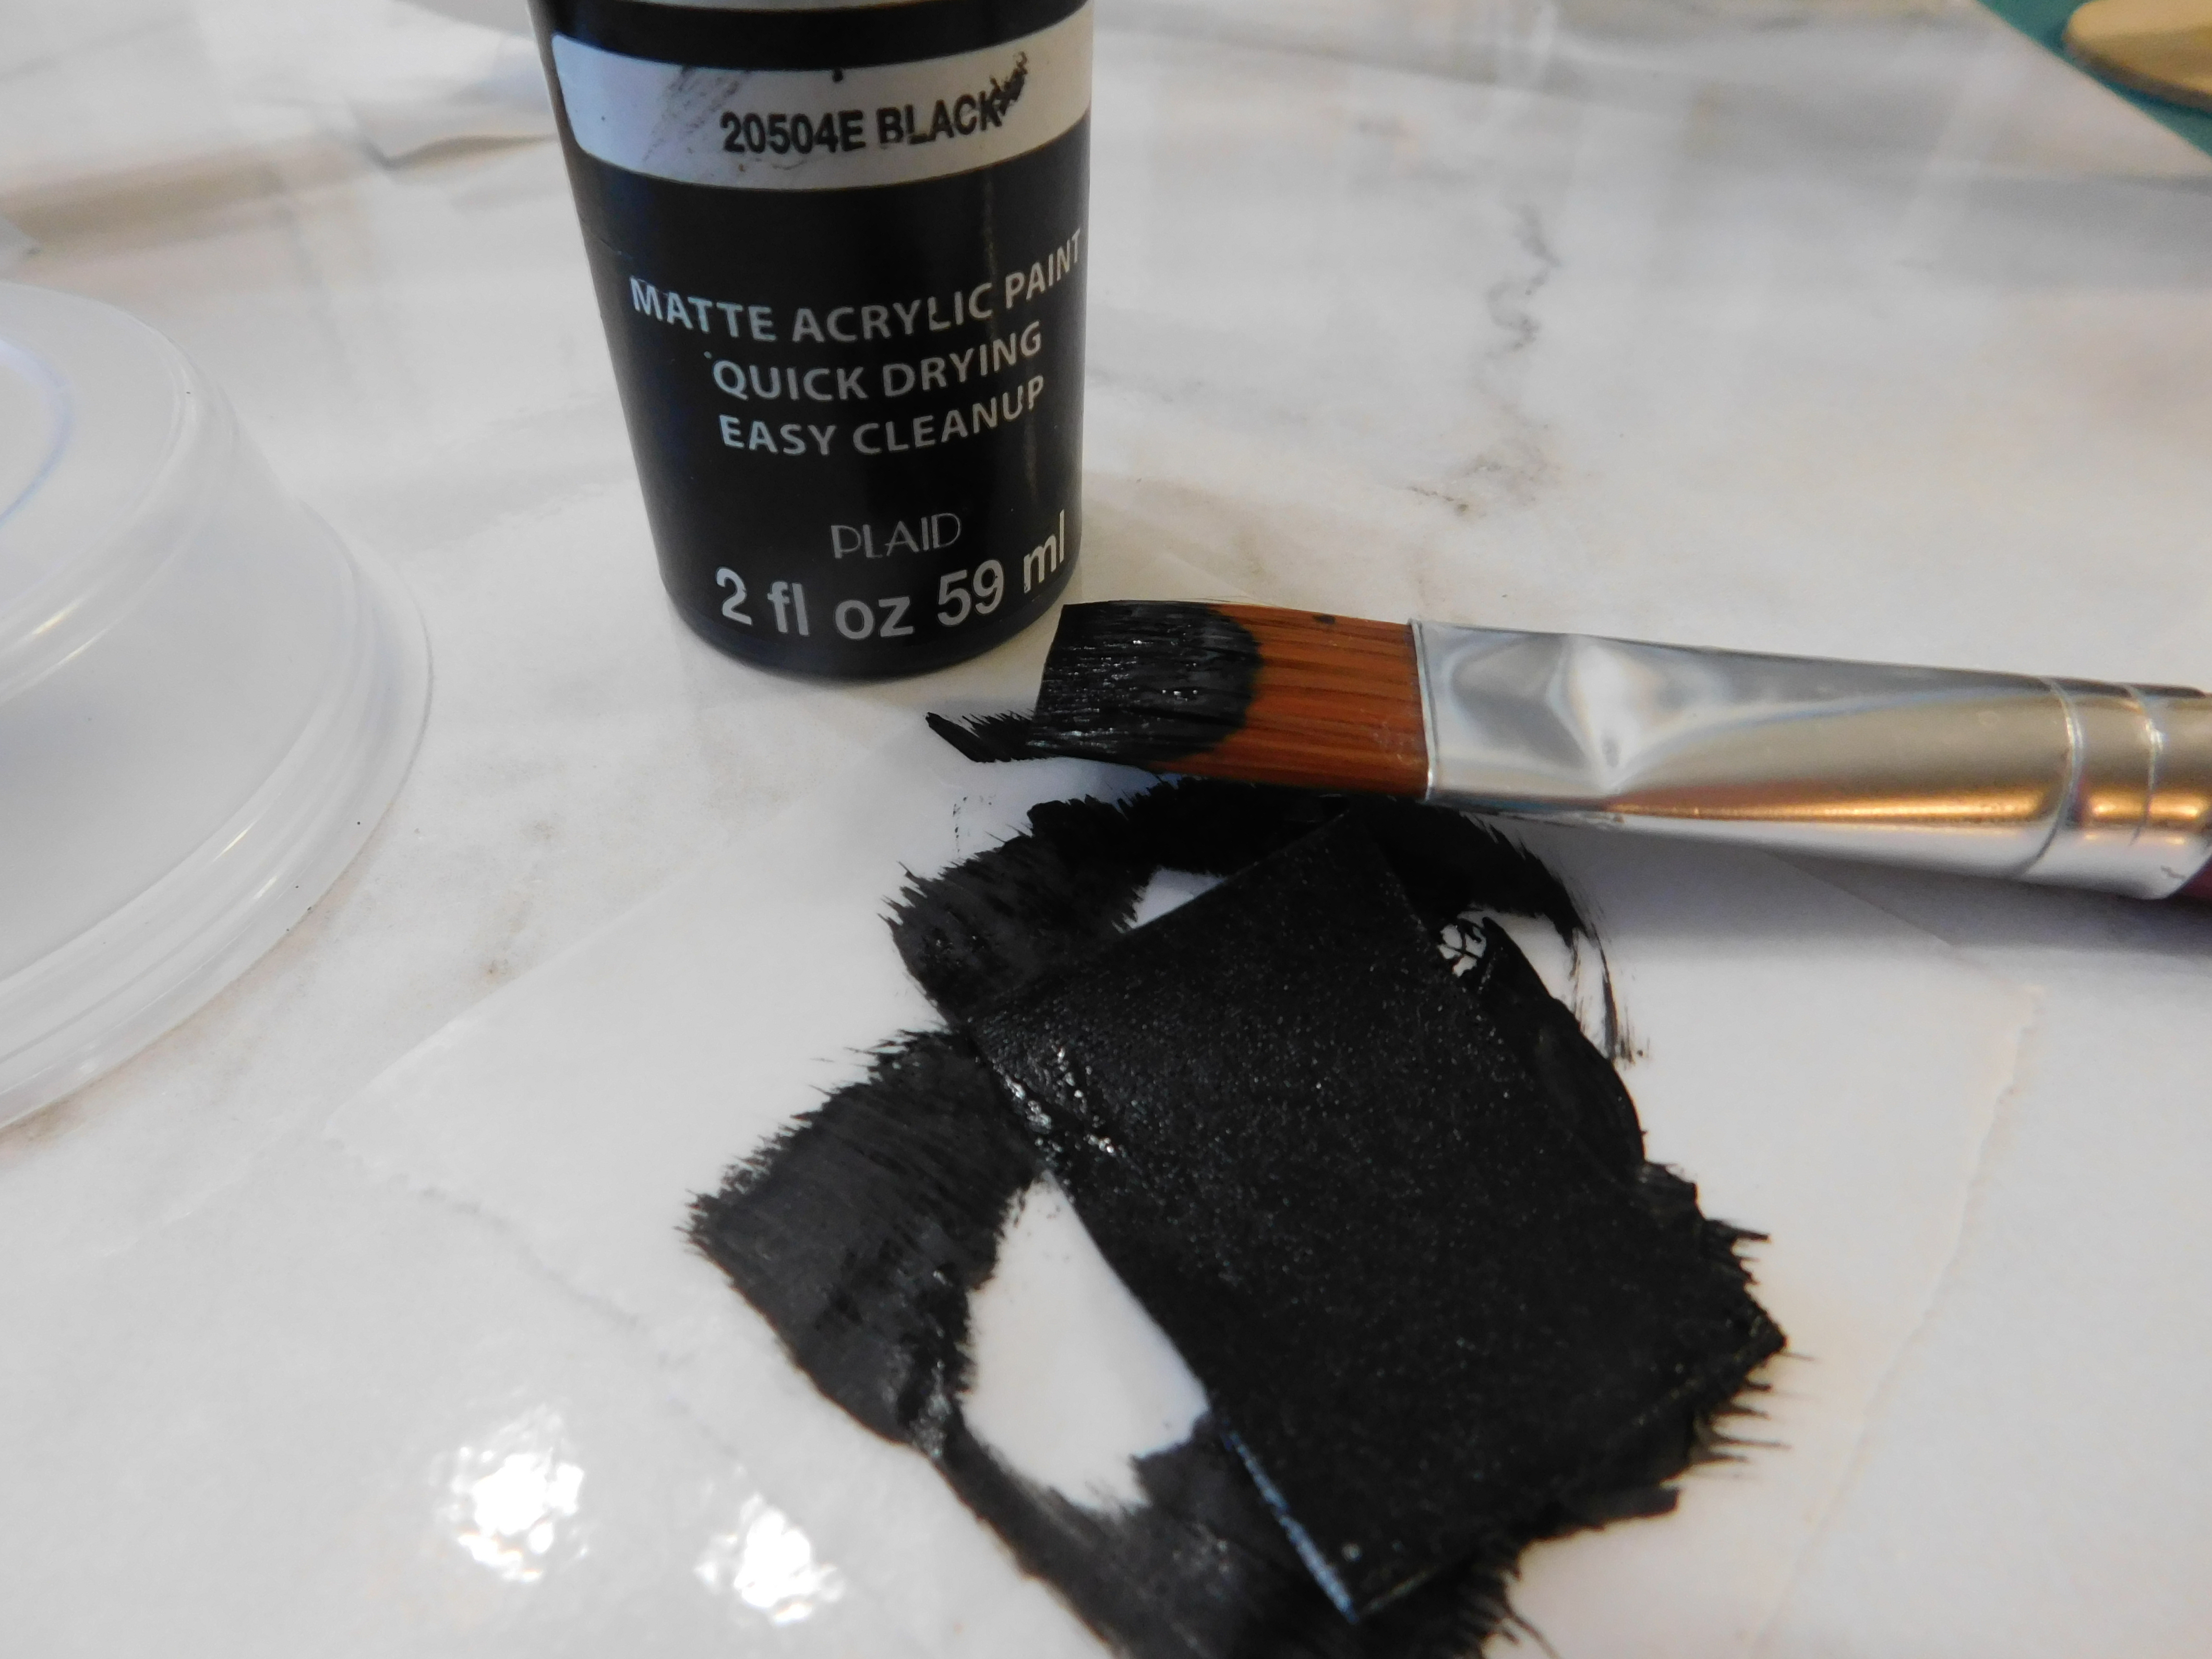
Now for the fun part, turning this flag into a fun Halloween flag. The first step is actually to check the orange paint to make sure it can cover the black background. I just painted a swipe of black on a small scrap of card-stock then when it was dry I swiped a bit of the orange I was planning to use over it and let it dry. Mine was opaque enough to cover. If yours isn’t you can either find a different orange or try painting your design first in white then top that with the orange, most whites seem to be pretty opaque.


Now onto the creating a Jack-O-Lantern face. First paint your flag on both sides with black paint. If you have some black fabric you could use that but I felt it was faster to use what I had out than to dig through my fabric stash to find a piece of black. Also it you make any errors in your painting if you have painted the background with the black paint you can paint over mistakes and it won’t show very much.


Once both sides are painted and dry we get to create our face. You can give your flag whatever personality you wish from cute to scary to anything in between. Paint the face on one side and allow it to dry before you paint the other side. I did need to do 2 coats of the orange paint on my flag to get good coverage.


Once the faces are dry your flag is ready to display. 


As always I do want to sincerely thank all of you for watching my videos and reading my blog posts. It means so much to me that you are supporting me in this way. If I could ask you all to do just a bit more by subscribing to the channel and liking the videos and leaving comments. Those help more than you can imagine. Also if you could pass the links on to your friends I would appreciate it so much.


Sunday, September 4, 2022

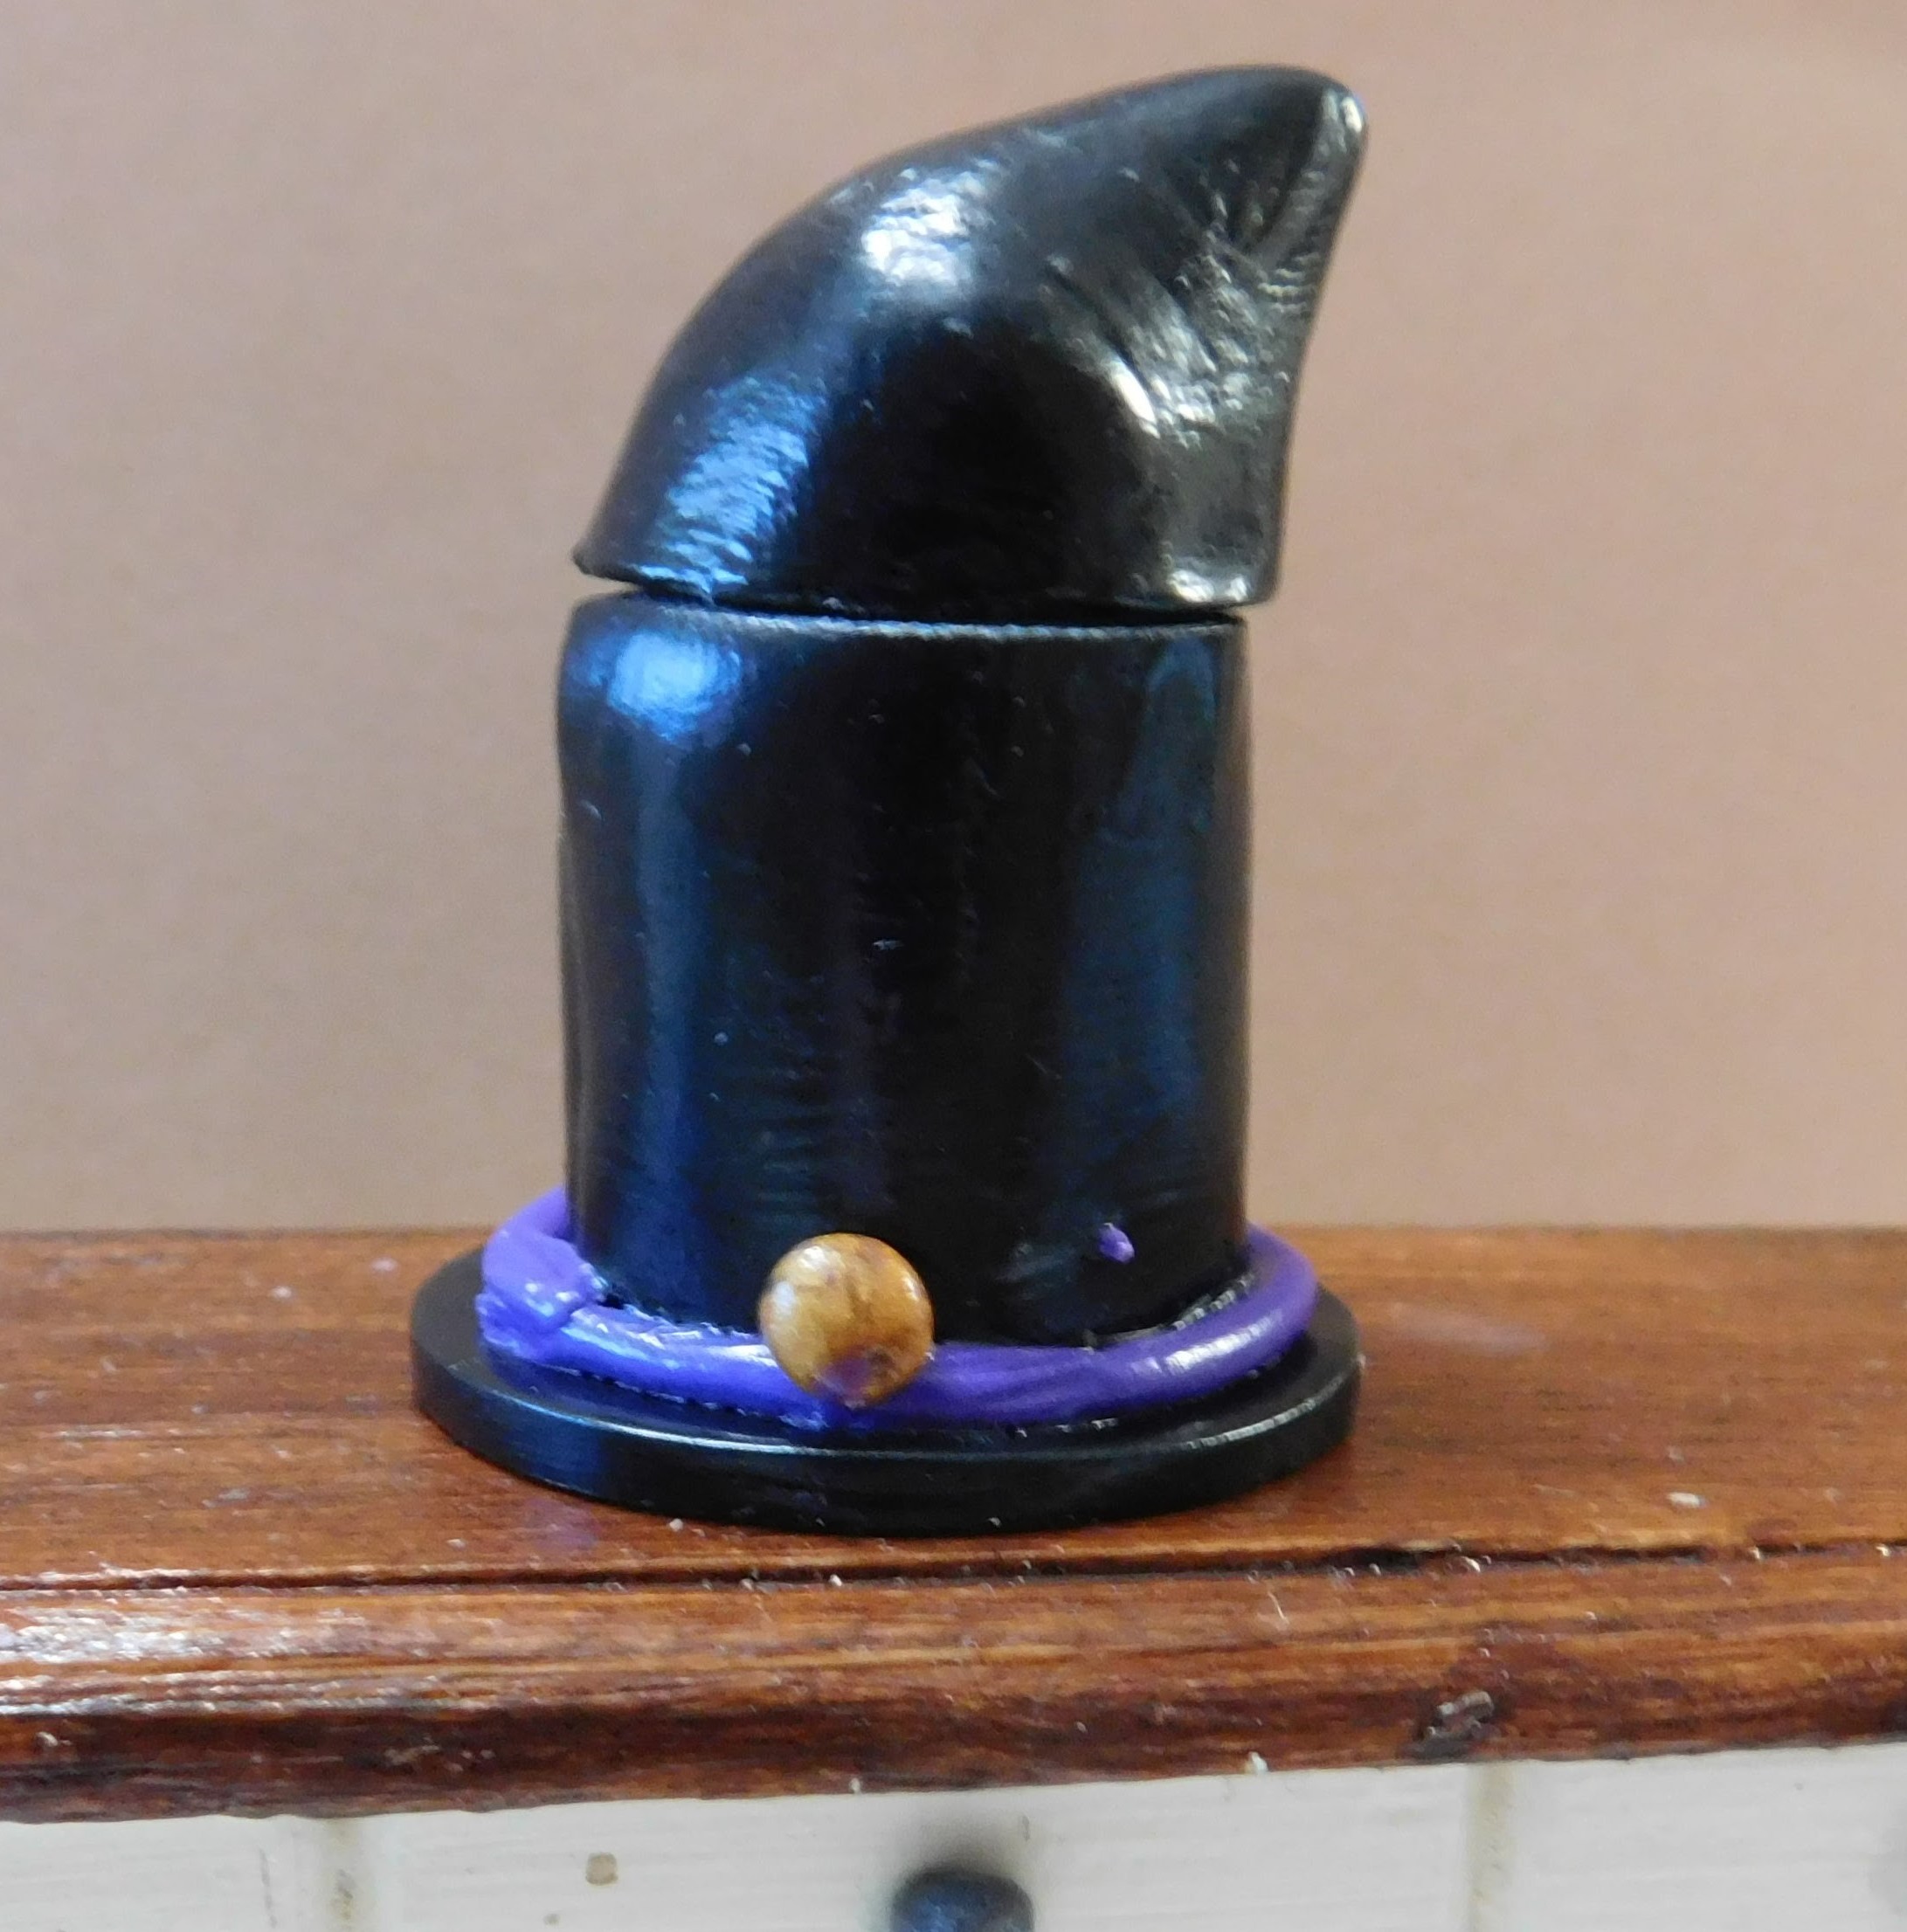
Dollhouse Miniature Halloween Cookie Jar


Watch the video here.


We start the cookie jar like pretty much all the others we have made, with a card-stock core or base. This is made from a strip of white card-stock that is ¾” by 4” and is rolled around a Sharpie type marker and glued to form a tube. This allows us to have a sturdy base to build our cookie jar on and it also gives the inside of the cookie jar a nice finished appearance.


I do highly recommend using a thick tacky glue for this step and then allowing the glue to dry really well (overnight is probably best) This way the glue will not let go in the oven. At least that is what has worked best for me on these. The only time this method didn’t work for me was when I tried to rush and didn’t give the glue enough time to dry completely.


Once the glue on the card-stock base has dried we need to add a very thin layer of white polymer clay. This will give us a nice base to build our cookie jar on. For this I used Liquid Sculpey in White. I would much rather of used TLS (Translucent Liquid Sculpey) but I am almost out and couldn’t get any the last time I shopped.


Once you have the outside of the base covered including a bottom added bake for 10 minutes at the temperature recommended on your clay. We also need to make a small disk of clay that will fit inside the top of the cookie jar to form the lid on. Bake your pieces for 10 minutes and allow to cool to room temperature before moving to the next step.


Now we can make this cookie jar look like a witch’s hat. We start by adding a thin layer of black clay. I used some Premo in Black this time. I rolled it out very thin and used some TLS (Translucent Liquid Sculpey) to attach it. I am almost out of the TLS and any only using it where I really feel I need to until I can get more clear/translucent liquid clay. Trim this black clay as best you can on both the top edge and the bottom. Also work on the seam with your fingers to smooth and minimize it. Now roll out some more of the black clay using a couple of craft-sticks to get a nice even thickness for the brim. I used my round clay cutter that is about 1” in diameter. Use a bit more TLS to attach this part and make sure your cookie jar is centered on the brim.


Back for 10 minutes at the temperature recommended for you clay and allow to cool.


Now that the main part of the cookie jar is baked we might need to even up the top edge. To do this tun it upside down on a piece of coarse sandpaper and carefully remove any un-eveness from the top edge. Be very careful to hold your cookie straight up and down while doing this.


Now use some more black clay to make the pointed part of the hat that will serve as the lid to our cookie jar. To do this start with a ball of clay and work with it until you like the shape. I like to place a small piece of parchment paper over the top of the cookie jar and really make sure the lid is the correct size and shape. Once you are happy with the lid bake at the recommended temperature for your clay for 20 minutes. We want to be very certain we get the clay all the way in the middle of the piece baked. Allow to cool to room temperature.


If needed even up the bottom of the lid with your sandpaper just like for the cookie jar. Now cradle the lid upside down in some foil to keep it level and use some TLS to attach the little piece we formed from the white clay.


At this point we can add trim to the cookie jar also. I used some purple Fimo to form a thin snake that would go all the way around the hat where it meets the brim to form a hat band. I also made a tiny ball of gold metallic Premo as a bit of a decoration.


I decided to forgo the liquid clay on this step because I didn’t think I could apply it so that it would not show on the finished cookie jar. Even the TLS will show up against the black. Since this piece is in a rather protected area and the purple clay goes all the way around and meets itself I am fairly sure it will be fine.


Bake both pieces for another 10 minutes at the recommended temperature and allow to cool to room temperature.


The last step is to apply a thin even coat of Satin Mod Podge to the outside of the cookie jar. This will not only add a nice finish but also give me a tiny bit more insurance that the purple band won’t come off later. Allow to dry.


And there have the newest addition the cookie jar collection. 


As always I do want to sincerely thank all of you for watching my videos and reading my blog posts. It means so much to me that you are supporting me in this way. If I could ask you all to do just a bit more by subscribing to the channel and liking the videos and leaving comments. Those help more than you can imagine. Also if you could pass the links on to your friends I would appreciate it so much.
Saturday, September 3, 2022

Dollhouse Miniature Tricolor Bread


Watch the video here.


This week we are going to make some more bread. This one isn’t baked in a loaf pan it is just a favorite of mine so I thought it would be fun to make. I rediscovered the real life recipe when I was looking for photos for last week’s swirl breads. I had been looking through some of my cookbooks for pictures and this one was in one of those books. I used to make this in real life back when my kids were litter and all at home. We especially liked it with soup or stew. It is a braided loaf made up of three flavors of bread: white, whole wheat, and a very dark pumpernickel. It was so cool in real life to make and serve that I just had to do a mini version of it with all of you.


The clays we will be using are- the bread mix we have used the last couple of weeks (4 parts white with 1 part Fimo Sahara) for the white bread, a dark brown (I used Sculpey III in Suede Brown) for the pumpernickel, and a mix of the bread mix with enough Fimo Yellow Ocher to make a good warm color for the whole wheat.


Roll each color into a snake that is a little over 1 ½” long and a little less than ¼” in diameter. Lay the snakes next to each other, I always put the white one in the middle with the real bread so that was what I did with the clay too. And braid them like you would bread. I find it is easiest to start in the middle and work to each end. Use your fingers to tweak the shape and get it just how you want it.


When you are happy with the shape it is time to dust the outside of the bread with artist chalks using the normal 3 we use for baked goods, yellow ocher, reddish brown, and dark brown.


Dust most of the loaf with the yellow ocher chalk using an eye-shadow brush.


Next move to the reddish brown and dust most of the loaf but a bit less than with the yellow.


Then finally just a touch of the brown over just the top and maybe a touch on the ends. Don’t over do the brown or it will look like the dolls burnt the bread. Be sure to burnish the chalk into the surface of the clay.


Once you are happy with the chalk application and shape transfer the loaf to the freezer for about 15 minutes to firm up the clay.


Once firm use a sharp clay knife to slice you loaf as desired. This needs to be done as soon as the clay comes out of the freezer to prevent/lessen distorting the loaf when slicing.


Now we need to texture the cut surfaces.


I like to start with a wire brush to give a base texture.


Next use your pointy tool to tickle the surface to give more texture.


Once you are happy with the texture bake the loaf and slices at the recommended temperature for 15 minutes.


As always I do want to sincerely thank all of you for watching my videos and reading my blog posts. It means so much to me that you are supporting me in this way. If I could ask you all to do just a bit more by subscribing to the channel and liking the videos and leaving comments. Those help more than you can imagine. Also if you could pass the links on to your friends I would appreciate it so much.

Wednesday, August 31, 2022

Dollhouse Miniature Stacked Pumpkins


Watch the video here.


I have been seeing these stacked pumpkin decorations all over and I simply love them. I decided they would be a lot of fun to make for the dollhouse so that is today’s project.


The set I made today is big enough to display outside on the dollhouse porch but you could easily make it smaller for an indoor tabletop decoration also.


Another thing you could change up is the both the colors of the pumpkins and the shape of them. I went with a fairly neutral color palette of a toned down orange with some brown/beige tones added in. But I am seeing pumpkin decorations in many other colors so pick what you love and go with it.


As for shape some of the of the real size ones I saw had tall pumpkins and some had short flatter ones. I loved the look of the shorter flattened ones so again that was what I made today.


You could also add a Jack-o-lantern face to all or some of the pumpkins and make this a Halloween decoration.


For the one I made I used one of those wooden plant pots that you can buy at the craft-store. Mine measured a 1” across at the top and was 1” tall. You can pick whatever container you want for yours. Again the real ones vary so much so look through your stash to see what you have on hand.


I painted the pot as plain black because that was the look I liked the best.


Then I mixed my clay colors.


My base color was Fimo in Cognac, which I love for a muted pumpkin color. This was what I used for the middle pumpkin. I mixed some dark brown (Sculpey III in Suede Brown) with some for the bottom pumpkin. For the top one I mixed in some white to the base color to give me nice ombre effect in my colors.


For the stem I mixed some lighter brown (Sculpey III in Hazelnut) with some white to give that dried stem color.


How much clay you need will depend on how big of a container you are using for your base and what shape you want for your pumpkins. Make a ball of the color for the bottom pumpkin and flatten it as much as desired. Then fit it to the top of whatever base you are using. When you have the size you like add the lines to the sides of the pumpkin, I used a toothpick for this step. Test fit the pumpkin to your base again in case you distorted the shape while adding the detail.


Now with the middle pumpkin color make a slightly smaller ball and shape shape it as desired. Try it on you bottom pumpkin and when you are happy with it add the lines the same way as before.


For the top pumpkin use the color you have chosen to make a smaller ball of clay and then shape it into a pumpkin. This one will have a few more details. Use a ball tool to make a dent at the top and smooth it out then add the lines to sides.


Use the light brown/beige clay to form a stem for the top.


Stack you pumpkins the way you want them. It is a good idea to try them on your base to make sure you have the look you are going for. Them bake the pumpkin stack for 30 minutes at a slightly lower temperature than called for on the clay package.


While the pumpkins baked I finished my pot with some Satin Mod Podge so it would be dry when my pumpkins cooled.


Now you can glue the pumpkins onto the top of your base or leave them loose. I choose not to glue in case I want to display them differently in the future. Since mine sits nicely on their own they will be fine not glued. If you do glue be sure to use a glue that is polymer clay friendly.


Black paint, Mod Podge. and brushes provided by Plaid for use in videos.


As always I do want to sincerely thank all of you for watching my videos and reading my blog posts. It means so much to me that you are supporting me in this way. If I could ask you all to do just a bit more by subscribing to the channel and liking the videos and leaving comments. Those help more than you can imagine. Also if you could pass the links on to your friends I would appreciate it so much.

Sunday, August 28, 2022

Dollhouse Miniature Fall Tabletop Decoration


Watch the video here.


Today I thought it would be fun to replicate in miniature a little fall decoration I recently picked up in real size. I was at the local Family Dollar store and they had just finished putting out some new fall decorative items. In amongst them I saw this cute tabletop decoration. Now to be honest I wasn’t going to buy anything that day but then little guy was just sitting there and I knew it would be perfect to make in miniature. I also know it will fit in on my fake fireplace since the decorations were a little sparse last year.


So to begin we need to gather just a couple of items. A couple of regular craft-sticks and a white chenille stem. For coloring those we will need a few paints (we’ll talk about those in a minute) and some alcohol markers.


Start by cutting the craft-sticks in the following sizes:

2 @ 1”

2 @ ¼”

1 @ ½”

1 with a roof peak that measures 5/8” from the tip of the peak to the base.


Glue the two 1” pieces together and clamp to hold until at least mostly dry. This well be the base of our piece.


Now glue the peaked craft-stick piece and the ½” one like this to form the little house.


Meanwhile use a pair of scissors to trim the chenille stem into a tree shape and color with the alcohol markers. Ideally if you have a brown one that would probably work alone. I didn’t have one so I used a yellow one first to coat it then just a touch of orange on the tips of what are now the branches. Set this aside to dry until later.


Once the glue dried mark the middle of the long unit and glue the 2 tiny pieces to the front like this. Allow to dry.


Now we can paint, I used some vanilla cream paint for the base piece. Then mix a tiny bit of the same paint with a brown (I used Woodsy Smoke) to make a beige color and paint the house part. Allow to dry.


Now add the details. On the house part use the cream color to add the roof details and a door and windows. Then first with a pencil write the word FALL on the base and they using a toothpick apply some rust[orange color paint (I used Buttered Yam) to the letters. Allow to dry.


Once dry glue the house to the top of the base. Cut the tree free of the rest of the stem and glue next to the house and allow to dry.


There you have a cute little fall tabletop decoration for your dollhouse. Here is the one I made in the video next to it’s real counterpart. I think I did a pretty good job of scaling it down for the dollhouse.


As always I do want to sincerely thank all of you for watching my videos and reading my blog posts. It means so much to me that you are supporting me in this way. If I could ask you all to do just a bit more by subscribing to the channel and liking the videos and leaving comments. Those help more than you can imagine. Also if you could pass the links on to your friends I would appreciate it so much.