This week we are making some really simple lemons to go in that fruit basket we made last week. I actually decided on making these before I decided on making the fruit basket. I wanted someplace special for them to live so the bowl first and now the lemons.
These are super simple and just for placing in a scene whole. If you want to have lemon slices I have a tutorial on making orange slices here, that you can follow just subbing in yellow clay for the orange and making them smaller.
Normally when I make a whole fruit like this I use a white/translucent clay blend and use either chalk or paint to add the color on the outside. For these lemons I did play around with different combinations of chalk and paint but I just couldn’t get the color the way I want4ed it. In this small scale they almost looked too light. So I decided to go the easy route and use a yellow clay. I think they turned out really well.
Since these are going in a fruit bowl you don’t need to go all in on the details of each and every lemon. I only added stems to a few for instance.
To get started roll your yellow clay into a snake a bit less than ¼” in diameter. Then cut into pieces. It does help to have a doll to assist you , that way you can make the lemons to fit a doll hand. Since these can vary a lot in real life just make the size that looks the way you want it to look in comparison to the doll’s hand.
Roll the pieces of clay into balls.
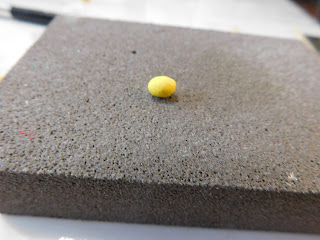
Now transfer the balls of clay onto a sanding sponge/block and while rolling the lemons on the surface to get the texture define the shape from a ball to a lemon shape.
On the ones you want to add a stem to take a tiny bit of a tan/beige clay (I used Sahara from Fimo) and using the tip of a wooden skewer add it to look like the tiny stem. Then roll and shape on the texturing surface.
Using an eye shadow brush apply just a touch of green chalk to the ends of your lemons. Don’t go too heavy just a touch.
Once you have as many lemons as you want bake them at the temperature stated on your package of clay for 10 minutes and allow to cool.
Now take just a tiny amount of Satin Mod Podge and give your lemons a very thin coat. You want them to glow just a bit not to be shiny.
Once dry the lemons are ready to add a touch of summer to the dollhouse kitchen.
As always I do want to sincerely thank all of you for watching my videos and reading my blog posts. It means so much to me that you are supporting me in this way. If I could ask you all to do just a bit more by subscribing to the channel and liking the videos and leaving comments. Those help more than you can imagine. Also if you could pass the links on to your friends I would appreciate it so much.


No comments:
Post a Comment