
One of the YouTube channels I watch that is a combination of crafting and home decorating had a recent video using tobacco baskets and I loved all the ways that they could be used. She placed them on tables as well as hung them on the walls. She added floral decorations to some of them these can be used so many ways. I also loved the lines and overall look of the baskets so I knew I had to make some mini ones.
I did take a few liberties with the design. On most the real size ones I saw online there were diagonal pieces of the woven base in addition to the open weave that I used. When I tried to add the add the additional pieces and it just looked too busy in this scale. I think if you are making one of these in Barbie scale (1/6) you would be fine adding them. I mean if you really want to you could add them in this scale but my opinion was they were just too much.
So to start you need to pick something to use as a form to help build your basket. Since I especially love the square version of these I used a square nail polish bottle. Mine was about 1” across. You can make these baskets square, round or oval. So check around and see what you have that can be use.
You will need some card-stock to make your basket from look for the kind that is heavy enough to make greeting cards out of. Most craft stores have loads of this paper in either pads or packs and it comes in every color you can imagine. Even though we will be painting our basket later I do recommend using a card-stock that is close to the color you want your finished basket to be. This will save you time in painting later.

My card-stock was 12”x12” and I cut 5 strips that were 1/8” wide. Cut one of these into two pieces that will wrap around your form and overlap enough to glue together (my overlap was close to ½”) These will be your basket inner and outer rims. Cut the other 4 pieces in half so you 8 pieces that are around 6”. (this is all based on using a form similar to mine. If you use something smaller you will need less strips if it is bigger you will need more.

Start by forming the inner rim by wrapping one of the strips around your form and gluing the ends. All this to dry off the form.

While it dries lay out 4 of the 6” strips spacing them evenly and tape down (or secure in some other way) now weave the remaining 6” strips into them forming a woven area that is very open that is smaller than the base of the form you are using.
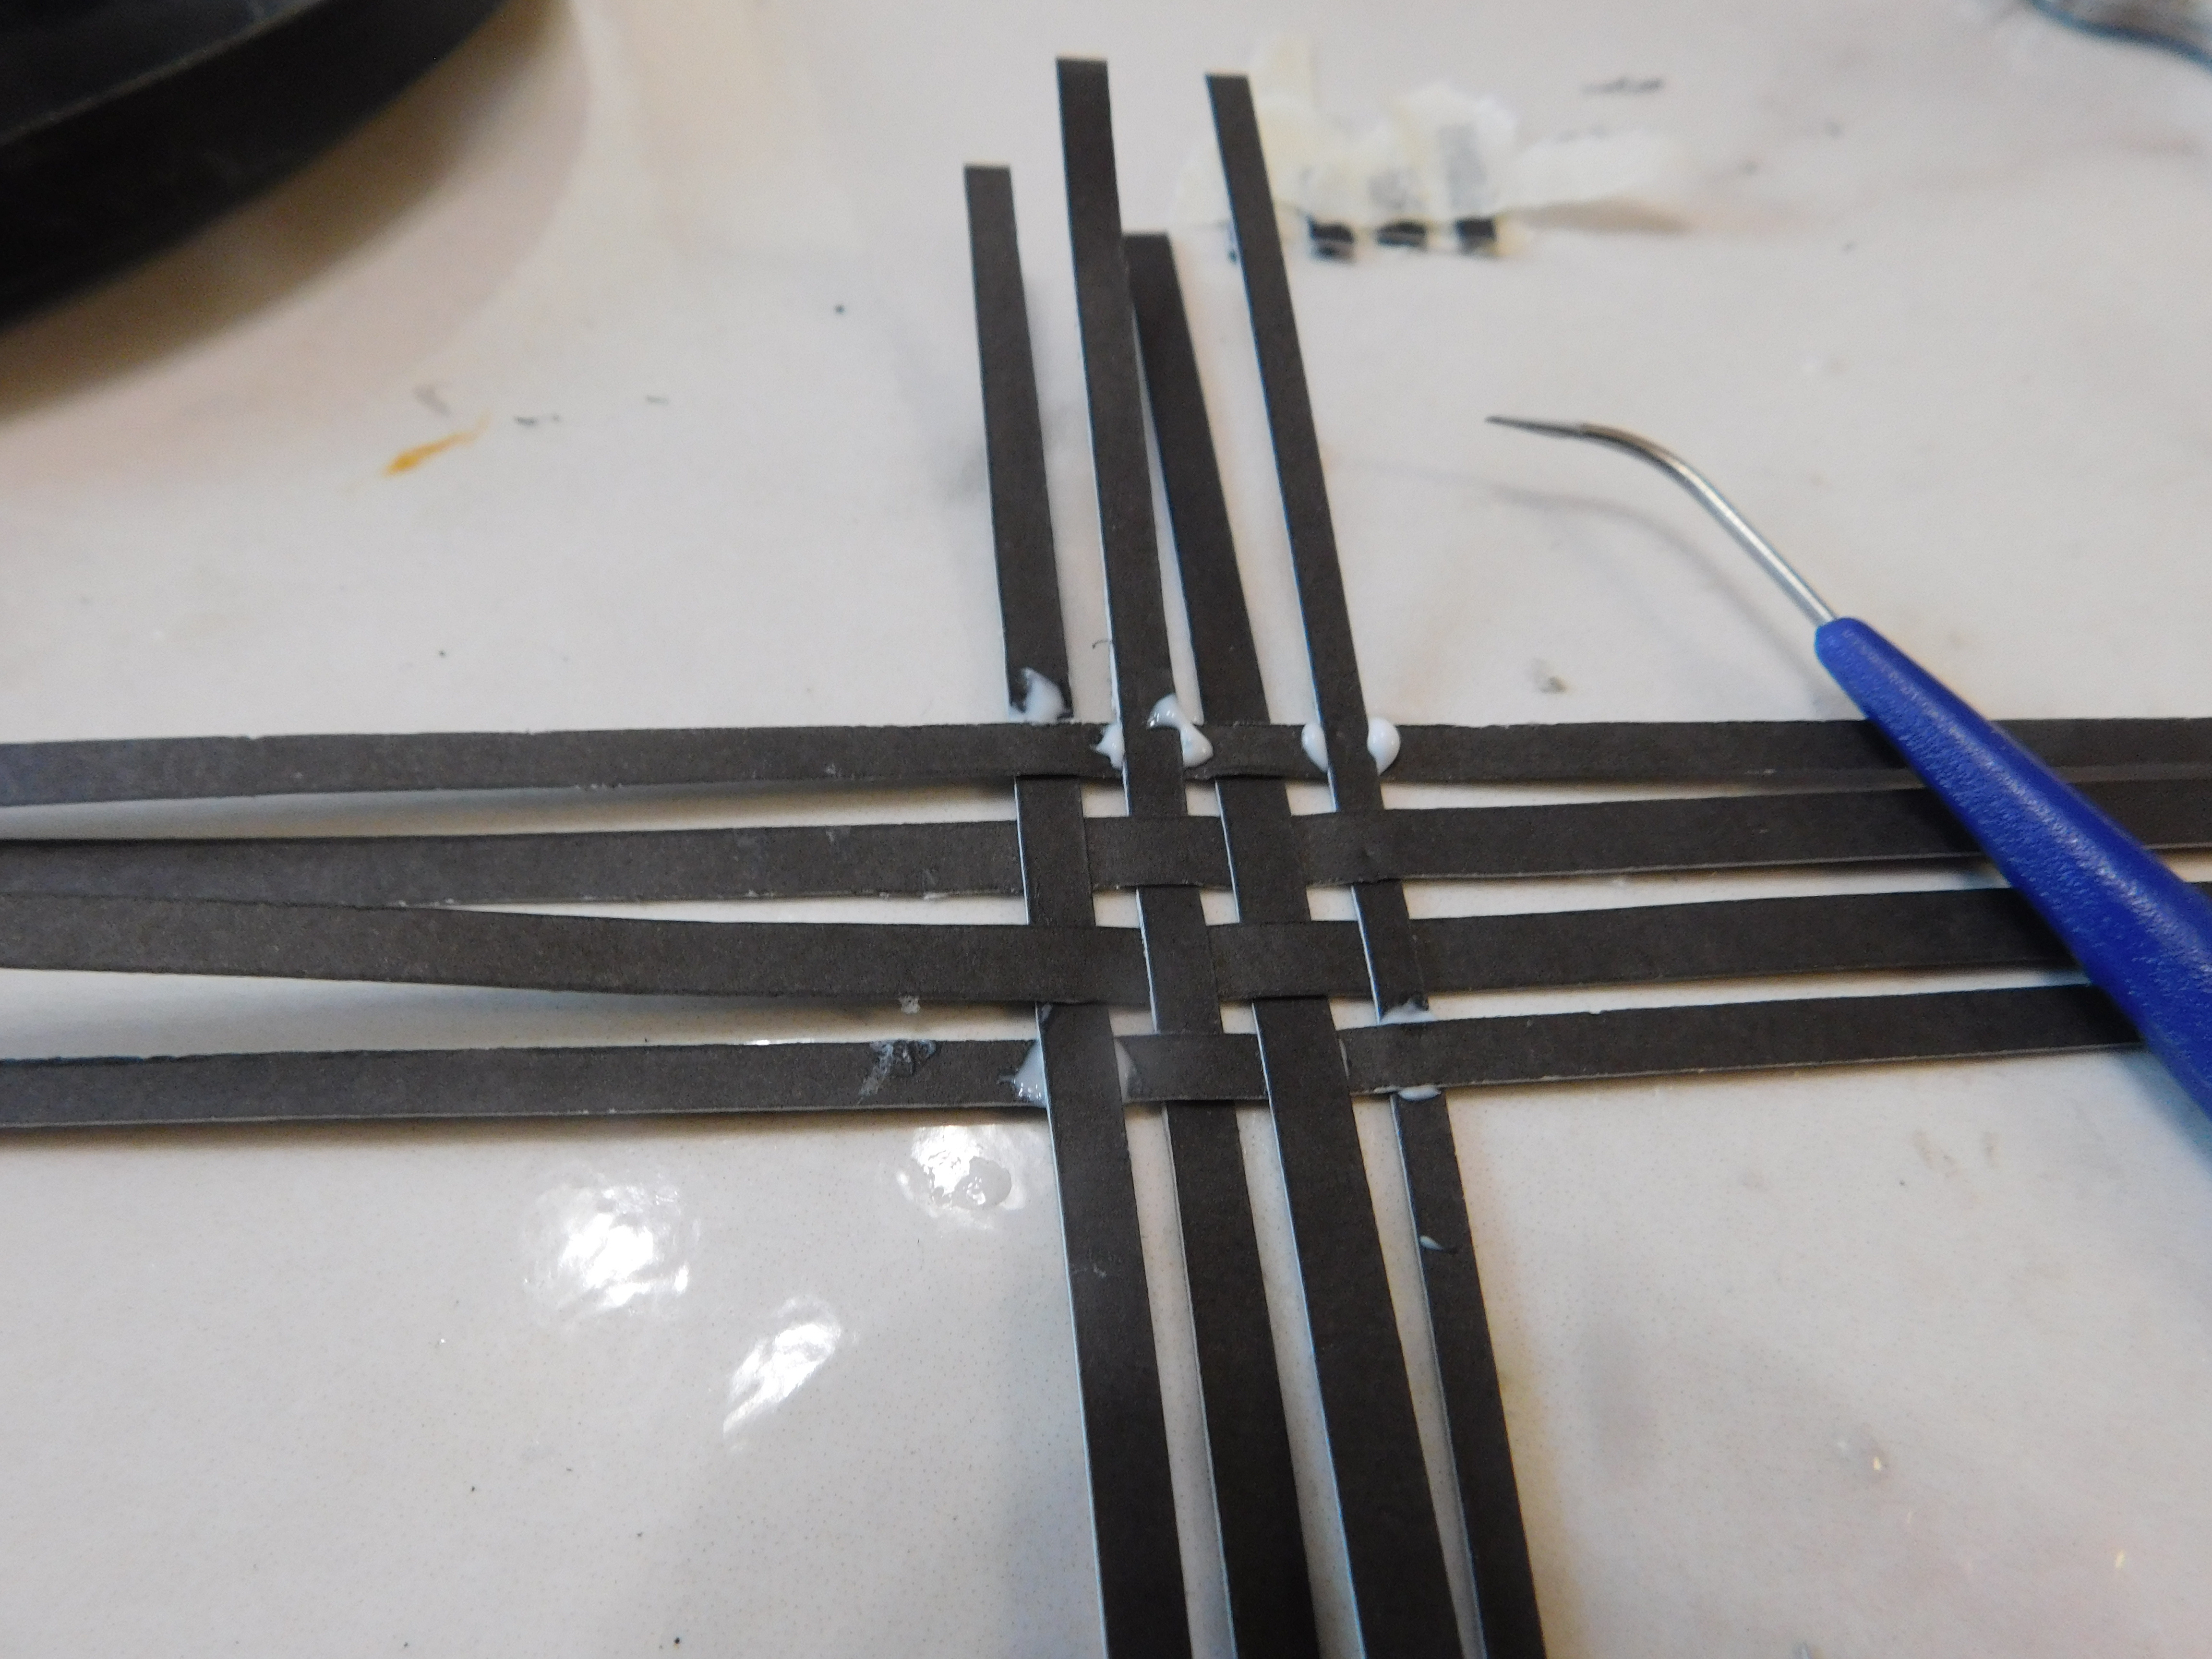
Carefully add dots of glue to the intersections on the outer edge of this woven piece and allow to dry.

Add glue to outside of the inner rim, slip it back onto the form place it so that it will form the depth of basket you wish to make and add the woven part of the basket. Make sure all the pieces are where you want them and are running straight.
Hold in place until the glue grips on its own. Allow to dry in place.

Once dry use a small pair of scissors to trim off the excess of the strips you wove the bottom of the basket with. I like to angle the basket so I am cutting from the inside so I can be sure that I am cutting all the strips even with the top of the inner rim.

Put the basket back on the form and add the outer rim being sure to line it up with the inner rim. Allow the glue to dry.

Use some craft paint to coat the basket to hide any glue that might be showing. It will also help make the basket look like a real basket and take away some or the “paper” look.

Once the paint is dry give the basket a coat of mat Mod Podge and allow to dry.
I love how these look and it really is hard to stop at just one.
A big thank you to the folks at Plaid for supplying the paint, brushes, and Mod Podge used in this tutorial.
As always I do want to sincerely thank all of you for watching my videos and reading my blog posts. It means so much to me that you are supporting me in this way. If I could ask you all to do just a bit more by subscribing to the channel and liking the videos and leaving comments. Those help more than you can imagine. Also if you could pass the links on to your friends I would appreciate it so much.
Nice little basket!
ReplyDelete