Check back often

Have you checked out all my blogs?


Dollhouse Minis: http://joannesminis.blogspot.com


18” Dolls: http://joannes18dolls.blogspot.com/


General Crafts: http://joannes-place.blogspot.com/


Cooking: http://joanne-kitchen.blogspot.com/


Also if for some reason I can't post I will try to give a head's up on the Facebook page so check there too.

Wednesday, October 19, 2022

Dollhouse Miniature Scarecrow Flag


Watch the video here.


Like always we are starting with a strip of plain white, 100% cotton fabric. I use bleached muslin for my flags, you should be able to find this fabric in any fabric store/department especially if they carry any fabrics geared to quilters. For our flag we need a strip that measures 1” by 3”.


The other item we will need to begin is some paper backed fusible web. This is basically a fabric glue that is heat activated and comes on a sheet of paper making it very easy to use. I prefer the Heat 'N Bond brand. There are other brands in stores and you can use whatever brand you can find. I do recommend you pick one that is designed to hold without sewing. Mine is labeled “Ultra-Hold” this way you won't need to worry about your flag coming apart later. You will need a 1” square of the paper-backed fusible web.


Follow the directions on your fusible web product to form your flag.


Now that we have a blank flag we can begin making it fit this month’s theme. I wanted a nice bright blue background like a couple of the scarecrow flags I saw online. However, I did not want to have to cover the blue color with my light face color paint. So I found my circle template and made a ¾” circle on the flag where I wanted the face to be. You will want to do this on both sides of the flag and do your best to line them up. 


By drawing this circle I can leave the area inside it plain and paint the bright blue right up to the edge all the way around. I don’t mind if the blue affects the colors of the other elements of the flag design.


Once the blue paint dries on both sides of the flag, use a creamy color to paint the face area. And allow to dry.


For the impression of the scarecrow’s shirt just paint a rounded shape with the color of your choice. I used a dark winey red. Be careful that you are painting this at the correct end of the flag (the sealed edge not the pocket edge)


For the hat I just paint a triangle shape on the top of his head.


Now we can start to add the details to the face. I used my white paint pen to make eyes, I will add to this in the next step. Some orange to make a small triangle nose, and finally some bright red to create a collar on his shirt. All to dry. I also added a small red flower to his hat.


Now with some black paint place a dot in the white dot for his eyes. I used my paint pen for this step. Then with a toothpick (or a very fine brush) add some black lines for the eyelashes and mouth. Then with some yellow paint  a dot to the middle of the flower.


With a darker yellow add some hay around the areas where the face meets the hat and shirt. I did find that my toothpick was much better for this step than a brush.


And with that our flag is ready to hang for fall.


As always I do want to sincerely thank all of you for watching my videos and reading my blog posts. It means so much to me that you are supporting me in this way. If I could ask you all to do just a bit more by subscribing to the channel and liking the videos and leaving comments. Those help more than you can imagine. Also if you could pass the links on to your friends I would appreciate it so much.

Wednesday, October 12, 2022

Dollhouse Miniature Standing Turkey


Watch the video here.


This week we are making a fun standing turkey for Thanksgiving. This is another project that I have created a pattern for you to use in two ways. I have a PDF for you to download and hand cut the pieces from. I also have a PNG that can be used with your electric cutting machine (like a Cricut) the PNG is designed to be used as a 6” by 6” file. Both can be downloaded here.


I highly recommend cutting the pattern from white medium weight card-stock, the kind you find in any craft store for card making.


Once you have your pieces cut out it is time to glue them together in sets of 3. by this I mean each set is made of 3 layers. I use a nice thick tacky glue for this step. Allow the glue to dry.


Now we can paint the pieces. This is where you can get creative and make the turkey yours. I chose muted fall colors but go with your heart. You will also need a strip of the same card stock that is 1/8” wide and two toothpicks. Paint those as desired too.


Now we can assemble the turkey. This will take several steps and I like to let the glue dry well in between the steps so that the pieces stay where I want them,


First glue the feathers to the body oval on the back. Start with the largest single feather in the middle and work down in size as you move out.


Next we glue the body front to the front of the oval.


Now add the wattle and beak to the face. You can use the pieces on the pattern or just paint these features. 


After the glue/paint on these dries add two small dots for eyes. Allow to dry completely.


Now glue the two toothpicks on for his legs. I added a small piece of the card-stock to re-enforce the joint but this is optional.


Once the glue on the legs is dry trim the legs to their final length. I cut mine so that the total height of my turkey was around 2 ½” tall.


Now glue some of the narrow strip of card stock at the ends of each leg to act as a “foot”


Once this is dry pick out a base. I found a piece of a jumbo craft-stick in my stash that I cut to just a bit longer than my turkey is wide. Finish as desired. I just used a very thick paint as a stain. Allow to dry completely.


Now glue your turkey to the center of your chosen base. I did have to use a glue bottle to prop mine up while the glue dried.


Once the glue dries give the entire turkey a coat of Mat Mod Podge and allow to dry.


There I think the front porch is looking very festive for the fall season.


As always I do want to sincerely thank all of you for watching my videos and reading my blog posts. It means so much to me that you are supporting me in this way. If I could ask you all to do just a bit more by subscribing to the channel and liking the videos and leaving comments. Those help more than you can imagine. Also if you could pass the links on to your friends I would appreciate it so much.

Sunday, October 9, 2022

Dollhouse Miniature Furniture Review


Watch the video here.


This week we are taking a look at some one of the pieces of unfinished dollhouse miniature furniture that is sold at Hobby Lobby. I know I have seen several people using various pieces of this furniture in their projects and I wanted to see for myself what the quality is.


I picked out the nightstand which is marked at $1.99, which makes it just a tiny bit more that the furniture from Dollar Tree. Some of the bigger pieces were higher in cost.


One thing I want to say is that I simply pulled the front piece off the hook and purchased it. I did not take any time to look for one that was in better or worse shape than the others on the display. I felt this was the most fair way to do the review.


So first impressions, it seems to be make of decent wood, not sure exactly what it the quality of the wood is nice. The overall piece is fairly smooth out the package and only needed minimal sanding.


For the most part the glued joints seem to be neat and done well. One of the three drawers in my piece had the front put on a bit crooked but not a lot. It was definitely more noticeable in person than on camera. Do note that because of the style of this piece all the drawer fronts are angled a bit the top one is has stronger angle. Only really noticeable when you are really looking for defects.


I decided to test both a penetrating stain and a painted finish on the piece. These are probably the two most common ways to finish furniture and I wanted to see how both would behave on the piece. The only stain I had on hand was the black tone that I had for the roof of the Beachside Bungalow. Not my first choice as far as color goes but for our project today it is fine. One of the things I was looking for with the stain was how neat those glued areas really are. Stain normally will leave a light spot anywhere there was glue that was wiped away. I am happy to say that there was only one place that the stain did not take and that was this little area where the back and the top meet. Other than this one spot the stain was pretty even and covered nicely. The grain of the wood on this piece is also acceptable also for the piece.


For the drawers I used a red craft paint. I wanted to see how smooth the paint would go on and would it raise the grain badly. I have to say that with only 1 coat of paint the coverage was excellent and even if I was going to use this piece in a scene I would be tempted to skip a second coat. The only place the paint raised the grain was at the edges of the decorative cut area on the drawer fronts and even that was minimal.


A quick coat of gold paint over the red on the knobs and they are smooth enough to mimic metal hardware in person.


The only clear finish I had on hand the day I filmed was Mod Podge so that was what I used and it worked out fine.


So overall I really like this furniture piece. The crooked drawer could most likely be avoided by looking the piece over carefully in it’s package before purchase.


The spot where the stain did not take could be camouflaged by careful touch up especially since it was a small spot and in the corner.


I am pretty certain I will be purchasing more of this furniture in the future for projects. I think they will spark a lot of creative proctors in the coming months.


As always I do want to sincerely thank all of you for watching my videos and reading my blog posts. It means so much to me that you are supporting me in this way. If I could ask you all to do just a bit more by subscribing to the channel and liking the videos and leaving comments. Those help more than you can imagine. Also if you could pass the links on to your friends I would appreciate it so much.


Saturday, October 8, 2022

Dollhouse Miniature Caramel Apple Cheesecake Tutorial


Watch the video here.


This week for our Saturday tutorial I am recreating a caramel apple cheesecake that I saw in a magazine. I thought it was so pretty and would make a fantastic mini project. I did simplify the design a bit but all in all I am very pleased with the outcome.


We need to start by making the cheesecake portion of out dessert. For this it is simple just some white clay rolled out just under ¼” thick. I used my double craft-sticks to size the depth of the clay. Then I just used my ¾” round clay cutter to cut the cake. This was then baked at the recommended temperature for 15 minutes to make sure it was fully cured before moving on to the next step.


The next step was to create our apple slices that will decorate the top of our cheesecake. The real one had the slices rolled into apple flowers. I had intended to do something similar but my translucent clay was far too soft to cooperate with that. So I opted to just use the slices layered around the cake top then on apple flower in the center of the cake.


To create the apple color use some translucent clay mixed with just the smallest crumb of a yellow clay. Just enough to tine the translucent clay a very pale yellowish color, like the inside of many varieties of apples. Form this clay into a log that is flat on one side about ¼” in diameter. Then using artist chalks in yellow and red add the skin color to the apple log. This now needs to go into the freezer for at least 15 minutes to firm up enough to slice very thinly. Once chilled slice as many slices as you feel you will need plus a few more. You always need more than you think you will.


While the apple clay was chilling I mixed the “caramel sauce” that will act as the not only the glue that holds the apple slices on but also the decorative element and it will be used to form the crust also.


To mix this I used some of the last of my TLS (Translucent Liquid Sculpey) mixed with oil paints in Raw Sienna, yellow ocher, and burnt Umber. Just mix the colors in until it looks like a caramel sauce color.


Once you have the cake baked and cooled, sauce mixed, and the apple log sliced it is time to begin assembly.


To do this spread the top of the cheesecake with the TLS mixture then arrange your apple slices as desired. Once you are happy with the placement bake the cake for 10 minutes. This will set this part and allow you to move on and work on the next step.


Now add some of the sauce as a drizzle on the sides of the cake and add more to the top if you feel it needs it. Bake again to once again set your work.


Now add any more caramel sauce in spots you feel need it.


Now use the rest of your TLS mixture and add some sand to it to for a paste that can be spread on the bottom for the crust of the cheesecake. This is another step that will be done in stages. Get some on in a way you like then bake. Then come back and add more until you have everything the way you want it.


Bake after each step for 10 minutes to cure the TLS.


Once you are happy with the way your cheesecake looks use a very tiny amount of Satin Mod Podge to coat just the caramel sauce. Try not to get any on the surface of the cheesecake portion. We want that sauce to look shiny and wet like it would in real life.


Once dry it is tine to display your mini cheesecake in you fall mini scene.


As always I do want to sincerely thank all of you for watching my videos and reading my blog posts. It means so much to me that you are supporting me in this way. If I could ask you all to do just a bit more by subscribing to the channel and liking the videos and leaving comments. Those help more than you can imagine. Also if you could pass the links on to your friends I would appreciate it so much.


Wednesday, October 5, 2022

Dollhouse Miniature Christmas Tree Makeover


Watch the video here.


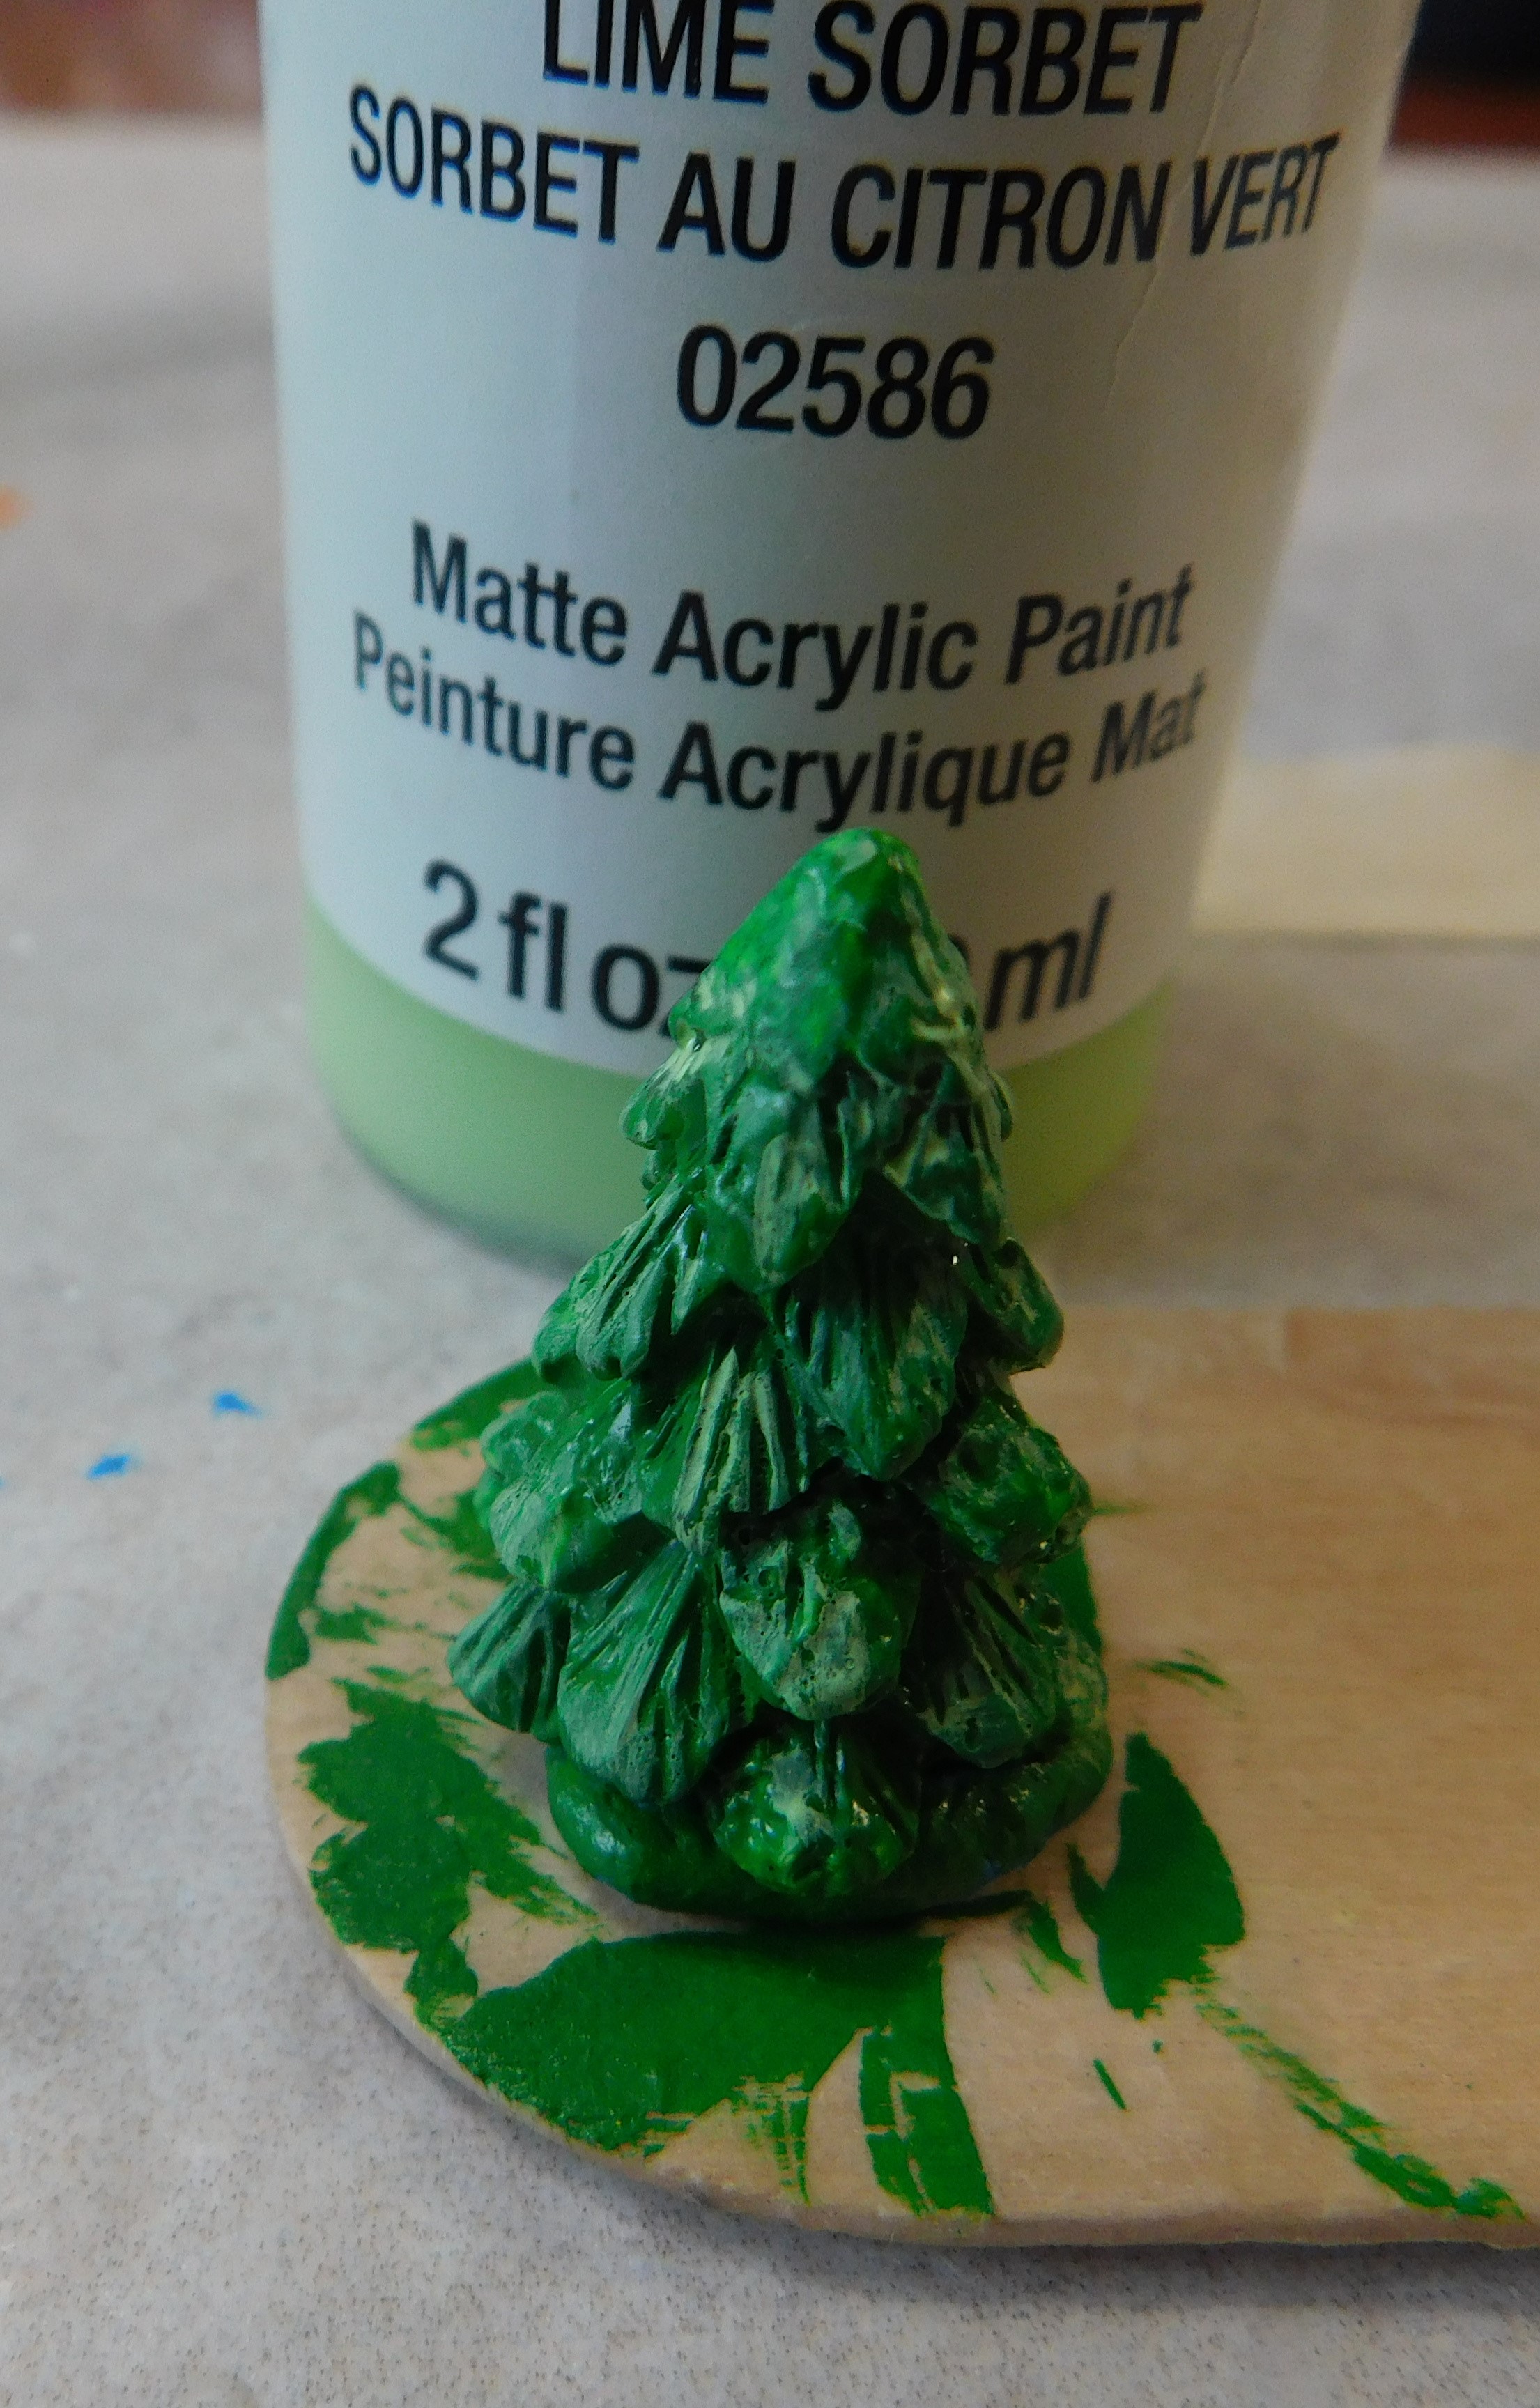
This week we are doing the re-paint on the cute Christmas tree that was in the blind bags I opened on the channel last week. I wanted to do this right away instead of waiting until I start some of the other Christmas projects I have planned.


So to begin with I like to make sure the item is really clean. This will help the paint I add to it stay in place much better and give a nicer finish. This time I simply wiped it off with some Isopropyl Alcohol. This removes any surface dirt, dust and oils that might be present and dries almost immediately.


Now it was time for a coat of paint in a nice green. This covered up the huge globs of white “snow” that was painted on the tree and I like this color of green better than the original green that was on the tree. Allow this dry.


Next I used a lighter color of green and dry brushed on some highlights. This tree had some nice branch details molded in to the surface but they were hidden by the original paint color. By lightly touching just the higher areas of the branches with the lighter color they show up a lot more but look natural.


Once this dried I added just a tiny dot of white paint to the end of each branch. I can't emphasize enough to make sure they are tiny dots. Let this dry completely again. This is only the first step in the snow process.


Now it is time for a coat of Satin Mod Podge. We want to make this painted plastic tree look like a ceramic tree. Allow to dry completely.


Now take the same Satin Mod Podge and a very small brush and add a small dot of the Mod Podge on top of each of the white “snow” dots we added to the branches earlier. Now carefully sprinkle on some fine glitter. You don’t want very much, you need to stay in scale but just tiny bit on each branch will catch the light and make your tree sparkly.


That being said I will add that I actually hate glitter. I very seldom use it but when I do it has to be in a place where I think it will really make the project sing.


Now we have transformed that little tree from a very cute little decoration to a very pretty decoration and it didn’t take much time or much in the way of supplies.


As always I do want to sincerely thank all of you for watching my videos and reading my blog posts. It means so much to me that you are supporting me in this way. If I could ask you all to do just a bit more by subscribing to the channel and liking the videos and leaving comments. Those help more than you can imagine. Also if you could pass the links on to your friends I would appreciate it so much.


Sunday, October 2, 2022

Dollhouse Miniature Rainbow Dresser


Watch the video here.


I have another Dollar Store Dollhouse Furniture flip for today’s tutorial. I love doing these they are so much fun and since the piece of furniture is so cheap I can get creative. This time I have one of the tall dressers. It just begged me to bring it home and do a rainbow paint job on it.


I will be honest I actually changed my mind on the final outcome multiple times during the painting of this. When I started I had a look in mind but by the end ii was a dramatically different look. In the beginning I was planning to do a paint blending technique on the drawers and I might pick up another dresser to do that some day. Then I saw a dresser online (real size) that had the drawers each a color of the rainbow and I decided to change direction and do that. Initially both of these choices were going to have silver drawer pulls. Then I say yet another dresser that had the pulls painted to match the drawers and I liked that a lot better so I shifted direction yet again.


The first step was to remove the drawer pulls, this is normally pretty easy just hit it with a heat gun then carefully use a twisting motion with a pair of pliers to remove them. This does have to be done quickly but it is easy to do. On most of these dressers anyway. Once in a while I get one that is stubborn. Even though in the end I put the pulls back on before painting I would still take them out since it is a lot easier to sand the piece with them out of the way. Also since one of my pulls was damaged I was able to put in where I wanted it to be to be less noticeable.

Do a really good job of sanding the dresser at this point. Mine had a lot of rough areas and I spent a good amount of time doing this step.

Since we are painting the pulls the same color as their drawers I would recommend adding them back at this point then proceeding with the painting. Since I didn’t decide to paint mine to match the drawers until later I added mine later. Whenever you add them back just use a tiny drop of thick tacky glue and allow to dry before going to the next step.


This is a good time to do any repairs you to do to your dresser. Mine was in good shape this time so none were needed but sometimes they can have damage.


Now give the entire dresser a coat of white craft paint. This will be finish color for the case part of the dresser and the base for the drawer colors. I used 2 or 3 coats of white craft paint. Allow to dry.


Now my insurance policy, a coat of mat Mod Podge. I am really glad I did this which you saw in the video, more about that in a second. Just gibe the white paint a light coat of the mat finish and allow to dry. This makes cleaning up mistakes so much easier.


Now for the mistake. Yes, I really did paint the drawer the wrong color. I didn't even notice until I was sitting on the couch an looked across the room at the dresser and realized the orange should have been the middle drawer. Since the paint was partly dry I grabbed a wet wipe and cleaned it up before I turned on the camera. I was so happy the paint wiped away almost completely. If not for the Mod Podge that would not have been the case. And yes, I could have just edited out my error but I wanted you all to see that
1) I do make mistakes and 2) they can be fixed.


Once I had the orange paint cleaned off I added the yellow to the drawer and let the first three colors dry. It did take multiple coats of each of the paint colors to get nice solid coverage. Jut work at it until you are happy.


Next up I painted the orange and purple drawers, adding as many coats at needed.


Once the orange was dry I was able to paint the green. This was the drawer I am most unhappy with, I don’t feel like the paint coated very well and I was messier with it. I was running out of time to get this video done so I am going to blame that.


Once all the drawer colors are dry go back in the the white and touch up any areas where you go messy. I find a dotting tool is much easier to use between the drawer fronts than a brush.


I also added a hint of silver paint to the bottom shaped edge of the dresser front base. Totally not a needed step just for fun.


Once all paint is dry and you are happy with your dresser add a light coat of Satin Mod Podge and allow to dry.


Here are all the paints I used in the project, all but the purple were provided by Plaid as were the Mod Podge and most of the brushes I used. 


As always I do want to sincerely thank all of you for watching my videos and reading my blog posts. It means so much to me that you are supporting me in this way. If I could ask you all to do just a bit more by subscribing to the channel and liking the videos and leaving comments. Those help more than you can imagine. Also if you could pass the links on to your friends I would appreciate it so much.