Check back often

Have you checked out all my blogs?


Dollhouse Minis: http://joannesminis.blogspot.com


18” Dolls: http://joannes18dolls.blogspot.com/


General Crafts: http://joannes-place.blogspot.com/


Cooking: http://joanne-kitchen.blogspot.com/


Also if for some reason I can't post I will try to give a head's up on the Facebook page so check there too.

Showing posts with label dollhouse Christmas. Show all posts

Sunday, December 22, 2024

Dollhouse Miniature Christmas Gnomess


Watch the video here.


I have another free pattern for you to download so you make the project. You can find the file here. In the download there are 3 files: a PDF for hand-cutting of the pieces, a PNG to use with your electronic cutting machine and a text file with handy hints and tips (and the sizing information) to use the PNG.


As with most of these projects I cut all the pieces from medium weight white card-stock, the kind used to make cards and such. This is way more economical than having to purchase a bunch of colors and in my experience the paint colors are a lot more stable than the paper colors. I rarely get noticeable fading with the painted projects.


You are free to use the pattern as many times as you wish and even to sell the finished project. But, please don’t give away or sell my patterns. I spend a lot of time creating them and the only compensation I get is from people watching the videos and checking out the blog post. I really want to keep offering these for free so please if someone else wants to make one send them to the video and blog so they can get their own copy of the pattern.


Glue the pieces together as shown on the video using your favorite white glue. I like to use Tacky glue and I use a toothpick as a glue applicator.


Once the glue is completely dry I laid down a strip of masking tape (sticky side up) to hold all the pieces that needed to be painted. To make that easier I group the pieces by the color that I am painting them. I did the same thing with the 3 single layer cookie pieces but I used a piece of washi tape since it is slightly less sticky and won’t tear the single layer of card stock as easily.


I painted the back and hat with red. Then once dry I added a slightly lighter color of red to the hat to give it a bit of dimension.


The plate for the cookies with metallic green.


The braids with a golden yellow color.


 The hands and nose with a flesh like tone.


The had band with white.


The shoes with black.


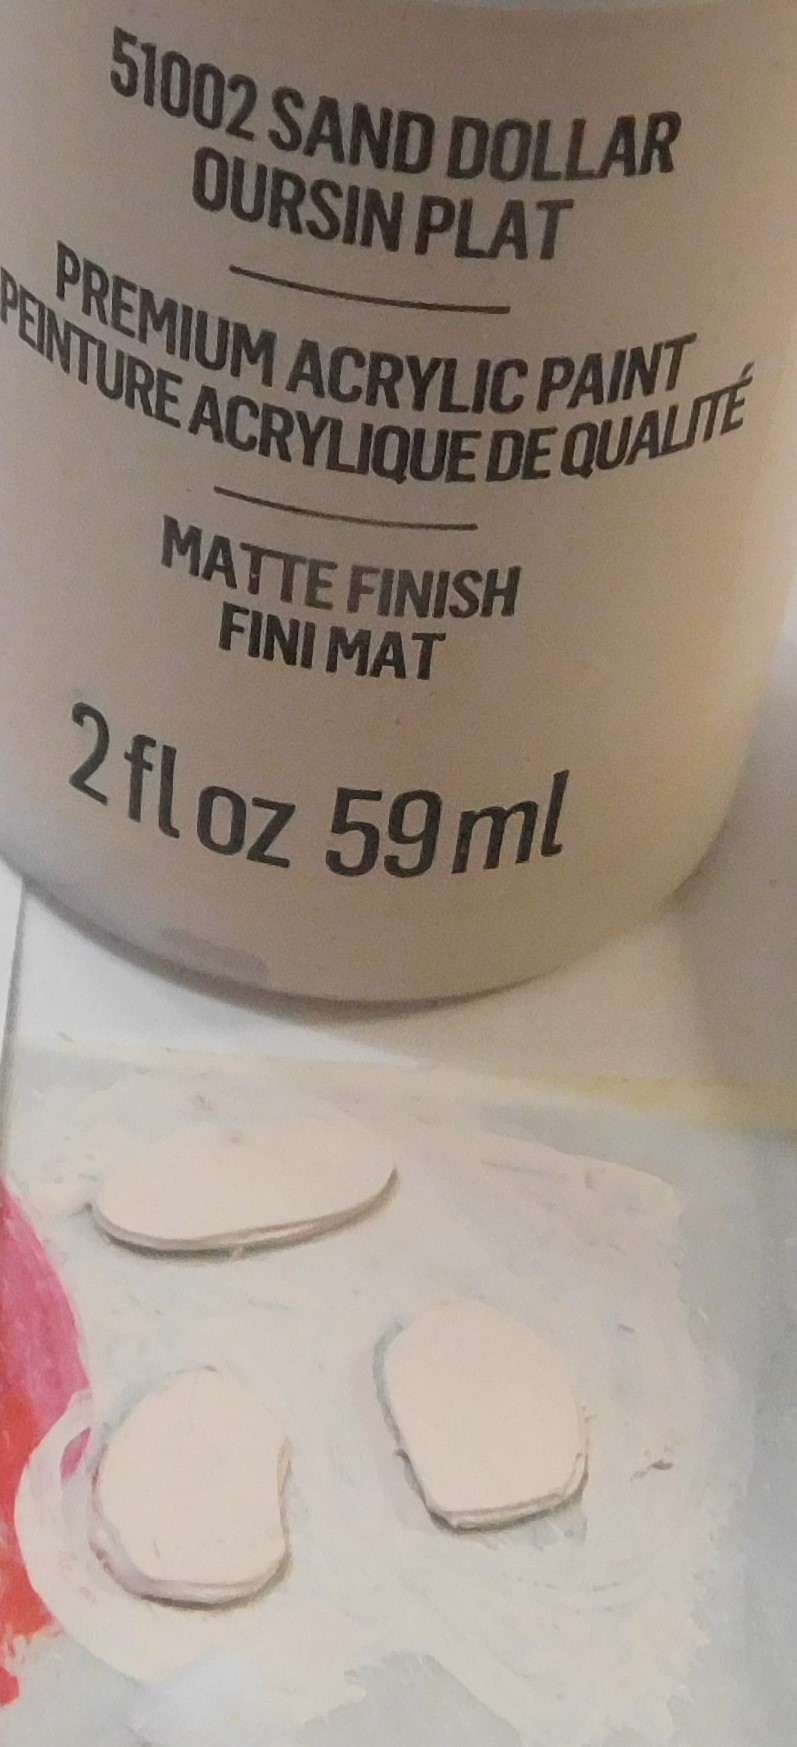
And the cookies with a cream color. And once dry I added some “chocolate chips” with dots of a brown paint.

The cookies are simply a ¼” round and if you want a different shape cookie you could use any shape ¼” hole punch to make them.


Once the paint dries completely it is time to assemble the gnomess. This will be done in stages allowing the glue to dry at least a bit in between so everything stays in place as you add parts.


I like to start by gluing the hat to the hair and the nose as the first step. Then this can set up. Since she is holding the plate of cookies I also glued the cookies to the plate so they could also dry.


Next the hat portion can be glued to the body/backing piece. I wish I had glued my hat on lower to the body but I was feeling really rushed as I was working on the gluing since the building I live in is in the middle of having all the balconies removed and new ones put on. Just as my paint was dry they showed up to do the removal and it was very noisy for the rest of the day.


After the hat part add the shoes, the plate of cookies and the hands. Then allow the glue to dry completely.


Now we just need to add a thin even coat of a clear finish. I am using Satin Mod Podge on mine. I did coat the back off camera (including the edges all the way around) then when that dried I came back and coated the front on camera going over the edges a second time. I find doing 2 coats on the edges really helps to seal all those layers and makes the finished gnome look a lot nicer. Allow to dry.


As always I do want to sincerely thank all of you for watching my videos and reading my blog posts. It means so much to me that you are supporting me in this way. If I could ask you all to do just a bit more by subscribing to the channel and liking the videos and leaving comments. Those help more than you can imagine. Also if you could pass the links on to your friends I would appreciate it so much.


Sunday, December 24, 2023

Dollhouse Miniature 3-D Christmas Tree


Watch the video here.


Let’s take a moment to talk about today’s project. I keep seeing these little 3-D trees all over my social media feeds. They seem to normally be made of wood and I see them both painted and left as the natural wood color. I thought since they are so popular in real life the dollhouse family should get some too.


So I have another free pattern for you to download so you make the project. You can find the file here. In the download there are 3 files: a PDF for hand-cutting of the pieces, a PNG to use with your electronic cutting machine and a text file with handy hints and tips (and the sizing information) to use the PNG.


As with most of these projects I cut all the pieces from medium weight white card-stock, the kind used to make cards and such. This is way more economical than having to purchase a bunch of colors and in my experience the paint colors are a lot more stable than the paper colors. I rarely get noticeable fading with the painted projects.


You are free to use the pattern as many times as you wish and even to sell the finished project. But, please don’t give away or sell my patterns. I spend a lot of time creating them and the only compensation I get is from people watching the videos and checking out the blog post. I really want to keep offering these for free so please if someone else wants to make one send them to the video and blog so they can get their own copy of the pattern.


This project is pretty simple with only two shapes for each tree and 3 layers of each shape. I decided to make 3 sizes because that seems to be how most people are showing off the real ones. Once you have your pieces cut you simply need to glue the units together like I show in the video. When you are done you should have these 6 units. To glue I like to use a nice thick Tacky glue and apply a thin even coat with a toothpick. Once glued I would suggest putting these under a weight to help them stay flat until they get at least part way dry. Once they pieces are completely dry we can move on to assembly.


The assembly for this project is really simple because now all we need to do is add glue and slip the slotted units together to form a tree shape. Once the are put together look at them from different angles to make sure they are standing straight and let the glue dry. If you have a huge empty space in the center just add a bit more glue to the area to fill it. I didn’t have any problems with the ones I made on camera but the one I made before filming to test the pattern had a large gap in the center.


Once the glue dries we can paint our trees, you can use any color you want on your trees. I just went with a very boring bright green but I’ve seen these in many colors. A lot of people are just leaving the real ones plain wood and you can get that look with a light beige paint. If you want yours white I would still paint it to help disguise the layers of card stock.


I do like to use some really sticky double sided tape to temporarily attach the trees to craft sticks. This adds a handle to the tree and makes it so much easier to paint them.


Once the paint dries a quick coat of Satin Mod Podge will finish off the trees and make them look really nice.


Then all you need to do is pop them off the craft stick and display them in the dollhouse.


As always I do want to sincerely thank all of you for watching my videos and reading my blog posts. It means so much to me that you are supporting me in this way. If I could ask you all to do just a bit more by subscribing to the channel and liking the videos and leaving comments. Those help more than you can imagine. Also if you could pass the links on to your friends I would appreciate it so much.

Sunday, December 3, 2023

Dollhouse Miniature Let’s Decorate the Fireplace for Christmas


Watch the video here.


This week I thought it might be fun to decorate the fireplace we just finished making for the Christmas holiday season.


I did an image search online for real fireplaces decorated for the holidays and I found lots of inspiration. I took ideas from a couple of ones that stood out to me both because I thought they were pretty but also because I could create something similar in mini using some basic supplies.


We are starting by making a piece that looks like the fake snow batting stuff that is often used under Christmas decorations. For this I did debate with myself about what to use to get the effect I wanted. There were really three choices that tempted me. My first thought was to use fabric with a layer of aluminum foil on the back like we do when we make table clothes. The other idea that I felt had a lot of promise was to use some white felt, preferably the cheap kind that is thinner but I didn’t have any on hand to try out. So I went with my other idea which is the same white medium weight card-stock we use so often on the channel. I had it right on my work table, I know it will cut really well either with an electronic cutting machine or by hand and it is really easy to work with. So that is my material of choice today.


So that means I have another free pattern for you to download so you make the project. You can find the file here. In the download there are 3 files: a PDF for hand-cutting of the pieces, a PNG to use with your electronic cutting machine and a text file with handy hints and tips (and the sizing information) to use the PNG.


You are free to use the pattern as many times as you wish and even to sell the finished project. But, please don’t give away or sell my patterns. I spend a lot of time creating them and the only compensation I get is from people watching the videos and checking out the blog post. I really want to keep offering these for free so please if someone else wants to make one send them to the video and blog so they can get their own copy of the pattern.


I do want to make it clear that I designed this pattern to fit the fireplace we made on the channel recently. If you have a fireplace that is a different size you will need to do a bit of resizing. That should be simple since this is a fairly simple shape.


Once cut out the first step was to score the card-stock where we need it to fold to fit over the fireplace. The first score line is in line with where the tab that goes on the back of the fireplace meets the area that will cover the top of the fireplace. Then a second score line where the bend at the front edge of the mantle is.


Now I coated the fireplace with so Mod Podge. Any of the versions would work fine. You could also use a thin glue in its place.


Working quickly sprinkle on some glitter. The one I used was labeled as “crystal” then follow with some white flocking. Pat everything into the wet glue and allow to dry.


Since I wasn’t happy with the coverage of the flocking I opted to do a second layer of the flocking and glitter with more Mod Podge. This will need to dry also.


Now we can work on the greenery for the decoration. I looked through what I had on hand and tried to give you ideas for what you can use. I opted to use some of the Wired Pine I have on hand. It is made a lot like a chenille stem but is much coarser and looks like fake pine. You can also use clipping from the

Christmas floral picks that are sold at all the craft stores this time of year. You only need a piece long enough to line the back edge of the mantle. In the case of my fireplace this measures 3 ¾”long. You could combine two (or more) pieces to make the length for your fireplace.


Use a small brush to add spots of Mod Podge on the surface of the greenery piece you are using. You just want to brush and hit some areas. Then add some sprinklings of whatever you want to decorate yours with. I used some very coarse green glitter, some red micro-beads, and the same crystal glitter I have been using earlier. Pat the stuff into place to help it stick to the glue and let it dry completely.


Once all the Mod Podge that was used to glue the decorations onto the parts is dry we can bring this all together.


First re-fold the “snow” piece and use a small piece of regular “scotch” tape to hold the tab to the back of the fireplace.


Once you have the ‘snow” in place add a generous line of thick glue (like Tacky glue) to the back edge of the “snow” and add the greenery piece. Be sure that you have the “pretty” side of the greenery to the front. Be very careful to not get any glue on the fireplace itself, just on the snow topper. I did need to use some clamps to hold the piece down while the glue dried.


Now we can have fun and add any of our Christmas decorations to the topper and instantly the fireplace is ready for the holidays. I have a few suggestions using some of the items we’ve made in the past on the channel.


You could also add some candles or maybe mini Christmas cards, the possibilities are really endless. Look in your stash and see what will go on your fireplace for Christmas.


So sorry for rushing the end of the video, my video camera was not cooperating with me. The battery was almost dead and the charger would not work today at all. So I was in a race with the dying battery. I did win the race in the end and hopefully the charger will decide to behave so I can charge the camera for the next video.


As always I do want to sincerely thank all of you for watching my videos and reading my blog posts. It means so much to me that you are supporting me in this way. If I could ask you all to do just a bit more by subscribing to the channel and liking the videos and leaving comments. Those help more than you can imagine. Also if you could pass the links on to your friends I would appreciate it so much.

Wednesday, November 15, 2023

Dollhouse Miniature Christmas Garland


Watch the video here.


My cousin and I went shopping the other day and decided to cruise through the Hobby Lobby. I of course was looking for things to use in the dollhouse. This time of year is excellent for finding non-mini items that will work in the dollhouse because of all the Christmas decorations that are showing up in the stores. One of the items I found was this adorable mini garland. It is really pretty just as it comes and it would look really nice if draped against a dark colored surface. I wanted to use it on the front porch of

the Beachside Bungalow and it has a white railing on the porch. As pretty as the all white, slightly iridescent color was it just was lost again the white paint,.


My first plan was to paint the bead areas with red and green and the snowflakes with silver. I decided to use nail polish instead of paint because I knew it would be very durable if the garland gets bumped. Sometimes it is hard to get paint to adhere really nicely to the cheap plastic like this is made with. For items that will just sit somewhere that is usually not a problem. But I knew that the garland being on the railing on the front of the porch it is going to get bumped and brushed against just in the course of day to day life here. I knew that the nail polish would hold up to that abuse a lot better with basically no additional prep-work other than taking it out of the package. Also I love working with nail polish because of the beautiful colors and special finishes you can find. Also it has a beautiful gloss without having to add anther layer.


The silver I had on hand in my collection, it is labeled with the name Live on the label and the number 409 on the cap. I only had time to run down to my local Family Dollar in search of the red and green I hoped to use. They had a couple of nice reds, I went with one labeled as Fierce. However, they didn’t have a single color of green in stock. So we will just use the two colors.


These are just the cheap LA Colors polishes that are easy to find.


To apply the nail polish I used some of the micro brushes that I got off of e-bay a while back. They are pretty good for this project in that I don’t need to clean them, just throw them out when done. I did go through several of the brushes in this project.


I used some of those cheap clamps from the dollar store to hold the garland so it wouldn’t be touching anything as it dried. I found painting about 6” at a time was the best for me. Anymore than that and I started having issues with keeping it off my work surface.


I first painted the beads red on about 18” of the garland. Then I let that dry completely.


Once I had what I felt was enough of the beads colored red I went back and did the snowflakes with the silver polish. This was easier and quicker for a couple of reasons. First I had figured out what worked best for me with the beads. And secondly the snowflakes are bigger and flat so they are a lot easier to paint.


Be sure the nail polish is completely dry before trying to add the garland to your mini project.


To attach the garland to the porch rail I decided to use pieces of embroidery floss that matched the color of the railing. If I wasn’t trying to do this for you guys on camera I would have used just 3 of the 6 strands of floss but I felt that would have been much harder to deal with on camera. Little did I know that my cat was going to help so much with this step. He does make life interesting at times for sure.


Anyway, all you need to do is run the floss around both the railing and the garland and tie a simple knot. Once you are happy with the placement and drape of the garland trim off any excess floss and turn the knots to the back side of
the railing where they won’t be seen. I also just tucked the extra garland at each end behind the railing so it was out of the way and out of sight.


I hope you enjoyed the project I love how it looks with our other Christmas items on the porch.


As always I do want to sincerely thank all of you for watching my videos and reading my blog posts. It means so much to me that you are supporting me in this way. If I could ask you all to do just a bit more by subscribing to the channel and liking the videos and leaving comments. Those help more than you can imagine. Also if you could pass the links on to your friends I would appreciate it so much.


Sunday, November 5, 2023

Dollhouse Miniature Christmas Gnome


Watch the video here.


I have another free pattern for you to download so you make the project. You can find the file here. In the download there are 3 files: a PDF for hand-cutting of the pieces, a PNG to use with your electronic cutting machine and a text file with handy hints and tips (and the sizing information) to use the PNG.


As with most of these projects I cut all the pieces from medium weight white card-stock, the kind used to make cards and such. This is way more economical than having to purchase a bunch of colors and in my experience the paint colors are a lot more stable than the paper colors. I rarely get noticeable fading with the painted projects.


You are free to use the pattern as many times as you wish and even to sell the finished project. But, please don’t give away or sell my patterns. I spend a lot of time creating them and the only compensation I get is from people watching the videos and checking out the blog post. I really want to keep offering these for free so please if someone else wants to make one send them to the video and blog so they can get their own copy of the pattern.


As always the first step is to glue the units together, this time there are a few variations in the number of layers in each unit and I went over that in the video when I showed where each piece was on the mat. Here is a photo of the glued units so you can see what they should look like and how many of each you should have.


Once the glue is dry we need to paint the units, I find this to be much easier if I first lay down some tape sticky side up and group the pieces together by the color they will be painted. (all the ones that will be white together, all the ones that will be red together in a different place, etc) I have found that the glue needs to be really dry before I place these pieces on the tape or the back layer will stick really badly to the tape and tear. I sometimes get a little tearing even when they are dry but not as much.


Now for the colors I used. The beard, hat brim, and pom-pom for the hat were painted white. Then I used a bit of black to add some streaks to the beard.


The shoes were painted black.


The gift box was painted green and the top to the box with yellow.


The nose and hands get a coat flesh color which I am still having to mix from a pale yellow with just a touch of a very pale yellow.


And lastly I painted the base, hat, ribbon, and bow with a red paint.


Make sure the paint is all dry before you go onto the next step which is to start gluing the units together.


I like to start by adding the beard to the base piece trying to center the beard side to side and the tip of the beard no lower than the straight bottom edge of the base (body) piece. Add the shoes again lining them up with the bottom edge. Adjust the pieces so they are where you want them and allow this step to dry at least enough that they won’t move when we are working on the next steps. I did need to add a small weight to keep the tip of the beard down since it wanted to curl up a bit at the bottom.


Next we add the hat to the gnome along with his nose. I also added he hat band and the pom-pom the to tip of the hat at this step. This was also a good time to assemble the gift box that the gnome will be holding. Simply glue the lid to the top, the ribbon the center and the bow to the top. Allow these to dry at least enough that they will not slip around in the next step.


Now we add the gift box to the front of the gnome and his hands to hold the gift box. You can angle the hands however you want to make your gnome the way you want. Now we need to make sure all the glue has dried clear before going on to the next step.


For the last step we will be giving the gnome a clear finish coat. I am using Satin Mod Podge, in an even thin coat all over the front and edges of the gnome. Once this has dried I give the back of the gnome a thin coat of the same finish.


Once the finish is dry our gnome is ready to join the other Christmas items on the front porch of the dollhouse.


As always I do want to sincerely thank all of you for watching my videos and reading my blog posts. It means so much to me that you are supporting me in this way. If I could ask you all to do just a bit more by subscribing to the channel and liking the videos and leaving comments. Those help more than you can imagine. Also if you could pass the links on to your friends I would appreciate it so much.