Check back often

Have you checked out all my blogs?


Dollhouse Minis: http://joannesminis.blogspot.com


18” Dolls: http://joannes18dolls.blogspot.com/


General Crafts: http://joannes-place.blogspot.com/


Cooking: http://joanne-kitchen.blogspot.com/


Also if for some reason I can't post I will try to give a head's up on the Facebook page so check there too.

Tuesday, March 15, 2022

Dollhouse Miniature Easter Bunny Garden Flag


Watch the video here.


In preparation for Easter I knew we needed a new flag to go on our flag bracket and I decided to stick with the same style of Easter Bunny that I have been using on the other items for porch decor. I do love how he turned out.


So to start we are again using a piece of bleached muslin fabric that measures 1” by 3”. One thing I don't think I mentioned last month when we made the St, Patrick's Day flag was to make sure your flag piece is cut on grain of the fabric. This fabric is a woven fabric so you want to make sure you are cutting the piece of fabric straight with that weave. The easiest way to find the “straight of grain” is to first make a small snip at the edge of the fabric and tear the fabric the entire width. Because it is woven it should tear straight. Then use a ruler and rotary cutter to cut a neat edge that is parallel to the torn edge. Let me know it you would like me to demonstrate this in a video in the future.


Once your have your flag blank cut it is time to decorate it. I wanted a bunny at the bottom corner, similar to the one on the doormat with a “sky” area behind him. This month I am using craft paints instead of fabric paint since I had the colors I wanted. I started with 2 blues and a bit of white and using a stencil brush I make a sky area. I tried to stay away from the corners I wanted to place my bunny in.


Once the paint dried I used my fine tip black paint pen to draw the outline and facial features of our very simple bunny.


Since I had quite a bit of blue paint inside of the ears I decided to use some white paint to cover that up a bit. It would have been fine left as is also.


Once the paint was completely dry I used a 1” by 1” square of Heat 'N Bond Ultrahold to glue the flag into shape. I gave detailed instructions last month on how to do that so here is a link to that blog post if you need those instructions.


After you have bonded the flag all you need to do is trim any loose threads and your flag is ready to display on the dollhouse front porch.


And a huge thank you to Plaid for the paints they provided to help me make better videos for all of you.


As always I do want to sincerely thank all of you for watching my videos and reading my blog posts. It means so much to me that you are supporting me in this way. If I could ask you all to do just a bit more by subscribing to the channel and liking the videos and leaving comments. Those help more than you can imagine. Also if you could pass the links on to your friends I would appreciate it so much.


Saturday, March 12, 2022

Dollhouse Miniature Sliced Jellyroll


Watch the video here.


This week for our Saturday tutorial I decided to make some jellyroll slices. I think they turned out really cute and they can be plated up for so many scenes in your mini displays.


To start we need just a few colors of clay. For the cake layer I am using about equal parts white and beige with just a tiny bit of yellow added. All you need to do is make that white not so white and more of a creamy cake color.


Next add some sand to add some built in texture to the cake layer. You could skip this step but then you would need to do a bit more texturing later. Here is what you want the clay/sand mixture to look like.


Now for the jelly filling, this is made with just two colors some translucent and a bit of any red. Keep in mind the color of the unbaked mixture will be a lighter in color than will be after baking. If you are in doubt if you have enough red in your mix go ahead and bake a tiny bit to do a color check.


Once the clay colors are mixed roll each out into a slab to use as the cake and jelly filling.


I used a set of double thick craft-sticks to roll the cake layer.


And a pair of craft-sticks to roll the jelly layer.


You want the layer of cake to be about twice as thick as the jelly layer.


Now put the jelly layer on top of the cake layer and press together a bit. Trim both layers to be a nice rectangle and then roll them together to thin them out just a bit. I used my double set of craft-sticks for this.


Now roll up into a jellyroll shape and reduce the diameter to about 3/8”.


Now would be a good time to add some chalk to give the cake a good baked look (I forgot until I pulled mine out of the freezer)


Now freeze your jellyroll for about 20 minutes to firm it up a bit. This will make cutting it so much easier.


Slice as desired, I cut all of mine into slices.


Texture the cut side of each slice and bake for 10 minutes at the temperature stated on your clay package.


That is all there is to this project, the slices are ready to plate however you wish.


As always I do want to sincerely thank all of you for watching my videos and reading my blog posts. It means so much to me that you are supporting me in this way. If I could ask you all to do just a bit more by subscribing to the channel and liking the videos and leaving comments. Those help more than you can imagine. Also if you could pass the links on to your friends I would appreciate it so much.


Tuesday, March 8, 2022

Dollhouse Miniature Easter Bunny Porch Sign


Watch the video here.


This week for the Tuesday tutorial we are adding a cute porch sign to the front porch of the dollhouse for Easter, actually a pair of signs. I was once again inspired by several signs that I saw when I did an image search and combined ideas from a several different signs. And since I thought the bunnies were so cute and I couldn't decide if I should make a girl bunny or a boy bunny I decided to make a pair of bunnies.


Once I had an idea of what I wanted to make I started digging through my bin of wood pieces that I have collected over the years. I wanted to find some basic shapes that would give me a head-start on the bunny shaped signs. I found some wood oval shapes that are just over 2” long and some 1” circles. I knew those would be perfect for what I wanted to do. I also grabbed a couple of the Hobby Lobby slim sticks to use as the ears on the bunnies.


Next before I started working I checked online and did find that you can still get the oval and circle wood shapes (online at least) so if you don't have them on hand you should be able to easily find them.


Now to begin I sanded one of the ends of the oval shape to make a flat base for the bunny.


Once I had the oval shaped so it would work for what I wanted to do I glued the circle to the not flattened end of the oval. This forms the bunny head and body. Overlap the two pieces enough that you get a good bond but leave enough space for the ears in the next step.


Speaking of the ears, cut 1” from each rounded end of the slim stick to use as the ears. Glue these on the back side of the head like this. You can angle the ears anyway you wish to give your bunny some personality.


Once the glue is dry give the front and sides of the bunny a coat of white paint and allow to dry.


Now add some pale pink in a line down the middle of each ear.


And using a fine tip black paint pen add a cute face.


You can add as many or as few details as you wish.


Once the detail paint is completely dry give your bunnies a coat of Mat Mod Podge and allow to dry.


Next I added a bow to the girl bunny's ear and a bow tie to the boy bunny using some embroidery floss. Use a dot of glue to attach.


Once the glue dries trim the excess floss ends from the bows.


Once again I do want to thank Plaid for the paint, Mod Podge and brushes they provided for me to use in making videos for all of you. 


And you have a cute pair of bunny signs to put on the dollhouse front porch for Easter.


As always I do want to sincerely thank all of you for watching my videos and reading my blog posts. It means so much to me that you are supporting me in this way. If I could ask you all to do just a bit more by subscribing to the channel and liking the videos and leaving comments. Those help more than you can imagine. Also if you could pass the links on to your friends I would appreciate it so much.


Sunday, March 6, 2022

Dollhouse Miniature Toaster


Watch the video here.


I was putting my real toaster away the other day when I realized we don't have a toaster for the dollhouse. I knew I needed to change that so here we are.


I had been going through some boxes a while back (oh the joys of moving, will I ever have all the boxes emptied) and found a package of Chipboard I had purchased for a project before I moved. I had put it aside to use on a project soon and this seemed like a good one to try it out on. I was going to post a photo of the label but I can't find the label but this link will take you to a similar product.


I cut 6 pieces of chipboard at ½” by 5/8”


and glued them together in pairs making 3 double thick pieces. These will form the walls of our toaster.


I then cut 4 pieces of 1/8” strip-wood to a bit over 1” in length. The length on these doesn't matter because we will cut them to size in the next step. I tried to make them the needed size and found it way too difficult to get them glued in place. The extra bit to hold onto makes a huge difference here. Glue these pieces of wood like this to 2 of the double thick chipboard pieces. Making sure to line up the edge and tops. The ½” dimension is the height and the 5/8” is the width on the toaster. Once the glue dries cut the excess wood strips off at the bottom.


Then glue all the pieces of chipboard like this to make a sandwich forming the basic shape of the toaster.


Using some lightweight paper cover the ends of the toaster, since my toaster will be black with chrome I used black paper.


Next cut a strip of paper and cover up the one side over the top and down the other side of the toaster with the same black paper.


Use a knife with a small tip to cut the slots in the top once the glue dries. And then paint the entire toaster with a coat of craft paint the color of your finished toaster.


Since I wanted my toaster to have chrome on the body just like my real one I used a piece of stainless steel Contact paper (you can find it here) just cut a strip and add it to the toaster. I did use some glue under mine just to make sure the bond will be permanent.


Now we can add some of the extra bits.


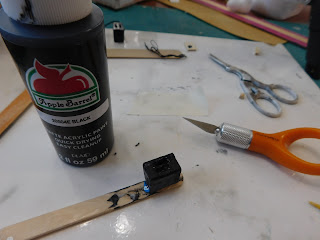
I started on one end and cut a small bit of toothpick and a ¼” circle of chipboard. These were glued to one end to form the thing the electric cord wraps around for storage on my real toaster.


For the other end I cut another small bit of toothpick for the handle to raise and lower the toast and a very small bit of the point of a toothpick to represent the dial that determines how dark you want your toast. Glue these to the opposite end of the toaster.


Once the glue dries give another coat of paint over the ends of the toaster to paint the new bits.


Use the same knife to cut the slits in the top of the toaster through the contact paper.


Make a cord from embroidery floss (2 strands) and a tiny bead if desired. Then cut a base for the toaster from chipboard and glue the cord and base to the bottom of the toaster.


Once the glue is dry give any areas another coat of paint and at the same time paint the base.


Give all the painted areas a coat of Satin finish Mod Podge.


And you are done and the dolls in the dollhouse can make some toast to go with their coffee.


Paint, brushes and Mod Podge used in this video were provided by Plaid for use in videos.


As always I do want to sincerely thank all of you for watching my videos and reading my blog posts. It means so much to me that you are supporting me in this way. If I could ask you all to do just a bit more by subscribing to the channel and liking the videos and leaving comments. Those help more than you can imagine. Also if you could pass the links on to your friends I would appreciate it so much.


Saturday, March 5, 2022

Dollhouse Miniature Radishes


Watch the video here.


This week I was in the mood to make some radishes so that is today's project. I had picked a bunch of them up at the store and while I was cleaning them to put them away I decided that they would be the perfect project for today.


They are really simple and use just a few colors of clay and a couple of colors of chalk.


To start we need to create the roots and stems so they will be ready to use when we create our radishes.


For the roots, I decided that I would use some white embroidery floss and coat the individual strands with some TLS (Translucent Liquid Sculpey). I cut a piece of the floss to around 2” then separated it into the 6 individual strands. Give each strand a good coat of TLS and move to a nonstick baking surface.


Next we need to make the stems. For this I used a small amount of my 50/50 blend of white/translucent clay that is always in my stash with a very tiny bit of green clay. You just want to tint the clay a very pale green. Then roll out into as skinny of a snake as you can. Break the snake into 3 pieces. Coat the tip of your finger with some green chalk and roll the clay some more, coating the snakes with the darker green color. Now gently press the 3 snakes together, keeping their round shapes as much as possible.


Now bake both the roots and stems at the recommended temperature for 10 minutes and allow to cool completely.


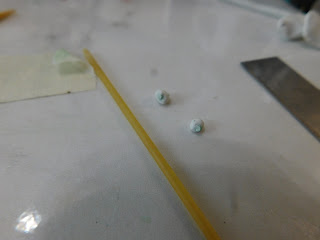
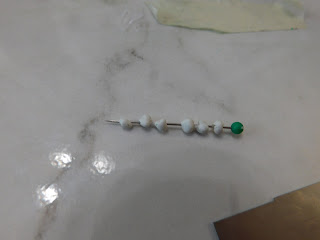
Meanwhile take some more of the white/translucent blend clay and make a snake about 1/8”. cut this snake into pieces about 1/8” long. Some can be a bit smaller some a big bigger. Roll the pieces into balls and slide them onto a sewing pin. This serves 2 purposes it creates the hole in the middle we will need to add the stems and roots and it also keeps the balls in one place to they are easy to keep track or. Allow the balls of clay on the pin to set and rest for at least 15 or 20 minutes longer if possible. This will allow the clay to firm up again since it gets very soft when you work with it.


Once the clay has rested and the stems and roots have cooled cut the stems into tiny bits. Try to have some variety of stems with 1, 2, and 3 snakes in them.


Then dot some TLS into the hole at one end of one of the radish balls and insert a stem piece. Try to keep it going vertically so you see the cut edge when you are done. Do this to all the radishes.


Now dot some more TLS into the opposite hole in the radish balls and insert a root into each one. Use your finger tips to carefully ease the clay around the root to form the shape of the radish.


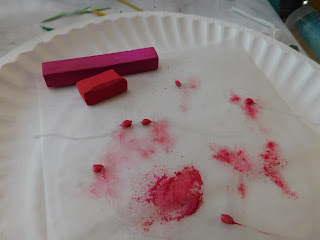
Once all the radishes have both roots and stems grate some red and hot pink chalk onto your baking surface and carefully using a brush coat each radish with the combined chalk color. Go just a bit down the root also.


Now bake for 10 minutes at the temperature recommended for your clay and allow to cool.


Once cooled trim the roots to a realistic length and you are finished. You even have more roots to use to make more radishes.


As always I do want to sincerely thank all of you for watching my videos and reading my blog posts. It means so much to me that you are supporting me in this way. If I could ask you all to do just a bit more by subscribing to the channel and liking the videos and leaving comments. Those help more than you can imagine. Also if you could pass the links on to your friends I would appreciate it so much.


Tuesday, March 1, 2022

Dollhouse Miniature Easter Bunny Doormat


Watch the video here.


I decided that since March is here and that means Easter is next month I wanted to get started on some Easter decorations for the dollhouse. This week we are kicking off our Easter decorations for the year with a really cute doormat.


Just like for all the doormats I have been making in this series I started with a blank cut from some rust brown felt. This is the felt that is sold by the yard in the fabric store as opposed to the felt that is sold by the square in the craft store. It is a bit heavier in weight but either variety of felt will work just fine.


Start by cutting yourself a doormat blank that is 1 ½” by 2 ½”.


Now give the piece of felt a good thick coat of mat Mod Podge and allow to dry completely. I like to do this step for two reasons it seals the felt so that I get a much better finish on the coat of paint that comes next and it makes the mat nice and stiff so I lays in front of the door better. On the ones that I skipped this step on I needed more coats of paint and it never got as even of a coat of color.


Please note-Mod Podge, paint, and brushes provided by Plaid for use in videos.


Now that the Mod Podge is dry give your doormat a good coat of the background color. I am using Paradise Blue from Ceramcoat. I love this color and am not sure why I haven't used it before this.


Once the background color is dry the fun begins, we are adding a bunny rabbit to the bottom right corner of the doormat. I saw a couple of real size doormats online with bunnies similar to this on them and I thought they were so cute. Allow to dry completely.


Now for the final step we are going to use a fine tip paint pen and first add the words to the left side. I picked the phrase “Hop On In” since I thought it was really cute and went so well on the bunny themed doormat.

Now use the paint pen to carefully outline the bunny and add any details you want him to have. I added some fold lines to the ears, eyes, nose and mouth.


That is all there is to this doormat, I love how cute it came out and I hope you love him too.


As always I do want to sincerely thank all of you for watching my videos and reading my blog posts. It means so much to me that you are supporting me in this way. If I could ask you all to do just a bit more by subscribing to the channel and liking the videos and leaving comments. Those help more than you can imagine. Also if you could pass the links on to your friends I would appreciate it so much.