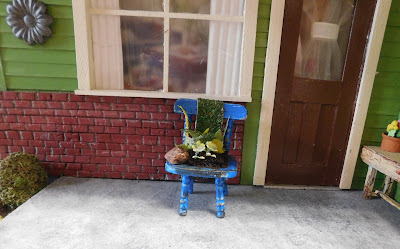
This week we are finishing the Succulent Chair and I have to say I love how it turned out. To think we started with that off kilter Dollar Tree mini chair and we ended up with this gorgeous decorative chair.
If you haven’t seen last week’s tutorial where we aged the chair and got it prepped to plant it you can find that tutorial here.
This week I dug out the floral stems I picked up at Dollar Tree a few months ago to use in some other mini projects on the channel. I did purchase 1 additional stem to add to those. We’ll talk more about these in a minute.
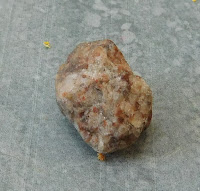
I also had a rock I wanted to use. I channeled my “inner-child” and found a pretty rock in a parking lot when I was out for a walk.
Like a lot of rocks this one is much prettier when it is wet so I coated it with some clear nail polish. Since the floral stems tend to shed a lot I waited until the mail polish was dry completely before I tackled those. I really didn’t want any of the bits that were sure to float off the floral pieces embedded in my clear coat.
Next I cut tiny pieces of some of my florals, remembering that the plants we want this to look like are pretty tiny in real life so very small end pieces. I also cut a few long thin pieces that could climb up the back of the chair. Remember at this point I had no idea how this was all going to be arranged.
Now we can tackle what we are planting our plants into. I am using some of the foam from the dollar store. You just need a thin piece that fits the chair seat. It will be the mound of soil you are going to plant into. The foam should be a bit thicker in the center and the back and taper down on the sides and front like soil would in real life. Tacky glue should hold this just fine so glue the foam in place and allow to dry.
After the glue dries it is time to paint the foam with some dark brown paint (I somehow missed taking a picture of this step, sorry) once the foam is painted brown let the paint dry.
Now the fun part time to assemble!
First step is to add the “soil” and like always I am using well dried, used coffee grounds. Coat the entire surface of the foam with glue. I am using some Elmer’s School glue today because the thinner glue is a bit easier to spread and get good coverage. Do be careful to cover the entire surface that shows on the foam.
Working on a piece of paper add the coffee grounds to the glue on the foam and dump off any excess. Using the sheet of paper dump the excess coffee grounds back in your container to use next time.
Now while the glue is still wet we need to add the plants to the soil. Use a toothpick to make holes and insert the stems of the floral pieces you cut earlier.
Then simply tuck the stems of the pieces into the holes. I work one piece at a time. On the tall pieces that went up the back of the chair I did add a dot of super glue to hold them in place. I also used super glue to hold the rock in place.
Allow the glue to dry completely and your chair is ready to use in your next mini scene.
As always I do want to sincerely thank all of you for watching my videos and reading my blog posts. It means so much to me that you are supporting me in this way. If I could ask you all to do just a bit more by subscribing to the channel and liking the videos and leaving comments. Those help more than you can imagine. Also if you could pass the links on to your friends I would appreciate it so much.


No comments:
Post a Comment