Check back often

Have you checked out all my blogs?


Dollhouse Minis: http://joannesminis.blogspot.com


18” Dolls: http://joannes18dolls.blogspot.com/


General Crafts: http://joannes-place.blogspot.com/


Cooking: http://joanne-kitchen.blogspot.com/


Also if for some reason I can't post I will try to give a head's up on the Facebook page so check there too.

Wednesday, August 28, 2024

Dollhouse Miniature Paint Test How Many Coats???


Watch the video here.


I was in the mood to do another paint test and this is one that has been roaming through my brain for a couple of weeks now so here we go. I do want to preface this by saying I really wanted to do this test with the acrylic paint form Dollar Tree but they were out of the black so I decided to do the test with the Prang Tempura paint also from Dollar Tree. I have another idea that I want to do with the Dollar Tree acrylic paint which also will need the black so I hope they get it in stock soon.


So let’s start with the set up for the test.


I am using a sheet of 140lb weight watercolor paper. I used some acrylic (Anita’s brand) black paint to cover half the sheet.


I put out some of each the black and white paint that I am testing into containers that have lids to work from as the day goes on.


I picked two large brushes that were similar to use and they were wrapped in wet wipes between tests. This way I am not going back in with water in the brushes that could affect the opacity of the paint.


I then laid down as even of a coat as I could of the black on the white side of the paper and the white on the black side. This coat filled most the height of the sheet of paper. Then it was allowed to dry.


Off camera I added more single coats of paint allowing then to dry between. I would have filmed more of the coats but there were people in the parking lot outside my window with a stereo going loud enough that it would been picked up by my microphone. (YouTube would have not liked that at all)


I was surprised that the black covered a lot better than the white did in this test. Especially since the first coat of black was so transparent and blotchy. It really looked okay in person after the fourth coat was dry and the fifth coat looks really good. The white at this point was still lacking coverage big time.


With the white paint the fifth coat was almost okay… And for some applications I can see it being usable. The 6th coat was close to decent coverage, maybe one more would have been enough but I am not sure sure.


Off camera I also did test the white acrylic paint and the results were very similar to the white in the “official” test today.


So what did we learn. As expected with enough coats of the paint you can get decent coverage. The question is would it be worth it? That remains for you to answer.


I do wonder if these could be a good alternative as a base or primer coat. Since they are a lot cheaper than the good craft paints if they would seal the project and allow us to cut down coats of the more expensive paint it might be worth it for that. The question there in my mind is durability and that could be a future test on the channel.


I do have another test in mind where I think the lack of opacity would be a positive and as soon as I can get the black in the acrylic I will be doing that one.


In the meantime if you have paint tests you would like to see let me know I love doing these. They are probably the videos I have the most fun doing and that is just what I need some weeks.


As always I do want to sincerely thank all of you for watching my videos and reading my blog posts. It means so much to me that you are supporting me in this way. If I could ask you all to do just a bit more by subscribing to the channel and liking the videos and leaving comments. Those help more than you can imagine. Also if you could pass the links on to your friends I would appreciate it so much.


Sunday, August 25, 2024

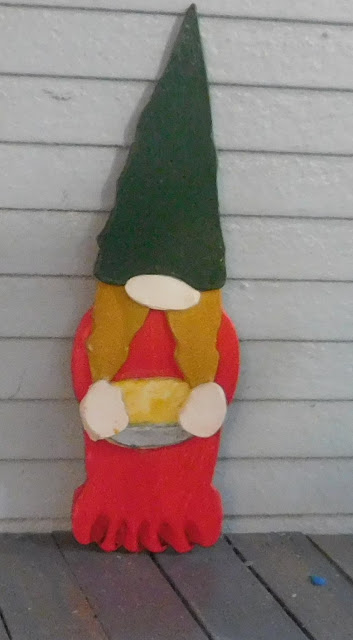
Dollhouse Miniature Apple Gnomess


Watch the video here.


I have another free pattern for you to download so you make the project. You can find the file here. In the download there are 3 files: a PDF for hand-cutting of the pieces, a PNG to use with your electronic cutting machine and a text file with handy hints and tips (and the sizing information) to use the PNG.


As with most of these projects I cut all the pieces from medium weight white card-stock, the kind used to make cards and such. This is way more economical than having to purchase a bunch of colors and in my experience the paint colors are a lot more stable than the paper colors. I rarely get noticeable fading with the painted projects.


You are free to use the pattern as many times as you wish and even to sell the finished project. But, please don’t give away or sell my patterns. I spend a lot of time creating them and the only compensation I get is from people watching the videos and checking out the blog post. I really want to keep offering these for free so please if someone else wants to make one send them to the video and blog so they can get their own copy of the pattern.


Once the glue dries put the glued pieces onto a piece of tape that is taped to your work surface and paint the individual pieces.


 I painted the back piece with red.


The hair braids with a golden yellow.


The nose and hands with a flesh color.


The pie tin with some gray.


The pie with a cream color.


And the hat with a green.


Let the paints dry.


Then I came back and gave the pie tin a coat of silver.


And I added some darker red (I had to use a darker on off camera to get look I was after) to create some shadows in the ruffle area of the back.


Again allow the paint to dry.


Now we start the assembly of the gnome. I like to start by gluing the hair braids and nose to the hat.


At this time I also glued the pie tin to the bottom of the pie.


Allow the glue to set up enough that it will not allow the pieces to shift around. It doesn’t have to be completely dry to go to the next step.


Now we can add some dry brushed golden yellow paint to the pie. We want to make it look baked, just like when we use the chalks to color our polymer clay baked goods. When you are happy set the pie aside to dry.


Now it is time to add the head to the body. You can make her shorter or taller depending on where you place the head. It’s up to you. Do try to get the head on straight and centered side to side (that seems to be my biggest challenge when building these)


Next we glue the pie to the gnome and then glue the hands to the pie. Allow the glue to dry at least until you see no remaining cloudy glue areas.


Now just a quick coat of a clear finish. I’m using Satin Mod Podge today. Be sure to coat both the front and the back. I try to cover the edges with both coats to make sure they are sealed together really well to help hide the fact this is made from multiple layers of card-stock. Allow to dry.


And there she is with the some of our other apple themed items from past tutorials.


As always I do want to sincerely thank all of you for watching my videos and reading my blog posts. It means so much to me that you are supporting me in this way. If I could ask you all to do just a bit more by subscribing to the channel and liking the videos and leaving comments. Those help more than you can imagine. Also if you could pass the links on to your friends I would appreciate it so much.


Wednesday, August 21, 2024

Dollhouse Miniature Pruning Saw


Watch the video here.


I have a fun and easy Trash to Treasure project for you this week. I was just about to toss the empty box from my plastic wrap in the trash when I got the idea to turn that metal piece that cuts the wrap into a pruning saw. This is a pretty easy and quick project. The hardest part is cutting the metal strip with the wire cutters. I wish I had a pair of tin snips because I think that would have worked better but I got it done with the wire cutters.


The strip from my box had little holes every ½” that were there to hold it onto the box. This limits the length of the blade we can get from the strip.


I started by cutting a piece of the strip to work with. Then I cut an angle on one end removing the hole at that end.


Next I cut away some of the part that will go into the handle and be held by the clay. I bent this so that it would fit inside a handle.


Next I covered the part that will be covered in polymer clay with some liquid clay. Then using some scrap clay I formed a handle.


Once you are happy with the shape bake at the recommended temperature for 10 minutes.


And now Mr Doll can go out and get some trimming done in his yard.


As always I do want to sincerely thank all of you for watching my videos and reading my blog posts. It means so much to me that you are supporting me in this way. If I could ask you all to do just a bit more by subscribing to the channel and liking the videos and leaving comments. Those help more than you can imagine. Also if you could pass the links on to your friends I would appreciate it so much.


Sunday, August 18, 2024

Dollhouse Miniature Exterior Floor Cube Side 5


Watch the video here.


I had so much fun with the floor last week I decided to cover another side of the exterior floor cube this week. This time I went with a wood look for the material but still used just some poster board to make it.


This time I wanted two layers a black bottom layer that was then covered with strips that look like wood. For the black layer it is a simple coat of black craft paint. For the wood look I used a couple of colors of brown as well as a golden yellow and painted on a very streaky coat of paint to look like wood grain. Once cut into the small pieces it will be more convincing than it looks as a large piece.


Let the paints dry. Once dry cut the piece that is painted to look like wood grain into ¼” strips with the steaks going the long way.


Once cut it is a simple task to just glue those strips to the black piece leaving a small gap between them. When we are done this will resemble the fake wood tiles that you can buy to cover a real deck with.


Once the strips are glued down and the glue has dried (at least mostly dried) cut the piece so that you have strips that have 3 “boards” on each one.


Once cut use one of the wide strips (with 3 boards) to determine the length to cut each one into. What you are wanting is a bunch of square “tiles” that look like they are made of 3 pieces of wood.


Now just glue the tiles onto the cube (or in place on your dollhouse patio/deck/porch) alternating the orientation of the boards on the tiles. Continue until the surface is covered trimming as needed at the edges.


I did add a clear finish to this floor using some Mat Mod Podge to give just a very subtle shine to the flooring.


And there we are another surface of the floor cube covered.


What do you think I should to with the last side? Be sure to let me know if you have an idea.


As always I do want to sincerely thank all of you for watching my videos and reading my blog posts. It means so much to me that you are supporting me in this way. If I could ask you all to do just a bit more by subscribing to the channel and liking the videos and leaving comments. Those help more than you can imagine. Also if you could pass the links on to your friends I would appreciate it so much.


Sunday, August 11, 2024

Exterior Floor Cube Side 4


Watch the video here.


This week I decided to cover another side of the exterior floor cube, this time with some bricks laid in a herringbone pattern. I love the look of brick and love to look at brick patterns. So this just seemed like a natural to do at some point.


This time I am not using my normal go-to of egg carton to create my bricks. I wanted something that was a bit thinner for this project and that I could work with in a larger sheet as opposed to the smaller pieces that the egg cartons provide. I decided to use some of the poster board I always have on hand. If you don’t have any of this feel free to use something like a lightweight cardboard (like a cereal box)


I am going to create my bricks to look like “used brick” so I need to have a base of a brick color. For this I needed a brick color paint which I didn’t have so I just played around with some red, brown and orange paint mixing in a little of each until I had a color I liked. I then cut a chunk of the poster board bigger than what I needed. That way I knew I would have plenty of bricks so I would be able to pick and choose for each area. I also will have some bricks left to use for a future project.


I then painted the dull side of the poster board with the brick color and let this dry. I wasn’t really careful about getting a super even coat of paint since I am going to create “used bricks” from this and therefore I want variation in color.


Once the brick color was dry I brushed some stripes of black, light gray and a thin white so that I could have some different colors of brick all from the same sheet. Let this paint dry.


Next I drew some cutting lines on the back of the poster board that were ½” apart. Then when this was done I cut the poster board into ¼” strips going the long direction. This way I had my ½” cutting lines to guide me in cutting my bricks without having to measure each and every one. (I think I ended up with somewhere in the neighborhood of 400 bricks)


Now for the fun part we are going to lay our bricks. I decided to start in a corner to make things easier. I glued down the firs two bricks in the corner and let the glue dry long enough that I was sure that the bricks wouldn’t shift on me when I pushed the rest of the bricks against them.


I next added just a couple of bricks to continue the pattern along with the first of the half bricks that were needed to fill in along the edge. To do this just glue a full size bricks (or some of the ones that were miss-cut too short) in those spots and trim to size after the glue dried. These I also let dry for a while before going on with the pattern.


From here on it is just a matter of the continuing to add the bricks following the same pattern. I like to work out from the diagonal center line of my pattern but do whatever works best for you.


I will admit my pattern got off in a couple of places and if I was doing this on anything other than the cube I would have been a lot more upset about it. For the cube I am going to let it slide.


However, because of the mistakes I made I have a few hints for you to help you get yours a lot closer to perfect. First and most importantly DO NOT TRY TO RUSH THIS PROCESS!! I ended up being short on time this week for doing this and had to rush through more than I would have liked. This caused me to make some mistakes. So allow lots of time. Also I found things worked much better when I worked in short bursts of time. Lay bricks for a few minutes and then walk away and do something else. Next time you walk by add a few more bricks. The parts of the floor where I was able to do this went much better than the ones where I tried to sit and do a big chunk of the floor all at once.


In the end I am very happy with the end result I got and I think I might want to use this pattern for a floor in a future project.


As always I do want to sincerely thank all of you for watching my videos and reading my blog posts. It means so much to me that you are supporting me in this way. If I could ask you all to do just a bit more by subscribing to the channel and liking the videos and leaving comments. Those help more than you can imagine. Also if you could pass the links on to your friends I would appreciate it so much.


Wednesday, August 7, 2024

Dollhouse Miniature Dresser Makeover


Watch the video here.


I have another Dollar Tree furniture makeover for you this week. This time I am using the tall dresser, but this project will work with any of the cheap dressers on the market, it works especially well on the ones that have the fake drawers like this one.


For this project we will need the dresser and some scrap book/ card making paper that has a tiny (in scale) design. We will also need the normal supplies of glue, Mod Podge, paint, etc.


As always we start with a bit of prep work, mainly to remove the drawer pulls and any excess glue. Both of these tasks required me to dig out my heat gun but once the heat was applied everything went smoothly (except a bit of darkening of the wood near on pull that did not want to come off)


Now its time to give the entire dresser a base coat of white craft paint. This will give a nice surface to work on and it will seal the wood. Let the paint dry.


Once the paint dries go over the dresser with some sandpaper to remove any bumps and lumps and just to smooth everything out. After sanding it wipe it down with a dry paper towel to remove the dust. Then give the dresser another coat of craft paint. I used the same white for this coat. Allow to dry.


At this point I knew I had to do something with about the fact the top of my dresser was on in the wrong place. I had debated between removing the top and gluing it in the correct place or just cutting it flush on the side that extended out. I decided to remove it and place it correctly. For this I just heated the glue with my heat gun and then used a knife to pry it off.

 Measure to find the center of both the top and the body of the dresser and glue it back in place. Allow the glue to dry.


Now we can add the paper to the drawer fronts. I cut a piece of my paper that was as exactly the height of the drawer area and a tiny bit wider. I then carefully applied some Mod Podge to just the drawer fronts. Keep it out of the spaces between the drawer fronts because we will be removing the paper in those areas later. Now smooth the paper in place being careful to have the paper oriented correctly. Allow the Mod Podge to dry completely.


Now we can remove the excess paper, I started with any paper that was hanging off the sides. I used a clean emery board and basically sanded the edge of the paper away. This will give a nice crisp line at the edge of the wood and remove the extra paper.


Now very carefully line something like a dotting tool with the crevice between the drawer fronts and slowly (in a couple of passes) break through the paper in that area. Then follow up with the emery board to neaten the line. Repeat this as needed.


I did decide to let the top drawer be just one drawer instead of the original three. I felt it would look too busy with the third drawer and third drawer pull up there.


Once you are happy with the way the paper looks go over it and if needed add some more Mod Podge in any areas where the edges of the paper are not stuck down.


At this point I used some white paint on a tiny brush and painted over the line between the drawers to sharpen it up and make it look better.

Then if desired pick a couple of colors from the paper and paint parts of the dresser. I decided to paint the bottom of the dresser with a light green and the top with a pale blue. I did my best to match the colors in the paper.


Then paint the drawer pulls to to coordinate with the dresser. I picked the pink from the paper for these.


Use a ball tool to find where the drawer pulls were on the drawer fronts and get the holes started. I came back to this task later when my paint was dried to finish it.


Before we can put the drawer pulls back on the dresser the holes will need to be cleaned out really well. I ended up using a combination of dotting tools, my knife and some tweezers to get this done.


I do recommend dry fitting each pull before in the hole where you plan to place it just before you do glue it. Do this one at a time do any additional cleaning up then dip the flat end in some glue and place it in the hole in drawer front. Let the glue dry.


Now follow up with a thin even coat of Satin Mod Podge and allow to dry.


And there we have a really pretty dresser to use in our next mini scene.


As always I do want to sincerely thank all of you for watching my videos and reading my blog posts. It means so much to me that you are supporting me in this way. If I could ask you all to do just a bit more by subscribing to the channel and liking the videos and leaving comments. Those help more than you can imagine. Also if you could pass the links on to your friends I would appreciate it so much.