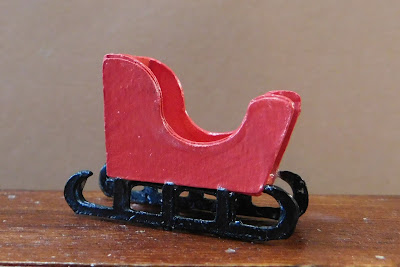
I decided to make another project with a downloadable pattern for you for today. This time it is a tabletop size Santa’s Sleigh and you can find the pattern here. I have both a PDF for those that are cutting the pieces by hand and a PNG for use with an electronic cutting machine.
The pattern has all the pieces you need to make 1 sleigh. There are three of each piece except the piece that the runners attach to that one just has one piece. I grouped the pieces together to make it easier to see what goes with what so I do recommend keeping them together until you glue them.
A little note about the runners. The end that is supposed to be the front of the runner is slightly bigger than the back. Not by much but there is a difference so be careful when gluing to keep everything going the right way.
Like always after cutting the pieces from a medium weight white card-stock we are going to glue the sets of pieces together. I like to use a thick tacky glue for this since I am confident it will last. I’ve had problems with some of the glue sticks letting go after a while so I just tend to not use them.
Once
all the pieces are glued together in their sets we can construct the
body of the sleigh. The 3 pieces that are square/rectangles are the
front, bottom, and back of the sleigh. The bottom piece is the
largest of the three, the smallest is the front.
Once the glue on the body of the sleigh is dry it is time to paint. I used just a simple red for the body.
And black for the runners. You can definitely get fancier with yours. Allow the paint to dry completely before the next step.
Now it is time to glue the runner unit to the bottom of the sleigh. Apply glue to the top of the runner unit and line it up on the bottom of the sleigh body.
I also run a couple of beads of glue to the inside of the where the runners bend so reinforce that angle and keep everything from collapsing. Once the first set of glue dries completely add more to this area. This way your sleigh hopefully can remain standing even if you put something small in the sleigh.
Once the glue is completely dry you can touch up your paint if you need to and add any other painting to your sleigh. Then add a coat of Satin Mod Podge to your sleigh and allow to dry. Now it is ready to display in your dollhouse.
As always I do want to sincerely thank all of you for watching my videos and reading my blog posts. It means so much to me that you are supporting me in this way. If I could ask you all to do just a bit more by subscribing to the channel and liking the videos and leaving comments. Those help more than you can imagine. Also if you could pass the links on to your friends I would appreciate it so much.


No comments:
Post a Comment