This week we are starting a new addition to our monthly themed series. Last year about this time I made the first cookie jar and at that time I had debated between doing cookie jars or teapots. I decided at the time that cookie jars would be what I wanted to focus on for the year. Now we get to switch to the teapots. I am so excited to do these. I have tons of ideas to go with the different themes we have been working with.
A couple of things I want to cover before we start. Most months the teapot will not be a match to the cookie jar, it will coordinate and be the same general theme but not be an exact match. My plan is that these are parts of the same collection of many items that the doll house dolls have been collecting for many years. They are not going to be designed to be “matchy-matchy” as a set. That being said some months they might match just not all the time or probably even most times.
Also one of my favorite features of the cookie jars were that they could open up the teapots will not be able to open. They will have a “lid” as a permanent part of the piece.
Since this is the first in the series I am still working out how these will be made so especially with the first few I might try a few different ways of doing them. We can all learn together what is going to work the best.
Okay, now that that is out of the way let’s get to work and make a snowman teapot.
We only be using 3 colors of polymer clay to make this little guy. Along with some liquid clay, some basic colors of paints and a few types of Mod Podge. All of the paints, the Mod Podge, and the brushes were provided by Plaid to use in videos for you guys so a big thank you to them.
We are going to start with a ball of white clay that is a little under ½” in diameter. Then we are going to press it to become about ¼” tall by around ½” you need to be close but don’t stress if yours is a bit bigger or smaller. Teapots come in different sizes just be close to these sizes and you will be fine.
We are going to be baking our clay between each step, that will preserve our work and prevent us from messing up the shapes we are adding. So for this first part I want you to bake your teapot for 15 minutes at the temperature recommended for your brand of clay. Then let it cool completely to room temperature.
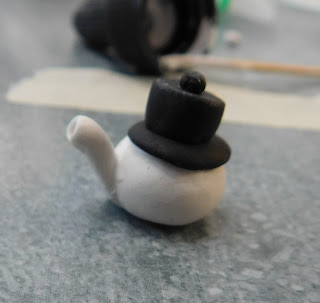
Once cooled we will add the hat of the snowman. On some of the real teapots I saw online this was the lid and on some only the very top was the lid. Regardless that is the next step. For the hat we need 3 small pieces of black clay- a ¼” ball, a snake that is ¼” in diameter cut about ¼” long, and a very tiny ball of clay.
First step, take that ¼” ball and with your finger flatten it to a thin disk to become the brim of the hat. Then add a tiny bit of liquid polymer clay to the top of the baked clay to act as a glue. Add the brim centering it on top of the teapot. Then add a small bit of liquid clay to the top of the brim and add the piece of the clay snake to act as the hat. Normally I don’t use the liquid clay when
adding raw clay to raw clay but since I don't want to ruin the shape of the hat the liquid clay will act as our insurance that the hat will stay together. Next make a tiny divot in the top of the hat with a dotting tool of something similar then add some more liquid clay to and the tiny ball of clay to act as the handle for the lid. Now bake the teapot again for 10 minutes and allow to cool again.
Now we need to clean our work area really well because we are going to be working with the white clay again. Clean all your tools, your work surface and your hands thoroughly because any little dot of black clay that is left is going to show in the white clay.
Next up is the spout of our teapot. For this you need a small snake of white clay. Cut one end flat then add a bit of liquid clay to the body of the teapot where you want your spout to start. Carefully smooth the not cut end of the snake into the teapot and shape the spout as desired. Use something small to make a hole into the end of the spout then bake again for 10 minutes and allow to cool.
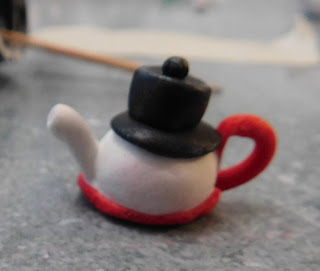
Next get out your red clay and make a small snake. I used the textured area on one of my clay tools to texture this to look a bit like it was a knitted piece. Then add a small dot of liquid clay across from where the spout is attached. Add your handle at the top bend it around and bring it to the bottom of the teapot. Smooth the end at the bottom. You can make your handle round or more angled depending on the look you are going for. Bake again for another 10 minutes and cool.
Now using the same red clay make another snake and wrap it around the base of the teapot using some liquid clay as glue. Try to be as neat as possible but the red will probably smear a bit. We can cover up some of that in the next step. The read is supposed to look like the scarf of our snowman so give it some texture with the same tool as you did for the handle. Bake again for another 10 minutes (this is our last bake_
Once cooled we can use some paint that matches the teapot to touch up any areas where things aren’t the correct color. Maybe there’s a bit of liquid clay showing or maybe the red clay smeared. A thin coat of paint will cover up those little imperfections. Allow to dry.
Now for a bit of insurance seal the teapot with a thin coat of Mat Mod Podge. This way if you make any mistakes when painting the face you can “erase” them with a bit of water on a cotton swab. Allow to dry.
Now I do recommend painting one feature at a time since if you mess up any of them it will be hard to remove just the one that went wrong. Paint dries pretty quickly so it will only need about 10 or 15 minutes between and you should be fin. I used my pointy tool to paint the tiny bits of charcoal that form the smile.
A dotting tool for the carrot nose.
And finally a dotting tool for the eyes and cheeks.
Once dry give the entire teapot a thin coat of Satin Mod Podge and you are ready to add to your snowman collection.
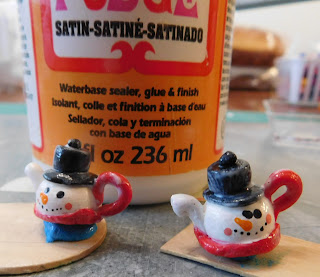
Here is a picture of both the teapot I made on the video and the one I made while taking the pictures for the blog post. I love both of them and they very definitely have different personalities.
As always I do want to sincerely thank all of you for watching my videos and reading my blog posts. It means so much to me that you are supporting me in this way. If I could ask you all to do just a bit more by subscribing to the channel and liking the videos and leaving comments. Those help more than you can imagine. Also if you could pass the links on to your friends I would appreciate it so much.


These are sooo cute. Be fun doing them
ReplyDelete