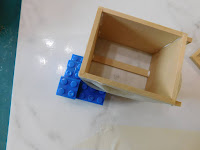
This week I am beginning the job of tackling the kits I purchased for the kitchen of the Beachside Bungalow. I was most excited about the doing the dishwasher kit so that is what I decided to start with.
I love how well laid out these kits are and the identification sheet that is provided it so helpful. It takes the guess work out of figuring out which piece is which. You can lay all the pieces out on the full-size diagram and you then know for sure what each piece is.
Once assembled it was time to start the finishing of the kit. The manufacturer of the kit recommends their clear finish but am using the same primer that I have been using throughout the dollhouse build. Being water-based it did raise the grain a bit more than I would have liked but some careful sanding took care of that issue.
I initially was going to paint the door with the same white trim paint I have been using in the dollhouse. But I wasn't happy with the finish on this piece. For the regular doors it will work alright but I wanted to have a perfectly smooth finish to replicate the metal door of a real dishwasher. So after the first coat and some sanding I switched to my regular white craft paint. And with enough thin coats it would have achieved the finish I was looking for. But, that would have been a lot of coats so I got to thinking and decided to try flooding the surface with paint and tilting the door to force a completely level/smooth finish.
I have been getting into acrylic pour painting in real size and I was inspired by that technique to get the smooth coat. I was so happy when it worked. I hadn't filmed when I was doing it because I was in the middle of a rather long phone conversation with my daughter at the time. But I do show you later in the video how this was done.
Once the black paint dried it was time to add the “chrome” to the door. Off camera while the paint was drying I was trying out several ideas for this chrome. The one I was happiest with was using some silver nail polish. It gave the best, most “metal” like look the easiest.
I used some LA Colors polish which I love to use in crafting because it is easy to find and really cheap. It is also decent quality. Most of the time I only pay around $1 per bottle unless it is one of their special finishes.
I also used some black nail polish (also LA Colors brand) for some of the details on the control panel.
I love how this turned out. I hope you enjoyed it as well.
As always I do want to sincerely thank all of you for watching my videos and reading my blog posts. It means so much to me that you are supporting me in this way. If I could ask you all to do just a bit more by subscribing to the channel and liking the videos and leaving comments. Those help more than you can imagine. Also if you could pass the links on to your friends I would appreciate it so much.


No comments:
Post a Comment