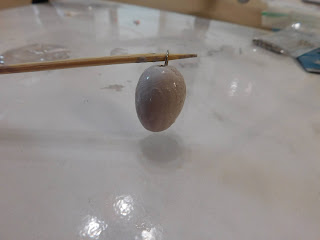
This week for our Tuesday video I thought we could make a wasp's nest for the dollhouse. I love making little details like this because they are usually simple, fairly quick and just add that extra bit of realism to the build.
To be truthful this is not what I was going to make this week but inspiration struck and I went with it. I was a bit rushed for time so this was a really quick build. If I had more time I would have probably fussed with it a bit more but I really don't know if it would have improved it. This is one of those projects that is probably better just being simple.
For
the base of the nest you will need something that is kind of egg
shaped or round. I had these glitter covered Easter eggs from Dollar
Tree in my stash and that was perfect but really anything of a
similar size and roundish shape will work. After all wasp's nests are
all unique.
I added a headpin to act as a handle while painting and to use to hang the nest when it is finished. I just made a sloppy loop at the top. Do be careful if you are using a Styrofoam egg as the pin can easily be pulled through the top.
Now it was time to paint the Easter egg to make it look not like an Easter egg. Just mix any brown, any grey and white craft paint together and coat your next base. Don't bother to mix the paint thoroughly because streaking of the color will make this look more real.
I
then cut some very narrow strips of the tissue paper and using the
paint mixture as a glue wrapped the strips around the next. This is a
very messy job so be prepared to get paint all over.
I allowed this to dry just enough to not be so sticky then added some more strips of tissue paper. Allow this to dry again and then optionally you can mix a tiny bit of brown paint and white paint to create a beige color and just paint a few streaks of this color on the nest.
Take a look at your nest and decide if you need to add more tissue paper strips or more streaks of color.
When you are happy with it let it dry and add it to your dollhouse tucked up under the eaves somewhere.
As always I do want to sincerely thank all of you for watching my videos and reading my blog posts. It means so much to me that you are supporting me in this way. If I could ask you all to do just a bit more by subscribing to the channel and liking the videos and leaving comments. Those help more than you can imagine. Also if you could pass the links on to your friends I would appreciate it so much.


It is always great with inspiration for those special little details and this is just fabulous, thank you.
ReplyDelete