Check back often

Have you checked out all my blogs?


Dollhouse Minis: http://joannesminis.blogspot.com


18” Dolls: http://joannes18dolls.blogspot.com/


General Crafts: http://joannes-place.blogspot.com/


Cooking: http://joanne-kitchen.blogspot.com/


Also if for some reason I can't post I will try to give a head's up on the Facebook page so check there too.

Showing posts with label Howuseworks Kitchen Collection. Show all posts

Sunday, October 17, 2021

Beachside Bungalow Kitchen- The Sink


Watch the video here.


If I sound a bit “off” in the video I had a bit of a headache most of this last week.


This kit is part of the Kitchen Collection by Houseworks which can be found here.


So this week I decided to paint the sink for the kitchen set. I could have left it the white color it came in but I wanted to change it up a bit. Since all the appliances are white so far I decided to go with a “stainless steel” look.


The one thing that I can say I am not really thrilled with in this sink is the fact the surface is textured as you can see in this photo. I would have preferred it to be smooth. But we will just go with it and it will be fine.


Since the faucet that I purchased only needed one hole centered on the sink and the sink had 2 holes dealing with that was the first task. I filled the holes with some caulking and drilled a new hole where I wanted it. This all worked fairly well. I did have to dig out my Dremel to drill the hole but that is not really an issue. I could have filled the holes a bit more than I did but I am okay with the slight dents, I'll probably have thing setting in those areas anyway. I just didn't want the holes to be there. The dill bit I used was 1/16” and it is a tight fit.


Next up was to glue the two parts of the sink together. If you wanted to paint the rim and the basin part in different colors I would paint first then glue together. I am painting mine all one color so I wanted it to be a single unit to make painting easier.


I used a base coat of black craft paint followed by a coat of Brushed Metallic in Brushed Silver. This makes a nice dark metal color that will look lovely in place in the dollhouse.


I added just a bit of black paint in the little drain area that was molded into the sink bottom to make it look more like a drain, totally optional step but I usually do this when possible.


I sealed my sink with a coat of mat Mod Podge, this step was probably not completely necessary but I prefer the finished look it gives the piece.


After all was dry I stuck in the faucet to see how it looks. At this point I am going to leave it just in the sink and not glue it. It fits very snugly and I think it will be fine. If I find it slips out at all I will glue it in place.


Here is a picture of the finished sink placed in the cabinet where it will eventually live.


As always I do want to sincerely thank all of you for watching my videos and reading my blog posts. It means so much to me that you are supporting me in this way. If I could ask you all to do just a bit more by subscribing to the channel and liking the videos and leaving comments. Those help more than you can imagine. Also if you could pass the links on to your friends I would appreciate it so much.


Sunday, October 3, 2021

Beachside Bungalow Kitchen- The Oven Door & Stovetop


Watch the video here.


All paints, brushes, and the Mod Podge was provided to me from Plaid free of charge.


These kits are part of the Houseworks Kitchen Collection which can be found here.


I decided to tackle both the oven door kit and the cook-top kit at the same time since they have a lot of the same steps in common.


The first step whenever I am painting any minis that are made of any kind of metal is to thoroughly wash them. I did this in a bowl of soapy water (I use whatever dish washing soap I have on hand) I then rinse them in another bowl that contains mostly water with a Tablespoon or two distilled vinegar. The vinegar helps to remove any remaining oils that might have gotten onto the pieces. I then let them dry completely before I paint them.


For paints I used just plain craft paint. Since I know these pieces will only be for display and not handled much I feel that is enough. If I was painting something that was going to be handled a lot I might use either a multi-surface paint or an enamel.


To make it a lot easier to handle the small parts I used some super glue and temporarily attached the small pieces that I wanted to really detail to some craft sticks. It was easy to pop them off when I was ready to assemble but held well for painting. As a bonus it made keeping track of those tiny pieces much easier. Just be sure the super glue is dry before you paint.


I used two colors for the base coat on the pieces- white and black. For the door and the main part of the cook-top I used multiple coats until it looked smooth. For the control panels I used a bushed steel paint until it was smooth and well covered. I then added details with the white and black paints. For the oven door handle I added some of the steel color to the parts that attach it to the door, I love little details like this even though no one will probably notice in the finished dollhouse. I know its there and that is what is important.


Once the paints were dry I glued the two main pieces to the oven door together. I am using E6000 today for most of the gluing.


The next step was to seal all the painted surfaces with the various Mod Podge varieties I had on hand. You can of course just use one finish for all of the pieces (I would suggest gluing everything together first if you are going just use one finish) Using multiple finishes is a bit extra I know but I like the effect I got. I wanted some parts to look like shiny new metal, I wanted some parts look like digital read-outs and I wanted some to look more textured and not shiny. It was a bit more work but I like how it came out and it was worth it to me.


Once all the finishes were dry it was time to finish gluing the parts together. I did use a couple of drops of super-glue to add in the assembly of some of the tiny parts.


I love how these look and they are going to be stunning when the kitchen is completed.


As always I do want to sincerely thank all of you for watching my videos and reading my blog posts. It means so much to me that you are supporting me in this way. If I could ask you all to do just a bit more by subscribing to the channel and liking the videos and leaving comments. Those help more than you can imagine. Also if you could pass the links on to your friends I would appreciate it so much.


Sunday, September 26, 2021

Beachside Bungalow Kitchen- Corner Cabinets


Watch the video here.


This kit is part of the Houseworks Kitchen Collection which can be found here.


I am going to be very honest here as I was in the video this kit did not go together as well as the others in the set. I am not sure why. It could have been me, it could be the kit, I have no idea but I struggled this time. In the end I got it done. I think I have it put together correctly but there might be a few mistakes here and there.


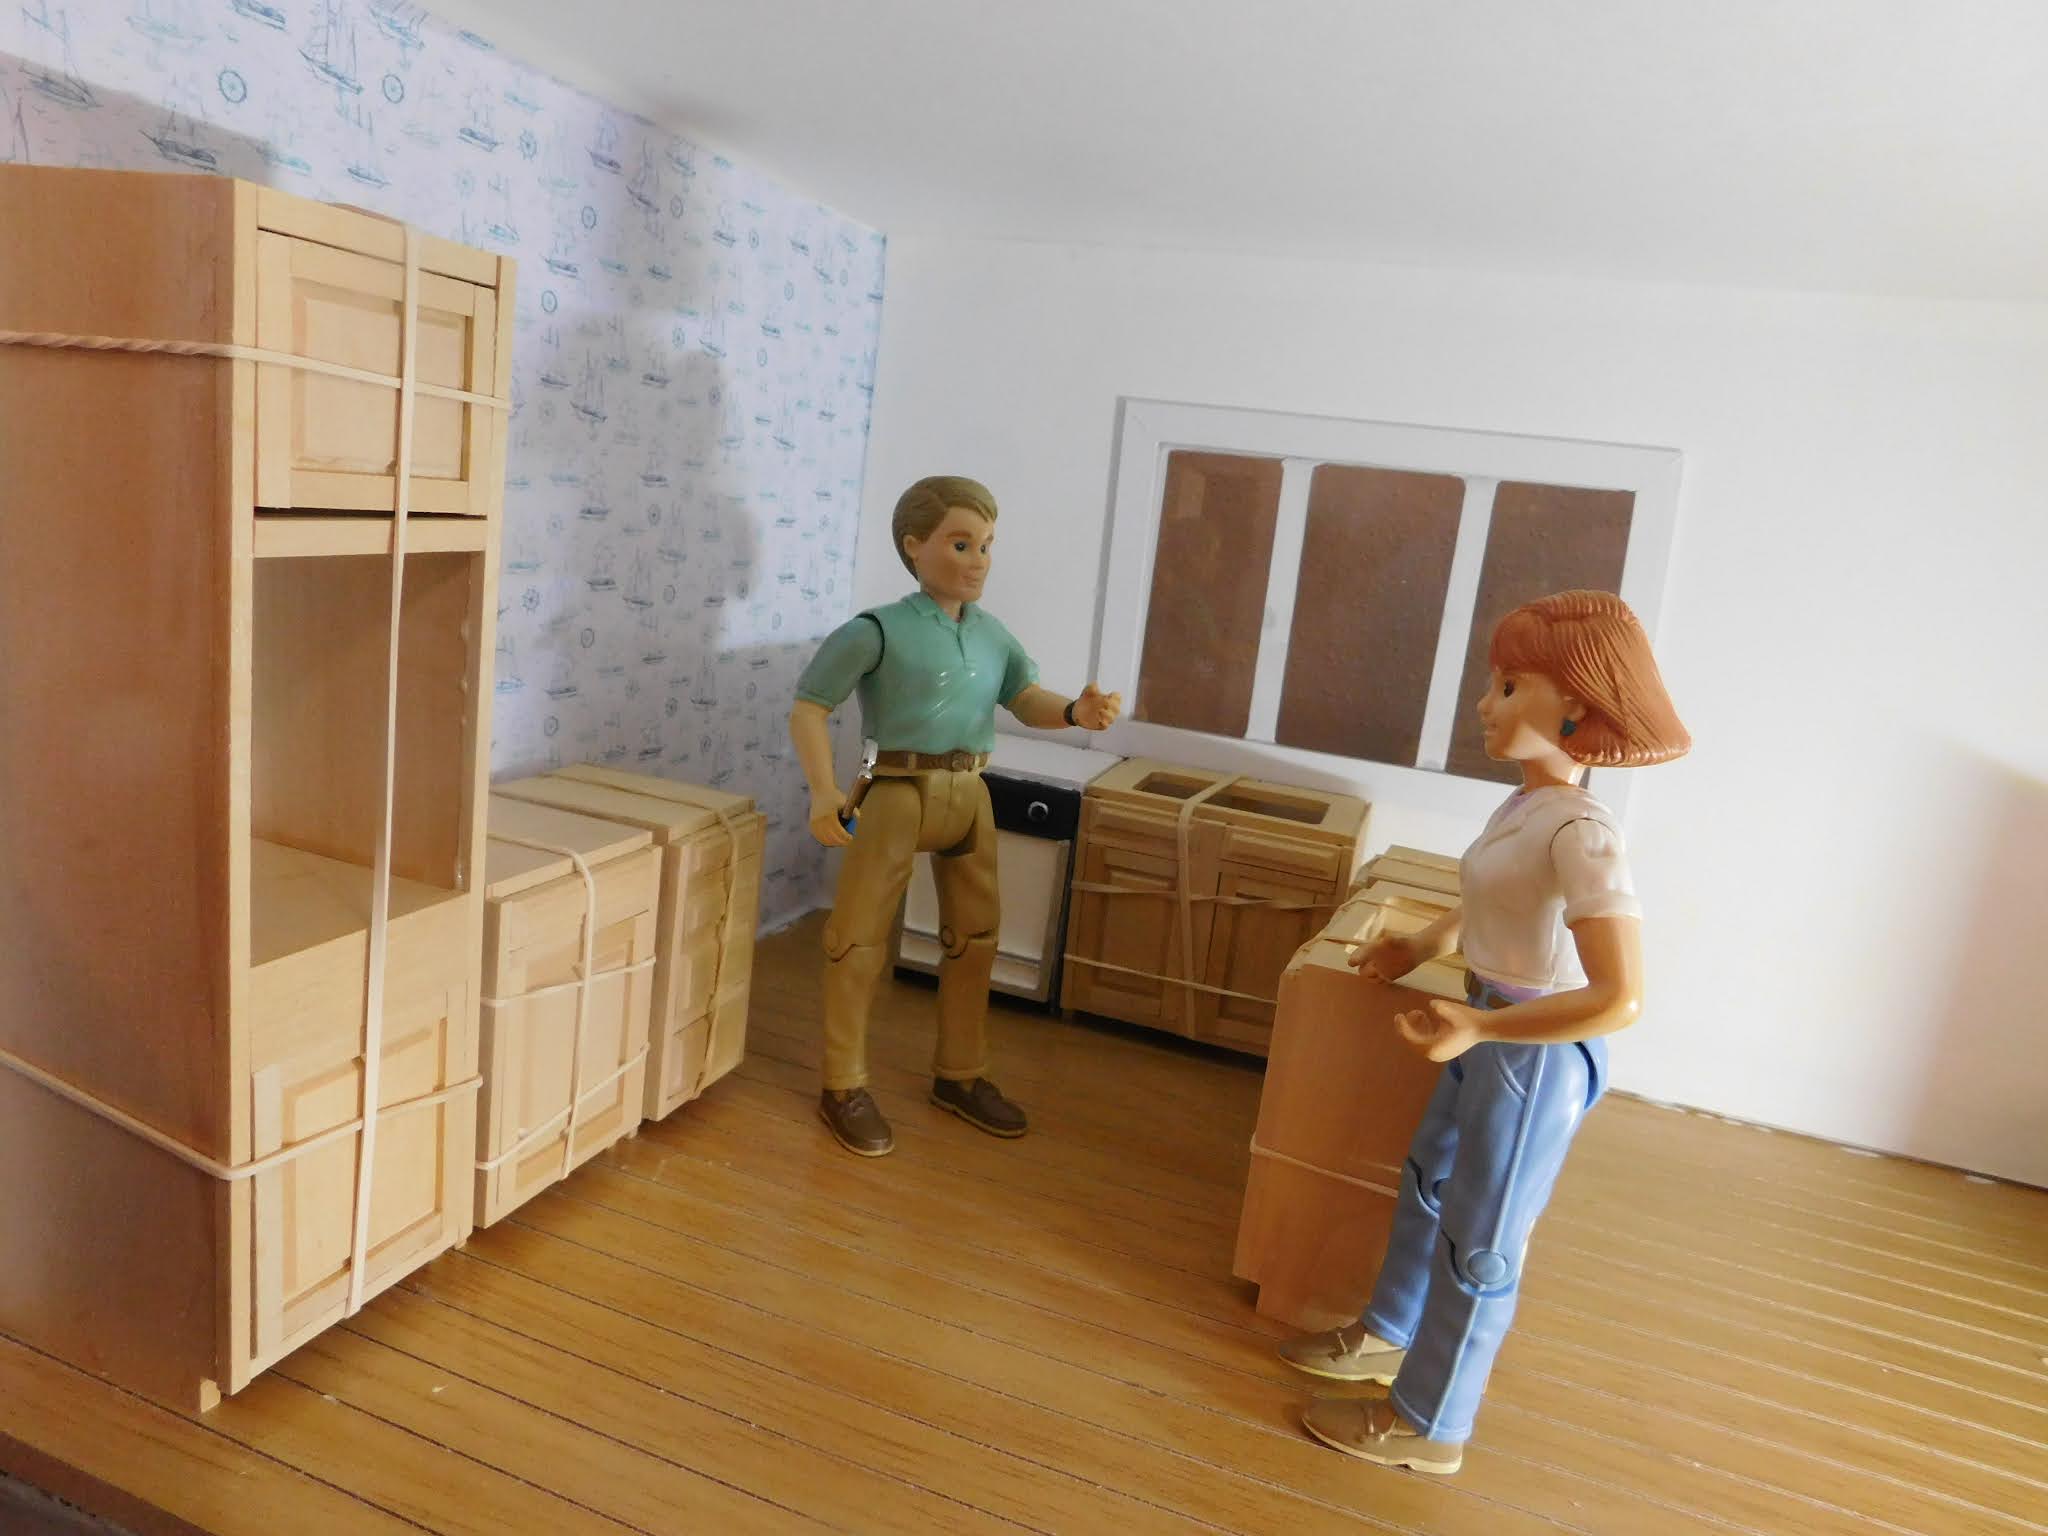
I am fairly positive I will be using both of the base cabinet pieces. The top ones I am really not sure if I will be using either of them. I will need to figure out the upper cabinets that I want to use before I will know. That is something I won't figure out until I have the lower cabinets and appliances in place.


On the bright side the lower corner cabinets really won't be seen in the final kitchen. They are mostly going to be there fill in the corners and make sure the countertops fit correctly.


Because they won't be seen they are really simple pieces with few parts.


The base corner piece went together much better than the upper one. It is glued much like the other cabinets in this set minus the doors/drawers and shelves. They do help with figuring out the layout of the kitchen though.


The upper corner unit was what gave me the most trouble. I really am not sure why I had so many problems with it. If I use this piece the front angled panel will show in the kitchen.


These are the last of the cabinets that we will be putting together for a while. Next week I am planning to work on the cook-top and oven door kits. Then I want to paint all the base cabinets and put them in the kitchen. Then the countertops will need to be figured out.


I also hope to get the refrigerator kit to complete too.


Only after all of those steps will I tackle the upper cabinets.


As always I do want to sincerely thank all of you for watching my videos and reading my blog posts. It means so much to me that you are supporting me in this way. If I could ask you all to do just a bit more by subscribing to the channel and liking the videos and leaving comments. Those help more than you can imagine. Also if you could pass the links on to your friends I would appreciate it so much.


Sunday, September 19, 2021

Beachside Bungalow Kitchen- The Oven Cabinet


Watch the video here.


This kit is part of the Houseworks Kitchen Collection and can be found here. I am working on several of the pieces on the channel to build the kitchen in the Beachside Bungalow.


So this week we put the Oven Cabinet together. I like this piece for several reasons on being it adds some height to the kitchen and will allow the wall cabinets that come later a piece to kind of anchor them.


The cabinet has 2 areas each with a door and an opening to place the Oven Door kit from the same collection. 


The kit goes together pretty much like all the others in the set. The big difference being it is more difficult to keep the unit square because of the shape. The height combined with the narrow size make it want to go a bit wonky. It was easy to work with once all the pieces were together but it definitely needed to be taped. I also let the glue dry all the way before taking off the tape and adding the trim pieces. This one really needs the drying time.


As I was doing my dry fit before I turned on the camera it did seem that one of the long side trim pieces was slightly warped. Not much just a tiny bit. I was able to still get it in place with the glue and some careful clamping.


I did run into an issue I have not had in any of the other kits so far- the smaller of the 2 doors was just a tiny bit short for the opening. I have checked multiple times and all the parts appear to be glued correctly so I am not sure what happened. I think because of where it will be placed it won't show a lot so I think it will be fine. The gap is really small but it is there it you look at it straight on.


I did show how the oven door will fit into the cabinet and I am really looking forward to getting all the pieces finished and installed in the dollhouse. I think it is going to look really nice.


As always I do want to sincerely thank all of you for watching my videos and reading my blog posts. It means so much to me that you are supporting me in this way. If I could ask you all to do just a bit more by subscribing to the channel and liking the videos and leaving comments. Those help more than you can imagine. Also if you could pass the links on to your friends I would appreciate it so much.


Tuesday, September 14, 2021

September Mini Haul


Watch the video here.


Today I have a very short haul for you. I purchased some more kits to use in the Beachside Bungalow Kitchen. This time I got the oven cabinet and the oven door, a faucet for the kitchen sink we got last month, a cook-top and a pair of corner cabinet sets.


Let's talk about the items one by one.


The oven cabinet kit is one of my favorite pieces to use because I happen to love wall ovens in real life and I love the realism you get by adding one to the dollhouse. This cabinet has 2 working doors as well an opening to add the wall-oven door kit. When finished the cabinet height will be 7” so it will break up that solid line of cabinets.


Next the oven door kit is made completely of metal and when properly painted looks very nice in the kitchen. It does not open or have a window but it is still a really wonderful addition to the kitchen.


I purchased 2 sets of the corner units. I am not sure if I am going to use both or just part of one but I decided to just get two and worst case scenario I end up with extra pieces I can use in a future project.


I really love the cook-top in this set of kits also, Again it just makes the kitchen seem a little nicer and little more real. I haven''t decided how much I will modify this one yet. I have some thinking to do about what I want to do and how I want it to look when in place.


Lastly this time I got a faucet for the kitchen sink. I like the look of this one and although I think we will have to do some modifying to the sink I got last month I think it will look wonderful in the finished kitchen.


I was really hoping to get the refrigerator kit this month also but it was still out of stock when I ordered. I did sign up to get an email when they get them back in stock so I am hoping to get my hands on it soon also.


As always I do want to sincerely thank all of you for watching my videos and reading my blog posts. It means so much to me that you are supporting me in this way. If I could ask you all to do just a bit more by subscribing to the channel and liking the videos and leaving comments. Those help more than you can imagine. Also if you could pass the links on to your friends I would appreciate it so much.


Sunday, September 12, 2021

Beachside Bungalow Kitchen- 1 ½” Base Cabinet with Door


Watch the video here.


This week we tackle another of the kitchen cabinet kits I purchased. This time it is a 1 ½” wide cabinet with 1 door and a drawer. The hardest part of this was probably trying to decide which way I wanted to hinge the door. LOL


The process was pretty much the same as the previous kits so hopefully you aren't bored by this by now. I did run into a problem which I tried to explain both the cause and the fix for. The area was just too small for me to really show what I was doing. In a nutshell I had neglected to wipe out the glue from the
inside where the drawer slides in. I got distracted and just forgot. So when the glue dried that little bit of extra space it took was too much for the drawer to slide in. it did take me a few minutes to realize what had happened. 

Once I knew the cause of the issue I had to figure out how to fix it. In the end I was able to use a dental pick (this is a great addition to your craft tool box) and some of my pointed clay tools. I then wrapped a screwdriver with some sandpaper and sanded off most of what I couldn't pick out. Since the spot was still really tight I sanded off a bit of the back corner of the drawer and now everything fits. The area of the drawer I sanded off isn't noticeable unless you take the drawer all the way out of the cabinet.


Like all the other cabinet pieces I will be adding the finish at a later time when I have all or most of the rest assembled.


As always I do want to sincerely thank all of you for watching my videos and reading my blog posts. It means so much to me that you are supporting me in this way. If I could ask you all to do just a bit more by subscribing to the channel and liking the videos and leaving comments. Those help more than you can imagine. Also if you could pass the links on to your friends I would appreciate it so much.


Sunday, September 5, 2021

Beachside Bungalow Kitchen-1 ½” Base Cabinet with Drawers


Watch the video here.


This week we continue work on the kitchen cabinet kits that I recently purchased to put into the Beachside Bungalow. This week I am putting the 1½” wide base cabinet with drawers together. So not only do I put the cabinet itself together I also assemble the 4 drawers.


While drawers might sound kind of scary put together they are really easy since the pieces of the kit are cut so well. All (or most) of the edges are cut in such a way that they almost go together by themselves.


The number 1 thing to remember when putting any kit together is to take it slow. Don't rush the steps to get it done quickly. You need to work carefully and make sure each step is done correctly. Always dry fit everything. I can't emphasize that enough, by dry fitting you can see what goes where and if it fits.


The first step on all of these (and really) kits is to sort and label all the parts that come in the kit. That way you know what the pieces are so you are less likely to make mistakes.


On these cabinet units you do need to make sure all the corners are square and all the edges that should line up do. So take your time and make sure you understand each step before you start doing it. 


Also at each step give your glue time to dry. Not amount of measuring and fitting will do any good if you try to rush and move to fast. That is when things get crooked and end up not fitting.


The drawers did need to be sanded just a bit to make them fit which it normal. I was pretty certain they would even before I tried them. All kinds of things can affect the fit of the drawers into the cabinet. After all the fit is very tight since we are working so small. When you do sand pieces keep your sandpaper flat on the work surface and keep the item being sanded at the proper angle.


This piece like the one last week will get finished later when more pieces are ready.


As always I do want to sincerely thank all of you for watching my videos and reading my blog posts. It means so much to me that you are supporting me in this way. If I could ask you all to do just a bit more by subscribing to the channel and liking the videos and leaving comments. Those help more than you can imagine. Also if you could pass the links on to your friends I would appreciate it so much.


Sunday, August 29, 2021

Beachside Bungalow Kitchen- 3” Base Cabinet


Watch the video here.


This week we are working on one of the kitchen cabinet kits I recently purchased. This one is the 3” wide base cabinet that has a spot to put either a sink or cook-top into.


The front has 2 fake drawers at the top just like a real cabinet would and it has 2 doors with shelves.


I do want to say again how much I love this set. I do wish there were more informative instructions in addition to the diagram but I still got this done easily. I did have to make one correction (I initially placed the fake drawer fronts upside down) It was an easy fix since I figured it out before the glue had time to set.


As with any kit I recommend you sit down with the instruction sheet, all the pieces included and a pencil. Go through each piece and figure out what every one of them are. Then with the pencil on the backside of the pieces label each one with its number. This will make putting the kit (any kit) so much easier.


Also dry fit every step before you put any glue on anything. Even if I don't show this step I always do it. You will prevent a lot of mistakes by simply dry fitting the parts.


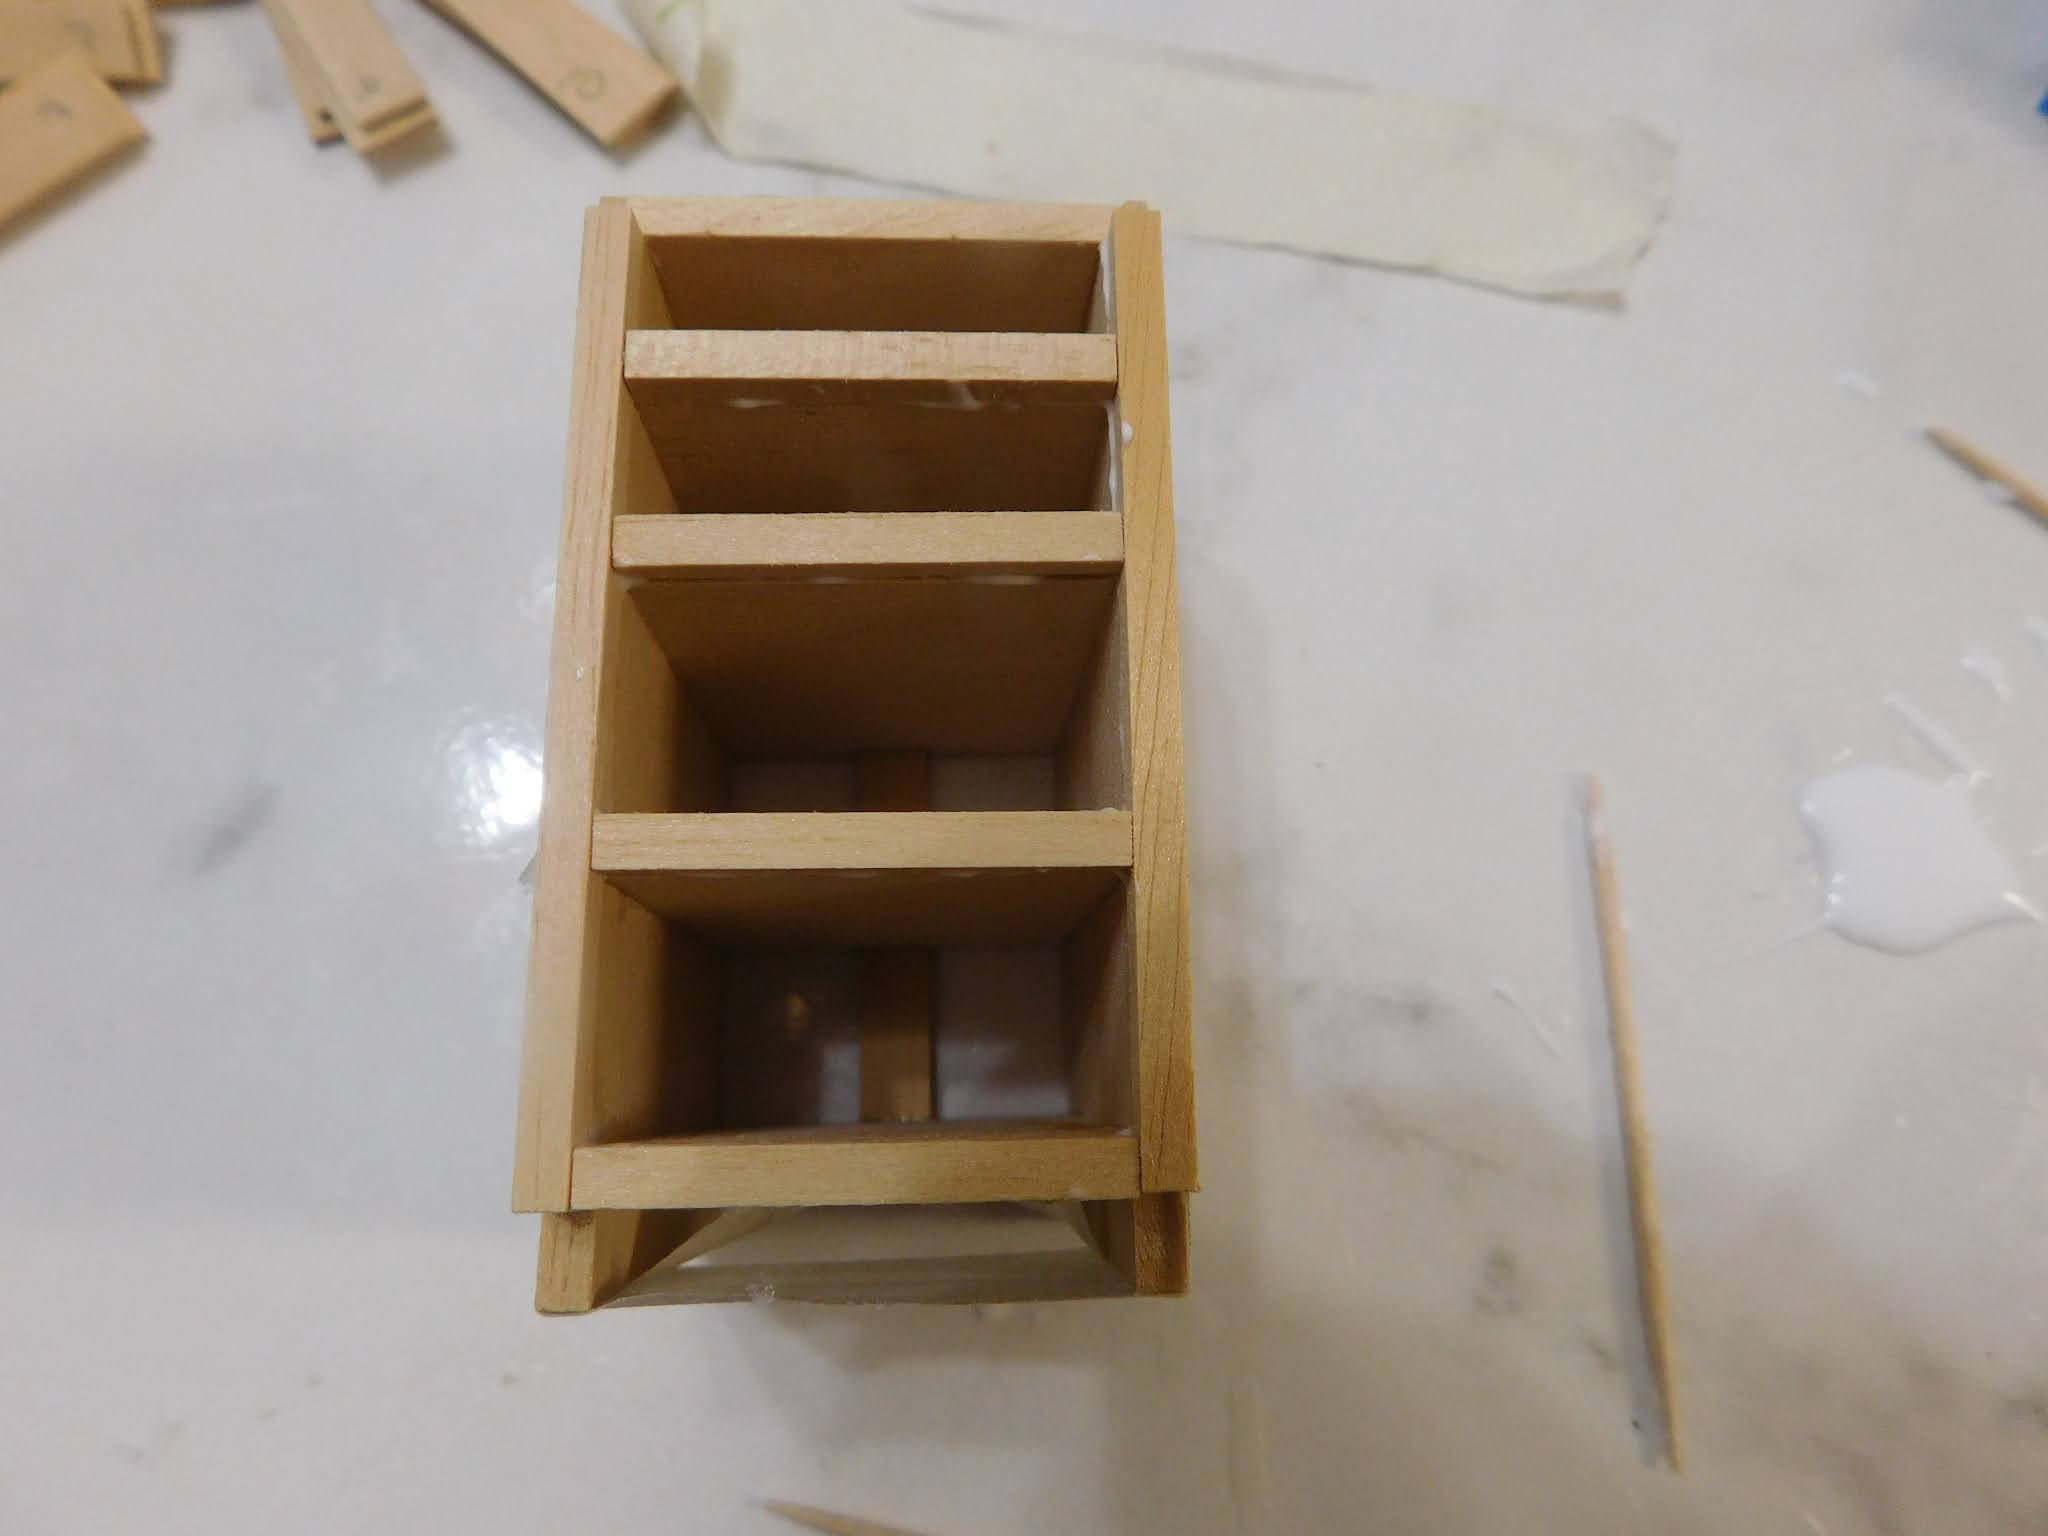
The first construction step of this kit is to build the structure of the cabinet. This consists of the top, 2 sides, 3 shelves and the back brace piece. You do need to do all of these in one step to make sure they are all squared up and that everything fits. Off camera I checked it with my “Lego” block square and then used both tape and clamps to hold everything in place until the glue was dry. Don't rush this step if anything is off in this step the entire piece will be off.


The next piece we add is the filler piece that will hold the drawer fronts in place. This piece just gets glued in to fill the space. Allow the glue time to set up before going on but it doesn't have to be all the way dry if you are careful.


Now we add the drawer fronts, and the pieces that will frame the doors. Work carefully and make sure (again) that everything is in the correct location.


The last pieces to glue onto the cabinet are the pieces with the holes for the hinge pins. Be sure that you align the holes correctly and that they don't get glue in them.


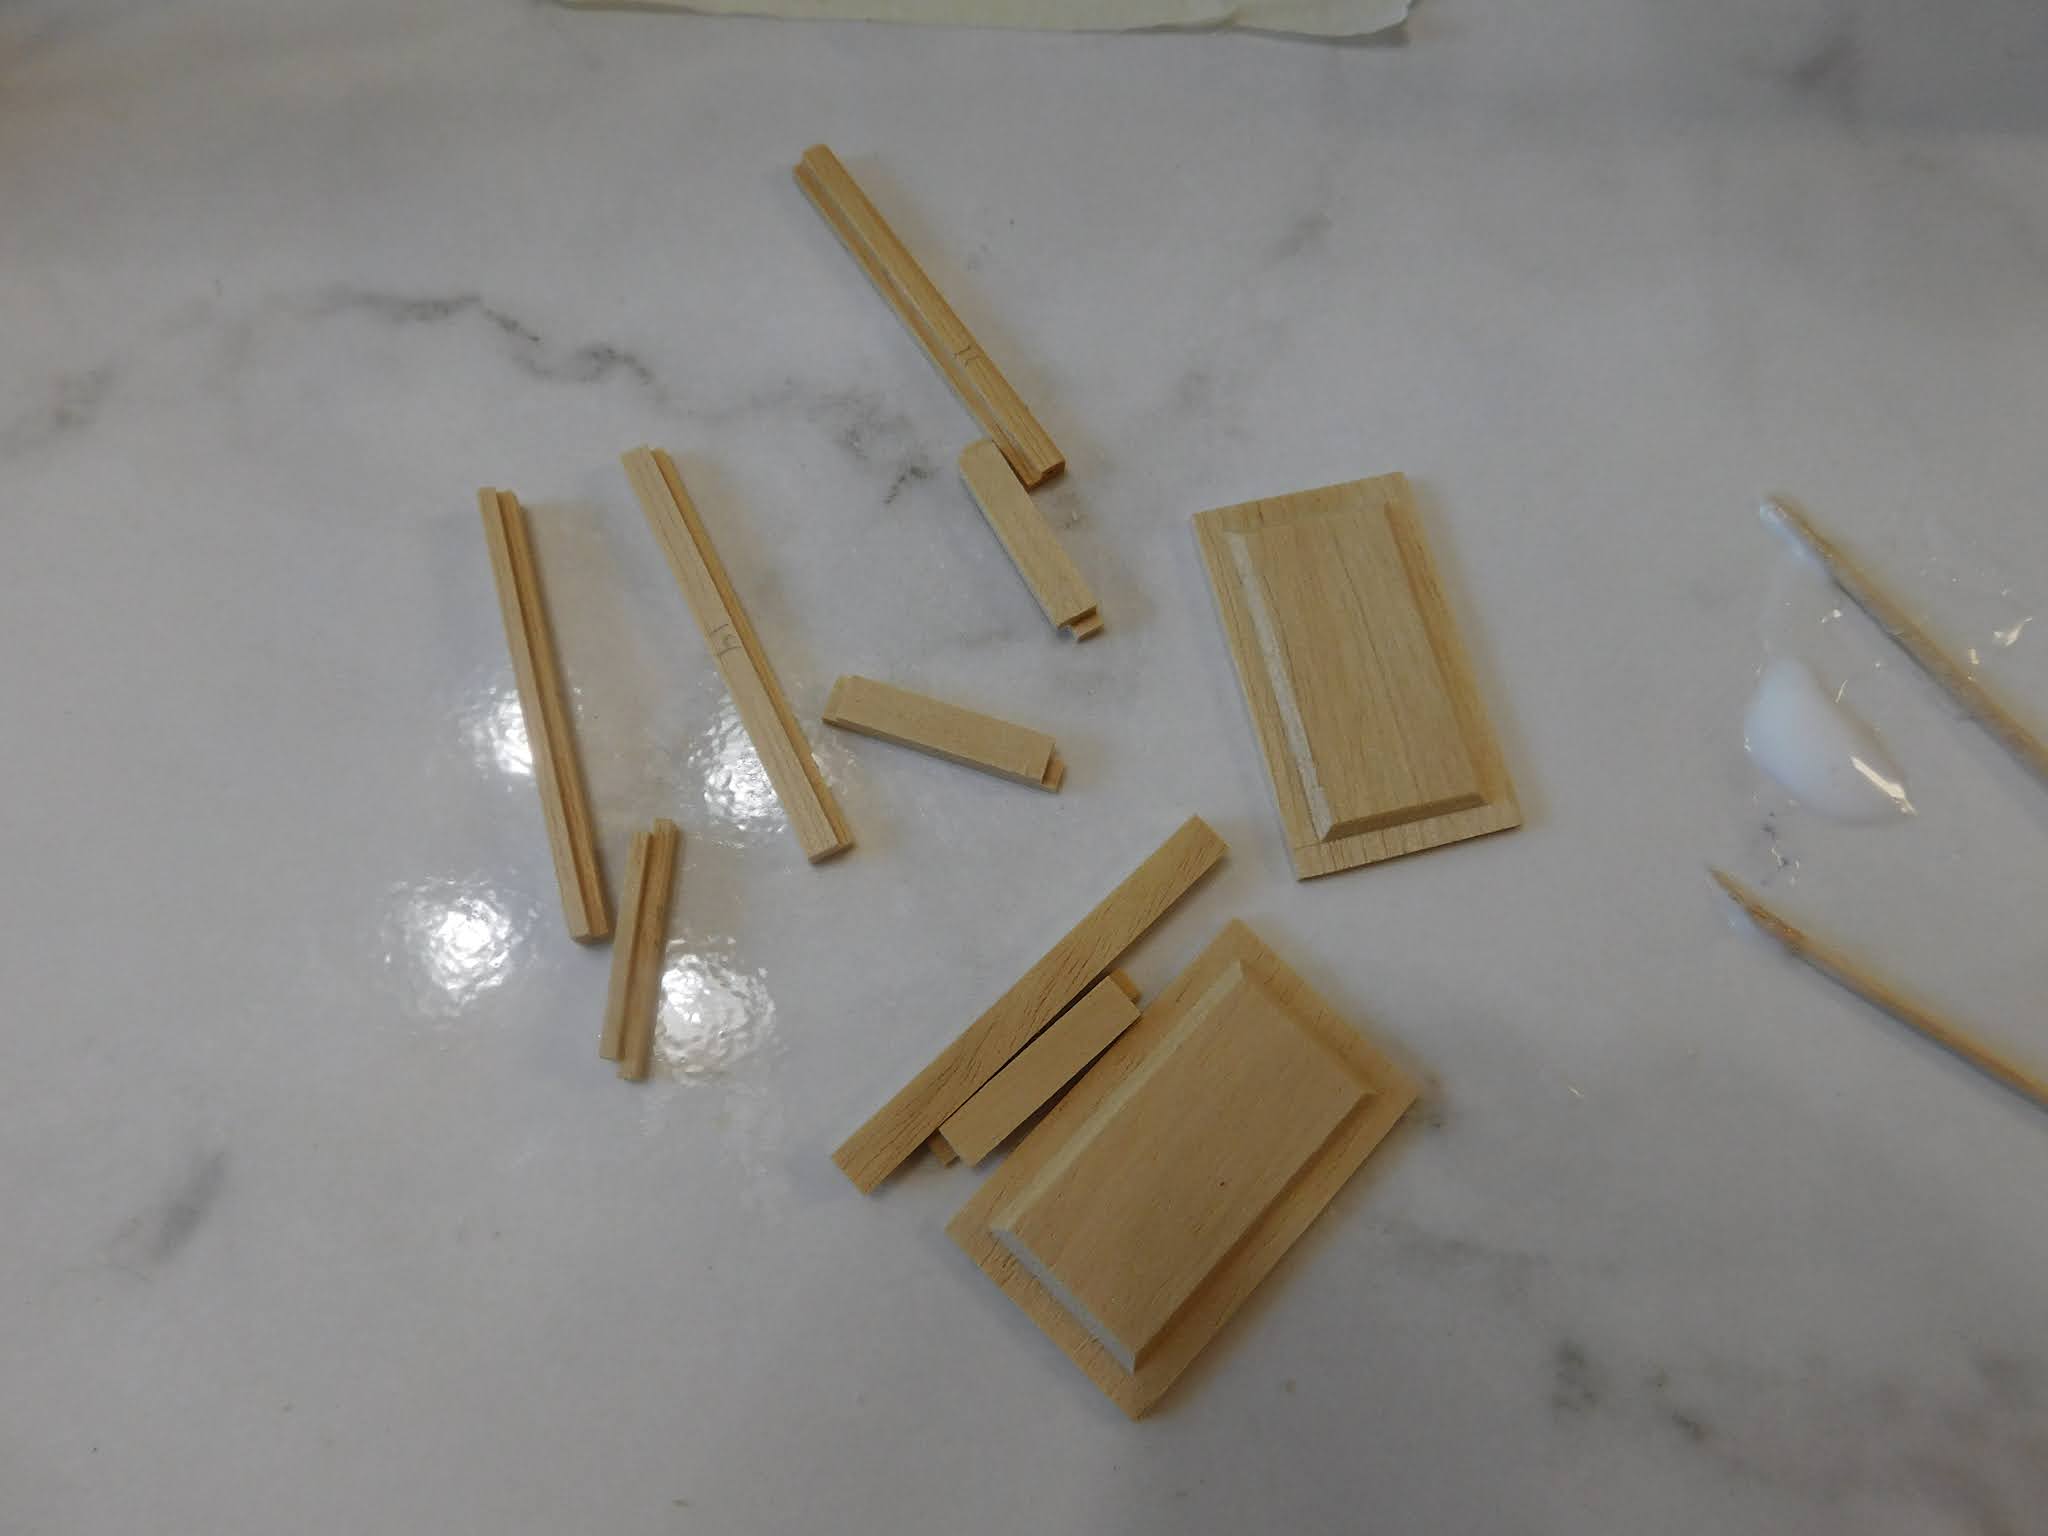
The last construction step is to put the doors together. Each door has 5 pieces. Dry fit and check that you have the long pieces correct. There are 2 different long side pieces that look a lot alike. One has a nice square edge and the other one is slightly rounded and has the holes for the hinge pins. Be sure each door has one of each of these pieces.


That is as far as we a going to go on this piece this week. I am going to construct at least all the kits I already have before I start painting them. 


Next week we will do another base cabinet kit.


As always I do want to sincerely thank all of you for watching my videos and reading my blog posts. It means so much to me that you are supporting me in this way. If I could ask you all to do just a bit more by subscribing to the channel and liking the videos and leaving comments. Those help more than you can imagine. Also if you could pass the links on to your friends I would appreciate it so much.