Check back often

Have you checked out all my blogs?


Dollhouse Minis: http://joannesminis.blogspot.com


18” Dolls: http://joannes18dolls.blogspot.com/


General Crafts: http://joannes-place.blogspot.com/


Cooking: http://joanne-kitchen.blogspot.com/


Also if for some reason I can't post I will try to give a head's up on the Facebook page so check there too.

Sunday, March 26, 2023

Dollhouse Miniature Easter Gnome


Watch the video here.


For today’s tutorial I have another project that I have designed a pattern for yo to use. You can find the pattern by following this link. You will find both PDF version if you want to hand cut the project and a PNG that can be used with an electronic cutting machine. (like the Cricut) Be sure to check the text file for sizing directions and a few hints to make cutting the file on your machine easier.


The pattern like most of the ones I have made for you is designed to be cut from a medium weight card-stock and then the layers glued together and painted to the colors you choose for you display.


I totally forgot to take any pictures of the pattern pieces before I glued them together this time. You can see what pieces I had in the video though. I do apologize if I miss any steps in this blog post, I have been suffering with a migraine for a couple of days but I need to finish this post if I am going to get it uploaded. So if I do forget things just ask me and I will fill in any blanks. I'm doing my best this week.


In the set of cut pieces you will find a couple of small pieces that are meant to be single layer that act as the lining area of the bunny ears. I found that a single layer looked much better for this part so set those aside when you are gluing the sets together.


 I have been placing the glued sets of pieces under a flat object (my small ruler) and then putting some weight on top of that to help keep the pieces flat while they dry. They take a bit longer for the glue to dry that way but I haven’t had any problems with warping that way.


Once the glue dries I like to place my pieces onto a strip of masking tape to paint. To prep the masking tape I like to stick it to my jeans a couple of times to make it a bit less sticky then tape it down so the sticky part is facing up. I then place my project pieces on the tape lightly (I like to keep part of each of the more delicate pieces hanging off the tape to make it easier to remove them) I also group the pieces by the color of paint I am going to use.


Paint your pieces in the colors you chose for your project. 


Here are the colors I used (minus the white) for my gnome this time.


The first piece to glue is to place the beard on the gnome, center it side to side and have the tip just lined up at the bottom of the body piece. I also glued the carrot part of the carrot on to the carrot base at this time.This is also the prefect time to glue the single layer liner pieces to the bunny ears.


Allow this glue to set up enough that the pieces won’t move around on you when you add the next pieces.


For the second round of gluing we are adding the shoes/feet to each side of the beard and the hat. Again allow the glue to dry enough to hold everything in place before moving on to the next step.


Once set we can add the nose, the bunny ears and the carrot to our gnome and again allow the glue to set up.


Next we add the brim to the hat and the hands holding the carrot.


 Lastly add the stand to the back of the gnome if you are going to use it.


The glue now needs to completely cure before moving on to the next step.


Once the glue is cured we can add a coat of Satin Mod Podge or a similar sealer. This will do a couple of things it will make the gnome look more finished and it will help to seal the edges of the layers of card-stock to make it look like it was made of a heavier material.


Once dry your gnome is ready to display in your Easter Dollhouse scene,


As always I do want to sincerely thank all of you for watching my videos and reading my blog posts. It means so much to me that you are supporting me in this way. If I could ask you all to do just a bit more by subscribing to the channel and liking the videos and leaving comments. Those help more than you can imagine. Also if you could pass the links on to your friends I would appreciate it so much.


Saturday, March 4, 2023

Dollhouse Miniature Mandarin Oranges


Watch the video here.


One of the things about this time of year that I love is that the bags of Mandarin oranges are usually available in the grocery store. I know there are some around Christmas too but I like the ones that we get later in winter the best. I’m not sure it they really are better or if it is just that they taste like summer in the worst part of winter.


So I decided to make them this week for the Saturday tutorial.


Like with a lot of fruits I make from polymer clay I started with white clay that I then will coat with some artist chalk. When I make these from orange clay they just look too dense and heavy and they don’t have that “glow” that the real fruit has. Use any brand of white clay for this.


I find the easiest way to make these is to start with a thin snake of the white clay that is about 3/16” in diameter. (that’s halfway between 1/8” and ¼” if you were confused)


I then cut that snake into segments that are approximately 1/8” long. They don’t have to all be the exact measurement, not all the real oranges in the bag will be the exact same size.


Now roll each segment of clay into a ball and roll it on a piece of medium grit sandpaper to add texture to the surface.


Now using an eye shadow brush apply some bright orange artist chalk to the balls of clay. I find this easiest to do quickly if I put the chalk dust into a small bowl, add the clay balls and use my brush to gently roll them around to coat.


Now we need to add some stems. For this I took a tan clay (our of my scrap clay bag, any tan will work) and a light green clay (I used Moss from Sculpey) and I marbled the two colors together a bit. That way some of each color was still visible.


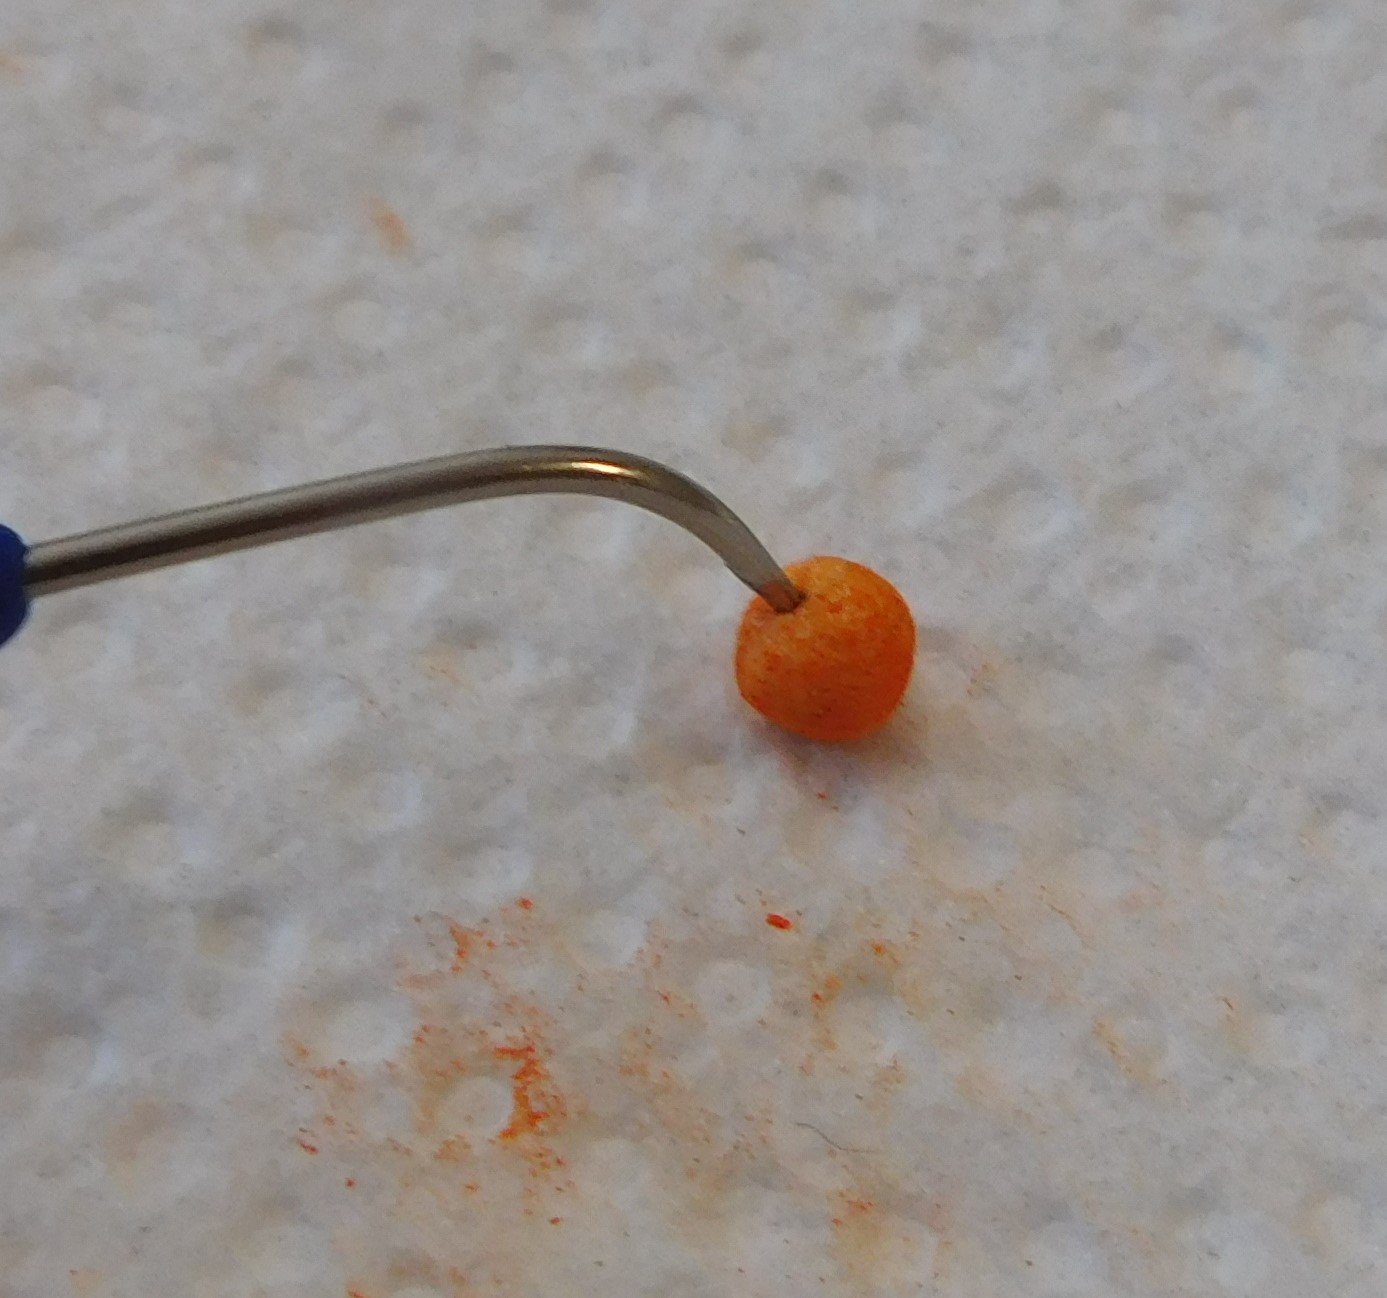
I used my pointy tool to make a hole at the top of each ball.


 Then used the same tool to tear off a very tiny amount of the marbled clay.


And added that to the hole at the top of the ball.


Once you have all your oranges done bake at the temperature recomme4nded for your clay for 10 minutes then allow to cool completely.


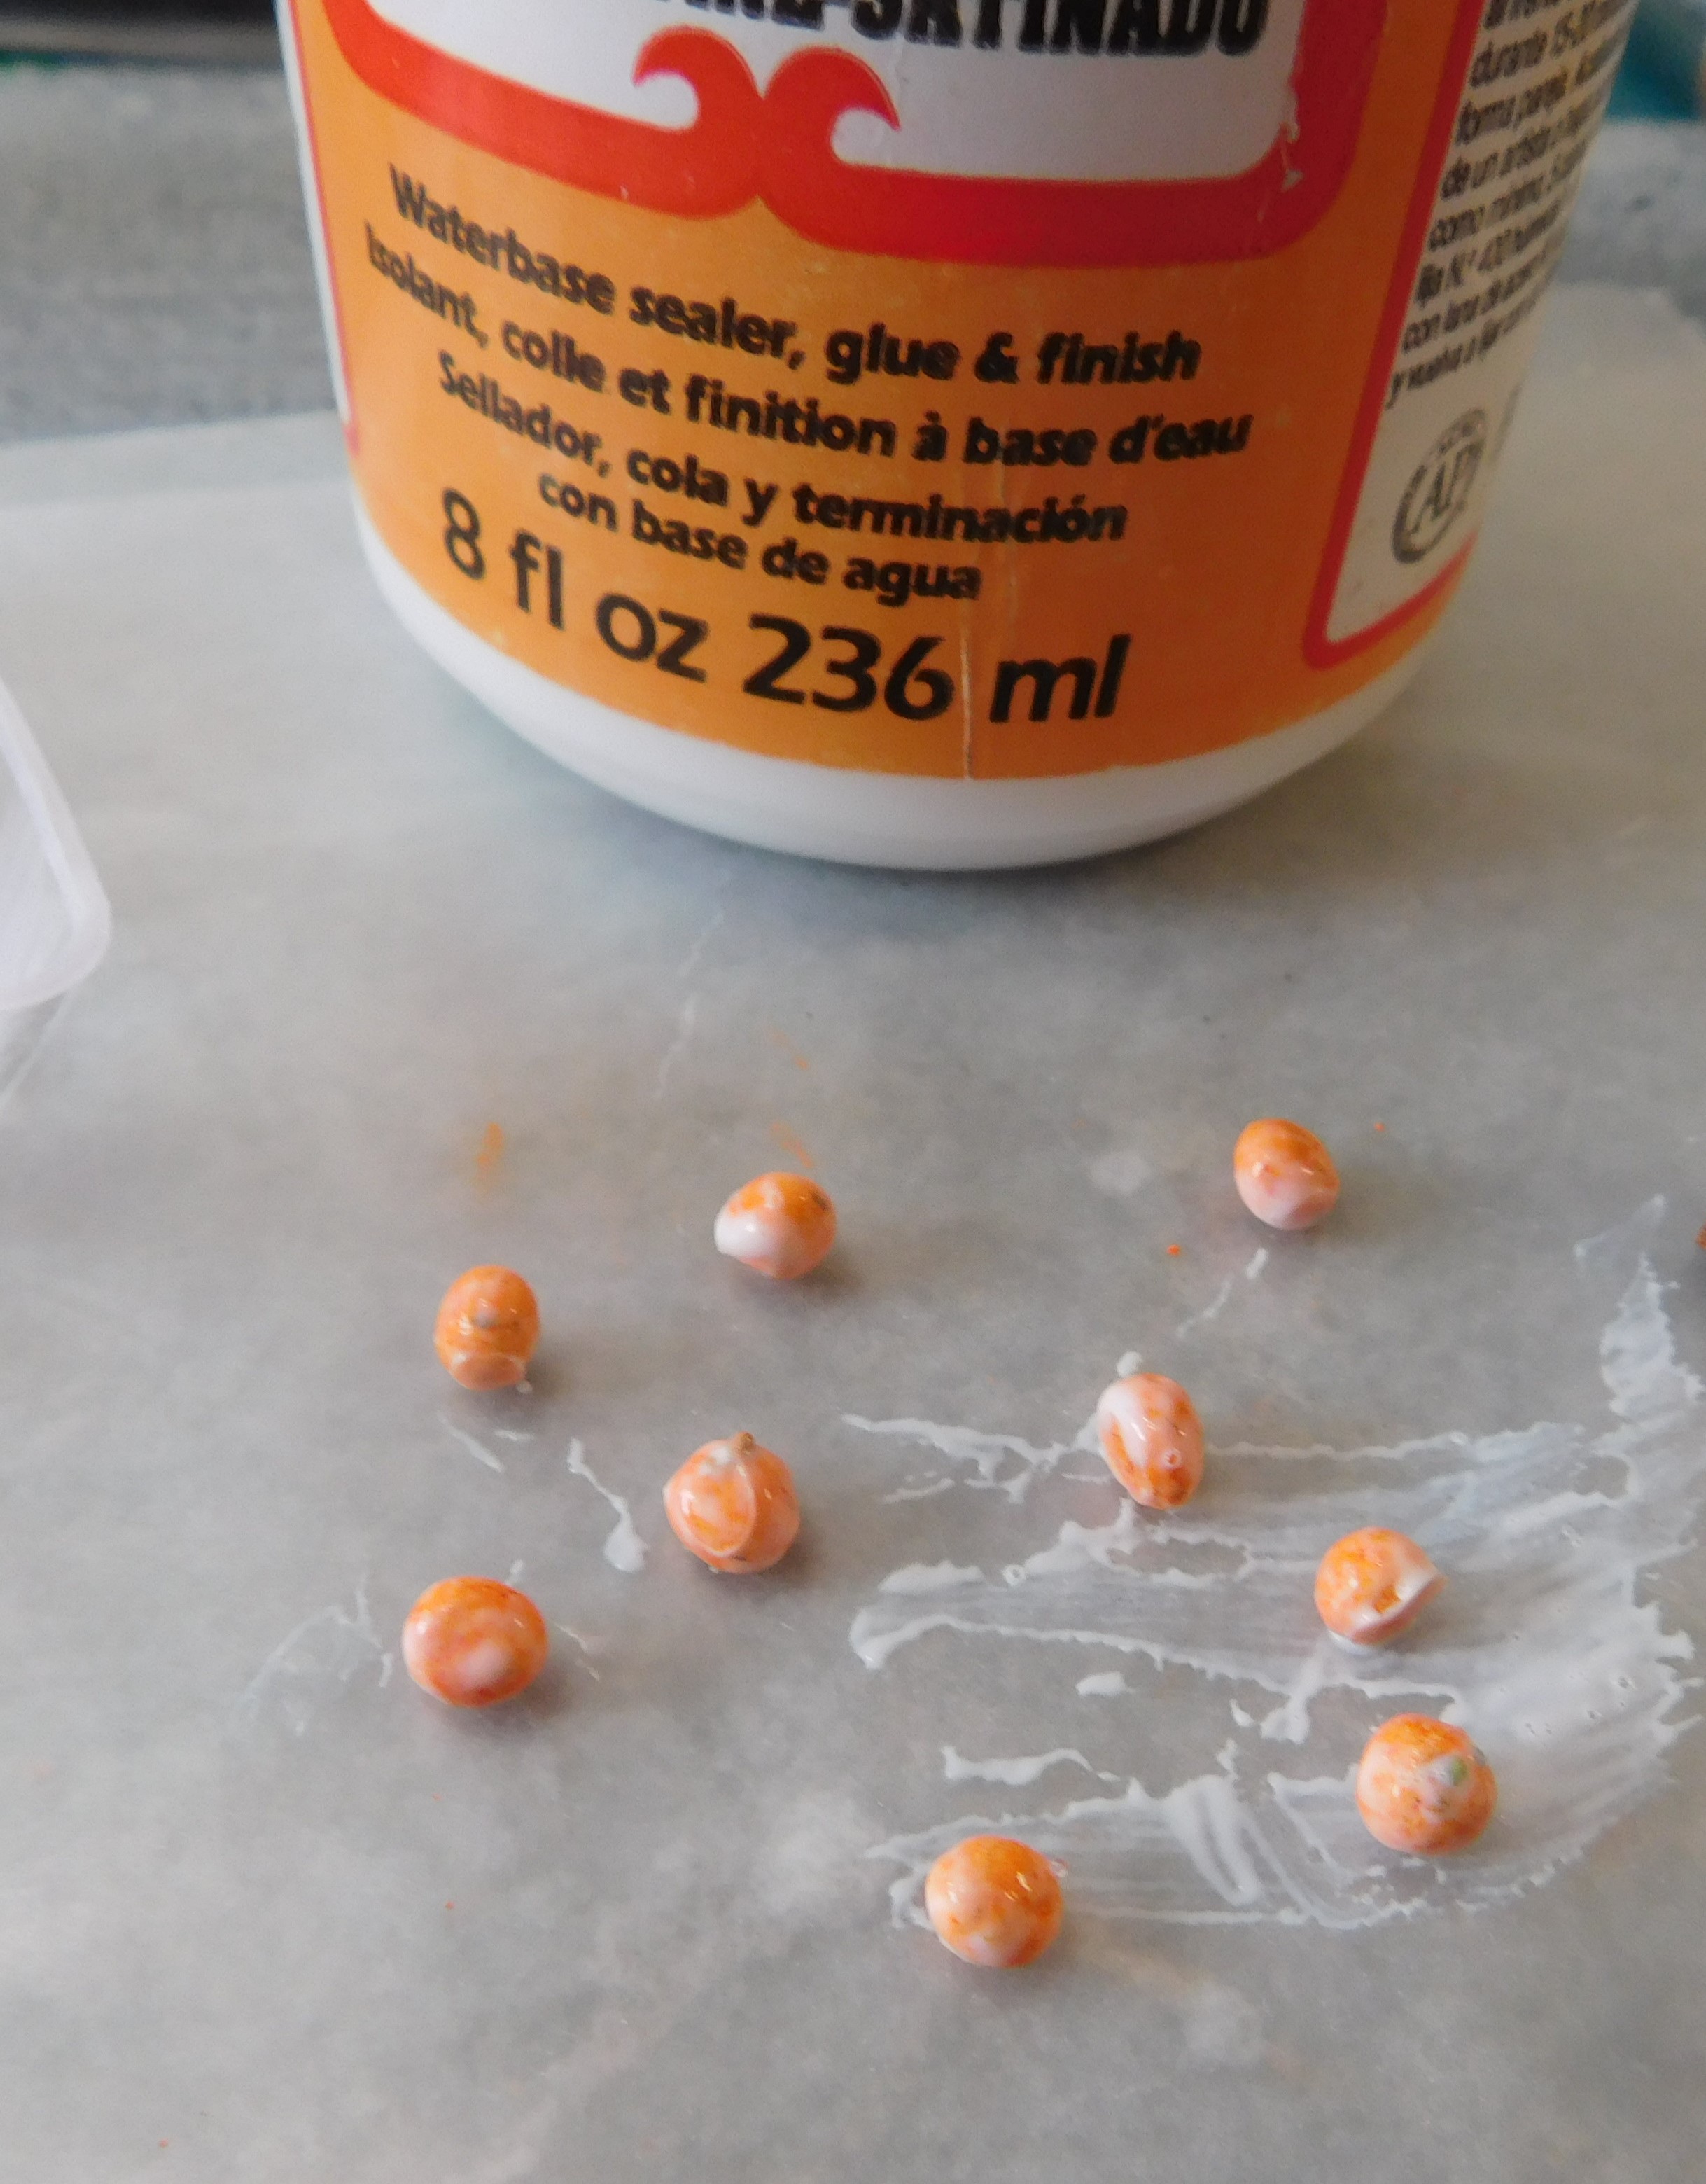
 Once cooled add a thin coat of Satin Mod Podge to the oranges and allow to dry.


Now the dolls in the dollhouse have a fun treat for these cold winter days.


As always I do want to sincerely thank all of you for watching my videos and reading my blog posts. It means so much to me that you are supporting me in this way. If I could ask you all to do just a bit more by subscribing to the channel and liking the videos and leaving comments. Those help more than you can imagine. Also if you could pass the links on to your friends I would appreciate it so much.

Sunday, February 19, 2023

Dollhouse Miniature Saint Patrick’s Day Gnome


Watch the video here.


For our Sunday tutorial this time I thought I would add another gnome to the dollhouse decor. This time in a Saint Patrick’s Day theme. I love these little guys so much both in mini and in real life decorating. Once again I have created a pattern that is free for youto download here. You will find both a PNG file to use with an electronic cutting machine and a PDF that can be used to hand cut the project. If you are using the PNG be sure to check the text file for the sizing of the file and any other hints I have included.


As I was looking online at the Saint Patrick’s Day gnomes I found about half of them were wearing a top hat so that is what I decided to go with also. I think he is so cute.


When you are painting yours you might want to make his beard a red color, I debated but decided to go with the white beard this time.


For this pattern I decided to include a piece to allow the gnome to stand up instead of having to lean against a wall. Let me know which you prefer for future projects. If I do include it in future projects I will be making a couple of changes to make it work a bit better. Of course you can leave it off entirely and just lean your gnome against a wall.


We will start like we do with most of these projects by cutting the pieces out of a medium weight white card-stock. Most of the pattern pieces are meant to be glued together in sets of 3. The exceptions being the main body and the stand piece, both of those have 4 pieces to make them a bit stronger. When gluing the beard be sure to watch the edges since that piece is not symmetrical. Also watch the hand pieces

and make sure you have them lined up. Note you should have two sets of the hand pieces and two sets of the feet/shoe pieces when you glue them. There are 6 individual pieces of each of those.


To glue use a thick glue and I suggest putting something flat on top of at least the bigger pieces to keep them from curling up as they dry.


Once dry add the triangle shaped stand to the back of the main body piece attaching with glue and being careful to line up the bottom edge so it will stand up straight. If you are off a bit you can trim as needed once the glue is dry.


Allow all the glue plenty of time to dry before going to the next step.


Once the pieces are dry lay them out to paint them. I like to put mine on a piece of masking tape on my work tile. I rub the tape against my jeans to de-stick it a bit and then use 2 small pieces of tape to tape it down to my work tile. Then I can place the pieces in groups according to the color I am going to paint them. The only piece I didn’t add to the tape this time was my main body piece with the stand since it would sit nicely on its own.


Now pick your colors and paint as desired. Here are the colors I used this time. Since I still don’t have a flesh colored paint (I really need to get out to the craft store soon) I mixed some from white, pale pink and pale yellow. Since I wanted the buckle on the hat band to be gold I first painted it with a very warm yellow for the first coat, then a coat of the gold will look much better.


Allow the paint to completely dry before starting the assembly of the gnome.


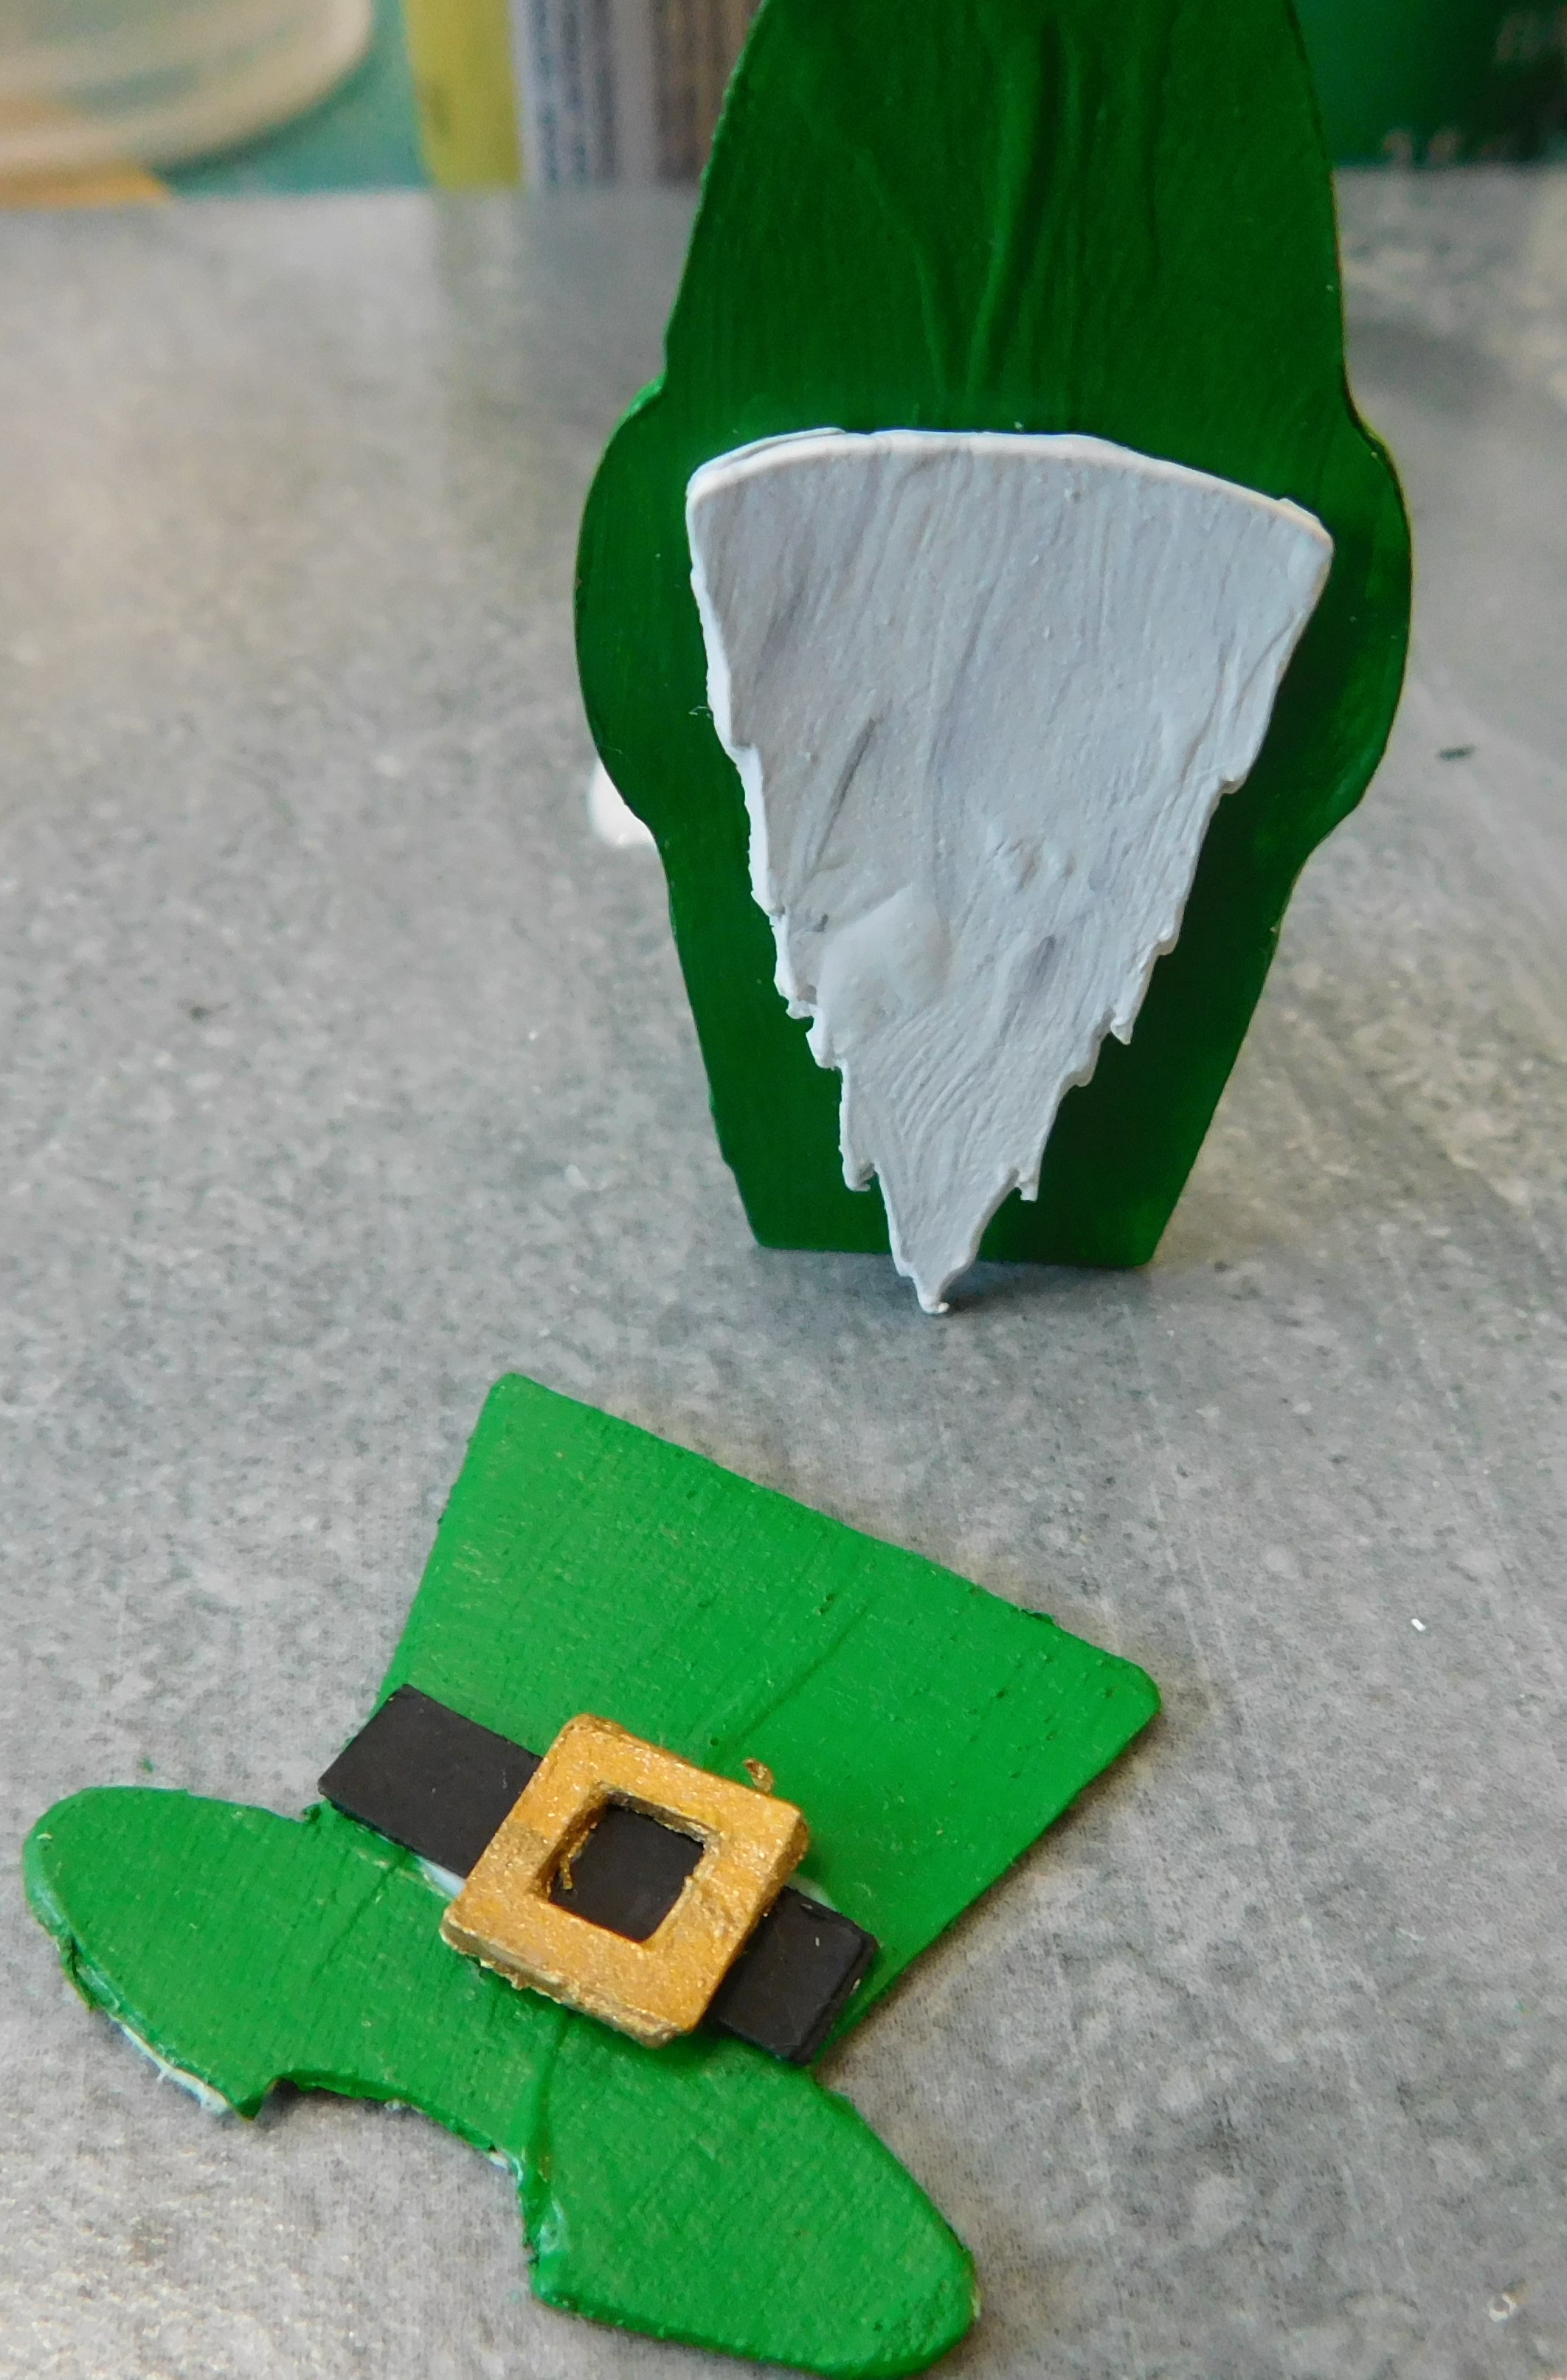
The first step is to attach the beard since everything else is placed around it. Try to line up the bottom tip of the beard at the bottom of the gnome and center it as much as possible side to side. Allow the glue to set up before moving on. Now is also the time to add the hat band and buckle to the hat so it will be ready to add to the gnome next.


Next add the hat to your gnome. It is designed to overlap the beard slightly and to lay at a slight angle from the beard to the top of the gnome back piece. Glue and allow the glue to set up.


Now add the shoes/feet to the bottom being careful to have the flat edge at the bottom edge of the gnome body. Add the nose just below the hat in the cut out area of the hat. And add the shamrock to the front of the gnome wherever you want it. Allow the glue to set up.


Now just add the hands to each side of the shamrock so it looks like he is holding it in front of himself. All the glue to completely dry before moving forward. I like to let it dry at least a few hours, overnight is even better.


Now just a coat of Satin Mod Podge needs to be added.


Now he is ready to join the rest of our Saint Patrick’s Day decor items on the porch or anywhere in the dollhouse for the season.


Now he is ready to join the rest of our Saint Patrick’s Day decor items on the porch or anywhere in the dollhouse for the season.


As always I do want to sincerely thank all of you for watching my videos and reading my blog posts. It means so much to me that you are supporting me in this way. If I could ask you all to do just a bit more by subscribing to the channel and liking the videos and leaving comments. Those help more than you can imagine. Also if you could pass the links on to your friends I would appreciate it so much.


Wednesday, February 8, 2023

Dollhouse Miniature Shamrock Wreath


Watch the video here.


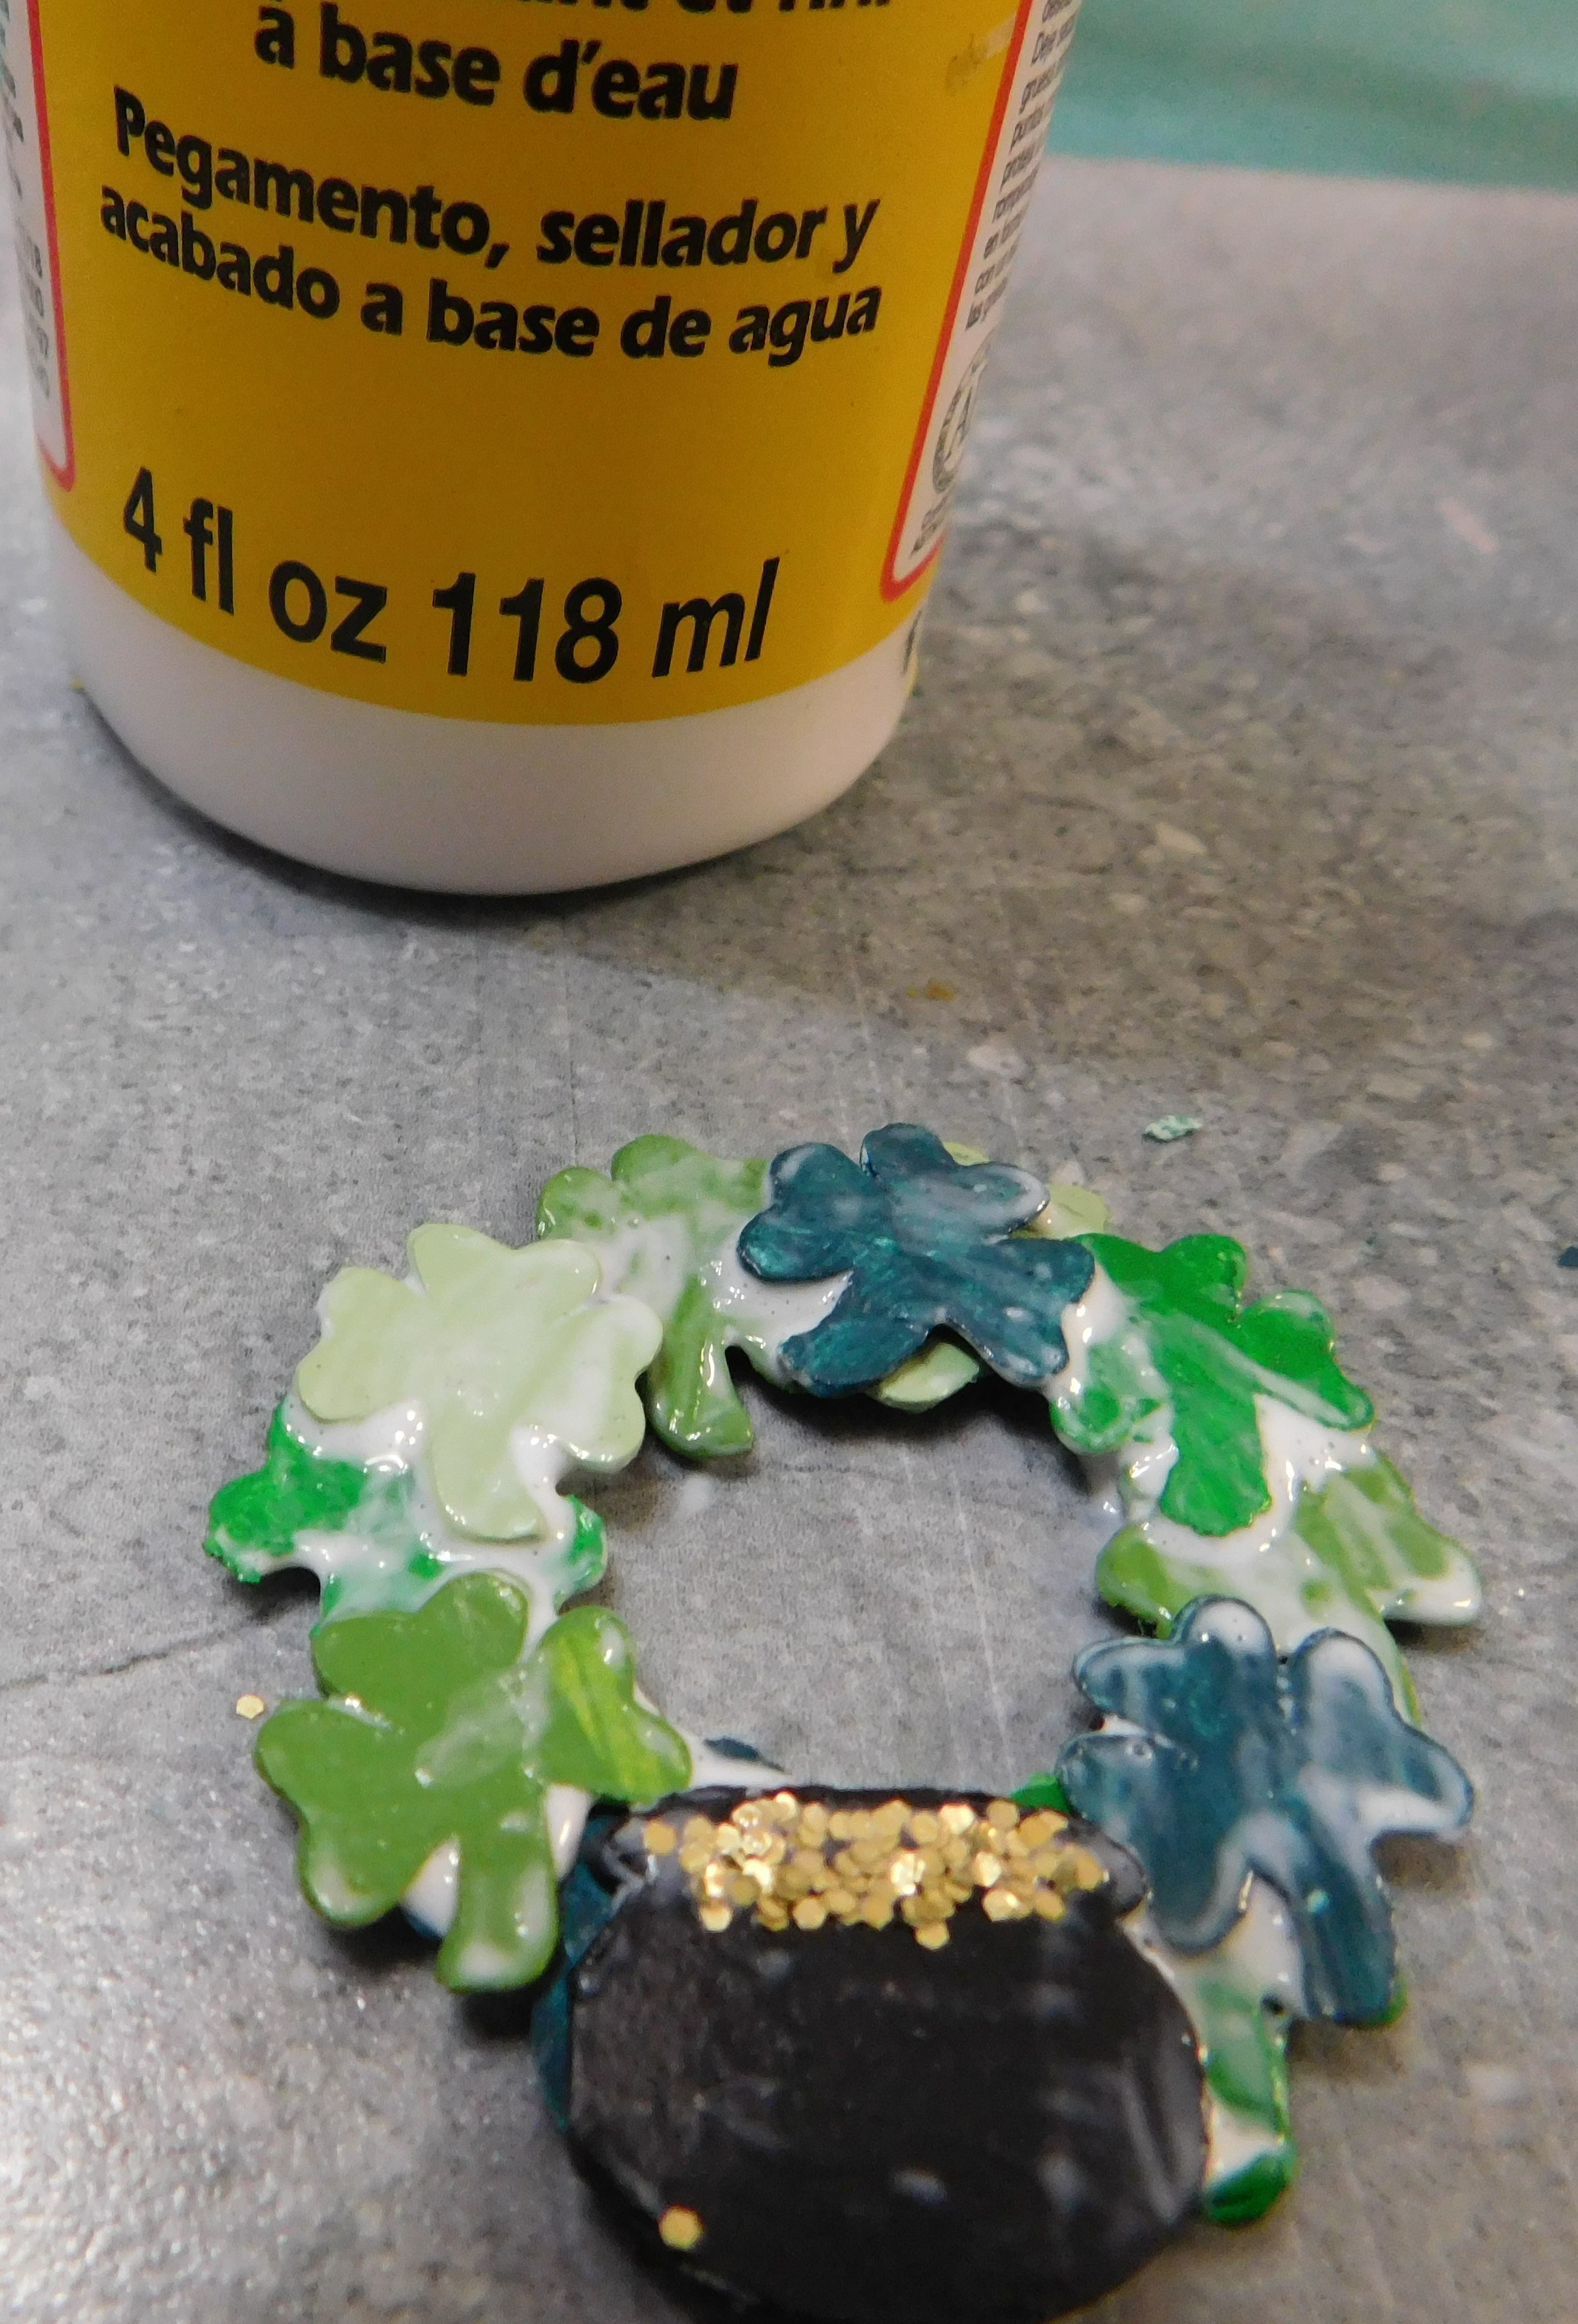
Today we are making a fun little wreath covered in shamrocks for the dollhouse. It is kind of funny this was not the project I had planned to do today. I had something in mind and decided to do an image search to help me finalize my idea. That was when I ran across this cute little gem. It seemed like everywhere I looked a similar shamrock wreath showed up and I couldn’t resist, I had to make one for the dollhouse.


This is another project that I have created a free downloadable pattern for you to use. You can find the pattern here. You will be able to download both a PNG file to be used with an electronic cutting machine (be sure to consult the text file in the download for specific instructions on using the file) as well as a PDF for hand cutting of the pattern. All I ask is that you don’t pass the pattern or pattern pieces along directly but instead send others to the video/blog post so they can download their own copy.


Once again I am using just a plain medium weight white card stock to cut the pieces.


Once we have the pieces all cut out glue them into sets. This time the 4 large rings are one set, the 3 kettles are a set, and the 24 shamrocks are to be glued in pairs to make 12 finished shamrocks.


I like to use a thick tacky glue for this step because that is the glue I have the best luck with.


Once the glue dries all the way we can paint the pieces. I like to set up a painting area with masking tape sticky side up (I first press the tape to my clothing to take away a bit of the sticky) to hold all those small pieces.


I do recommend using 3 or 4 colors of green paint for the shamrocks to make the wreath more interesting to look at. I did make a switch from the paints I showed initially in the video. I had missed my better green color on my first look through my paint bin.


This time I am going to paint both sides of the pieces to make it easier to put the wreath together.


Once the paint dries it is time to assemble the wreath. Try to place the shamrocks with the colors spaced out on the wreath and be sure to leave a space at the bottom of the wreath for the pot of gold to be placed. I didn’t notice until I was editing the video that I had lost a couple of my shamrocks before I glued them onto the wreath (oops) I was wondering why I didn’t have the even spread of color…..


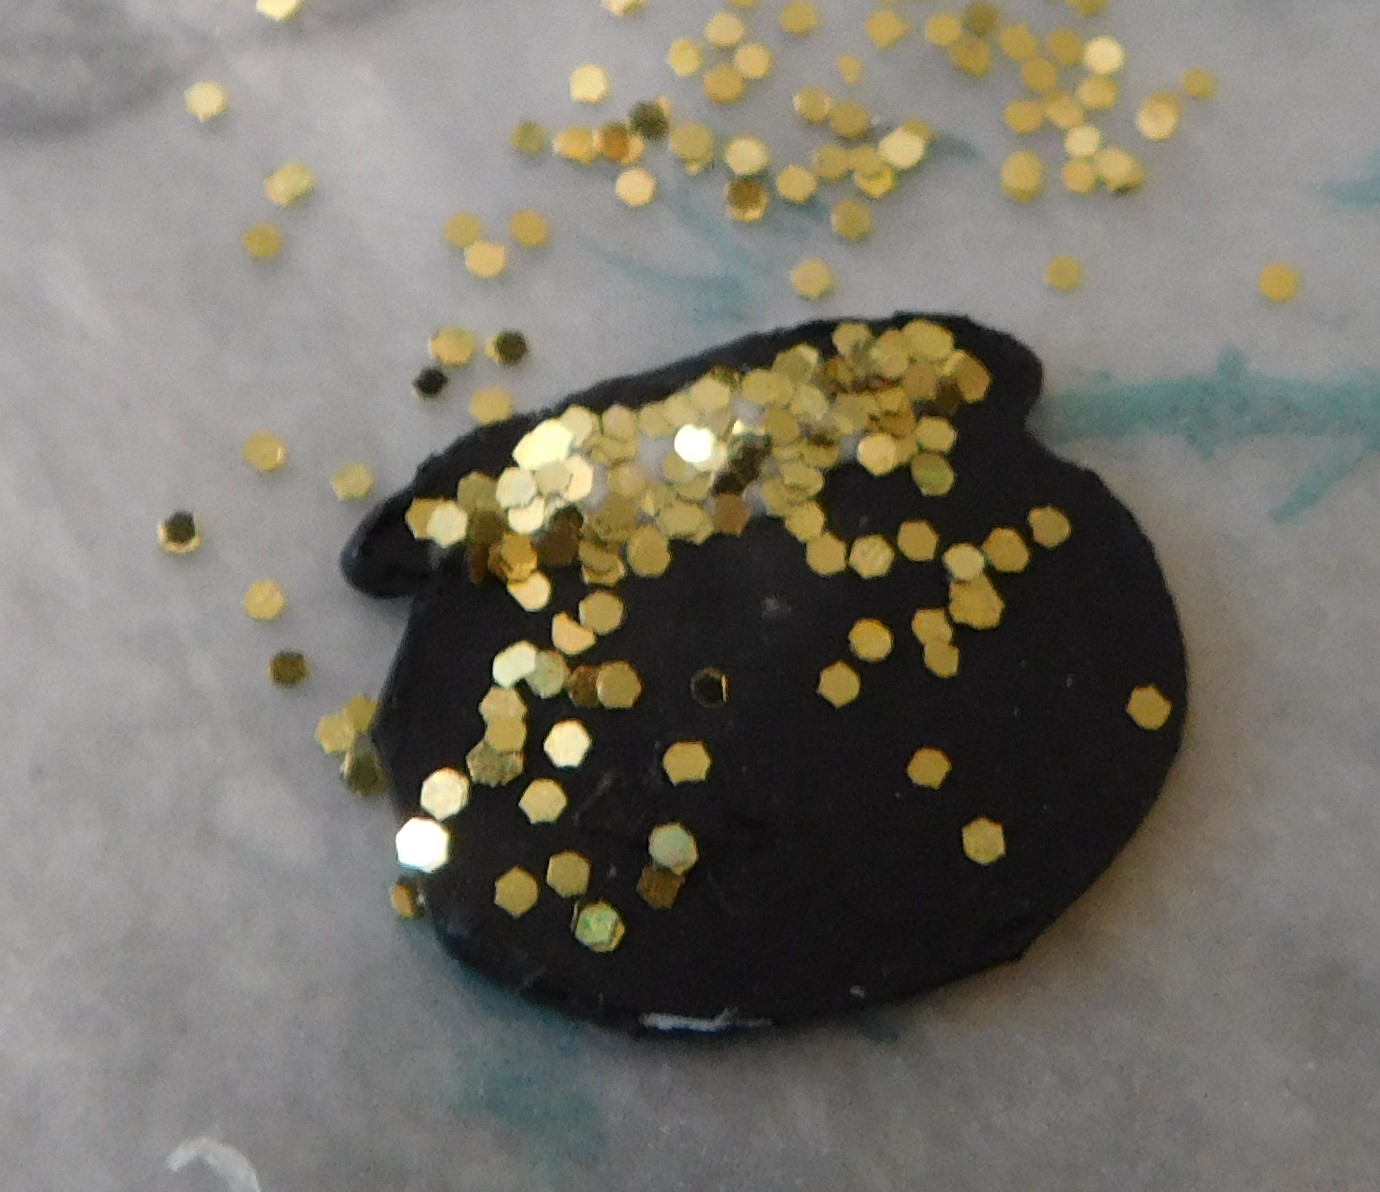
While the shamrocks are drying we can add a bit of gold to our pot of gold, for this just a touch of glue and a sprinkle of gold glitter will do the trick.


Once the glue dries shake off the excess glitter and glue the pot of gold in place at the bottom of the wreath and allow the glue to completely dry.


To finish the wreath add a coat of Mat Mod Podge to both the back and front of the wreath being sure to dry completely between.


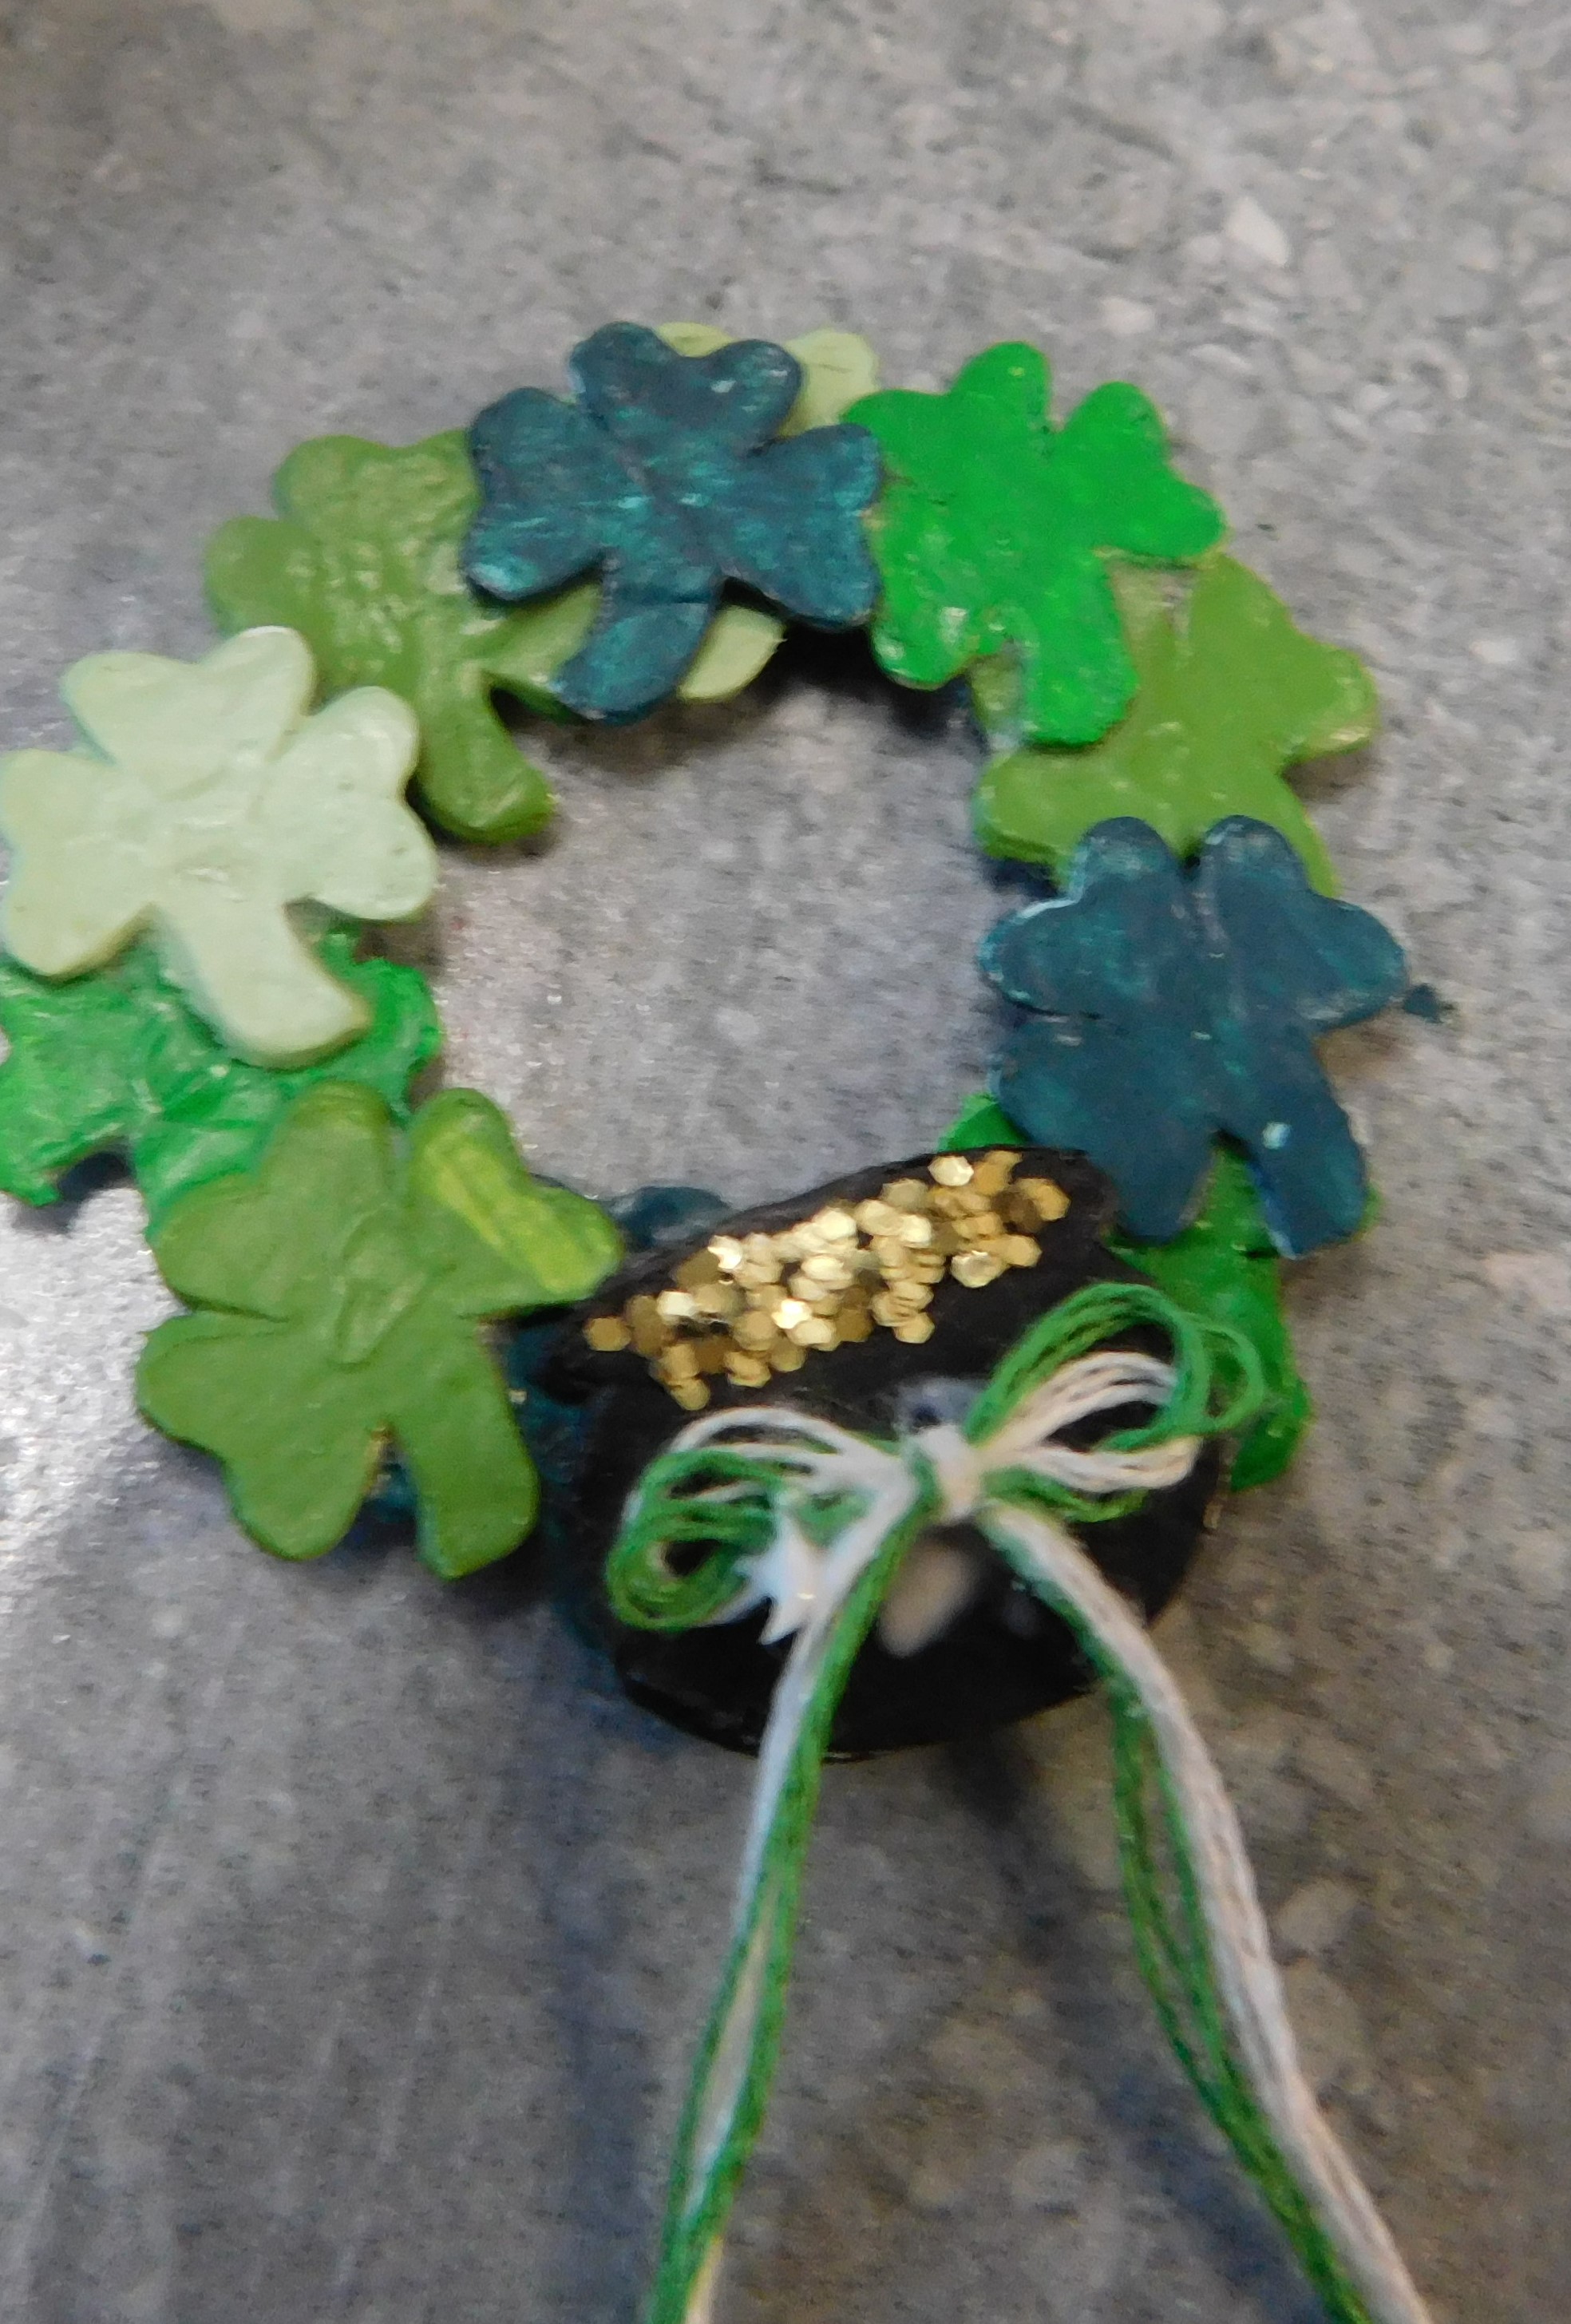
As a fun finishing touch I added a simple bow tied from two colors of embroidery floss (a green and a white) 3 strands of each. Make the bow as small as you can and then attach to the wreath with a drop or two of tacky glue. I also added a couple of drops of Mod Podge to the top of the bow at the knot to make sure it stayed just the way I wanted it.


Once dry you can trim he long ends on the bow. 


Now your wreath is ready to display either inside or outside your dollhouse for Saint Patrick’s Day.


As always I do want to sincerely thank all of you for watching my videos and reading my blog posts. It means so much to me that you are supporting me in this way. If I could ask you all to do just a bit more by subscribing to the channel and liking the videos and leaving comments. Those help more than you can imagine. Also if you could pass the links on to your friends I would appreciate it so much.


Saturday, February 4, 2023

Dollhouse Miniature Saint Patrick’s Day Cake


Watch the video here.


I could have titled this tutorial “the tutorial that almost didn’t happen” because the first day I tried to film this I had a really bad clay day. It happens to all of us so it you have a day when things just aren’t turning out don’t be too hard on yourself. For a little insight I have been struggling with my depression for a couple of weeks and it makes it hard to concentrate even on things I love. So if you are in the same boat know that I am here for you and I understand. Now on to the project.


I found the inspiration pic for this cake a couple of weeks ago. Actually it is a combo of a several cakes I found online. The one this is closest to had some very intricate piping on the top which I felt would not translate well to mini. Also I love the more simple look that I got in the final cake design.


To begin our cake we need to make the base or core of the display cake. For this I am using some Original Sculpey. I rolled out a sheet of clay using my double craft-sticks and cut 3 rounds using my ¾” round cutter.


These were then stacked carefully to make a nice straight tall cake. This was baked for 25 minutes to make sure it was cured all the way to the middle. This is the only really long bake for the project the rest will be only the normal 10 minutes. For the core since it will not be seen you could use any clay, if I wasn’t doing a video for you I would probably use some scrap clay but I am always afraid that will be distracting on the video.


Once baked and cooled to room temperature it is time to decorate the cake.


I haven’t had an excess to do a Skinner Blend in a long time and it was a lot of fun to do it for this project. Although in all honesty I think I would call this a “modified Skinner Blend” since I offset the ends a lot to keep more of the original colors at each edge and I didn’t take it as far as normal.


I wanted to use a green and white for the blend so I picked Sculpey III in Emerald Green and white. These were rolled into sheets using my set of single craft sticks as a thickness guide. Cut the two colors in identical rectangles. Then split the rectangles diagonally to form the pieces we will use for the blend.


Put the two cut pieces of clay side by side and smooth them where they meet to make them stick together on the seam.


Start rolling and folding as shown in the video. Being careful to always fold the same way to preserve the blend that is forming. I have a tutorial on the Skinner Blend that can be found here if you are not familiar with the technique.


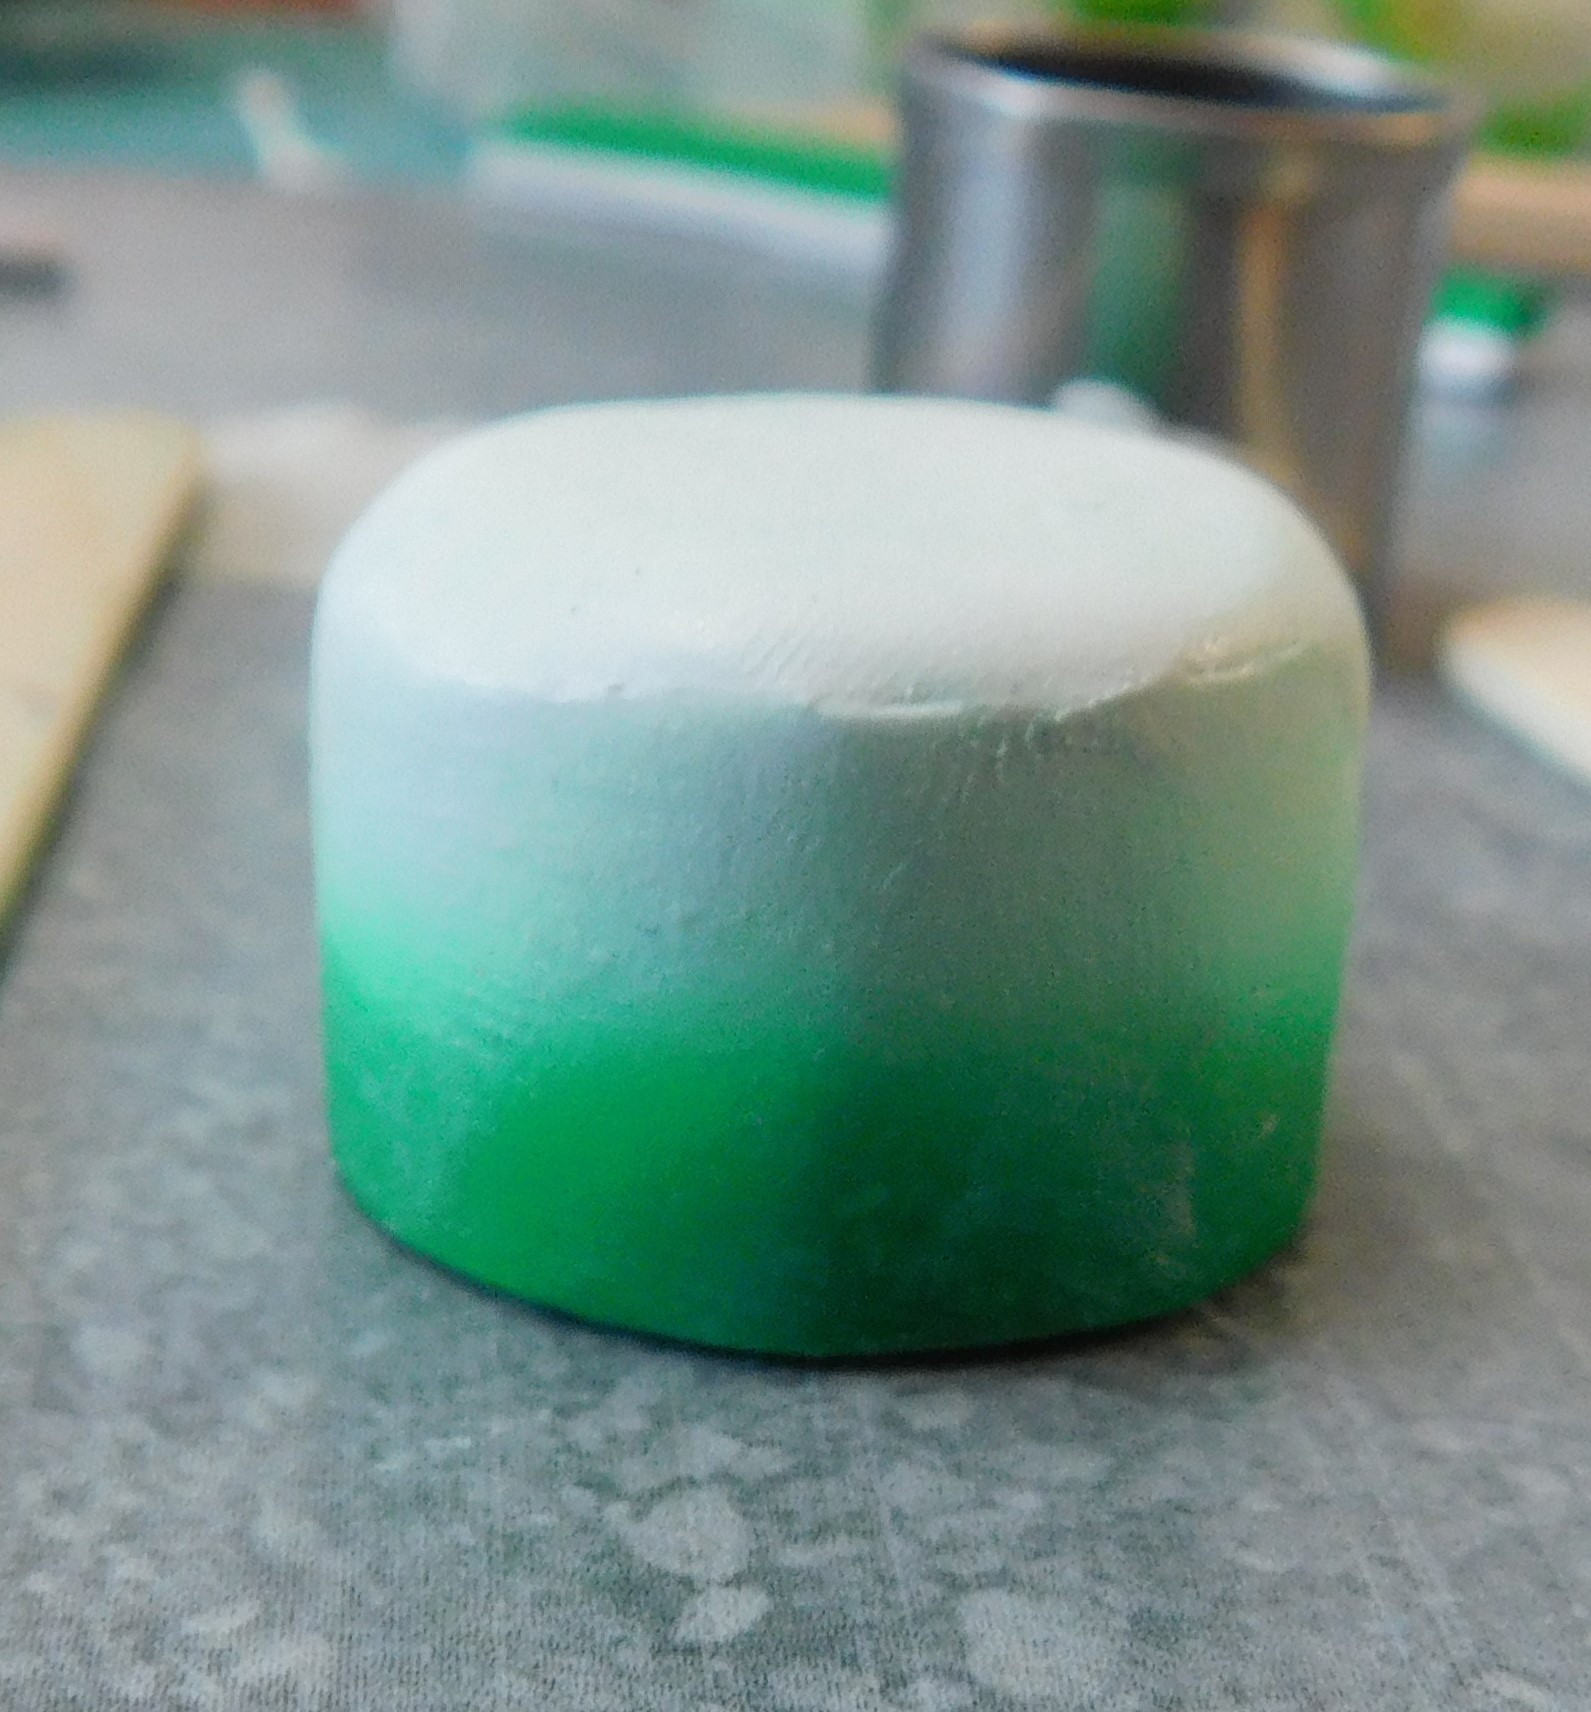
Here are a couple of pictures of the blend as it progressed. This first picture was taken just after I turned the video camera off.


This one part way through.


And this final one when I decided I had the blend to point I wanted it for this project.


I was very careful to keep compressing the width of the blend every time I folded to that the final piece was still the shape I needed it to be. If I had just let it go it would have become a square and I wouldn’t have had the colors I wanted in the area I needed them to be.


Cut one green edge straight. Apply some liquid clay to the cake base and lining up the bottom of the cake with the straight edge cover the lace with the blend. Trim and neaten up as needed.


Now bake this to set the sides of the cake. Bake for 10 minutes and allow to cool to room temperature.


Now we can cover the top of the cake. Since the top edge of the clay on the cake sides had a bit of green I mixed the bit I had trimmed when I covered the sides of the cake with some more of the white clay. This gave me a slight tint to the clay so it would look like it belonged on the top of the cake. If I had used plain white the color difference would have been obvious. Roll this tinted clay out using the single craft sticks as a thickness guide and cut it with the same ¾” round cutter we used earlier. This will result in a top that is smaller than the finished cake.


Coat the top of the cake with some more liquid clay and add the round you just cut. Use your thumb to work the clay and blend it into the baked sides of the cake. Take your time and get it just the way you want it. Then bake for 10 minutes at recommended temperature and allow to cool.


Now you have a cake ready for the dolls to enjoy in March for Saint Patrick’s Day.


As always I do want to sincerely thank all of you for watching my videos and reading my blog posts. It means so much to me that you are supporting me in this way. If I could ask you all to do just a bit more by subscribing to the channel and liking the videos and leaving comments. Those help more than you can imagine. Also if you could pass the links on to your friends I would appreciate it so much.