
One of the things about this time of year that I love is that the bags of Mandarin oranges are usually available in the grocery store. I know there are some around Christmas too but I like the ones that we get later in winter the best. I’m not sure it they really are better or if it is just that they taste like summer in the worst part of winter.
So I decided to make them this week for the Saturday tutorial.
Like with a lot of fruits I make from polymer clay I started with white clay that I then will coat with some artist chalk. When I make these from orange clay they just look too dense and heavy and they don’t have that “glow” that the real fruit has. Use any brand of white clay for this.

I find the easiest way to make these is to start with a thin snake of the white clay that is about 3/16” in diameter. (that’s halfway between 1/8” and ¼” if you were confused)

I then cut that snake into segments that are approximately 1/8” long. They don’t have to all be the exact measurement, not all the real oranges in the bag will be the exact same size.

Now roll each segment of clay into a ball and roll it on a piece of medium grit sandpaper to add texture to the surface.

Now using an eye shadow brush apply some bright orange artist chalk to the balls of clay. I find this easiest to do quickly if I put the chalk dust into a small bowl, add the clay balls and use my brush to gently roll them around to coat.

Now we need to add some stems. For this I took a tan clay (our of my scrap clay bag, any tan will work) and a light green clay (I used Moss from Sculpey) and I marbled the two colors together a bit. That way some of each color was still visible.
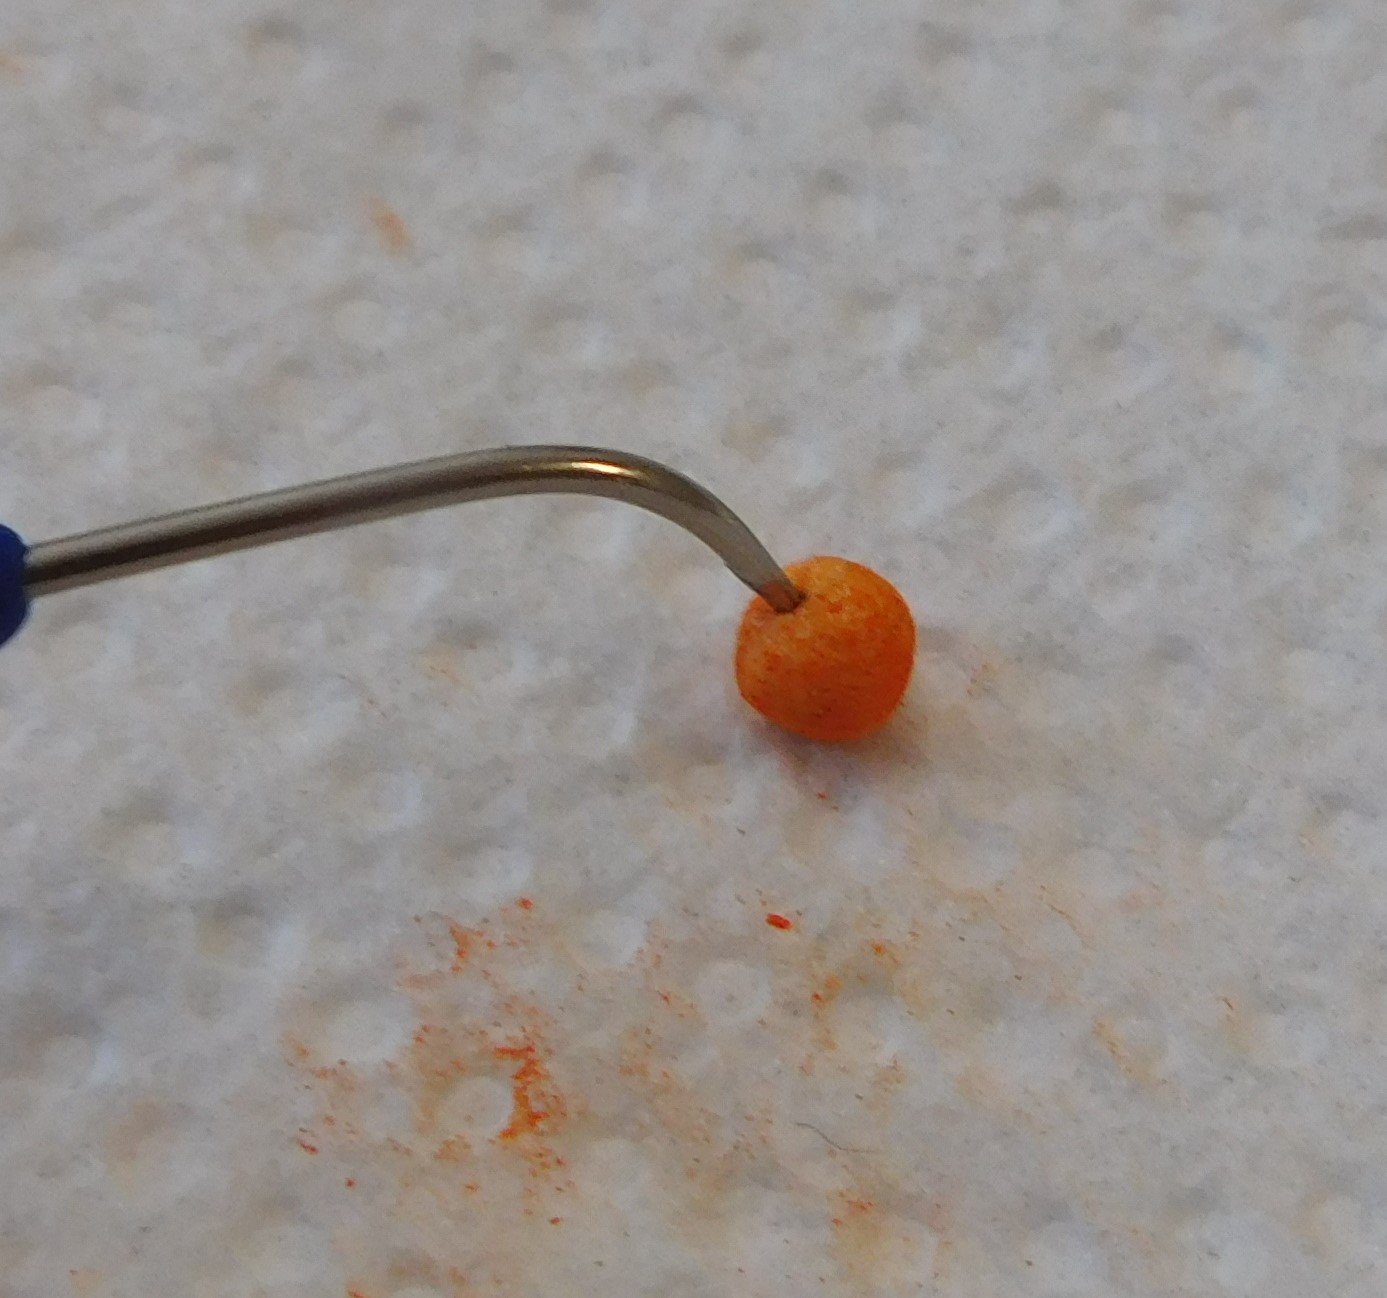
I used my pointy tool to make a hole at the top of each ball.

Then used the same tool to tear off a very tiny amount of the marbled clay.

And added that to the hole at the top of the ball.
Once you have all your oranges done bake at the temperature recomme4nded for your clay for 10 minutes then allow to cool completely.
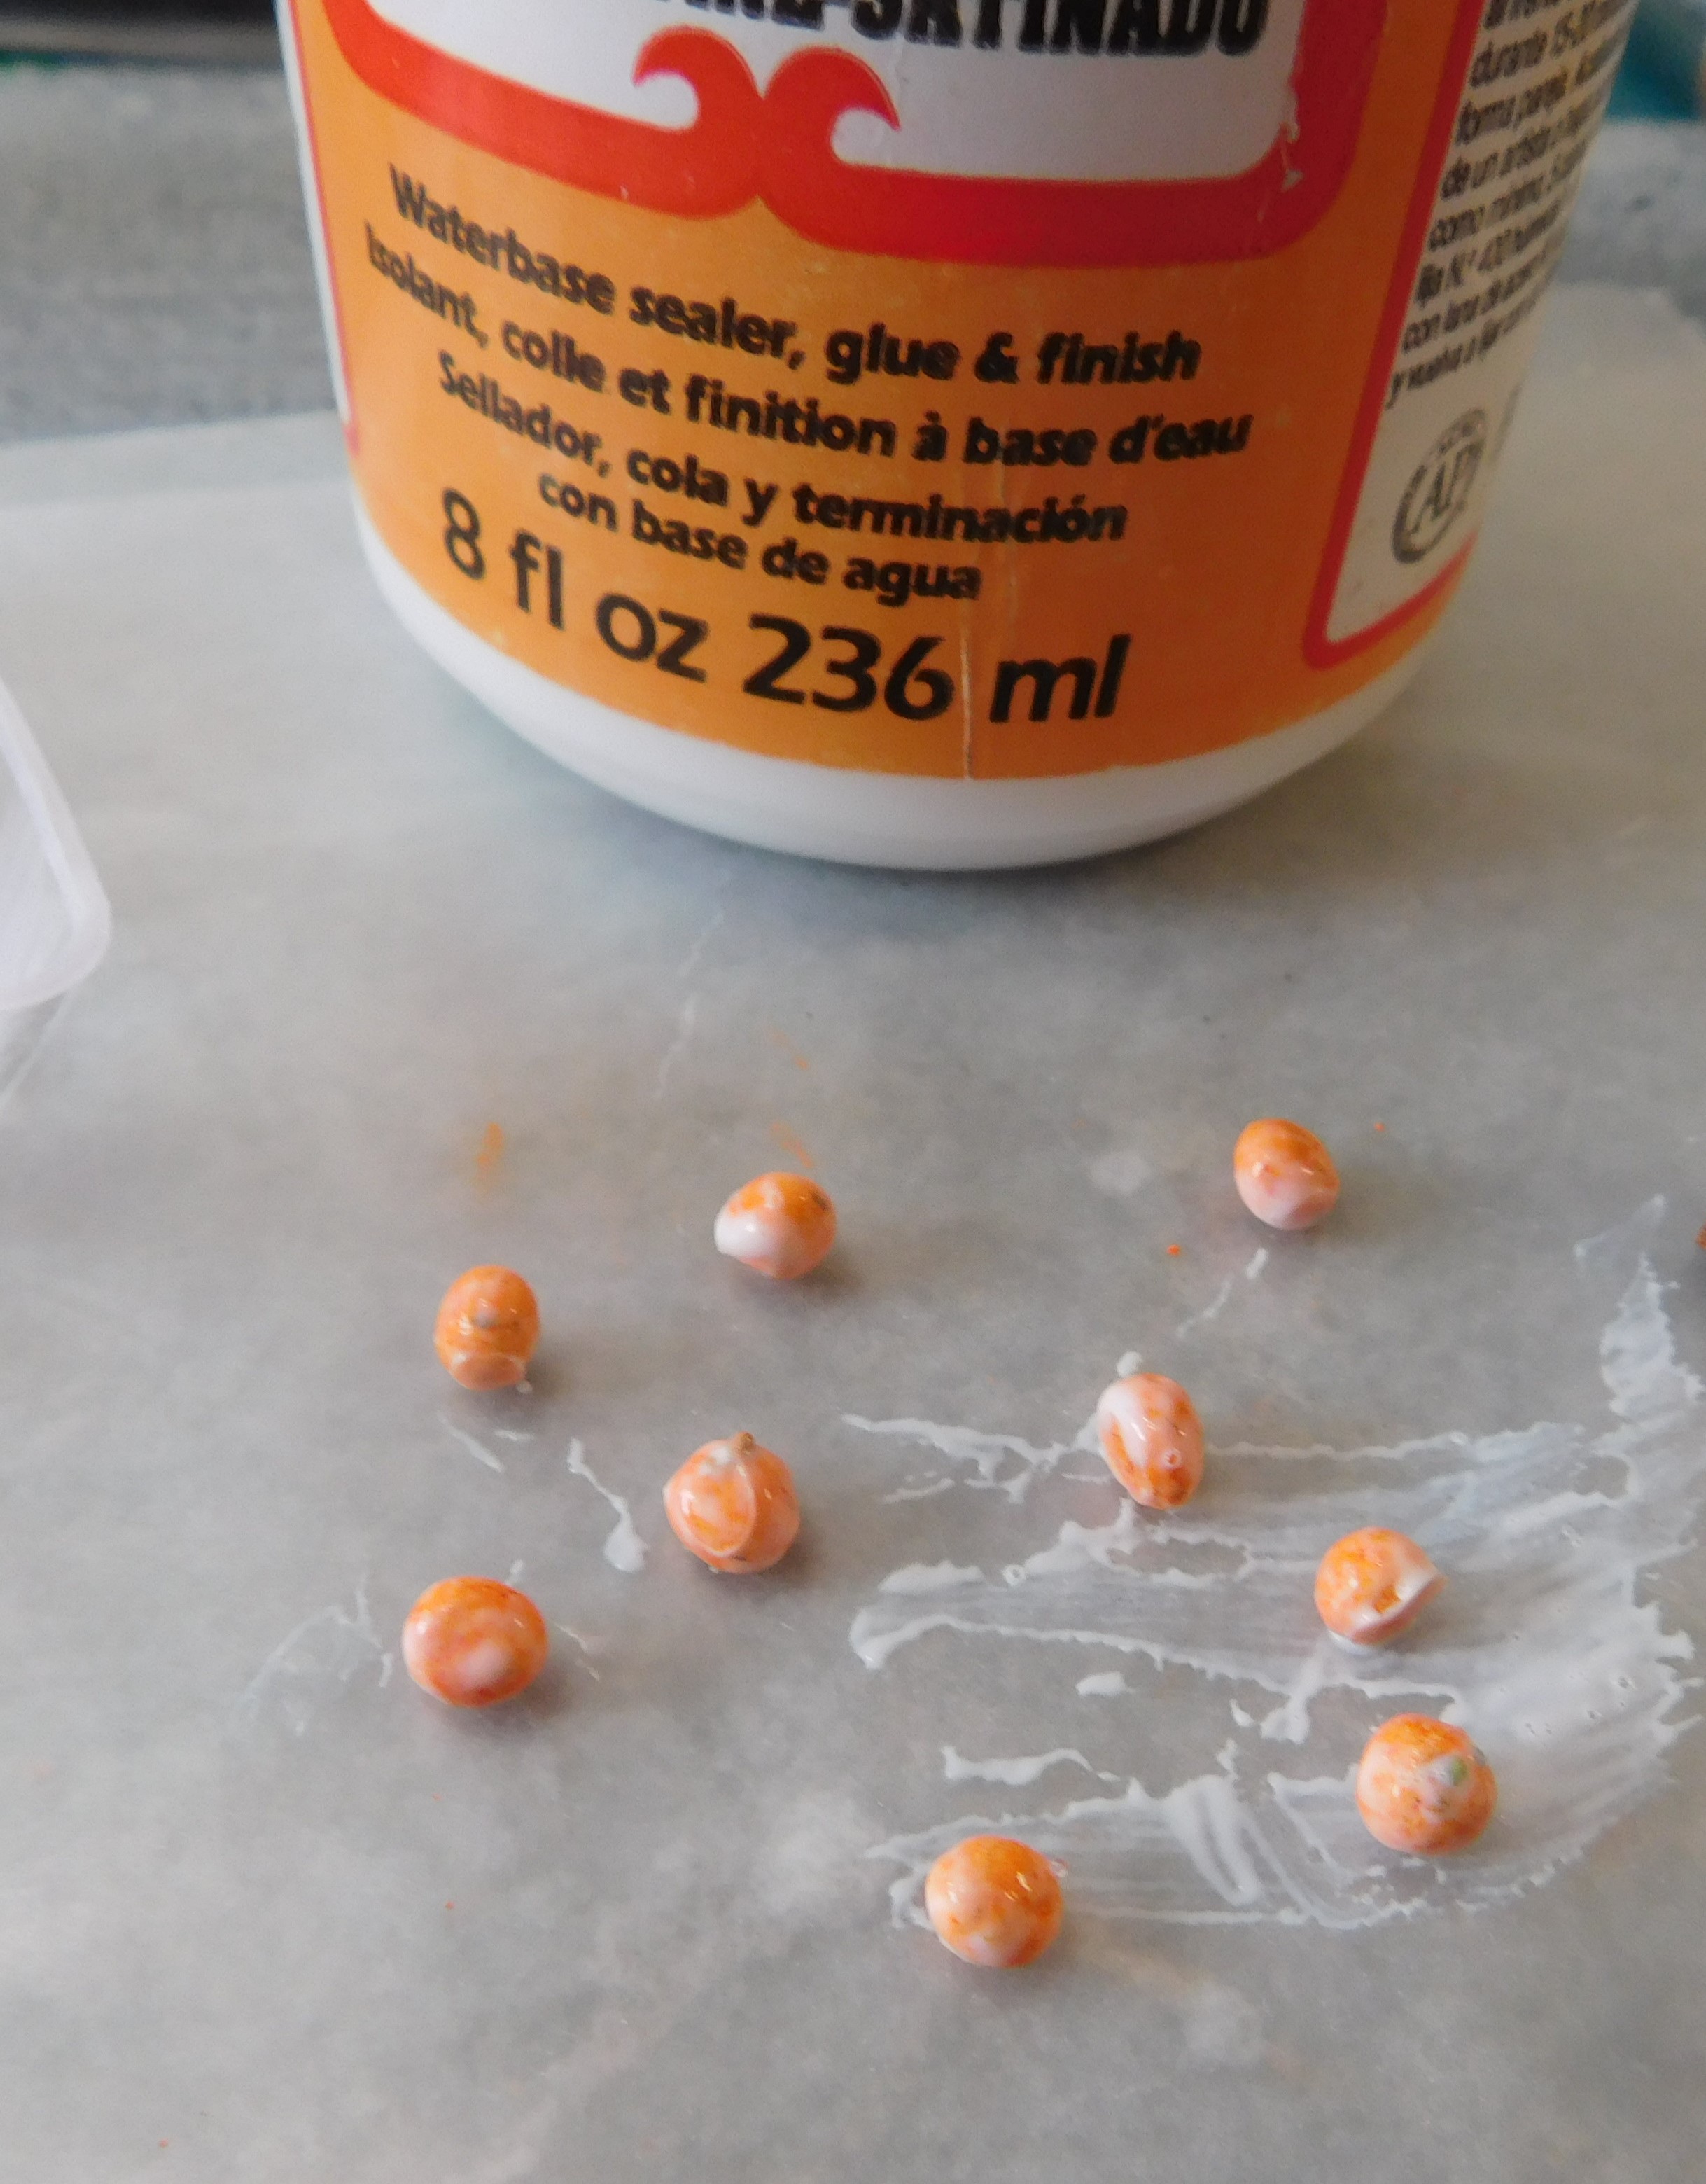
Once cooled add a thin coat of Satin Mod Podge to the oranges and allow to dry.

Now the dolls in the dollhouse have a fun treat for these cold winter days.
As always I do want to sincerely thank all of you for watching my videos and reading my blog posts. It means so much to me that you are supporting me in this way. If I could ask you all to do just a bit more by subscribing to the channel and liking the videos and leaving comments. Those help more than you can imagine. Also if you could pass the links on to your friends I would appreciate it so much.
No comments:
Post a Comment