As I was walking through the Dollar Tree the other day I saw these pumpkins hanging on the wall. They caught my eye because of the size, they looked to be perfect for the dollhouse. The color however was way too bright to look like anything close to a real pumpkin. I knew I had to try to tone down that color and use some to decorate the dollhouse porch for the season though.
The first step was to remove the wire from the bottom of the pumpkins and replace it with a toothpick to use as a handle while painting. I have my little wooden blocks to put mine in but you could also use a foam block or a chunk of pool noodle to hold yours.
For the first coat of paint I used Anita’s in Terracotta, this is a very muted orange and will tone down the bright orange and work well as a base coat under the painting technique I am going to use today. Don’t worry about this coat of paint being perfect, if a little of the bright orange peeks through that’s okay it will just add to the depth of color later.
I also base painted the stems with a very pale yellow paint. This will lighten them and allow the painting technique to work nicely to create the look of a dried stem on our pumpkins later.
Allow these paints to dry completely.
Now we are going to dirty up the pumpkins and accent the indentations on them. For this brush on a medium brown, I’m using some Woodsy Smoke from Anita’s. Then use a makeup sponge to blend the edges of the paint really well. I used a really small brush for this step to get the paint just in the crease part initially. When blending try to get rid of any sharp lines at the edges of the brown paint. Then allow this paint to dry completely.
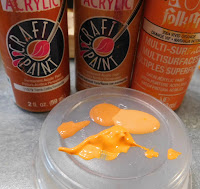
Now we are going to give the pumpkin it’s color. For this I am using 3 colors of paint- the same Terracotta that we used earlier, Buttered Yam also from Anita’s, and some Vivid Orange from Folkart. You don’t need to use the exact same colors just some that are similar to these. Add a drop of each to a flat surface.
Then using a tiny
brush add dots of the paints to the parts of the pumpkin that stick
out from the indentations. I kept most of the Buttered Yam at the top
of the area, the Terracotta at the bottom, and the
Vivid Orange
at the middle. Then using a clean makeup sponge (the wide end) blend
the colors to look like the photo. Allow to dry completely, since the
paint is so thin this won’t take long.
Now we are going to tackle the stems and make them look like they are in various stages of drying out. Again we are using 3 colors of paint- the same brown we used earlier to “dirty up” the pumpkins, the same pale yellow we base coated the stems with, and Leaf Green from Ceramcoat.
Again add a drop of each color to a flat surface and use a tiny brush to add tiny dots to the stem then using the skinny end of the makeup sponge blend the colors on the stem just like before. Try not to get these colors onto the pumpkin. When you have the look you like allow to dry completely.
Remove the toothpicks carefully and display your pumpkins around the dollhouse or in your fall mini scene.
As always I do want to sincerely thank all of you for watching my videos and reading my blog posts. It means so much to me that you are supporting me in this way. If I could ask you all to do just a bit more by subscribing to the channel and liking the videos and leaving comments. Those help more than you can imagine. Also if you could pass the links on to your friends I would appreciate it so much.


No comments:
Post a Comment