I have another free pattern for you to download so you make the project. You can find the file here. In the download there are 3 files: a PDF for hand-cutting of the pieces, a PNG to use with your electronic cutting machine and a text file with handy hints and tips (and the sizing information) to use the PNG.
As with most of these projects I cut all the pieces from medium weight white card-stock, the kind used to make cards and such. This is way more economical than having to purchase a bunch of colors and in my experience the paint colors are a lot more stable than the paper colors. I rarely get noticeable fading with the painted projects.
You are free to use the pattern as many times as you wish and even to sell the finished project. But, please don’t give away or sell my patterns. I spend a lot of time creating them and the only compensation I get is from people watching the videos and checking out the blog post. I really want to keep offering these for free so please if someone else wants to make one send them to the video and blog so they can get their own copy of the pattern.
Glue the sets of the pieces together as I show in the video, when you are done you should have these units ready to paint. Remember the 6 wedges for the beach ball as well as the tiny round piece are not glued together, they need to remain in a single layer until after they are painted so set those aside until you are ready to paint.
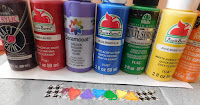
Once the glue dries place some tape on your work area, sticky side up and add the pieces that need to be painted. I like to group all of my pieces according to the colors they will be painted. Here are the colors I used for each set of pieces,
Flesh color for the nose, hands, and feet-
Plum for the sunglasses frame-
Pale yellow for the hat-
Silver for the lens part of the sunglasses-
A golden yellow for the hair-
Pink for the dress and the beach ball backing_
And a rainbow for the beach ball parts with the plum for the small dot_
Once the paint has dried it is time to add any extra details that you want on any of the pieces. I added a line for the brim of the hat and some dots on the top part of the hat. I used colors that I had used elsewhere on the project to help tie everything together (the pink from the dress and the blue and purple from the beach ball) Let these colors also dry.
Now we can glue the sunglasses together. This is a simple step add some glue to the lens portion and add the frame piece on top lining up the edges all the way around. Let dry. Touch up the frame color around the outside edge of the glued sunglasses.
For the beach ball glue the pieces on to the ball base piece. You can use any colors in any order you wish on your beach ball. I did have to trim the final wedge just a hair to get it to fit. Add the tiny dot to the center to cover up the spot where all the points come together. Allow to dry.
Once everything is dry again we can start gluing our little friend together. I like to start by assembling the head of these little guys/gals. For the ladies like we are working on today I find it handy to put the hair braids onto a piece of washi tape so that they stay where I want them. Then glue on the hat and the nose to the hair braids. Let this glue dry enough that it will now move around when you add this part to the body.
Now we can add the head to the body as well as the feet. This is a fairly simple step. Let the glue dry about 5 or 10 minutes between each of these steps so that everything will stay in place as you work on the next steps.
Now we can finish the assembly of our little friend, by adding the beach ball, hands, and sunglasses. This is also the time to paint the sandals onto her feet.
Let both the glue and the paint dry.
Now it is simply a matter of adding a coat of Satin Mod Podge to the entire gnomess and then just a drop of gloss Mod Podge to each lens of the sunglasses.
Let everything dry and she is ready to display in your summer mini scene.
As always I do want to sincerely thank all of you for watching my videos and reading my blog posts. It means so much to me that you are supporting me in this way. If I could ask you all to do just a bit more by subscribing to the channel and liking the videos and leaving comments. Those help more than you can imagine. Also if you could pass the links on to your friends I would appreciate it so much.


No comments:
Post a Comment