Check back often

Have you checked out all my blogs?


Dollhouse Minis: http://joannesminis.blogspot.com


18” Dolls: http://joannes18dolls.blogspot.com/


General Crafts: http://joannes-place.blogspot.com/


Cooking: http://joanne-kitchen.blogspot.com/


Also if for some reason I can't post I will try to give a head's up on the Facebook page so check there too.

Sunday, June 30, 2024

Dollhouse Miniature Nautical Side Table


Watch the video here.


I have another free pattern for you to download so you make the project. You can find the file here. In the download there are 3 files: a PDF for hand-cutting of the pieces, a PNG to use with your electronic cutting machine and a text file with handy hints and tips (and the sizing information) to use the PNG.


As with most of these projects I cut all the pieces from medium weight white card-stock, the kind used to make cards and such. This is way more economical than having to purchase a bunch of colors and in my experience the paint colors are a lot more stable than the paper colors. I rarely get noticeable fading with the painted projects.


You are free to use the pattern as many times as you wish and even to sell the finished project. But, please don’t give away or sell my patterns. I spend a lot of time creating them and the only compensation I get is from people watching the videos and checking out the blog post. I really want to keep offering these for free so please if someone else wants to make one send them to the video and blog so they can get their own copy of the pattern.


Since I wanted to make this table more sturdy than some of our other projects I decided to use 6 layers on each pattern piece and I have to say it does make for nice sturdy table once the glue dries.


So as you saw in the video there are only 3 pieces to the table with each of those being made up of 6 layers. For that reason this is a fairly easy project to assemble. Since there are so many layers though it is going to take longer to dry than some of the thinner projects we have made in the past. So allow extra drying time. And be sure to add a bit of weight to the project at least in the beginning of the drying process.


Once dry it is time to assemble the table, for this we will need a small piece of 1/8” by 1/8” strip wood. I used 4 pieces of this cut at ½” long each. These little pieces will help that thin table leg get a much better grip to both the table top and bottom.


Before you start to glue the table together smooth and slightly round the edges of all 3 layer pieces with some sandpaper, a sanding block or an emery board. This step is much easier at this point.


Now find the center of the two round pieces and make a mark to help you with lining up the table leg.


Next I cut 4 pieces½” long of a thin wood strip. The one I used was 1/8” square.


Then add some glue to the center of the bottom side of the table top and add the skinny end of the anchor. Glue one of the ½” pieces of strip wood on each side of the table leg to help hold everything together. I did add a couple of drops of a CA type superglue to the joints to help it stay in place while the tacky glue was setting up.


Once the table leg and table top have had time for the glue holding them together to dry repeat the same process to glue the bottom of the anchor (table leg) to the top side of the table base. Adding the other 2 pieces of the strip wood, one to each side. Allow the glue to dry.


When the glue is dry (mine wasn’t as dry as I would have liked because I was trying to hurry) give the entire table a coat of whatever color you want to have showing through in the “aged” spots of the final paint job. I used State Blue but really any color that you choose will be wonderful. I am only giving my table what I am referring to as a “rough coat” of paint because in the end I want a table that looks old and worn. Allow this coat of paint to dry.


Once the undercoat of paint is dry you can topcoat with another “rough coat” of whatever color you want to be the table color. For my table I used some white craft paint and a very stiff brush, that way it was much easier to make the paint look old and worn away from the beginning so less work when I go to age the table. Allow the top coat to dry.


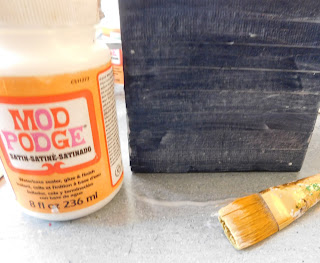
Once the paint dries add a coat of a clear finish and allow that to dry. I used some Satin Mod Podge on mine. Once dry this table is ready to sit either in the dollhouse or out on the dollhouse porch.


As always I do want to sincerely thank all of you for watching my videos and reading my blog posts. It means so much to me that you are supporting me in this way. If I could ask you all to do just a bit more by subscribing to the channel and liking the videos and leaving comments. Those help more than you can imagine. Also if you could pass the links on to your friends I would appreciate it so much.


Wednesday, June 26, 2024

How I Made the Cubes for Displaying Mini Architecture Samples


Watch the video here.


After the video for the Exterior Dollhouse Flooring Cube went up on YouTube I did get several requests to show how I make the cubes. It seems several of you want to play along and have these reference cubes on hand also. So today I am making another cube and taking you all along on the way.


You won’t need a lot of materials to make these just some foam core, glue, round toothpicks and some lightweight paper. Of course you will also need to the tools to cut those items safely. Even though these are only made from foam core they are surprisingly sturdy especially once they are covered with the samples.


I did have another idea that I might do with some of these cubes in the future also. I got to thinking that in addition to having cubes that each have a different part of the dollhouse on them (like a roof cube, a siding cube, etc) it would be really cool to do some that represented different types of architecture. For instance I love Art Deco but I have no desire to do an entire dollhouse in that style but to do a cube with each of the 6 sides showing different examples of the details that are synonymous
with the Art Deco style would be really fun. This might be a good way to explore styles of architecture that you want to learn about.


To create the cube the same size as the one I am using you will need to have 4 pieces of foam core cut 4 ½” square and 2 cut at least 4 ¾” square. I had planned to cut mine at 5” but somehow cut them at 6” I’m going to blame it on too many interruptions the day I was prepping for the video. LOL


You will need to cut round toothpicks in half (just close to half don’t worry about measuring) These will be inserted into the glued areas to reinforce the joint. For something the size of this cube I use 2 half toothpicks per side.


Construction is pretty simple just add the toothpick pieces to one edge of each square of foam core then add glue to the opposite edge as shown in the video. Once all 4 of the squares are together carefully push all the toothpicks all the way in. if you can’t get them all the way in you can trim them if you need to. Be careful not to run one into a fingertip though.


Once the 4 sides are together and the toothpicks pushed in add the two larger pieces gluing and adding toothpicks as before trimming to size if needed. Allow the glue to dry at least long enough to hold the cube together. The dryer the glue is the better.


Since my foam core is black I am using some thin black paper that I have in my stash. Cut strips that are about 4 ¾” long and 1” wide. You will need a total of 12 strips of paper this size for the cube the size I am making.


The paper strips are to cover up the edges of the cube and give it a more finished look. This not only makes it look better it also helps to make sure that the edges are going to be nice and strong. Do you best to get the edge centered on the strips and use enough glue to make sure everything holds nicely. I do like to use something like a craft stick to smooth down the paper and make sure it is firmly adhered.


As always I do want to sincerely thank all of you for watching my videos and reading my blog posts. It means so much to me that you are supporting me in this way. If I could ask you all to do just a bit more by subscribing to the channel and liking the videos and leaving comments. Those help more than you can imagine. Also if you could pass the links on to your friends I would appreciate it so much.


Sunday, June 23, 2024

Dollhouse Miniature Exterior Flooring Cube pt 1


Watch  the video here.


This week I decided to make a cube for exterior floor options. If you have been around the channel for a while you might remember the cube I did about 6 or 8 years ago that I covered in different examples of exterior sidings. I loved that cube and had planned at the time to make more cubes. I was reminded of it a couple of weeks ago and decided to work on more cubes. I also want to replace the original cube because it got damaged and had to be thrown away. I loved how it looked on my desk and I think a stack of these would look really awesome.


Also my daughter had an idea which once I have enough cubes made I might try. She suggested that I do a project based on rolling the cubes to pick the various aspects of a project. Like maybe a room box and roll the cubes to pick the walls, floor, and ceiling of the box. Or do a small building project and use the cubes to pick the roof, siding and a porch/patio for it.


I do want to know if you all want to see how I make the cube itself? I didn’t film that this time since there was a lot of noise going on the day I was working on it that prevented filming. So if you want to see the process of making the cube itself let me know.


Also when I re-make the exterior siding cube do you want to see that again. I will probably do some of the same choices but possibly some different ones also on it. Again let me know.


And thirdly, do you have an exterior flooring that you would like to see one of the sides of this cube? Again let me know.


So onto the project. The cube measures just a bit over 4 ½” on each side and is made from foam core. My foam core was black because that was all the store I was at the day I got it had on hand.


We will be covering 2 sides of our cube today and then the others over the course of the next few months as I get ideas for what kind of floor to add to each side.


The first floor we are adding to the cube is the same about the same as the one I used for the front porch on the Beachside Bungalow. I am making a “wooden” porch floor from strips of thin cardboard. This cardboard is what was used between the layers of cans of cat food when I purchase the cat food by the case. You can find similar cardboard on the back tablets or even use cereal/cracker boxes. I cut my strips cut ½” wide and long enough to fit across the area you are covering.


I wanted to start in the middle so I first found the middle of the surface I was going to use and then glued on the first strip at the center mark. I then laid the strips from the that center strip to the edge doing my best to keep the strips straight. I tried to leave just a very tiny gap between my floorboards to help them look more realistic. The last strip overhangs the edge, it will get trimmed later.


Now it was time to let this glue set up so that I can work from the center to the other edge without worrying about messing up the boards that are in place. I put a piece of wax paper on top of the floor and added my small quilter’s ruler and a small weight too help keep everything flat and let the glue set about an hour or so.


Now it is just a matter of repeating for the other side of the floor. And again let the glue dry a while.


Now it is time to trim any pieces that are hanging past the edge of the cube. I used my knife on a self-healing mat for this step but if you are careful you could use scissors for this step.


Next we need to neaten up the floor, first by using some sandpaper to even out the cut edges. Then go through and any ends that are not glued securely add a drop of glue so that all the edges are securely glued.


I like to use a piece of sandpaper to go over the edges of any boards that have a slight gap between them to round the edges of the boards and make them again look more like wooden boards.


Now onto the wood-grain. For this I am using a wire brush, the kind they sell to clean tools with. This works really well when drug lengthwise on the boards. Really push down to get some good texture.


Then follow up with some kind of pointed tool to add even more lines that are a bit thicker. Be sure to go the length of the boards and make them slightly wavy to look like wood-grain.


Now the glue will need to be completely dry before we move to the next step which is to paint the floor boards. You can pick any color you want to fit the project you are doing. I looked up what are the most popular colors to paint a porch floor online and navy blue was I believe number 2 so that was what I picked. Just simply paint the boards with your chosen color. Just use a light color so that your texture shows through.


Then once dry give the floor boards a coat of a satin finish (I used Mod Podge) and allow to dry.


For the second floor example we are doing today I decided to replicate in miniature a concrete paver patio. We put one of these in a long time ago so I do have a good understanding of how they are made. Also I like the look of them so I thought this would be a fun choice.


To begin again find the center of your cube side.


To prep I cut a bunch of 1” squares from cardboard egg carton and sponge painted some white and gray paints to give a slightly aged concrete color. I painted on the side that was the outside of the egg carton since this is a smoother surface, we normally use the inside surface. Since there was a lot of printing on the squares they took multiple coats of paint.


Once dry I started by gluing the 4 center blocks in place. I put a weight on top to keep everything flat and let the glue dry long enough that I was certain the blocks would not move. We will need to push the rest of the blocks against these to get them in place so we need these to be sure to stay in place.


Once the glue was dry I went in and added the rest of my blocks. I set this up so that I have a nice boarder all the way around to place the “treated wood” border that “holds” the patio together. Once again let the glue dry,


For the wood strips I am using some craft sticks that I picked up at Dollar Tree. These are bigger than normal craft sticks, I cut two to fit next to the paving stones and glued those in place. I only cut the length, the width I will cut once the glue dries. Once again do put a weight on this while it dries to keep everything flat.


At this point I also prepped the sand I am going to use later in the project since it will need a bit of time to dry. If you have some gray sand you can just skip this step and use that.


Since all I have is white sand I needed to make some of it gray. To that I used a gray alcohol marker and scribbled in the bottom of a plastic container. I then sprayed in some Isopropyl alcohol to create some gray alcohol ink. I then stirred in some of my white sand and set it aside to dry. Once dry I have gray sand to use in the project.


Once the glue dries on the shorter sticks trim the excess width off and add long sticks to the other 2 sides of your floor. Add a weight and allow the glue to dry. 

Once the glue dries trim off the excess on the sides and ends.


Next I decided to add some color to the wood strips to make them look more like the treated wood that would hold one of these patios together in real life. For that I just used a very thick dark brown paint and wiped it on the wood and then wiped it off like a stain. Let this dry.


Once the paint is completely dry add the colored sand to the surface of you mini patio and use a soft brush to work it into the cracks between the paver stones. Take your time and work it in and off the surface.


Then very carefully add some mat Mod Podge to just the patio area, keeping it off the wood strips. I like to add the small bottle with the pouring top and add a small amount right over the sand and then carefully spread it. You want seal the sand in place but not brush it out over the stones. Take your time with this step.


Once dry this side of our cube is finished and ready to display. Now what to put on the other 4 sides?????


As always I do want to sincerely thank all of you for watching my videos and reading my blog posts. It means so much to me that you are supporting me in this way. If I could ask you all to do just a bit more by subscribing to the channel and liking the videos and leaving comments. Those help more than you can imagine. Also if you could pass the links on to your friends I would appreciate it so much.


Sunday, June 16, 2024

Dollhouse Miniature Big Basket


Watch the video here.


I have another free pattern for you to download so you make the project. You can find the file here. In the download there are 4 files: a PDF for hand-cutting of the pieces, 2 PNG files to use with your electronic cutting machine and a text file with handy hints and tips (and the sizing information) to use the PNG. Do be aware that Cricut has changed some of the steps to upload files, I will do my best to give correct instructions but I am not very familiar with the new process yet.


This time I decided to make the basket out of Kraft color card stock for a change. You can use whatever color you wish and you could paint your basket like we normally do these projects. Since I didn’t feel it would matter if the color faded a bit over time for a basket I went with the Kraft color.


You are free to use the pattern as many times as you wish and even to sell the finished project. But, please don’t give away or sell my patterns. I spend a lot of time creating them and the only compensation I get is from people watching the videos and checking out the blog post. I really want to keep offering these for free so please if someone else wants to make one send them to the video and blog so they can get their own copy of the pattern.


For this project I couldn’t get all the pattern onto one cut file and have it fit normal size paper. I think you can use both files if you cut from 12” by 12” paper but I am not sure. 


The first file we will use is the one labeled as the frame. These pattern pieces will give you the body of the basket. 


The other file is labeled as the weavers and it contains the strips that will be woven onto the frame to make the sides of the basket.


I gave you a few extra of all the strips and they are slightly longer than they need to be. That way even if you make a mistake or two you should be fine. You can also play with the spacing on your basket to make yours looser or tighter depending on how your doll family wants to use it.


There are only two parts to be glued together this time the rest (all the strips) are used as single layer pieces. The two basket bottom pieces will need to be glued the inner bottom has 2 layers and is slightly smaller. The outer bottom has 3 layers and is just a tad bigger than the inner bottom. Glue these parts and put a weight on them until they dry to help keep them flat.


Once the glue dries we can add the first part of the strips to the smaller inner bottom piece. Start with the 2 longest strips and glue them diagonally on the inner bottom. If you want a looser woven basket you could skip these pieces altogether. Then once they are lined up add the middle size strips from the frame page to the inner bottom right over the diagonal pieces. 


Then cover with a piece of wax paper or parchment paper add a small weight and allow the glue to get set up enough that the strips won’t move around.


Next glue the shorter pieces to the inner bottom.


The spacing is up to you. The way I spaced mine gives a fairly tightly woven basket but you could go tighter (I don’t recommend it but you could) spacing further apart will give a much looser woven basket.


Again cover and put a weight on the piece until the glue starts to set up.


Once all the strips for the “frame” of our basket are glued in place I like to stop and trim them to 1” past the inner bottom. We will be trimming more later but I like to have them trimmed up before I start weaving. For me it is easier to get everything the way I want it that way.

Now it is time to add the outer bottom piece to the basket frame. Glue it so that the strips are sandwiched in between the inner and outer bottom pieces. This will provide a neater look to the basket as well as making it much stronger and sturdier. Allow the glue to dry.


Once dry fold up all the strips to start forming the sides of the basket. Be sure that the smaller, inner bottom is on top at this point. Then pick a spot to start weaving. Dip one of the long “weaver” strips into a bit of glue and glue it to the back side of one of the frame pieces. Allow this glue to set up being sure to have it lined up at the very bottom of the basket side and going straight.


After this glue sets up begin weaving over and under the frame of the basket all the way around to where you started. Trim the weaving strip and glue it to the inside of the basket. On this first row I like to add some dots of glue t keep everything in place pretty much every time my weaving strip goes behind an upright frame piece. Once you reach the starting point trim and glue the end in place inside the basket.


Repeat this process until your basket is between ¾” and 1” tall.


Then give the frame a final trim and add another of the weaving strips as a trim piece around the top of the basket.


Once dry you could add another strip around the inside of the basket at the very top and /or one at the bottom of the basket if you feel it needs to be neater at the base.


Now your doll family has a wonderful sturdy basket to use around the dollhouse for so many things. I think mine is going on the front porch next to the bench. I need to look through my fabric stash and see if I have anything that would look like some blankets for the dolls to have in case they want to enjoy that bench and it gets chilly.


As always I do want to sincerely thank all of you for watching my videos and reading my blog posts. It means so much to me that you are supporting me in this way. If I could ask you all to do just a bit more by subscribing to the channel and liking the videos and leaving comments. Those help more than you can imagine. Also if you could pass the links on to your friends I would appreciate it so much.

Wednesday, June 5, 2024

Rescuing Paint Brushes and Organizing My Paints


Watch the video here.


This week I am taking you all along with me as I tackle a project. First I have

several paint brushes that are very neglected and in desperate need cleaning. They all have some paint dried at the base of the bristles where the bristles come out of the ferrule. I know that paint should never get up there but things happen, especially when I am filming videos or otherwise distracted. So I either needed to clean these up at least a bit so they would be usable again or throw them out and replace them. I really wanted to rescue them since for the most part they are my favorite brushes.


I looked online and found several articles/videos on the subject. The three products that seemed to be most common to use to try to fix paint brushes were- nail polish remover (acetone type), Isopropyl alcohol, and distilled vinegar. Since these are all things I have on hand normally and use often I decided to try those. For the most part the instructions for all three products were the same. Immerse the brush bristles (up to the ferrule but no further) in the liquid and let it sit for a day. Pretty simple and I was hopeful that at least on of the methods would work. I took a “day” to mean around 24 hours and one of the articles I read stated 24 hours. I set up the experiment in an area where I could keep an eye on it and it was protected from bumping and being knocked over.


The Isopropyl alcohol started removing paint in just a few hours. This was easy to see since the liquid became very cloudy. The rest of the containers looked unchanged for most of the day.


I let my experiment set for about 20 hours and I am very impressed by the Isopropyl alcohol one. That brush looks and feels so much better. I took most of the paint out and the brush is now soft once again. It is a bit “fluffier: that it used to be but I am just happy to have it usable again.


The one in acetate was slightly better. Some o the paint was definitely removed and it is usable again just not as clean as the other one.


The brush that soaked in the vinegar feels pretty much exactly like it did when I started still stiff and full of dried paint.


So at least in my opinion the Isopropyl alcohol did the job well enough and that will be my “go to” from now on.


Now onto the organizing of my craft paint stash. As you can see from the picture it is a mess. Before I moved I had a dresser in my craft room and it had a drawer dedicated to my craft paint. I didn’t have room in the moving truck to bring that dresser nor would it have fit in my apartment. So for the last 4 years since I moved here I have just been keeping my paints in couple of boxes. One is a plastic storage box and then when I out grew that I just started putting some paints into a cardboard box that I had on hand.


I have been pretty good about labeling the bottles with a round sticker that I put on the lid of each bottle and smear some paint on so I can see exactly what is in each bottle.


But as you can see this system (and I use the term “system” loosely here) just isn’t working. I hate looking for paints lately because I can never find the ones I am looking for.


This mess has to change so today is the day to do just that.


Since most of the bottles of paint are also covered in paint and messy that will also be fixed by the end.


To prep I gathered all my paints (at least all I could find) I also grabbed a new roll of paper towels, some cotton swabs, some toothpicks, a bowl of soapy water with a stained cleaning rag in it, and a towel for my lap that is also already stained.


I also cut a sheet of round stickers on my Cricut that are about 7/8” in diameter to use for labeling each bottle. I also have a pen, a paint brush with a really fat handle and some music waiting to be turned on as soon as the camera is turned off.


The first step in this process was to start the label that will go onto the lid. I wrote the brand name of the paint (most were abbreviated) then the color name leaving room to add a paint sample to the label.


The next step to clean the outside of each paint bottle. For some bottles this was just a quick wipe with a paper towel. For others that were really messy I used the wet cleaning rag to wipe them as best I could.


Next I flipped up the top of the bottle and cleaned out any dried paint from that area. One of my pet peeves is when I squeeze out paint and that dried blog from around the opening drops onto my project.


Next I took off the lid off and made sure the threads on the bottle as well as the top edge were free of dried paint. Again on some this was a simple wipe with the paper towel and others required a good scrub with the soapy water.


At this point I used the handle of the paint brush to get a sample of the paint and set it aside.


Now onto the inside of the lid. Again I cleaned out any dried paint from each one.


Now the lid went back on the bottle. The label was added and the paint sample added the label. I then set the bottle off to the side and repeated this process about 60 more times.


I know this seems like a lot of work, and it was. It took me most of the afternoon to complete this. I used about half the roll of paper towels, a bunch of cotton swabs, many toothpicks and 3 changes of the soapy water. However, I think it was worth it. I love having the paints all in one basket. I love that I have the bottles all cleaned up and the labels make finding what I have so much easier. I am actually looking forward to grabbing paints for the next project where I need them instead of dreading it. LOL


I can also see what colors I have and more importantly I can see what colors I need to shop for. I have some room to add more bottles to the basket and I have a lot more labels left.


I did not label my two oversize bottles of paint since I can see those easily and there are only 2 colors (black and white) I buy in the big bottles. Also I did not label either the few paints I have in tubes instead of bottles or the ones I picked up from Dollar Tree. All of these paints will probably go into a storage container with my Mod Podge and glues now.


As always I do want to sincerely thank all of you for watching my videos and reading my blog posts. It means so much to me that you are supporting me in this way. If I could ask you all to do just a bit more by subscribing to the channel and liking the videos and leaving comments. Those help more than you can imagine. Also if you could pass the links on to your friends I would appreciate it so much.