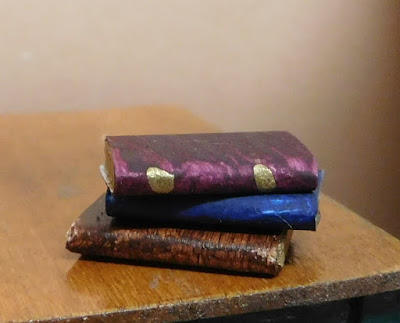
This is a super simple project to do. I know I have made a lot books over the years on the channel. It is totally a possibility that I have made some a lot like these in the past. But I wanted to make some this week for a small project and I thought I would film it for today’s tutorial.
These books are meant to either lay on a table or be in a bookcase. They don’t open in other words. They are soooo easy to make and it is a pretty relaxing process. You might find it hard to stop making them once you get started. You could use different sizes of wood pieces and make a fully stocked library in just a short time.
I am keeping mine simple by just using a single craft stick. This is one of the ones from the dollar store so it is a bit narrower than the craft store ones.
I started by sanding one long edge to be flat with some coarse grit (80) sandpaper. This does 2 things, it ensures the edge is flat but it also leaves very subtle lines going lengthwise that will look a bit like pages in the book. I then added a thin coat of a gold paint to this edge and let it dry. Since I wanted a very thin coat I used my finger tip to apply the paint. You could use other colors of paint depending on the look you are after. Let the paint dry (it will only take a few minutes)
Now using a finer grit sandpaper (120) I rounded the other long edge of the craft stick. This will be the book binding and the paper cover will wrap around it.
Once
you have a book shape that you are happy with cut the craft stick
into individual books. I didn’t measure because I didn’t care if
mine were the same I wanted them to be close to the same size but not
exactly the same. I would say for this width of craft stick ½”
would be the target length but just eyeball it. If you want bigger
books with wider wood strips make them taller.
Once cut use the coarse sand paper on the short ends of the cut pieces to again make the “pages” of the books. Then follow up with the same paint as before. This will need to dry before going to the next step but since the paint is so thin it will take just a couple of minutes.
Once the paint dries use the books to cut strips of card stock that are the width of the height of each book and long enough to wrap around the book with some extra to aide in painting later. Use just a bit of thick glue on one side of the book to glue the cover to the book like this. Line up the 3 edges of the book that you painted with the edges of the paper strip. Let this glue dry.
Now I like to go ahead and wrap the cover around the binding edge of my book before I add the glue. Then add just a bit of glue to the flat side of the book and wrap the cover around again. Allow the glue to dry.
Once the glue is dry we can paint the book covers. I would normally in the past trimmed the cover to fit the book first but it occurred to me today that it would be way easier to paint them first and trim latter. This way I have a handle to hold onto for the painting step and I can use my clamps to hold the books while they dry. So much easier. I chose all fairly dark colors because that was the look I was going for. I used a brown, a navy blue and a plum. Let the paint dry.
Once dry I did decide to add a couple of gold lines/areas to the binding on the plum book. Totally optional but I thought it would make the stack of books look more interesting. Allow o dry.
Now just use a pair of scissors to trim the cover to fit the book and you are ready to display the books in your mini scene.
As always I do want to sincerely thank all of you for watching my videos and reading my blog posts. It means so much to me that you are supporting me in this way. If I could ask you all to do just a bit more by subscribing to the channel and liking the videos and leaving comments. Those help more than you can imagine. Also if you could pass the links on to your friends I would appreciate it so much.


No comments:
Post a Comment