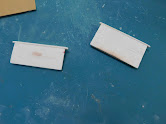
This week for the Tuesday video I am doing a flip of the Dollar Tree dollhouse bed. When I got it I had planned to just take it apart and make a doll bed. It sat on the end of my desk for a couple of weeks when I wasn't feeling too good and I was looking at it on a regular basis. One day it occurred to me how much the headboard and foot-board looked like the ends of a couch.... Hmmmmm I started to wonder and today's project just kind of happened.
I did end up making some changes in the process of the construction. Since I only had one of the beds and I really didn't want to go get another I just went with it and showed you the changes as they happened.
In the end I absolutely love how this turned out. It is exactly what I envisioned when I first got the idea.
The next step was to make both pieces the same size, I cut the headboard portion with my saw and then sanded them even and straight. By taping the two pieces together I was able to make them the same size easily.
Once dry I added the seat portion, For this I used these Giant Craft Sticks from Walmart. I love these things, they are very handy to have around.
You will need 2 cut at 5 ½” for the seat and 1 cut at 5 ¼” for the back.
I also used a couple of blocks from the Tumbling Tower game from Dollar Tree to act as spacers behind the back.
Once all the glue is dry I painted the couch frame first with Admiral Blue then with a coat of Vanilla Cream. These are the same colors I used for the coffee table a while back as well as in several other projects for the dollhouse. I am not sure what happened to the video clips of me painting this, they are no where to be found on my computer or my camera.
The couch frame will also need a good coat of Satin Mod Podge to seal it.
Now we need to cut some foam-core to act as the cushions for the couch. I cut 4 at 5” by 1 ¾”. Then glue them together in pairs to create 2 cushions.
I
used 2 layers of fabric to cover the pieces. The first is just some
cheap white fabric, this is there to create a little softness and
help to hide the fact the cushions are just foam-core.
Then the outside layer is a piece of cotton fabric that has been in my stash for several years. I had originally purchased it to use in the Harrison dollhouse. It is the perfect look for our Coastal Farmhouse style I am going for in the dollhouse.
For the white fabric cut 2 pieces 8” by 4 ½” and glue them on like you are wrapping a package.
The outside “upholstery” fabric is cut 8” by 6” and glued on the same way.
I used some really strong double sided tape to attach the cushions to the frame and the couch is ready to use.
As always I do want to sincerely thank all of you for watching my videos and reading my blog posts. It means so much to me that you are supporting me in this way. If I could ask you all to do just a bit more by subscribing to the channel and liking the videos and leaving comments. Those help more than you can imagine. Also if you could pass the links on to your friends I would appreciate it so much.


No comments:
Post a Comment