
This week we got to play with some paint so I am very happy. I was hoping to get a bit further in the build this week but the video was getting really long so I decided that the next steps will have to wait until future weeks.

Our
first steps were to get those short side railings glued in place then
we were able to mark the approximate place where they were going to
glue onto the post bases. This was important because we needed to
leave a bare space to glue the railing to the post bases. One bit of
caution I have for you is to be very, very, very, very careful around
those railings until you get the post bases glued on. I can tell you
from experience they will get knocked off really easy and that might
damage the siding where they are glued on. I was able to fix it so it
is all good but just be careful.

The best part of this week's tutorial for me was getting to mix up my paint concoction. I love this stuff and I have made it up several times lately to do non-mini crafts. It looks great in a lot of different uses. I know this has been around for a long time but it had been years since I last played with it, now I keep finding places to use it.
My paint mixture just contains 2 ingredients craft paint and baking soda. For the texture we used here I try to get the two to be about equal parts. I know once you try this you are going to use it a lot.
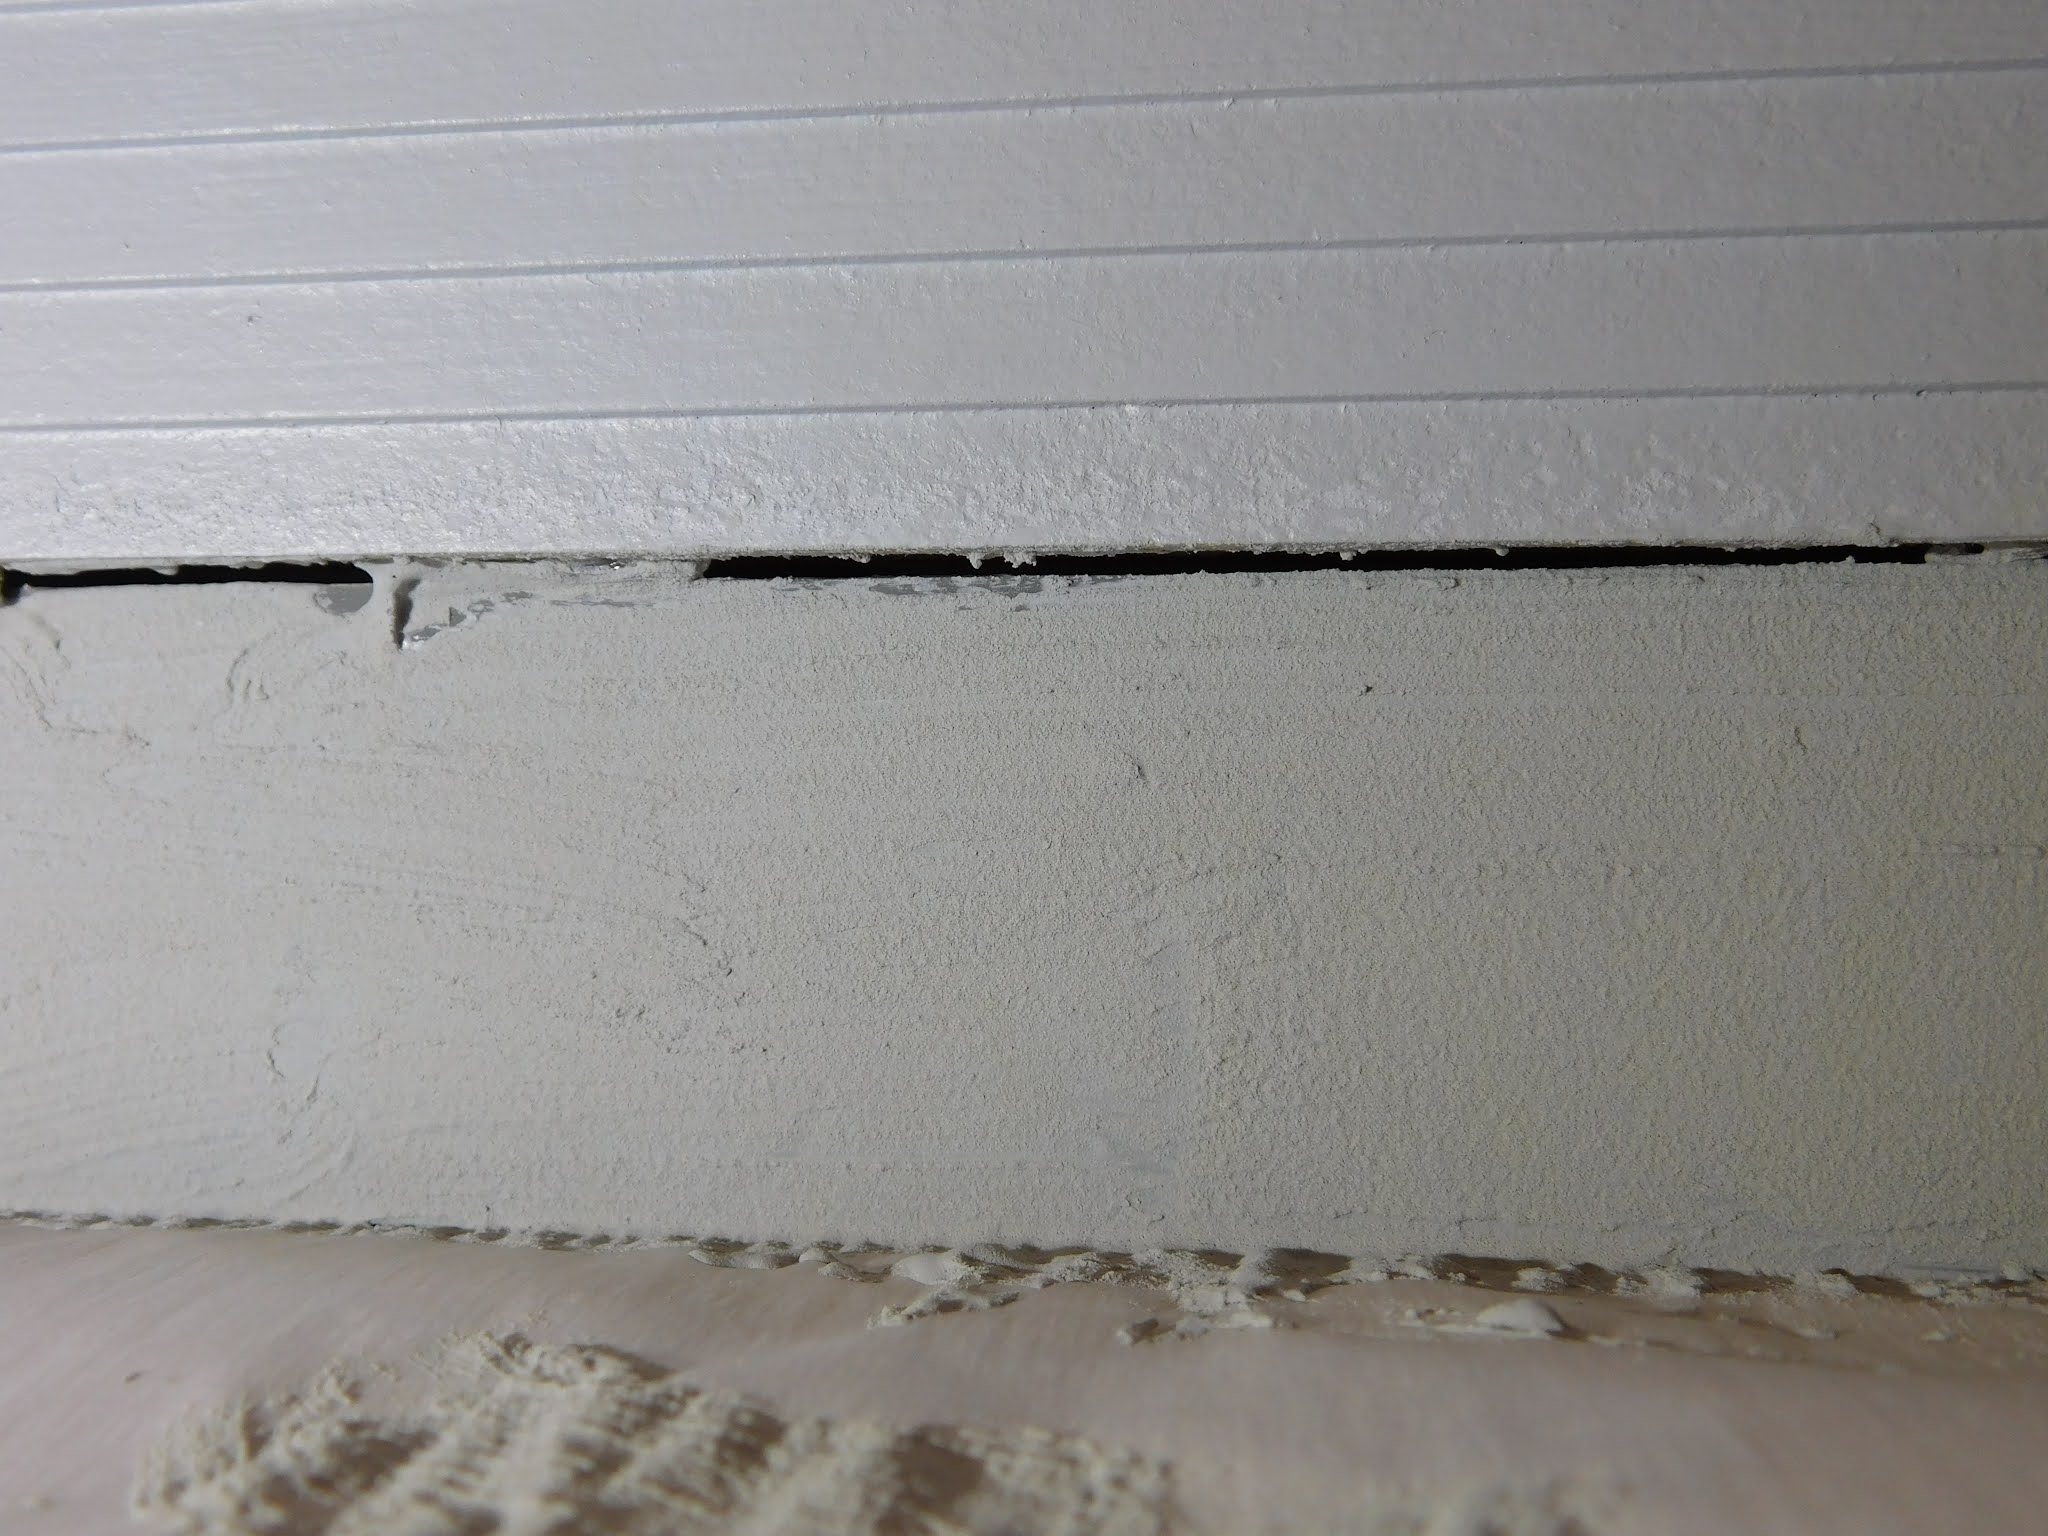
Here is an extreme close up of the texture of this paint. I hope you can see how cool it looks.
Those of you that really pay attention can probably tell that the chimney portion was filmed earlier. It was actually supposed to go into last week's video but I didn't get the other stuff finished that I wanted to do before it so it had to wait for this week.

So here are some more photos of what we got done today. I hope you are enjoying the series and learning something along the way. Be sure to share links to the videos and blog posts to any of your friends that would be interesting in them.


And be sure to come back next week for the next part of the project.
Looks good - great project and great photos!
ReplyDelete