Check back often

Have you checked out all my blogs?


Dollhouse Minis: http://joannesminis.blogspot.com


18” Dolls: http://joannes18dolls.blogspot.com/


General Crafts: http://joannes-place.blogspot.com/


Cooking: http://joanne-kitchen.blogspot.com/


Also if for some reason I can't post I will try to give a head's up on the Facebook page so check there too.

Tuesday, March 30, 2021

Changes Coming


I have some changes planned for the blog/YouTube Channel/ Facebook page starting in April. I am really excited about them and I hope all of you will be also.


First off I am going to add a new set of videos that will be on Tuesdays and I am going to call them “Tuesday Tidbits” these are going to be shorter (most of them will be shorter...) videos. My aim is to try for about 5 to 10 minutes but some will be longer and some shorter.


There will be a variety of topics, which I will try to keep as balanced as possible. Some of the types that are currently planned are: short tool tip videos, Q&A videos, hauls, reviews, dollhouse furniture flips, trash to treasure, and short tool tutorials. If you have any suggestions for other things to include be sure to let me know.


I do need you all to ask questions for the Q&A videos, I will save them up until I have enough to fill about a 10 minute video.


The other change that I hope you guys will find fun is I am going to try to do what I am going refer to as “Throwback Thursdays” for those there won't be any new videos but I will do a highlight post on the Facebook page about one of the videos that already exists on my channel. I know that with over 400 videos on the channel I can't remember what all I have. So I am going do a short post every Thursday starting in April where I will highlight one of the older videos and give the link to it. I know that some of you have been with me since the beginning but I bet you have forgotten about some of those earlier videos. And for the newbies, this will be a chance to see some of the older videos without getting too overwhelmed.


Anyway that's about it for today. I hope that you all enjoy these changes and will give me suggestions for things you'd like to see.


Sunday, March 21, 2021

Building the Beachside Bungalow part 07


Watch the video here.


This week we got to play with some paint so I am very happy. I was hoping to get a bit further in the build this week but the video was getting really long so I decided that the next steps will have to wait until future weeks.


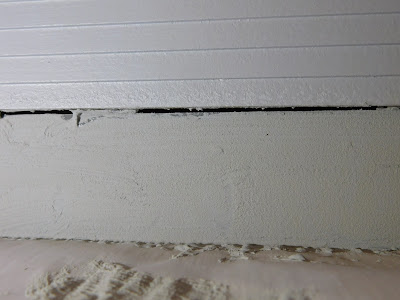
Our first steps were to get those short side railings glued in place then we were able to mark the approximate place where they were going to glue onto the post bases. This was important because we needed to leave a bare space to glue the railing to the post bases. One bit of caution I have for you is to be very, very, very, very careful around those railings until you get the post bases glued on. I can tell you from experience they will get knocked off really easy and that might damage the siding where they are glued on. I was able to fix it so it is all good but just be careful.


The best part of this week's tutorial for me was getting to mix up my paint concoction. I love this stuff and I have made it up several times lately to do non-mini crafts. It looks great in a lot of different uses. I know this has been around for a long time but it had been years since I last played with it, now I keep finding places to use it.


My paint mixture just contains 2 ingredients craft paint and baking soda. For the texture we used here I try to get the two to be about equal parts. I know once you try this you are going to use it a lot.


Here is an extreme close up of the texture of this paint. I hope you can see how cool it looks.


Those of you that really pay attention can probably tell that the chimney portion was filmed earlier. It was actually supposed to go into last week's video but I didn't get the other stuff finished that I wanted to do before it so it had to wait for this week.


So here are some more photos of what we got done today. I hope you are enjoying the series and learning something along the way. Be sure to share links to the videos and blog posts to any of your friends that would be interesting in them.


And be sure to come back next week for the next part of the project.


Sunday, March 14, 2021

Building the Beachside Bungalow part 06


Watch the video here.


This week's video did not go as I had planned at all. I had a list in my mind of what I was going to do this week and most of it is not in here. I bet we all have those weeks though.


I start the video off with a mini haul of a couple of things. I am so glad I picked up the Dollar Tree table cloths. I can cut them in half so I get two out of each. They are very thin but they offer some protection for my table from the work I am doing on the doll house. I also got a roll of kraft paper to use on top of the plastic table cloth to work directly on. I wish I would have thought of this a long time ago. So much easier for clean up and it gives a good work surface that my colors show up well on. I hope it works well for the video.


I went to Lowe's to pick up my paint. I knew I was going to get the sample size containers of the paint, they are perfect for our dollhouses. Since they are the same paint the store sells for real size houses it is excellent quality. I know that Home Depot also has these (at least they did last time I looked) I am not sure about other stores.


I went to the store planning to get a container of white for the trim and 1 of gray for the body of the house. The white was easy and the one I went with is called Winter Dawn. Then I ran into problems I couldn't choose a gray. I found 2 that were really close to what I wanted and they were on the same paint chip card so they are closely related. One is called Voyage, it is a bit lighter than what I was hoping for. The other color is Drizzling Mist, a bit darker than I wanted but again really close.


The white paint went on really well and I am very happy with it. It gave excellent coverage even with the thin coats I was using. I love how crisp it looks.


Then I moved on to the body color. That was where things didn't go as planned. First I found that the roller I have been using wasn't working very well with the thicker paint. It was going on way too thick. I dug out brush and did the rest of the application. I knew as I was putting the paint on the dollhouse I just wasn't happy. I know paint tends to dry darker but this was going on really light. I had more than a few moments of panic. I even posted on the Facebook page about it. The next morning it was better but just not right. I was going to just go with it. I decided to do a bit of sanding since the walls were a bit rough for my liking and then I was going to give it another coat of the paint.


As for the sanding I find the best way to sand the siding is to wrap a bit of sandpaper around a large craft stick or something similar and use that to sand each and every layer of the siding. It really doesn't take too much time once you get started.


Then I got ready to paint. I took another look at both the paint and the two craft sticks I had sampled the paint on. Then I made the decision to combine the two paint colors. I had used about half the container of the light color on the first coat. I added some of the darker color and stirred it a checked the color until I was happy with it. In the end the container was about ¾ full so I would guess I used 1 part of the dark to 2 parts of the light color.


I am so much more happy with the color of the house now. I am still going to make the foundation color a bit lighter than I had originally planned but this is much closer to what I had pictured for the color.

Sunday, March 7, 2021

Building the Beachside Bungalow part 05


Watch the video here.


This week we start out with gluing the front of the house to the shell. I was really worried that things wouldn't line up correctly since I couldn't actually check inside the house the way I had it laying on my table. I did my best to look as much as I could and I was somewhat confident that it was lined up. So when I turned it over to that yes, it had indeed lined up really well I was very happy.


Since this area was easy to line up and gravity was working with me instead of against me I didn't feel the need to use my “2-glue” method.


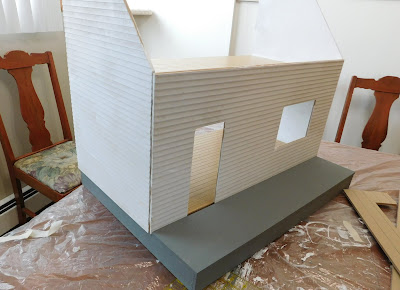
Same with when we go the point of gluing the shell to the foundation, gravity helped to hold until I could add weights. And once again I am very happy with the way everything lined up. It is really starting to look like a house.


I decided to go ahead and do the marking of the roof pieces for the shingles today too. It needs to be done before we glue the pieces onto the house. I am holding off on priming the outside roof pieces because I just haven't decided what color my roof will be. I want to make sure I prime the roof in a color that is close to the color of the shingles. That is just in case my shingles don't line up perfectly I didn't want white primer showing between my shingles. Right now I am leaning toward a gray tone for my roof but I haven't decided. I think once I paint the outside of the house I will put a poll up on the Facebook page and have you guys let me know what you all think.


Note from future me:


If you are reading this now, I just want to say I actually marked the wrong side of the front roof piece and the porch roof piece. I'll explain more about that in part 9 of this series, (should be released on April 11, 2021)