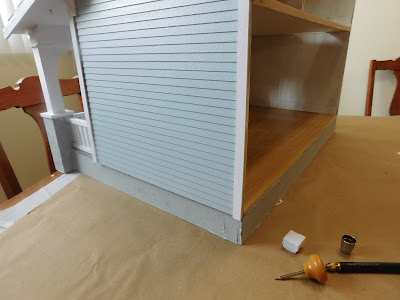
This week we are putting the tape-wire system into the Beachside Bungalow. Last Tuesday I did post a short video where I did some prep work to get ready for this step. If you haven't read that blog post or watched the video I suggest you go do that before you get into this one. I spent some time talking about some of the major parts of the system and also on how to pick the correct size transformer to power your dollhouse. I won't be repeating that information in this post.
Before we start I want to say that even though this is not a difficult part of the process of building the dollhouse it is (for me anyway) one of the most intimidating. I always have to force myself into starting. I am really not sure why but that is the case. I have never really had any issues in any of the houses I have wired and it is actually a fun step. I mean it is really cool to connect those parts and put the test probe onto the tape-wire and get it to light up. I still get excited when that happens.
Once you have all your supplies in hand you need to make a decision- where do you want to start the tape-wire run? It needs to be an area that will be easy to access when the house is in it's place on display. Not only do you need to be able to reach the on/off switch on the power cord it is nice to able to see and easily reach the junction splice to be able to make sure the lead-in wire is plugged in correctly. For me that is the back corner of the house, because of where I am going to display the house I am putting my junction splice on the outside of the house not inside. If I put it inside I would have to turn the entire house to be able to access it once it is on display. This does mean I will need to be careful to not damage the tape-wire that wraps about the back edge of the house though.
Once you have the tape-wire stuck to the house and get the junction splice in place go ahead and plug the lead-in wire into it and do your first test of the system. To do this press the prongs of the tester into the two strips of the tape wire. It should light up, if it does you are in business. If not make sure you have the on/off switch to on, then try again. Now before you do anything else unplug that lead-in wire. Always unplug it before you work on the system in any way.
The spots where you join two pieces of tape-wire together is called a splice. This is the spot that has the most potential for problems. Number one rule here is to be very careful to always connect the tape-wire correctly. You don't ever want to connect the two strips to each other. So always use this pattern to connect them.
Also make as few splices as possible in this house I used a total of 6 splices. And I know those are the first places I will need to check if there are problems in the future. The ones I know that some people do a folded corner in place of a splice to go around corners like around the door. I have tried that in the past and almost every time I do them I end up having problems later on. So for those areas I used splices. The only other splices were to join the top floor to the bottom floor and to join on a line to wire the ceiling light that will go into the kitchen area. That is the only ceiling light I am going to be putting in the house this time. My preference is to wire the ceiling light onto the floor above the ceiling it lives on. In this case it will be wired under the floor treatment for the bathroom. This works out because the bathroom is going to be the only room that doesn't have a wood floor. I have something else in mind for there.
So you see the wiring is really easy and it is so nice to be able to have that moment when the test probe lights up to show you did it correctly.
Next week we will be putting the front porch light onto the outside of the house.
As always I do want to sincerely thank all of you for watching my videos and reading my blog posts. It means so much to me that you are supporting me in this way. If I could ask you all to do just a bit more by subscribing to the channel and liking the videos and leaving comments. Those help more than you can imagine. Also if you could pass the links on to your friends I would appreciate it so much.


No comments:
Post a Comment