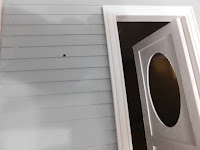
This week we are installing the front porch light. This is the only light that needs to be done before we wallpaper. The rest we will do as we decorate the individual areas/rooms (and as I find fixtures I like)
Then I drilled the hole through to the inside. Make sure you are not drilling where you will hit the tape-wire. Once the hole was drilled, I cut the oversized plug off the end of the wire and fed the wire in the hole to the inside of the house.
Now it was time to glue the fixture to the front wall of the house. I know there is sticky stuff on the back of the fixture but I never trust that it will hold long term. I used a dab of the same wood glue I have used for the most of the construction of the dollhouse. Once the glue is in place and the fixture placed measure it very carefully to make sure that the placement is correct. You want to double check you have the fixture straight on the wall. Now let the glue dry. I left mine to dry for almost 24 hours so I knew it was not going to be dislodged when I was moving the wires around on the inside of the house getting them wired into the system.
Now before I moved to the next step I did a quick check of the wiring to make sure everything was in order. By this I mean I plugged in the transformer and used my test probe to just make sure the tape-wire was still working. I tested both before the point I was going to be wiring to and a point past this point.
Next very important I unplugged the lead-in wire from the dollhouse. I like to fasten it where I can see it while I am working. That way I am absolutely sure it is unplugged. NEVER work on the wiring with the house plugged into the electricity. You could short out the system and probably hurt yourself.
Pick the spot to put the first eyelet and drill hole to fit it. (you could use a brad in place of the eyelet I just have better luck with the eyelets and use them wherever possible) Put the eyelet part way in the hole and wrap the bare wire from one side of the wire coming from the fixture around the eyelet. Then push the eyelet all the way into the wall. Now use small piece of paper first aid tape (click here to see an example of what I mean) cover the eyelet and all the bare wire attached to it. Now repeat this process with the other half the wire and the other strip of the tape-wire.
Once the fixture is wired into the tape-wire system it is time to check once again that everything is working as it should. This means plugging that lead-in wire into the house again. And once again use the test probe to test the tape wire both before the point we were working and a point after the point we were working. Then once you are sure the tape-wire is still working check the light fixture to see if it is working.
Now unplug the system again and make sure you have the eyelets/grommets or brads as flush with the surface as possible. Trim the bare wires if they are sticking out too far and then cover them with a piece of paper first aid tape. Be sure to use a separate piece of the tape over each set of wires. Also I like to cover the wire that runs along the wall with some of the tape. This will help to protect it from getting pulled loose and disguise it a bit when we paper over it later.
Once you are happy with the fixture I recommend covering the eyelets/brads at each splice of your tape-wire with small pieces of the paper tape. I then follow up by painting on a coat of the same white primer I have been using on the rest of the project. This will help the tape wire to blend a bit more under the wallpaper.
Next week we will move onto the first step in the wallpapering process- covering the ceilings with paper.
As always I do want to sincerely thank all of you for watching my videos and reading my blog posts. It means so much to me that you are supporting me in this way. If I could ask you all to do just a bit more by subscribing to the channel and liking the videos and leaving comments. Those help more than you can imagine. Also if you could pass the links on to your friends I would appreciate it so much.


No comments:
Post a Comment