Check back often

Have you checked out all my blogs?


Dollhouse Minis: http://joannesminis.blogspot.com


18” Dolls: http://joannes18dolls.blogspot.com/


General Crafts: http://joannes-place.blogspot.com/


Cooking: http://joanne-kitchen.blogspot.com/


Also if for some reason I can't post I will try to give a head's up on the Facebook page so check there too.

Thursday, February 6, 2014

Dollhouse Miniature Dirt


I know I have talked about what I use for dirt (or potting soil) in my mini scenes in different videos over the years but I thought I would go into more detail.

I use coffee grounds, they do need to be used coffee grounds but around here that is not a problem. We do go through a bit of coffee so I have pretty much an endless supply of them. I use my regular oven to dry them at a low temperature. They should dry in about 30 to 45 minutes at around 200 to 250 degrees Fahrenheit. It is better to err on the side of leaving them in too long rather than taking them out too soon. You do want to get most if not all the moisture out of them. Be sure to use a low temperature because they will burn and they smell pretty bad when they do.

I store mine in a jar that I have poked holes in the lid, that way if there happens to be any moisture left in them it can evaporate.


Sunday, February 2, 2014

Chrysnbon Table and Chair Kit part 1


I promised to tell you about what you were supposed to be seeing this week in the blog so let's start with that.

If you remember I had purchased 4 different Chrysonbon kits at the local mini show back in October. I did the first two kits on videos for you right away and there were no problems. I hadn't gotten around to doing the other 2 yet. Last week on of my friends asked if I had made up my Dry Sink kit yet. Her sweet husband had gotten her some minis for her birthday and that kit was one of the items he had gotten her. She wanted to know how mine had went and if I had any suggestions to help her with hers.

I decided that since I didn't have a project planned for this week's video yet I might as well start that kit. I had been meaning to get to it and this is as good a time as any.

I even taped the intro and the first part of the video (about 10 minutes of footage all together) and things seemed to be going well. Then I hit a problem, after I sorted out all the pieces I discovered that I was short a number of pieces. Part of what is missing is the towel bar that I really like that goes with the dry sink. I had really been looking forward to using that part in something I have planned. Then the I realized that more importantly some small pieces to the dry sink are also missing.

Since I had not even opened the box for the kit before this week I suspect they were missing when I bought it. I did notice when I did open it that the plastic bag was not stapled closed. Normally the bag is stapled but someone had removed the staple. I can see where it was at one time. So that is probably when my pieces disappeared.

I am going to check around and see if I can find another of the kits since I would really like to build the dry sink. I have one in my Harrison and it is one of my favorite kits to build from the Chrysnbon line.

Now onto the table and chairs that we are making today.

So you are probably wondering about that spot in the video with the voice over. I had paused the camera because I started coughing and I was sure I had started it recording again. It wasn't until I went to do my editing that I found I hadn't recorded that part. There really was no way to go back and re-do that section. On the bright side all I had done was to continue to separate a few more pieces of the kit and talk about using acrylic paint on the kit when it was done. You really didn't miss a lot. I think I hit all the points in the voice over.

I was thrilled when I was able to confirm that I do have all the pieces in this kit. I did run into a minor problem but I show you how to fix it and how I knew that it was a problem. This one is pretty minor if you think through the problem and solution. I was happy to be able to show you part of my way of thinking through the situation. I was also happy that I was able to show you how important it is to dry fit EVERYTHING and to really read the directions and look carefully at the diagrams. 


Thursday, January 30, 2014

Dollhouse Miniature Plant Pot


This week for Trash to Treasure Thursday I am going to show you another one of those old standby ideas that has been around for longer than I can remember.

I know it is getting harder to find this style cap on toothpaste I still find them on other products that come in tubes. Everything from glue to haircare products and so many other things come packaged this way. Just look around your home and I bet you will find a bunch of these caps. For this we need the old fashioned kind that you screw off to use the product and not the kind that has the hinged lid on them. I think this cap was on a tube of Ultra-Bright toothpaste in case you are wondering.

You can of course paint the caps just about any color you desire or do like I did and leave it white. Also many of the lids on other products come in other colors. I know I have glue with caps this style right now and those caps one of them is blue and one is red and there are probably other colors out there depending on the products they are on.

The only other items you need for this are some Styrofoam, some paint, some glue and some kind of plant to put in your pot.

Like all Trash to Treasure projects this supposed to be fun and easy. It isn't supposed to be a masterpiece, so have fun, look around and see what you can come up with. 


Sunday, January 26, 2014

Dollhouse Miniature Valentine Candy


This week I am finally getting around to doing a project I have been meaning to do for a long, long time. We are making some twirly pops and some unicorn pops. These just look so yummy and they are soooooo simple to make too.

I show you how to make them in 1/12th scale for Valentine's Day but you can make them in any scale in any color combination for any time of year. These also come in all sizes so you can work bigger if you like, scale while still important is not so critical, big is okay.

I think the only constant in these types of candies is that we need to start with a white sugar base. For this I really like the Fimo Pearl, it has sugary sheen without being shiny. If you look at the real pops they have an almost pearl look to the white sugar. Sometimes I add some translucent clay to my white (and to the colors) but sometimes I don't. I think with the addition of the translucent clay you a product that looks like the more expensive real candies and without like in today's project they look more like the cheaper ones you might find in the average grocery store. So go for the look you are after on these. I do find that in the Fimo line the soft colors tend to be a bit translucent out of the package unlike the classic colors.

For Valentine's Day we are working in pinks and reds for our colors, with a splash of purple since it is my favorite color and that was what the twirly pop I purchased had. You can use whatever colors you want. This is a good project to use some of those beautiful colors of polymer clay that we buy just because they were beautiful.

The twirly pop I purchased was about 2 ½” in diameter but they come from smaller than that to absolutely huge, so have fun and be creative. The unicorn pop was around 5” long so in 1/12th scale that would be just under ½” (7/16” if you want to be accurate) but again they come in all sizes.

If you make some of these be sure to post a photo on the my joanne's minis facebook page. I love to see what you are making.


Thursday, January 23, 2014

Dollhouse Miniature Coffee Cup


This week for Trash to Treasure I show you how to make a super simple coffee cup like you might get at your favorite coffee place to take with you. This really couldn't get simpler.

And remember you don't need to limit yourself to just the caps from glue bottles, look at other products you use every day. I'll bet you will find similar caps other places. 


Sunday, January 19, 2014

Putting the Brookfield back together


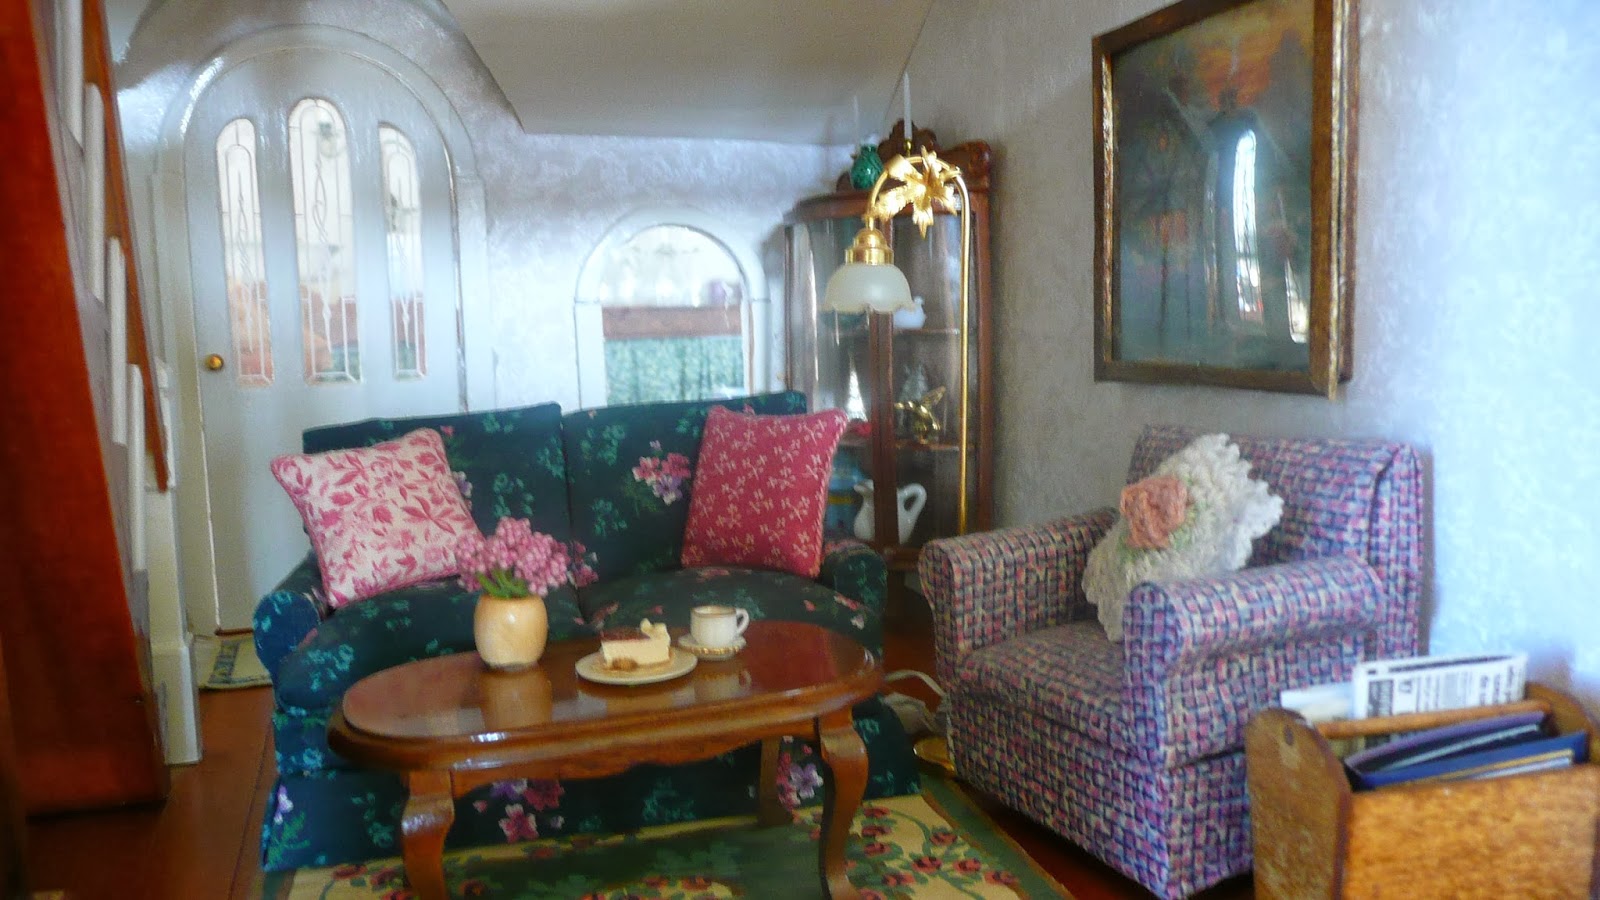
This week we are going to put everything back into the Brookfield and put the house back into my living room. I talk a bit about the problem with the floor in the both the bathroom and kitchen. I ask you all a question and we look at the different pieces of furniture as we put the house back together.

Here are the pictures I took of the rooms and contents of the dollhouse. I hope you enjoy them. If you have questions be sure to ask.


my middle son made this paper crane when he was into doing oragami


this photo album was hiding in the magazine rack


when I put in the floor it was the same color as the rest of the white in the kitchen


Thursday, January 16, 2014

Dollhouse Miniature Glasses


This week for Trash to Treasure Thursday I thought I would show you an easy way to make either a pair of reading glasses or a pair of sunglasses to use as an accessory in your next miniature scene. I am not sure if you could fit them to a doll to wear since I have never tried.

You really only need two materials some decorative wire (look where they have jewelry making supplies) and something to form the lenses. In the video I used some glass stain paint but I have also used clear nail polish the same way. You can also use a clear drying glue for this. Really anything that dries clear will work. I like the glass stain paint for making sunglasses since it comes in so many colors and I already have several bottles of it since I use it in some many mini projects. The nail polish was something I tried on a whim and it worked great for clear lenses, I am sure it would work for sunglasses too as long as you used a sheer color of polish.

The only really downside to this project is that you will have to mess around with the wire to get the shape correct. Also they tend to give into gravity over time and you may need to go back and do some minor reshaping over time. Maybe a slightly heavier wire would fix that but it would be harder to shape for the lenses.

Just play with the technique and have fun, after all that is what these Trash to Treasure projects are all about having fun with our minis.