Check back often

Have you checked out all my blogs?


Dollhouse Minis: http://joannesminis.blogspot.com


18” Dolls: http://joannes18dolls.blogspot.com/


General Crafts: http://joannes-place.blogspot.com/


Cooking: http://joanne-kitchen.blogspot.com/


Also if for some reason I can't post I will try to give a head's up on the Facebook page so check there too.

Sunday, June 28, 2015

Dollhouse Miniature 4th of July Decoration


This week I am fulfilling a request made by a very good friend. I had sent her one of these decorations several years ago and she has put it on the front porch of her dollhouse every summer since. I got an email message from her last night asking if I had done a tutorial for these because she wanted to make a bunch of them this weekend. You see her regular mini club has their monthly meeting on this coming Friday and since the 4th is the next day she wanted to surprise everyone with these as a small gift. I was sure I had made a tutorial for these at some time but when I went to find it to send her the link there wasn't one! So I quickly put this together at the very last minute for this week. Hopefully even though I was rushing you will get the idea and be able to make your own for your dollhouse.


Since I got the request last minute and I didn't have time to go back to town for supplies I had to make due with what I had on hand. I guess it is a good thing I have a ridiculous stash of crafting supplies.

Also I was feeling rushed since we are under a heat advisory this weekend and I wanted to finish this video up before the temperature got too hot. As it was by the time I got to the editing portion of this video it is getting way too hot to do much.


Anyway here is the particulars of the project. Have fun with it!

We start with a wooden plant pot, use whatever size you want. Remember this can be a table top decoration or one for the front porch.

Start by painting the pot in your desired color scheme. I used red, white and blue since this is for the 4th but by changing the colors you can change the theme.

Next add some foam and top with your “soil” (dried coffee grounds) then add whatever decorations you want to add. I love to add the little twists of wire, they look fun and are easy to make. Since wire for crafting comes in so many colors again you can make this for just about any occasion.


So that is about it. Since it is getting way too hot here I am going to go find a good book to read, a nice glass of iced tea and sit in front of my fan and read for the rest of the day.  

Sunday, June 21, 2015

So Just Where is This Week's Tutorial


You might be wondering why there is no tutorial this week. Well, it is a combination of things. First off I got totally distracted doing other things. I have about a million projects going but not so much minis.

I did have a video started. I was going to get the doors installed and instal the exterior trim on our building project this week.

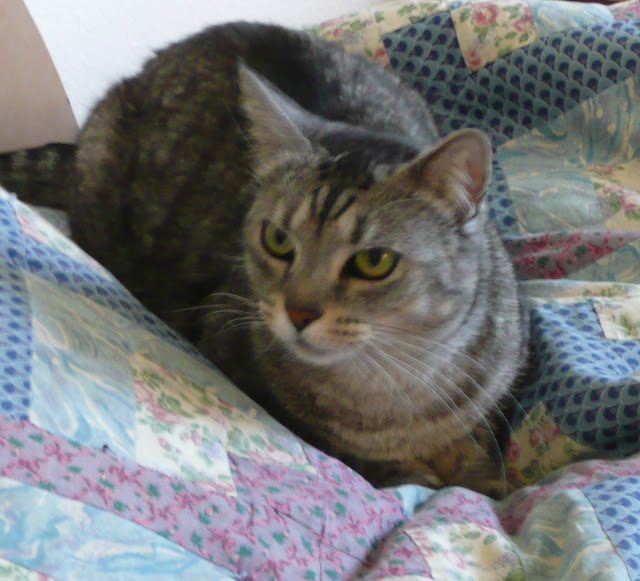
I got the first part filmed and I got the pieces painted. I had other things to do for a couple of days and when I got back to my table I found I had a problem. Apparently Buddy (my son's cat) decided that all those nice dark blue pieces of wood made wonderful toys. I found my finished wood pieces all over the floor and in the corners of the room. Unfortunately I am missing 3 rather important pieces. I did make new ones and they are drying (this time they are taped down to dry) but there is no way I am going to get them dry in time to make the video for this week.

In the meantime you can enjoy a picture of the culprit.


Wednesday, June 17, 2015

Dollhouse Miniature Vanity Mirror


You might be noticing that this week's Sunday tutorial is showing up on Wednesday. I was out of town most of last week and just didn't have time to get a video filmed over the weekend.


So I decided to show you how to make some really cute little vanity mirrors. I came up with this project several years ago when I was still active in a lot of the mini swap groups. I was in a swap that was themed for something like a ladies dressing table. I knew that most people would probably be making perfume bottles from beads (I was right) and I wanted to do something different. I decided that a small mirror would be really fun. I started playing with some of the items in my stash and this is basically what I came up with.

For each mirror you will need some fairly thin wire, 2 bugle beads and a small mirror. I have changed these up a couple of times by putting a frame around the mirror but for the tutorial I wanted to keep it really basic.

You will also need something to cut the wire and some glue. I also used some small jewelry pliers but they are optional.

The only requirement for the glue is that it is designed to hold beads. Look for something that says it will work for jewelry making and beading. I like the GS Hypo cement but there are a lot of other glues that would work. I did add a drop of my Gorilla super glue to help the bead stay in place since the other glue takes a while to dry.

You can dress these up just by using different color beads and wire on the back. Or like I said earlier make a frame for the mirror.

I have tried to make these larger with mixed results. The mirrors I used were the ½” square ones so they translate to a 6” square mirror in scale. I have also used ¾” mirrors and they worked really well (I think I had some rectangular shaped ones once too that were ½” by ¾” and they were wonderful) If you move up to 1” square the mirrors get a bit heavy for the wire that will work.


So how is this for a simple and really inexpensive project?

I hope you enjoyed the project remember I would love to see what you are working on. Be sure to either post pictures of your projects on the Facebook page (here's the link) or send me a photo (there's a link for that on the side of this blog page)

Sunday, June 7, 2015

Dollhouse Miniature Picnic Accessories


This week I am running way behind and we are already setting record high temperatures for this time of year. Those two things added together to inspire me to find some picnic accessory printables to put together. These are all from the Paper Minis site and are available free to subscribers to the free newsletter. Ann has some wonderful printables on her site both the free ones and even more wonderful kits that are ready for you to put together. If you haven't checked out her site be sure to go over there (here's a link) and check it out.

Now onto today's project.

I thought the the picnic accessories would be a lot of fun since we are just starting to have summer weather around here. I always assume the dolls are having the same weather as I am so they need to start getting outside more now.


The first page we work on is the salt and pepper shakers, these are really easy. All you have to do is cut the long printed strips of paper and roll them into cylinders. I like to pre-roll mine on a toothpick or something else that is small and round so they are ready to take the shape. A glue stick is probably the best way to adhere this step since we really need to cover the entire back of the strips. Then just roll them up, making sure the end of the strip meets the dotted line, and then use your fingertips to gently encourage them into a round shape. Set these aside and start cutting out the tops and bottoms. I used a liquid glue for this step. After they are put together just set them aside for the glue to dry and they are ready to put into you mini scene.

Now onto the the table linens. Anne has provided a wonderful retro looking table cloth and napkin design. I am pretty sure my mom had a set that looked just like this when I was a little girl! I printed mine on paper but I think it could also have been printed on fabric. There are lots of tutorials online to guide you. Let me know if you do this and send me a picture.

For both the tablecloth and the napkins all you need to do is cut on the outer line, score on the inner line, cut off the corners and then glue up the “hem”.

The tablecloth was a bit big for my table but that is the way it is on a picnic so I am okay with that.

The next part we did was the plates and a napkin holder. The page also includes a pattern for cutting napkins if you decide to not use the printed ones. The napkin holder is just a simple box on a base. The plates need to be shaped after you cut them out. I used my circle template and a ball tool that I use with my clay. Just gently shape the paper into a plate shape.

The last step was a little box that could contain any kind of food. Just score on the fold lines and cut out then assemble. I do find a hole punch to be a great help in getting those small interior areas cut out.

There you have it enough accessories for the doll family to get ready for their picnic.


Now I did tell you I would tell you a bit of what I have been up to that has kept me so busy. Well, I have been working on a Logo for my 18” doll channel/blog. I think I have the basic idea figured out now I have to get my son to finalize the design for me.

I have also been taking an online course about growing an online business. It has been really interesting and I feel I am learning a lot from it. I will try to tell you more about it when I get completely done with it.

I am also working on stuff so I can re-open my Etsy store. I have been not only trying to make product to put in the store but also working on packaging and labeling so that when it is received it looks nice and professional. There are so many choices out there for packaging and while I am really having fun with that portion of the planning process I admit I am also more than a bit overwhelmed.